G.I.Joe Deck Building Game - How to play (Official Video)
Games in This Video
1 game is featured in this video — it unlocks as you watch.
Transcript
grab yourself a coffee and pull up a seat because today i'm teaching you how to play the gi joe deck building game from renegade game studios i'm mark maya and this is board game coffee
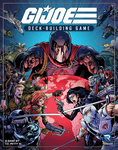
the power hungry forces of cobra have set in motion their plans for total world domination and gi joe is the only team that can put a stop to them so it's up to you to assemble your elite squad of joes and work together to take down the slithering global menace once and for all yo joe gi joe is a one to four player cooperative deck building game that has players working together to accomplish missions in an effort to stop cobra from doing whatever it is they do because let's be honest it's never good to do it has to be done you'll recruit classic joes and vehicles to improve your deck and you've got until the threat meter here reaches full cobra to foil said nefarious scheming or you lose in this video i'll be teaching you the rules and setup for a three to four player game of the gi joe deck building game to adjust your game for one to two players refer to the appropriate section in the back of the rulebook if you're looking for a particular section of this rules video check out the index in the description below with that said let's get to the setup first thing we're gonna do is create our starting deck to do that take these six leader cards with the promote keyword listed in bold shuffle them together and deal out one randomly to each player then find the matching promoted version
of the leader you were dealt and set it aside near your play area it won't be going into your deck just yet any remaining leaders from the original 6 and their matching promoted versions can be placed back in the box to continue building your starter deck each player should collect the following starter cards which can be easily identified by the starter keyword listed here 6 gis 1 comms one diffuse and one second effort any remaining starter cards can be placed back in the box now take your nine starter cards and your base leader card not the promoted version shuffle them together and place them face down in your play area to form your own personal starting deck then draw five cards off the top to use as your starting hand to build the main deck that will be used by all players collect all the cards with the blue backs that you haven't returned to the box and pull out all the service rifles and covertroopers everything that remains will make up your main deck shuffle these remaining cards place them face down in the center of the table then take the top six cards of that deck and lay them out face up like this to form your lineup the space on the opposite side of the main deck should be reserved for the main deck discard pile now place the service rifles and cobra trooper cards face up on the table
within easy reach of all players at this point you can also add the stack of cobra battalion and cobra officers to the table face up place the hanger tile in easy reach of all players and park the starting vamp transport vehicle inside like so then set the threat meter to the appropriate side for your player count so for our four player game we'll set the side with the three to four player count face up and place the threat marker in this blue zone here at the bottom next separate the complication cards into three acts as indicated here in the lower left corner act one act two and act three then shuffle all the cards from act 1 and place them face down near the threat meter the cards for act 2 and 3 won't be used until later in the game so you can just leave them here for now you'll also notice these expert mode cards included in your box we won't be using them for our first game so you can just put them back in the box until you feel a little more comfortable with how the game plays but when you are ready you can find the rules for including these cards in the rulebook next place the dice within easy reach and hand out a player aid to each player now before we take on cobra we're going to have to decide which of the two available story packs we're going to play through mission 1 the mass device
or mission 2 operation total control for your first game it's recommended that you take on mission 1 the mass device which means you can place the cards for mission 2 back in the box to set up the chain of events that you'll have to overcome during this story first pull out these three gold bordered cards then separate the remaining story mission cards into their designated stacks act one act two and act three now choose two cards randomly from each of these stacks and place them face down then return the other story cards back to the box next place the gold border story cards face down on top of their respective decks once that's done place the stack of act 3 cards on top of the act 2 cards like so then place that combined stack of cards on top of the stack for act one this should leave you with a story mission deck consisting of nine cards now take that stack and place it face up on the table keep these mission success and fail tokens nearby we'll need them later the last thing we need to do is determine the starting player and how you do that is completely up to you and once you've made your decision place this end of round marker to that player's right with the text side facing up the token acts as a reminder that the round is over and lists the necessary steps you need to
take before starting the next round now that the table is set let's learn how to play the gi joe deck building game the gi joe deck building game is played in rounds during each round players take turns in clockwise order around the table to go on missions and recruit new cards to improve their deck once everyone has had a turn we resolve all end-of-round effects then begin a new round and do it all over again gameplay continues this way until the players either win or lose one of the more important parts of being in the team is communication so players are encouraged to talk freely amongst themselves in order to best strategize against cobra okay let me start by giving you a peek of what you're up against this is the threat meter every round this meter increases by one space sometimes even more to defeat cobra and put an end to their latest schemes players will need to successfully complete the final mission of the story deck before the threat meter reaches this top space here because if that happens you lose a player's turn is broken up into three phases the start phase action phase and end phase and each of those phases must be performed in order but the first round of the game plays out a little different the first round and the first round only
each player skips the start phase of their turn and the mission portion of their action phase this means that there won't be any missions available to attempt during the first round and you can just jump right into the recruitment phase where you'll buy cards from the lineup to at your deck once everyone has had a turn the round ends the threat meter raises one space into the green zone and the rest of the game continues as normal another thing to note is that the threat meter is only ever in the blue zone during the first round if a card ever asks you to reduce the threat meter it can never be reduced further than the first space of the green zone okay once the first round is over and from this point on you'll play through all these phases in order until either you win or lose let's go over those phases now starting with the start phase the start phase is where you'll refill the story mission and resolve any start of turn effects in that order if there was a story mission in play when the round started then leave it in play and don't add a new one but if there's no mission in play when the round starts add one from the top of the story mission deck and apply any immediate effects that might be listed here this mission for example tells us to bring in baroness and whenever you're asked to bring in a named cobra officer simply look for them in this stack of cobra officers and place them face up
near the story mission card in addition if you see this red box with a number in it then add that many cards from the top of the complication deck and place them face down near the story mission card these will be revealed later so no peeking if you ever need to reveal or draw a card from the top of the complication deck for any reason and the deck is empty simply reshuffle the complication deck discard pile and place it face down and draw from the top of this newly formed complication deck once you've refilled the story mission and done everything it required you to do resolve any start of turn effects that are in play like major blood that covers up cards in the lineup if there are multiple effects that resolve at the start of your turn resolve story mission start effects first followed by cobra effects and finally joe effects if two or more effects trigger at the same time then the players choose which order to trigger those effects once you're done resolving all sort of turn effects we move on to the action phase the action phase is broken up into two parts during the first part players can play cards from their hand to activate their abilities and start a mission and you can take these actions in any order you want as many times as you want as long as you have the cards to do so the second part of the action phase is
where you get to spend recruitment points to purchase cards from the lineup and add them to your deck once you begin the recruitment phase you can no longer start a mission until your next turn but if you want you can skip the mission part altogether and just jump right into the recruitment portion before we get into how each part of the action phase works let's learn a little bit about the cards you'll be playing with throughout the game your deck will change and grow with the different cards that you recruit these cards consist of joe's transports utility gear and your starter cards this large number in the upper left corner is the card's recruitment cost below that is the number of recruitment points that this card generates on your turn in the case of a transport this number represents how many joes it can carry and the image below that tells us what terrain type that vehicle is best suited for this area here lists the joe's skills and the text in this window describes what this card does when you play it speaking of playing cards a card's ability is resolved the moment you play it from your hand but you can only play it before you go on a mission and once the mission is over but there is an exception to this rule if a card's ability includes this icon it can be played at any time during a
mission as long as you have at least one joe assigned to that mission but more on that a little later if a card's ability is preceded by a colored block like this it means that this additional effect will take place if the threat marker is in that threat color range when that card is played if not you can still play the card but ignore this ability missions come in two flavors side missions and group missions a card's mission type is indicated here side missions can only be attempted by the active player and must either be in that player's play area or covering a card in the lineup group missions on the other hand are still started by the active player but can be joined by other players to take it on as a team even if it's not their turn to accomplish a mission successfully you need to roll enough hits to meet or exceed that mission's difficulty number indicated here the number of dice you roll is based on the joes you take on the mission with you and any bonuses you might receive from the transport you're writing or cards played and remember whether it be a group or side mission only the active player can start a mission with that said let's take a closer look at two types of group missions starting with story missions story missions are one type of group
mission and they consist of different events that make up your story to start a group mission the active player needs to announce which group mission they want to attempt assign a joe to start the mission select a transport vehicle from the hangar and place it in front of them assigning a joe and a transport to a mission is a must you can't start a mission without those two things and you can't use more than one transport when attempting a mission if a transport has a terrain type it will be indicated here but you can select any transport type to take on any mission although if the transport type you take matches the terrain indicated on the mission then you get to activate the bonus ability listed here if it doesn't match or there isn't a terrain type 2 match then you still get the basic ability just not the additional ability once the active player has chosen a mission played their joe and selected their transport they can now ask if anyone wants to contribute a joe to the mission players can contribute any number of joes they have in their hand as long as the total number of joes going on the mission doesn't exceed the maximum capacity of the transport so in this example up to 5 joes can go on this mission some joes have abilities that will help you on your mission but that only works for joes that have been added to the mission at this time
once the mission starts you can't add new joes or switch up the ones you sent when you have your joes all loaded up in the transport but before you start your mission the active player can play additional non-joe cards that they think might improve their odds of success the only cards that can be played once the mission starts are cards with these icons in their ability text these cards can be played at any time even after you see the dice result and by any player as long as they have at least one joe in the fight but before we roll any dice the first thing you're going to do when the mission starts is reveal any face down complication cards that might be attached to that mission once revealed players will have a chance to play cards that could affect the revealed complications before its effect takes place once that's done resolve the complications in the order of your choosing if the complication card you reveal has an instant effect like this one resolve it right away then discard the card to the complication card discard pile if you reveal a precision strike side mission then assign that mission to any player at the table a player can't have more than two precision strikes in their play area at the same time so if everyone at the table already has two then just discard
the newly revealed one other complications you reveal might have this story mission keyword written in bold these cards stay in play and have different effects on the story mission and none of them are good for you once you've resolved all the complications it's time to roll some dice to defeat a mission you need to roll enough hits to meet or exceed that mission's difficulty number the number of dice you roll is based on the joes you brought on the mission and the particular set of skills best suited force admission as listed here in this example the mission is best suited for joes with these skill types so if i look at this joe that i brought with me on the mission i can see that they have one of the listed skill types preceded by this number three this means that since this joe has a skill that matches one of the skills listed on the mission they contribute three dice to that role attempt this joe on the other hand has the other listed skill type preceded by a 4 which means that we add 4 more dice to our roll bringing us to a total of 7 dice these 2 joes don't have a skill type that matches the mission but that's ok if a joe doesn't have a mission appropriate skill they can still contribute one wild die to the roll and just so we're clear wild dice isn't a different kind of dice it just means that you can roll one of
these basic dice regardless of the skill listed on the mission so thus far we are rolling three plus four plus two dice which brings us to a grand total of nine dice but the game only comes with eight not a problem if you ever need to roll more than the eight dice included simply make your initial roll separate your hits and use your misses these faces with the circle icon to make up for any missing roles score one hit for every star you roll so for this example we rolled eight hits if the number of hits you roll is equal or greater than the mission's difficulty number earn the reward listed here but if you rolled less hits than the mission's difficulty number instead suffer the penalty listed here at this point if the roll didn't turn out the way you had hoped you and or any player with a joe in the fight still have an opportunity to play a card with this icon in an attempt to change your fate these cards will allow you to do things like re-roll dice hit or add more dice to your roll yeah well i didn't really need that anyway if you successfully complete the mission remove it and place it under this mission success token if you failed the story mission remove it and place it under the failed mission
token whether you succeed or fail any face up complications attached to that mission will be removed and placed in the complication discard pile cobra officers on the other hand stay in play until they're defeated if the story mission fails as the result of a side mission's effect any face down complications attached to that mission will stay in play these complications will become attached to the next story mission that enters play but either way success or fail story missions get removed from the play area when attempted which means you only get one shot at success and win or lose once the mission is over the active player sets all cards they played for that mission except for the transport off to the side they're not discarded just yet you'll be using them in the next phase the other players who contributed to the mission can safely discard all the cards they played into their discard pile at this point most transports used for missions would be placed directly into the discard pile of the active player the starting vamp transport is the exception to this rule because it is always returned to the hangar after a mission if you did use a transport that needed
to be discarded the next time it turns up in your hand you must return it to the hangar at the start of your action phase once you've wrapped up your mission you can continue playing cards from your hand to trigger their ability or even attempt another mission but when attempting additional missions you cannot use the same joes that were used for previous missions on that same turn but you can use the same transport if it was sent back to the hangar but not if it was sent to your discard pile when you see the word and between two skill types as in the example we just covered it means you can take advantage of both these skills when calculating how many dice you roll if a mission lists two skills with an or between them the active player must choose only one of those skills and all joes with that skill or wild add those dice the other skill is not used if a mission lists any one skill the active player must choose which single skill of their choice is being used for that mission all other skills except wild do not add dice to the total the other type of group missions involve cobra officers cobra officers are brought into play by other cards and have effects on the story missions like requiring a leader
to start a mission to stop officers from making your life more difficult than it has to be players can go on group missions just as they would with a story mission you pick a cobra officer you want to attack choose a job to start the attack select a transport from the hangar and get assistance from other players at the table the only differences are there's no complications attached to officers so you don't have to deal with those there's also no specific reward for defeating them except that they won't be around to do that terrible thing they were doing and the biggest difference if you fail an officer group mission the officer stays in play but if you do defeat them they go back into the cobra officer stack and just so you know it is possible for them to return if another card brings them back side missions consist of cards like troopers battalions and precision strikes what separates these missions from group missions is that you have to complete them alone without any help from any other player to attempt a side mission it has to be in your play area or covering up a card in the lineup as is the case with these cobra battalion cards other than that side missions work just like any other mission let's take a look at some different
types of side missions cobra troopers are placed in your deck due to the negative effects of other cards to defeat these side missions you'll need to play them from your hand and attempt to complete them successfully if they're not defeated by the end of your turn they go back into your discard pile and continue to clog up your deck if you do defeat them just place them back in their stack cobra battalions cover cards in the lineup as a result of a negative effect as long as a card in the lineup is covered up by a cobra battalion it cannot be recruited if you ever find yourself with five cards in the lineup covered up and you have to cover up a sixth the players immediately lose if you fail an attempt at a battalion side mission there's no negative result other than the battalion staying in play and blocking up cards in the lineup when you defeat a battalion just place it back in the battalion stack and one last note unless specifically told by a card's effect where to place a cobra battalion always place it on top of the left most card in the lineup that doesn't already have a battalion on it the last type of side missions i would like to go over are precision strikes when you're assigned a precision strike due to a complication being revealed it stays in play on your side until it's successfully defeated the ability printed on the precision strike only
takes effect during the controlling player's turn the player who has the card once you're done taking on missions and playing cards to trigger abilities we move on to the recruitment phase the recruitment phase is when you get to recruit cards to improve your deck the cards you recruit will come from either the lineup this stack of service rifles or promoting your leader we'll save that leader promotion part for the end of this section to recruit a new card first add up the total of recruitment points from all the cards you played this turn and all the cards in your hand then spend those points to recruit as many cards as you can afford the cost to recruit a card is printed here when you buy a card either from the lineup or this stack of service rifles place that card face down on top of your deck not your discard pile unlike other cards transports are just yours they belong to the team so when you recruit a transport instead of placing it on top of your deck place it face up in the hangar so it's ready for the next player to use if they want to as soon as you recruit a card from the lineup fill the space immediately with a new card from the top of the main deck and remember if a card is blocked by a cobra battalion you can't recruit it any unspent recruitment points you have remaining at the end of the recruitment
phase are lost they don't carry over to your next turn so spend them while you got them another thing you can do during the recruitment phase is to promote your leader from this to this to promote your leader you must be able to pay the cost listed here and have your current leader in play and the recruitment points generated by that leader can be used toward the cost of the promotion once you pay the cost place the new promoted version of your leader on top of your deck and place the older non-promoted version back in the box the first thing you're going to do during the end phase is resolve all end of turn effects in this order story mission end of turn effects followed by any cobra card end of turn effects and then any end of turn effects listed on the threat meter based on the current threat level it's important to note that the only end of turn effect listed on the three to four player side of the meter is in the red zone which calls for a cobra battalion to be added to the left most uncovered card in the lineup these other effects here are end of round effects and we'll be covering those in a little bit as mentioned before if multiple effects take place at the same time you choose the order in which those effects resolve once all end of turn effects have been resolved discard all the cards you've played and any cards
remaining in your hand then draw back up to five cards if you ever need to draw a card from your deck but your deck is empty shuffle your discard pile place it face down to form a new deck and continue drawing from there and now that you've refilled your hand your turn is over and play passes to the next player on your left after everyone has had a turn and we've made it all the way around the table to this end of round marker we resolve all the end of round effects listed here in order first we resolve any end of round story mission effects followed by end of round cobra operative effects and then any end of round threat meter effects which are determined by the current threat level if it's green move the threat marker up one space if the threat level is in yellow draw and immediately resolve a complication card
lastly move the threat marker up one space and yes if you just suffered the green threat level effect your marker is moving up a second time when the final story mission of an act is completed as indicated by these bordered cards a new act will begin at the start of the next player's turn when placing the first card of a new act take all the complication cards with the matching act number and the cards in the complication decks discard pile and shuffle them into the main complication deck this means that the complication deck will be renewed and upgraded with a mixture of cards from the previous act and the new current act if you successfully complete the final story mission before the threat meter reaches this cobra space you win and that's the only way you win on the other hand if the threat meter does reach the top of the threat track you lose if cobra battalions cover five cards in the lineup and you gotta add a sixth you lose and if the main deck runs out you guessed it you lose and that's all you need to know to play the gi joe deck building game and knowing is half the battle thanks for joining us if you like this video and you want to see more subscribe to our channel it's the best way to keep up to date with everything we do here at
boy game coffee but if you want to see more right now we got plenty of videos to choose from and if that's not enough follow us on instagram facebook and twitter i'm mark maya and this is boy game coffee and remember have fun keep gaming be social see you next week