How to Solo: MetroX
Games in This Video
1 game is featured in this video — it unlocks as you watch.
Transcript
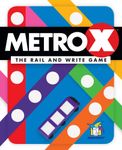
hey gamers this is Liz Davidson from beyond solitaire and today I'm gonna show you how to solo Metro X Tokyo and Osaka this is a really fun rollin right in which you are trying to fill in maps of Japanese subway stations the game comes with some rules some cool pencils and a couple of score pads one for Osaka and one for Tokyo so you can play several sheets on each of the subway maps I've actually made some laminated copies that I can keep for the long run but today we're going to do a normal map of Tokyo just on regular paper and we're gonna do it with a pen which will hopefully be dark enough for y'all to see all you need to play Metro X is your map sheet a writing utensil and this deck of cards even though this is a roll in right it's actually more of a flip cards and write game so as we flip cards we'll have values that we're going to try to fill in in these subway stations the ultimate goal of this game is to complete as many lines as possible and generally to fill in as much of this map as possible however it's gonna be a lot harder than you would think first of all it's actually there there aren't that many options for each line so these are what are called indicator spaces so the numbers that we will turn over on these cards this station this this line the fukutoshin line you can only put two numbers towards this line you can only put two numbers towards the your couch a line 3 3 3 2 2 3 3 so we have very
limited options for example I might not want to put a couple of two's in here because there's no way I'm gonna completely finish this line that way but it depends on what I draw in terms of cards I may be stuck putting not ideal numbers on my train lines not only do I have limited options in terms of my indicator spaces but I'm also gonna have to be careful about how far I advance certain lines before I advance other ones because you have to start at the beginning of each line in order to get to the end sounds obvious but I mean I can't start working on a line halfway through and you if I had a four over here and I wanted to make a bunch of progress on a line I actually have to stop if I filling in spaces along one of my subway lines and then I bump into a space that I've already filled in with either a station or a number so let's go ahead and play and see how it turns out um we should maybe name it uh let's just call it snakes on the train it's not like a very logical train name but we're gonna go with it cuz names are fun apologies for my horrible handwriting alright so now we're gonna flip our first card and we're gonna see what our options are so our first card is gonna be a four so what that means is that I can choose to fill in four squares along any of these any of these lines the map that's totally open to me at this point so let's figure out what I should do I think what I'm gonna do this time is hedge my bets I want to work with the Marucci line and I'm gonna put a four here in my indicator space so one of
those three spaces is now full and I'm gonna go one two three four so now I filled it in four spaces along this line I'm glad that I stopped here however because let's say that I had gone into this space if I were working on this line for example I would have to stop when I hit my own mark on the red line where it intersect it with another wine so by filling in just these four I've kind of hedged my bets for future turns depending on what lines I end up wanting to really work on and finish all right so let's flip another card oh wow that was early okay so this is a six what happens when you hit a six is that you play the six then you have to reshuffle the entire deck and start again so hitting it early I mean I guess it doesn't really matter but you know it can change the game because it puts some cards back into circulation or keeps you from ever hitting certain cards so let's decide what to do with this six I think I'm gonna do something risky I'm gonna go ahead and put the six this is risky I'm gonna go ahead and put it here on the number Q line that means I can go one two three four five six so for illustrative purposes I've done this so I can show you what this means is that if I want to add a number to the red line I'm gonna bump into one of the other marks that I have made before I can do that so there are some cards that allow you to skip but for now I'm a little bit stuck or I
can work on this line to try to complete it in another way but I'm not gonna be able to just simply advance my work on the red line right now because the work that I've done on this namboku line is actually blocking it which is what I want you guys to see so now we're it actually is gonna reshuffle the whole deck and get back to it all right so we've reshuffled and let's draw another card all right so this time we have a five man Oh get the big ones this time that's weird so let's figure out where to put it we will not be putting it here because it's a waste because if I put one here I have to stop when I hit my next mark so the red line is definitely out let's see what else we can do so let's go ahead and get some work done down here on the head be a line so let's put this five here and we'll go one two three four get a little more work on that red light then five so that's what we're gonna try just so you know I don't typically score very high at this game so we'll see what happens so let's flip another card ah so this is a to skip so what that means is that I can advance my interest along the line and I can skip over marks that I've already made so this one I am gonna go ahead and put on the margin line so I'm going to put this to skip here so I'm going to go one two so I've actually made some good progress on this line so let's hope another card and see what we get okay so this time we got a three so
let's figure out where is the best place to put it I think what may be the best actually so these lines intersect for a little bit so that's great I'm gonna go ahead and put that three right here on this purple line so that I can go one to three because see how it connects me with work that I've already done that way if I want to put another card into the Purple Line at some point I've already connected it up and I don't have a bunch of nasty little skips in there so let's do another one aha we got another skip another skip two that's less helpful this time so let's think about where we can put it that's just actually a good place to put you one place it might be good actually is right here oh that's nasty so I've actually been blocking off this green line a little bit this may be one of the lines that I just give up for lost so you're not actually going to complete all the train lines in any of these games unless you get really really lucky so you have to choose where you're gonna put stuff so let's think about that yeah I'm gonna go ahead and just tuck this to right in here I don't actually think I'm gonna finish the chiodo line but will give me options to move along it a little further at least fill up some squares alright so let's go ahead and flip another card okay so this time we got another three this uh fukutoshin line is looking pretty good already so why don't we put this three here and we'll start working towards the end of
that line as you can see these run together for a little bit so you can kind of portion your numbers out to make it easier to hit your targets between the two of them alright so let's hop so here's an interesting card this is a star and what it is good for is for scoring bonus points if you can put it in a good intersection so let's think about whether that's something that I'd really like to do so basically what's gonna happen is wherever I put this star I'm gonna get two points for every line that passes through that space so I can either put it in a heavy intersection line but use up one of these spaces these indicator spaces or I can try to use it just to stick it somewhere so I can keep getting work done on other train lines so it's just a matter of what I'm choosing to do with the start do I use it for big points now or do I use it as one space to maybe fill in something awkward like right here so let's see so think what I'm gonna do is I'm actually go ahead and put it here in the namboku line and hope that I have managed to get away feeling everything in but there are two lines that touch here so it's going to be worth four points so good thing to keep an eye on they're on the map so let's flip another your card aha this time I got four that's exciting let's see where I should put it so I think it's about time we did something with the tozai line so we're gonna go ahead and put the four right here and go
one two three four this is helping me kind of shape this line up really nicely because I have weight space for one more number on it so now if I pull a five I can finish we'll see what happens next card a three so let's see what would be a good spot for three all right so I think what I'm gonna do is hope I can build these other ones out and I'm cook with a three here so we'll go one two three that doesn't sound like too bad of an idea all right so let's flip another card it's the six again so we'll put a six somewhere and we'll reshuffle the whole thing so I think what I'm gonna do is I'm gonna go ahead and I'm gonna use the six to finish off this red line because it'll go one two three four five so I overshot slightly but I don't feel over I don't feel too bad about that I think that's gonna be just fine so I finished this line and what that's gonna mean is that I get to circle this five right here on the map so when you are playing with more than one person the first person to finish the line is one who scores the higher number and then later finish your score the lower number however when you're playing a one player game you score the higher number no matter what and then you just try to get the highest score that you can so now we're going to shuffle everything up and start again all right ready to rock again and so we get oh yeah okay so we
got the highly value to skip three so I'm actually gonna use it right here I'm gonna put a three here I'm gonna do one two three which is gonna put me in position to finish this line on future turn and also I'm very close on this one as well so that's really good ah we got a five okay where do I want to put that let's think all right so the only place I'm going to get the most out at five is probably the be a line so here I need four to finish like I just I could just blow it and finish this line maybe or I can try to get further along this gray line I can't do the orange line because I'm gonna run into a one spot here and I don't want to like waste waste space same with the Green Line that's not gonna work out too hot the red ones finished I only need two to finish this line I only need three to finish this line and I want to use my five really well so that's gonna leave it for either advance my way along the gray or finish the namboku line since I'm not in the huge hurry I'm gonna go ahead and spend it here in the javea we're gonna go one two three four five so with all these intersections the orange line is probably lost but we've made some decent progress on the blue this way I don't think I'll be able to finish that one either sadly yeah one
two three four if I got a six I can finish the blue so what kind of see what comes up see your next card aha free so the free is actually great what I'll let you do is put a free thing anywhere without having to actually write it in one of these indicator spaces so now I should just figure out what it is I might like to connect the orange just has too many interruptions I think that one's just dead hmm the best place to put it I think might be here on this the Chioda line cuz that way like I have a good potential to finish because I still have two indicator spaces here Emily five spots four spots five spots yeah five so it's good and it'll help me finish the gray off as well so I think that was probably my best call all right so this one we got to skip to but I don't want to skip anything at the moment I mean I could try with the orange ooh that's tempting let's think about this yeah you know what I'm gonna do it I'm gonna put it right here in the orange because I haven't put anything in there yet I've got so much what I've filled out so we can go one two and that actually fills in the gaps that were in this line which is pretty cool because it puts me within within finishing
striking distance on that I like that all right so let's put our next card aha three so the three is great I can use it in multiple situations um actually sounds like hand I'm gonna go ahead and use it to finish this Orange Line so one two three and this puppy is done so that that line is all over with that's awesome all right so it split a card okay so this one we got a four oh that's perfect I'll put it right here and then invoking line and do one two oh I should have done it over on of the green oh well for but that one is done so I've got four points I should have finished the Chioda up here because it would have helped with the gray line but yeah I made a mistake that's fine it's five spots anyway okay next okay so this time I got another three ooh so what would I like to do with that I can finish off this line that I'm pretty good yeah let's just go ahead and finish that line so we're gonna finish off the yard couch oh sorry about that guys my memory card got full and I lost a bunch of stuff basically I played some more cards and I ended up filling up the fukutoshin line and some other progress in places that I
actually can't remember because I was yakking away do not a care in the world having no clue that my memory card is just filled up I'm sorry about that alright so let's keep playing a are I'm not really all that excited to see the star because I don't have any intersections that I want to put anything in I think what I'm gonna do is since there's pretty much no way I'm gonna finish this purple line anyway I'm just gonna go ahead and put the star here and score a two right there and just waste it because I don't have any great intersections and I'm really hoping they'd sneak some of these lion likes I'm hoping to finish so we're gonna sum up some more of these so we'll see what I can do alright so here we got a three okay I think what I'm gonna do here is I'm gonna put it I'm gonna put it let's see yeah I'm gonna put it here on the chiodo line so I can go one two three that way I'm gonna be able to finish off both that one on the gray line with very little effort from me that's really good okay so now we got a four we're at the point where I'm really just hoping to hit the six and finish off the blue so we're gonna just delay and so we can see if we can get it or not I think so we're gonna do cuz you
know no guts no glory so we're gonna sway step four here and we're gonna finish the hibiya line oh god dang it oh actually that worked out fine so ho I don't think even one more spot on that green line so I could just put the start here and get another two here which is perhaps not the maximum for scores but I'm just hoping this Ness part of the six is my last open spot if I hit a six I'm gonna finish the line if I don't know what I didn't finish the line oh no way whoa oh my god okay so I hit a six on the last turn of the game I've never been this lucky in this game before ever dude okay so we finished off the tozai line and we finished off the shioda line that was amazing this is the best game of Metro X I have ever played I'm so glad I caught this on camera holy crap all right so let's score this puppy this couldn't be the big score I've ever gotten ever ever ever I normally squirt like in the low 30s okay so this spot is gonna be for completed lines it's gonna be 2 plus 4 for 6 plus 7 for 13 plus 5 for 18 plus 4 for 22 plus 5 for 27 plus 6 for 33 plus 4 for 37 Wow all right so this
next little square is for all the points that you get from intersections so for me that's for 2 and 2 for a total of 8 and then you score negative points for the number of squares that are empty on the map so for me that's only one two three dozen never happened to me before ok so let's find the card and figure out what my penalty is so actually there is no penalty so for if you have 0 2 5 empty spaces you score a zero and then you start getting minuses 4 6 enough so let me get real with you I've totally had like 14 empty spaces of this map before this was like a miraculous game so don't feel bad if you're not scoring like this cuz I don't normally wear like this so there were 3 empty spots for a 0 penalty so my total points were gonna be 37 plus 8 which is gonna be 45 so in the rules that has a meaning and let's see what it is so this time I got a 42 49 you possess professional skill level yeah I do alright so if I can ever break 50 it means that I'm either a genius or I have unspeakably good luck but honestly I'll consider a 45 unspeakably good luck at this game this
was fun I hope that you guys enjoyed this I think Metro axe is super enjoyable it's so easy to teach it's so easy to play you can take it to a restaurants you can play it at lunch in your classroom which I do often with students now it's just a really fun portable game the only thing that it's not sadly is cheap because it is a Japanese import so it's gonna cost you if you want a copy but other than that is an awesome game I've never had a dull moment with it and I highly recommend it for solo play so happy gaming