Aeon's End: Beyond the Breach | Playthrough
Transcript
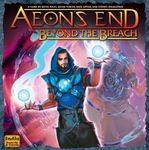
Hello everyone and welcome to Meet Me at the Table. This is Colin and today we are going to do another play through of Aeon's End and this is the new one, Beyond the Breach. I am an Aeon's End fanatic. I have purchased everything for this game. I certainly don't need all these different Aeon's End games yet I keep going to it because it is, I think, one of the best deck builders out there. The way that you don't shuffle your discard pile, the variable turn order, now adding the friends and foes. Oh, this is great. So, we are going to be playing the first mission. I'm not going to read the narrative because I don't want to spoil it for you, but we will be playing the Terror on the Brass with two characters. Overall, one of the best parts about Aeon's End is the rules are pretty straightforward. But, if I do make any errors and miss them in editing, I'll put them in Klingon subtitles, so make sure to let me know if you see an error so I can put that there. All right, let's go ahead and just start with our setup and then we'll jump into our play through. To set up our Nemesis, which by the way, he's a level five Nemesis, place the mat with the World Splitter track and armor chart next to his mat, normal difficulty side face up. Place a Nemesis token on the cast any player's prepped spell space of the armor chart. Place the Terror in the Brass token on the start space of the World's Splitter track and then set aside the regeneration power next to the mat, so this is not active right now. I have it over here. It will become active at some point. This Nemesis only has, you know, 99 health. It has an unleash.
If regeneration is in play, the Terror in the Brass gains five life, otherwise advance the World Splitter track. I'll show you that in a second. The additional rules we have, when every space on the armor chart is covered, the Terror in the Brass is vulnerable. When the Terror becomes vulnerable, place the regeneration power card into play if it isn't already in play. We then get to double all damage dealt to the Terror while it's vulnerable, so So, damage, which is awesome. When a player deals damage to the tear while it is not vulnerable, it just takes one damage. During any player's main phase, you can spend three ether to place a nemesis token on an uncovered space on the armor chart and resolve its effect. And then finally, when the world splitter track has advanced, move the tear in the brass token up one space and resolve that space. We have our nemesis deck right here. I've discarded the top five cards because we're playing with two um mages.
If we were playing with just one mage, we'd actually discard the top seven cards, and then it'd only be three cards. If we're playing with three player and four player, we would have left it in full. And that's because I am using the pre-constructed deck that came in the box. So, I haven't even looked at these. Here we have the world splitter and armor chart. So, what we can do during our turn is spend three ether and then place one of these here during our main phase and get the benefit. We need to do that and fill it up to the top, and then he's going to be vulnerable. But every time he unleashes, he's going to move up on this track and activate the effects that are here. Whenever he places out regeneration, he's going to reduce this one all the way down to zero. And then after this power goes off, which will have three tokens on it, so after three of the nemesis turns, he's going to clear this whole armor chart. So, we'll basically have up to three nemesis turns and our turns in between there to deal him double damage.
We've set up our supply of nine cards. We have three gems, two relics, and four spells. Our three gems that we have. This one costs three ether. When you gain this, gain a pulse token. And then we can gain two ether when we use it. It has a recall ability, which means we can actually use that while it's in our discard pile. We can lose one pulse token to deal one damage. The philosopher nugget, we can gain two ether. And then while that's in our discard pile, uh we can have any ally gain an ether token. And something I I wrong in my last play through, you cannot hold on to either tokens. Once it's your turn, you got to use them or you'll lose them. So, huh, that would have made a huge difference. We finally have the Iradecs Lump. That is quite an interesting name. You'll gain three either. Then, you can gain two trinkets.
Place one of the gained trinkets into your hand. This is our trinket deck. These are all going to be different gems that are one-time use and then they get placed at the bottom of this deck. So, they're kind of fun one-time effects. The only thing I don't love about them is they clog your hands. So, you got to be careful. If you're gaining two of these trinkets, then it's going to mean you're going to draw your spells and whatever a little bit less. Our two relics, we have the Rift Ring. This will gain you two charges and gain two trinkets and place them on top of your deck or you can just destroy this to gain two life. We have the Chronoid. An ally gains three either tokens and then it has a recall ability while it's in your discard pile. Look at the top card of the turn order deck. You may place that card on the bottom or top of the turn order deck. Finally, we have our four spells. Our cheapest one at the cost of three either, it will deal two damage. An ally may discard a deadly accord in hand and draw a card. If they do, deal one additional damage and you may destroy a card in your hand. So, a nice kind of combo with other players.
We then have our three more expensive spells. The Megaflux Slice. This has a cast deal two damage gain a pulse or you may lose three pulse tokens to deal seven. And then the Stone Fury can deal four damage. Each ally who has one in their discard pile gains a charge. So, if we can both get some of these, that'd be great. And the Descent of Destruction. While prepped once during your main phase, you may conjure. Conjure means you take the top card of your deck and you're going to place it into one of your open slots. And of course, by slots I mean breaches. Then we have a cast effect deal four damage. Spells you cast this turn that cost two either or less deal two additional damage. That's a great combo because those cards that you place out that are conjured are considered to be a value of two ether and they deal two damage. So, they'll actually deal four when you use this. Although friends and foes can make the game a little bit longer, I absolutely love the addition to the Aeons End mechanic. I can't remember who decided to add this, but it's really great. These friends and foes can help or hinder you and if you want the game easier or harder, add a friend and then have no foes or add a foe and have no friends.
We're going to add one of each just to make it more enjoyable. That also means I have a friend and foe turn order card. So, we're supposed to play with Dia the Youth as our friend. And this friend has no health, so it can't take any damage. What we're trying to do is fill it up with charges and once we do that, we can trigger this ability. It says, "Any player destroys a card in their hand or discard pile. If the card was a relic, that player gains a card from the supply that costs up to three more than the destroyed card. Otherwise, they gain a card from the supply that costs up to two more than the destroyed card. Either way, that player places the gained card into their hand." And so, we have a deck of four cards, we flip the top one face up. When it's the friend's turn, we get to make a choice on either having them gain two charges or having a player gain a relic from the supply that costs four or less. That's going to be this Rift Ring. That's the only one that costs four or less. As awesome as that friend is, we have a foe the Creeping Dark.
During any player's main phase, that player can spend five ether to remove a nemesis token from the Creeping Dark. The Creeping Dark has one nemesis token already. We have the ability that when this fills up with charges, remove a power token from Spreading Shadow. Repeat this. Then Creeping Dark gains one nemesis token. The Creeping Shadow, I will show you that card. It is terrible. We also have the four action cards. This one says, "Add a power token to the spreading shadow. Any player destroys a card in hand that costs one ether or more, or just any player discards two gems." Here we have the spreading dark card. I'm supposed to place it above the creeping dark, but my camera has a hard time reaching that far, so I'm just going to have it over here. This card is going to start with power tokens according to the setup of the creeping dark, and that is eight for two players. And I'm using this as a five. Five, six, seven, eight. And it has power X. Once this card runs out of power, for each nemesis token creeping dark has, gravehold suffers three damage. Then the creeping dark gains one nemesis token. Do not discard this card from play, instead then add seven power tokens to this card. So, it's going to keep going off and causing more havoc, dealing damage to gravehold. Gravehold only has 30 health. Remember that's one of the ways we lose the game. Gravehold loses all of its health, or both of our mages lose all of their health. Next, we can set up our turn order deck. I have two nemesis cards, a friend and foe card, two number twos, and two number ones. I'll shuffle this up, and this
will determine our turn order. Next up, we need to choose our two mages. I'm going to choose as one of my two, Steak. Steak is going to be player number one. He is going to start with one sage stone, three crystals, and one piercing light in his hand, and then one sage stone, three crystals, and one piercing light in his deck. He has an ability once he generates a total of four power and two ether each, return a spell in your discard pile to your hand, and till the end of this turn, you may prep any number of spells to your breach. You're going to see, if you look up here, I don't have a level one, a level two, a level three. I only have a level four breach. That's the only thing that I have. Or we can choose a set aside breach upgrade. Spend knowledge equal to its cost, then add that card and its effect to the prototype breach. These are all of the different upgrades. I, from what I understand, these are not relics, so we can have multiple upgrades for that breach, unlike if you have a relic that impacts a breach, you can only have one impacting it at a time. In order for us to gain power, we have to cast spells from this breach. Each time we do that, we will gain a plus one knowledge. Here we have our starting hand. We have piercing light, deal one damage if Steak has upgraded his prototype breach at least once, you can destroy this. I love all the destruction in this game. Gain one ether, you may lose one knowledge if you do gain a charge, and then three basic crystals. When you're playing the Friends and Foes expansion, you can get rid of one card from your hand that matches the type of one of these banners
and put it into your deck. I am going to burn a crystal cuz I have a basic crystal, so that means I can get one of these four. I think the one I'm going to grab uh the Banner of Valor seems kind of fun. It would just gain gain you an ether or the friend gains two charges, that's half of what they need, but then the foe gains a charge. I'm going to be risky, let's do that. Our second character will be the wolf. Our wolf will have three crystals, a doomstone, and a doom howl in her hand, and the same thing for her deck. She has a very large expense to activating her ability, but it is awesome. It says lose all your doom. Any ally draws a card, repeat this for each doom lost this way. What is doom? Well, there's a total of five doom tokens, and by the way, if ever I have five or more more doom, each minion and the nemesis suffer 10 damage, but then we suffer 10, and that's what our health is. Our health is 10, so then we are defeated and we lose all of our doom.
So, we don't really want to get 10 total or five total doom. She is going to have two cards that impact doom. We've got doom howl and doomstone. Deal three damage, we gain two doom, or we can just cast this to lose doom, and we've got the same thing here for ether. Gain three ether and gain two doom or just lose one doom. You'll see here we also don't start with a level one breach. We just have a level two, three, and a four. We have no sparks in our hand either. So, I think we're just going to burn a crystal and gain one of these banners. Let's see. You may gain a trinket and place it on the top of your deck. If you do, the friend gains a charge. You may discard the top card of the friend's deck. You may discard the top card of the foe's deck. Or if the friend has one charge or less, the friend gains one charge. Yeah, let's do this one. Let's do this one. We can then work together and potentially get three charges without having to do anything for our friend. With our setup out of the way, I think we can just start our play through. And I am going to put a link in the description below if you like these player boards that I'm using for my mages. I love them. We're going to flip this over. Player one, that will be uh Steak going first. Just in case this is your first time ever watching an Aeon's End play through, let's just go through the three phases. You start with your casting phase. You may cast any of your prepped spells. Well, I don't have any prepped spells, so we'll skip that.
During the main phase, we can do any of these actions. We can play a gem or relic. It gets played out into your play area. We can gain a card. That will go to your discard pile. Gain a charge. That's to be able to activate your ability. Focus a breach or open a breach. Focusing it turns it uh 90° and you'll get it closer to opening it or you might just be able to open it. Then you can prep a spell to to a breach. You can resolve a while prepped effect and you can resolve a two discard effect. After doing that, you'll discard your cards in any order you'd like because, and that is important, you're not going to shuffle your cards in the game. You're instead going to simply discard them and then draw back up. If you don't have enough cards, you're just going to take your discard pile, flip it over, and keep drawing. In order to open our only breach, we need to spend four ether. Well, I've got one, two, three, four. And think that's what you're supposed to do in this anyways. I need that breach open. We're going to open this. I do want to call out normally when you become exhausted, so you've taken 10 damage, you have to discard one of your breaches. Stake will not have to discard a breach because then he would have no breaches left. So I've used those cards and then I am going to prep my piercing light here. We'll end our main phase discarding our cards first the banner of valor, then the sage stone, and then the two crystals. And then we'll just draw our other five cards, the same as the last five. A nice and quick turn. We'll flip over our friend is going to activate next. We can now choose would we like a die to gain
two charges or any player gains a relic. We're definitely going to do the relic. We both want to be able to trigger our abilities a lot and we know Wolf's is very expensive, so I'm actually going to have Wolf gain this. This will go to her discard pile. And then what we do with this is we place it in the discard pile, flip over the next one. This one will not activate till Die's next turn. So far it's been great. It's been only positives and we're going to have another positive. It's Wolf's turn. The first thing we're going to do for Wolf, we're going to use these two basic crystals so we can focus this breach. It's not open, but when you focus a breach you can immediately prep a spell in your hand. Now I'm going to have to cast this next time. I don't get an option. With an open breach you don't have to cast spells that are there if you don't want. Then I still have doom stone which I am going to gain the three ether and that means I'm gaining two doom tokens and then I'm going to use the banner of unity and that will give us four. So three plus one we have four total ether. If our friend has one charge or less, it has one charge or less, it's going to gain its first charge. I knew that was in our hand, that's why I felt like if I gained the two charges here I wouldn't have gotten that free a charge. I still have four ether remaining. I'm going to buy the phosphor nugget. This will go to our discard pile and that means I can immediately activate this recall ability. Any ally gains an ether token.
I'm going to give that to stake. We'll then discard our cards starting with the doom stone then the banner and then the two basic crystals and then we'll draw our next five cards, which is the same as the last set. For our next turn, we'll flip this over. It's plan one again. Well, that's good, but we know that means we're going to have some nemesis turns back to back. We'll start with that casting phase. We most certainly want to cast the piercing light. That will give us one knowledge and we're dealing one damage to the boss. That puts him down to 98. Woohoo! Remember, even if we were dealing, let's say, 10 damage, it would be reduced to one because of that armor. Then this will be placed into our discard pile. We'll then go to the main phase. We're going to prep our other piercing light. And we have one, two, three, four. I don't want to Yeah, do I want the charge? I don't want the charge. We want the ether. That's four ether. Oh, wait, we can't forget our plus one ether token here. So, we actually have five ether. Even though I have five ether, I'm just going to forego that fifth one.
I'm going to get the phosphor nugget and I'm going to use this ability because it will be in our discard pile. Any ally gains an ether token. So, Wolf now has an ether token. With one ether, there's really nothing that we can do. I'll put the sage stone first followed by these three setting them in the discard pile. And then when I need to draw, I'm just going to take my discard pile, flip it over, and draw five. I now have my starting hand again. The banner of valor. We have our sage stone, two crystals, and a piercing light. There's only one more good card in here. The rest of them are bad. There's our nemesis card. The first part of a nemesis turn is activating all powers and minions that are in play. Now, this card is for our foe, but I just looked it up and confirmed it is in the Nemesis area, and so it will activate every Nemesis phase, not foe phase. So, that means we are going to discard one power from here, which means it's not going off yet, but when there's none on here, it's going to deal three damage per Nemesis token that the foe has, which is currently one. Now that we resolved all the cards here, we'll draw our first card from here and resolve it.
Okay, it's just a minion. This minion has a persistent effect, so it doesn't come into play now, but the next time the minion or the Nemesis activates, it'll activate the persistent. If this has two Nemesis tokens, any player destroys a breach and this minion loses two Nemesis tokens. Otherwise, this gains one Nemesis token. Wow, we got to kill that thing fast. It has six health. Destroying a breach is absolutely brutal, especially because I have one character with only one breach, so it'd have to be one of Wolf's breaches. I don't want that. We'll flip our next one over. Okay, it is uh Wolf's activation. Wolf is most certainly going to gain two more doom. That puts her to four, but she's going to deal three damage to that uh gauntlet stinger, so it's at three health. We really can't have that destroying a breach if we can. Then, what I think I'm going to do with my doom stone here is I am going to lose one doom, so I'm down to only three doom, and then I am going to use these three crystals plus this ether for four to open this breach. Thank goodness. Cuz that means I can put this right here, and then I'll just discard these with my doom stone on top. I'll get rid of my ether token because I used it, and then I will draw. Before I draw, I need to remember my Phosphor Nugget is in my discard pile, so I will have Stake gain an ether token. And then 1 2 3 4 5, we've got our five cards. We've got a lot of resources, but no spells. We'll
flip our next turn order card. We have the foe activating. We have add a power token to spreading shadow and any player destroys a card or any player discards two gems. I think I'm going to do the discarding two gems. Stake has two gems in his hand. He's going to discard both of those. It means his turn is going to stink. Uh but then we'll just discard this card, flip it over and this one is remove one from this and repeat this twice or he's going to gain two charges. I'll probably have him gain two charges. Our last turn order card we know is the nemesis card. We'll remove a power token from the spreading shadow. We will have a nemesis token on here and then we'll draw another card. Oh, this is another power card. Now, we can spend five ether to discard this, otherwise it's going to in two turns unleash any player or gravehold suffers five damage. That's half our health if we did it as a player. We've completed round one of the game. Let's go to round two. That will be at stake. Stake will most certainly use his piercing light dealing one damage to that glinting stinger, knocking it down to two health. We're then going to slot that piercing light and we need to remember we've gained our second knowledge token. We then either have two ether or we could use these effects and I think I might do that.
We're going to have our friend gain two charges and the foe gain one charge. And then we're going to lose a knowledge so we can gain a charge. We'll place our charge here and we'll remove one knowledge. We'll then place two charges here and one charge on the creeping dark. Unfortunately, we had one ether token. We're not going to be able to use that. We've discarded our cards 1 2 5. Here's our five. We have no spells. This could be a real problem with this glinting stinger. We'll flip our next card. Yeah, it's the Nemesis. First, this power is going to remove a token. The Glinting Stinger actually does not have two Nemesis tokens. We're okay for now. It's just going to gain a second one. This one is going to remove one, and then we draw our next card. Oh, another minion. We're so not ready. This is the Servant of Brass. Remove a Nemesis token from the armor chart, or any player suffers one damage and discards a gem in hand. That's what's going to happen going forward every time we activate the boss. But so far, no unleashes. Our next player to activate will be Wolf. What I'd love to do with Wolf is deal three damage, but if I do that, I gain two more doom, and I have too much. So, I'm going to have to cast this during the casting step, and remove a single doom token.
That's it. And then I have no spells in my hand. I do though have a lot of ether. I've got two. I could get three more for five, and then six and seven. Could have seven. I'd gain a doom. I think I'm going to get the seven. So, I have seven. Plus, I'm going to gain two charges. I need how many more to be able to cast that? One, two, three. I need four more. And then we're going to gain two trinkets and place them on top of our deck. So, I have two trinkets here. I'm going to place them on top. We'll see if that's a good thing or not. They are one-time use, but they should be pretty cool. And now we have to decide what we're going to use for seven ether. I think I'm going to grab this megaflux slice for four, and then I'm going to grab and that goes right to my discard pile. I'm going to grab the atomized ash. And when we gain this, we gain a pulse token, and then we can use this and discard pulse tokens for one damage.
Oh, I would love that. That would knock that thing down to one health. I think I'm going to do that cuz this is a recall, so it's going to go into my discard pile. I gain the pulse token. I immediately use that and lose the pulse token to deal one damage. That means this Gauntine Stinger is down to one health. It's not dead yet, though. For our discard, we're going to do the Rift Ring followed by the Phosphor Nugget, followed by the Doomstone, followed by the Banner, and then that Blasted Crystal. Then we're going to draw five, 1 2 3 4 5, from our deck hoping for something good. Well, we've got our Doom Howl. We're not going to We've got We've got to be able to get rid of at least one of these Doom I love her push and pull with Doom. So far, I do feel like we're a little bit behind this boss. We've hit him for one damage, but hopefully it'll change. Oh, we've got our friend activating. This is going to be such a difficult choice. We can have Dyn gain a charge, and that would mean then we could activate this ability. And any player focuses their closed breach with the lowest focus cost. That would help Wolf. We could start focusing our number three breach. Or any player with no closed breaches, which actually is Styx. He has no closed breaches. He could just gain two charges. He's one away then from being able to upgrade his breach. So, this is hard. I think I'm going to do the top one. We're going to have this one gain a charge. So, he will have the or she No, this is a he. He will have his fourth charge. Then we'll have a player focus their closed breach with the lowest focus cost. That will be
this level three breach. We'll turn it a little bit, and now it's only seven to open, three to focus. Then we get to trigger this ability. Any player destroys in their hand or discard pile. If this card was a relic, they can get a card that's worth three more. If it's not, they can get a card that's worth two more. And they get to place that card into their hand. Styx has this Phosphor Nugget in his hand. We're going to burn it. We're going to destroy it and replace it with a card that costs two more. This is the Iridex Lump. Gain two trinkets, place one of the gained trinkets into your hand. That seems pretty dang sweet. So, we're going to have these in our hand then. We'll then discard this card and flip over the next one. Now, I can gain two charges or any player discards a relic in hand. If they do, that player gains five ether tokens.
Next up for our turn order, it's the foe. We either have remove one power token from the spreading shadow and repeat this twice or the creeping dark gains two charges. You know, we're going to remove the two power tokens. So, that means there's only three power tokens on spreading shadow. Then, we will discard this and draw our next one. This one has creeping dark gains three charges at two power or any player discards a gem in hand that costs two or more. Our next turn order card is going to be player one. Stake for the win. Piercing light dealing one damage to this gauntling stinger. It's going to take it out. Thank goodness. We don't have to worry about losing a breach. And then, we will discard this. That will give us our second knowledge token again. We'll start our main phase with this lump.
We're going to gain three ether and then gain two trinkets. So, we can look at them and place one of them into our hand. You may cast any players no one has a prepped spell. Uh this one gain one gain additional one that can only be used to gain cards. I guess we might as well put that one in our hand. And then, this one it just says gain two trinkets. So, normally when you gain them, they go to your discard pile. So, we'll place that in our discard pile. We have three ether, four ether, five, six. Uh this could be a seven and then this is eight and then gain an additional ether that can only So, nine. We have nine ether. I think we're buying some stuff. We're going to spend five of that nine ether and get rid of this dismal outcome. And that means we have four ether left. We need some spells. This one's only going to deal two damage, but once we get some pulse tokens going, this could be great.
We will then return this to the bottom of the trinket and we'll discard our cards. The lump and the sage stone are first. We'll then flip this over. 1 2 3 4 5. Here's our five cards for our next turn. We have just our piercing light. That's it. Uh we definitely need some better spells. Moving to our turn order deck, we do have Wolf going next. Here we have Wolf's four cards in hand plus the doom howl, which just will go into her second breach. She has the power trinket gain a charge, so that'll be her third charge, and then return this to the bottom of the deck. And then we have the glittering trinket gain one, an ally gains an ally uh one of those tokens as well. So, we'll give one of these ether tokens to stake, and then this will be placed at the bottom of our deck.
Uh I have three total doom tokens. I want to be able to deal three damage with doom howl. So, we're going to use this just to lose a doom. That's going to put us down to two doom. That means I've one ether, totally useless. We're just going to discard and draw. We drew three crystals, and we do have two spells now. So, that means I do need to start working on opening a breach so I can put both out. We all know what that means. The nemesis is next. We'll remove a power token from here. I am going to remove this nemesis token from the armor. I know that means I've got even more work to do there, but I'm not ready for someone to discard cards. I feel still behind. Oh, here is our first attack. Unleash twice. Any player gains a charge. Well, I am most certainly going to give that charge. Let's see.
I'm going to give it to Wolf, actually. Wolf only needs two more, and she has her power all leveled up. Unleashing two times right now just means this will move up twice. When we get to here, it says if the tear of brass has 89 or less life. No, it's at 98. Otherwise, any player suffers two damage. We'll have Wolf take the two, going from 10 to 8. That'll end our second round. We'll shuffle up. Let's see what we're going to do now. We'll start by flipping over our turn order that is going to be at stake. Steg only has one spell in hand, the piercing light. We then have two basic crystals, a sage stone, and a banner of valor. Plus, we have one of these. We actually have five either. 1 2 3 4 5. Or, we could do four and we could have our friend gain two charges. That could be appealing. I think we're still in the mode of getting some better spells. So, I think I'm going to get the stone fury eruption. This will deal four damage. And then, I do think we need to get this card soon so that we can just get a lot of ether cuz that's what we need to deal with that armor chart, tons of ether. But, I feel like I'm not ready for that yet. So, that was five. We're not going to worry about the helping our friend. We will then discard like so.
Here we have our five cards in hand and now we have that piercing light. We need to be able to start getting rid of some cards, otherwise this is going to be stuck in our hand. Next up for our turn order, we have Wolf. All right, we're doing it. Wolf is going to cast dealing three damage. So, that means the servant of brass is going to go down to two health. That will mean we gained two more doom tokens though. We then have three crystals which we're going to use. I'm going to put them in my discard pile because we're going to flip this over. This is going to deal plus one damage on cast. We're going to put mega flux here and the doom howl here. Yes. All right, we're looking good. We've got four doom. 1 2 3 4 5. If I can get two more charges, which you can see here, we can lose all of our doom and an ally could then draw four cards.
They have an epic turn. Here's our hand. I don't have any recall cards now in here. No. Just going to make sure I watch for that. We'll flip our next card and we have Wolf going again. All right, we are going to cast this mega flux dealing two damage. That will take out this guy completely and we gain a pulse token. That's one of three. Once we have three pulse tokens, this will deal seven damage. We're actually going to hold on our doom howl. We're not going to cast it. We can do that because it's in an open breach. Oh, and I should have mentioned that mega flux dealt three damage, but the excess damage to a minion doesn't roll over to the boss. What I want to do here is gain two more charges. Oh, I can do that. Gain two charges. Yeah. Gain two trinkets and place them on top of your deck. So, I'll gain two trinkets.
Uh is that a good is that bad? I kind of feel like I don't love that. I don't love getting the trinkets. It's going to clog up my deck, but it is what it is. We have gaining one ether and a charge for a friend. A charge is always welcome. We're then going to trigger our ability. We are going to use the aegis of hope and this says lose all of your doom. That's four. An ally draws a card. Repeat this for each doom lost this way. So, that means that uh stake is going to draw four cards. Yeah, I feel like wolf is awesome. So, four cards. One, two. Oh my gosh, basic basic. Three and then we'll flip over four. Yes, we've got our good spell. We then have our doom stone and we most certainly are going to gain three ether for that, but we'll gain two doom. So, we've got two doom back. This one gives us two more ether and this one gives us two more ether. So, two, four, five, six, seven, eight. I almost feel like we've got to start going up that armor chart. Why don't we do this? We're going to spend five ether to get chronoid and then we'll spend the other three to start going up the armor chart. That will mean we can cast any player's prepped spell. Why don't we cast We're not going to cast ours because three damage is only is to the boss. Oh, we could cast it though. No, no, I'm going to keep it. I'm going to keep it. Steak is going to cast this dealing one damage to the boss. 97 health.
And he is going to gain another book token knowledge. That's three. That will end Wolf's activation discarding rift ring then the banner. Now, you know what? We're not going to put the banner. We're going to do the atomized ash then No, we're just not going to do the We're going to do the phosphor nugget then the atomized ash then the doom stone and then the banner of light. So, pretty much opposite of what I was initially thinking. 1 2 3 4 5. Great, we have our five cards here yet two of them are trinkets. It's eating up so means we have no spells. We'll flip our next card. We have the foe activating. Our foe states the creeping dark gains three charges and then add two power to this. But if we do that, remove a power token from spreading shadow. Repeat this then creeping dark gains a nemesis token.
Now, I think that's all terrible. Any player discards a gem in hand that costs two or more. I really don't want to discard our only gem that costs more than one. That's our lump here. So, I'm not going to do that. I'm going to do the top. That means we're going to have to deal with this negative effect because the creeping What is it? Creeping dark gains three charges. So, it's going to go off at the end of this. But then we'll add two power tokens to the spreading shadow. Then we'll discard this. We'll flip this next one over. But now this is going to go off. So, we're going to take these off and it says remove a power token from the spreading shadow. So, now it's down to only three and it says repeat this. So, now it's only two. And this guy's going to gain another nemesis token. Yeah, I know that wasn't great. That wasn't great and the nemesis is going to go next. We're going to remove another power token from here and we're going to flip our next card. We're still in level one. Immediate unleash then to discard four cards in hand, we're going to set the power for three.
If this goes off, what does it say? For the rest of the game, when the last power token is removed from regeneration, advance the world splitter track. Well, I haven't even gotten to the point where regenerations come out. That unleash just means Gravehold will suffer two damage. It's down to 28. That's fine for now. We'll then flip over our next turn order card. That is going to be Stake. Stake is going to have an epic turn. Stake is going to place out his mega flux slice to start his turn. He's then going to use his clouded trinket. You may cast any player's prepped spell and then put this at the bottom of the deck. He'll cast this mega flux, gaining one pulse token and dealing one damage to the boss. That's down to 96. And I can't forget that will give him a knowledge token, so I think that's four. He's then going to place the stone fury eruption here. Look at all of these gems in his hand. The first thing he's going to do is the Iradex lump. He's going to gain three ether. Then he's going to gain two trinkets and place one of the gained trinkets into his hand.
This one's giving him additional ether and Ally gains one. Uh so, we'll put this one What does it gain an additional that can only be used to gain cards? Yeah, I think I think I'm going to choose this one so I can help out Wolf. I'm going to put this one in our discard pile. I'm telling you these trinkets, I don't exactly love them. They eat your hand up. Uh so, let's see. I've got three, four, five, six, seven, eight, and then I am going to lose a knowledge uh so that I can gain a second charge. We're also able to give an ether token to Wolf, so Wolf's got that. I need four more ether to be able to set this off. I have three, four, five, six, seven, eight ether, so I'm going to use four of of to fill this up and then do it.
Choose a set aside breach upgrade and spend knowledge equal to its cost then we're going to have its effect. We're definitely going to have the upgraded efficiency. Two spells may be prepped to stakes prototype breach. That's going to cost us two knowledge we're down to one but now with that we can also put out our piercing light there. We have four ether remaining let's use three to push up on the armor chart. We're going to give Wolf another one of these ether tokens. That's our second one. We'll then discard our cards we want that lump as soon as we can. Sage stone and three crystals. And then we'll draw back up to five. I've got four here. We'll flip this over. Here's our fifth. Oh, now we can burn those piercing lights because we have upgraded our prototype prototype breach. It's now either the Nemesis or our friend's activation of course it's the Nemesis. The spreading shadow is going to go off. For each Nemesis token creeping dark has which is two.
We're going to have Gravehold suffer six damage. That means Gravehold is down to 22 and then we'll put seven on here. Five plus two. Oh, then creeping dark gains one Nemesis token. That means he has three of those. Boy, he's going to kill Gravehold. Then we'll discard one of these and we'll draw our next card. We're still at level one. We have the besieging blade. When Gravehold suffers damage from the world's litter track it suffers one additional damage and we have any player discards two cards in hand for its persistent. Ugh. Now it's our friend. I so wish one of us had a relic because we would definitely do this to gain five ether tokens but I can't. Nobody has a relic so we're just going to gain two charges. Die is not going to trigger. We'll flip over the next one. Any player draws a card or any player places a relic in their discard pile into their hand. Starting our next round, we'll flip our card over. That's Wolf. Wolf most certainly will deal the three damage gaining two more doom.
That's her third and fourth. So, she's going to have to get rid of some. But, that three damage is going to go against the besieging blade knocking him down to two health. We're going to start with our two trinkets. An ally draws a card. So, Stake will get the megaflux slice and then that will be returned to the bottom of the deck. As well as we have the power trinket, gain one charge, which actually is nice for us, and then return that to the bottom of the deck. This is one of the hard parts of the game tracking all of your recall abilities. We can look at the top card of the turn order deck and we can place that card on the top or bottom. Let's see. No, we're going to keep that on top. All right, then we could lose a pulse to deal damage. I don't want to do that. I want to get three pulse and then hopefully deal double damage. That'd be 14 damage if we can. Any ally gains an ether token though. Don't mind if I do.
We'll give one over to Stake. We then sadly only have these three cards in hand. I have to use my doomstone to get rid of one doom. So, I have three doom. I have two ether remaining. That's not enough to trigger the armor chart. So, I'm going to do that. So, I'm just going to gain another charge. That's our second charge. And then I'm going to discard this first followed by these two. No spells. We're going to draw back up to five. One, two, three, four, five. Oh, that one's good at least. We do know who's next and that will be a Stake. Stake will activate his piercing light dealing one damage to the boss. 95. Woohoo! And then we're going to burn this cuz it says if I have the at least one upgrade on my prototype, I can destroy this. Gone. That is cool. Then I'm going to deal four damage to the besieging blade. That's going to kill the besieging blade. And I can't forget both of these will give us knowledge tokens, so I have three now. And then it says each ally who has a stone fury eruption in their discard pile gains one charge. No, we don't have any in our discard pile. Next up, I am going to place the mega flux and the piercing light into our single
[gasps]
uh our single location here. It's so funny, I have four breaches, but really I only have one. For total ether, I have 1 2 3 4 5. I am going to lose a knowledge going down to two to gain that one charge. I want to keep leveling up that single breach. The way we can do it as good as we can there. Uh so that means I still have 1 2 3 4 5. I still have five. If Yeah, I'm going to I'm going to use the armor chart. I got to keep pumping that up. We're going to spend three ether here. An ally draws a card and discards a card. So we're going to draw the chronoid card for um Wolf. Oh boy, we're going to discard a card. What do you want to discard? That was amazing. I think we'll just discard a basic crystal. Put that into our discard pile. With the two ether remaining, we'll just buy another charge. We'll then place this in the discard pile followed by this, the two basic crystals. We'll draw back up to five, 1 2 3 4 5. We only have one card left. Our deck is so much smaller over here. We've got the golden trinket. We have the ear dax lump. Okay, this No no spells though. Back to our turn order deck. We have our friend. We either have any player draws a card or any player places a relic in their discard pile into their hand. Unfortunately for us, we don't have any relics in our discard piles. So I'm just going to have Wolf draw a card, and she gets the rift ring. Oh, that is a relic. Then we'll discard this and shuffle and draw and flip over. We now have our buy time card. We just need one more charge to activate this. For our
next turn, we have Oh my gosh, Steak is going to go. This means likely we're going to see two Nemesis activations back-to-back. I most certainly am going to cast both of these spells. This one's going to be burned. That will give me a third knowledge. We're going to get a fourth knowledge by activating this one and a pulse token. Oh, that's our second one. One more and we can deal seven damage. But that means we're only dealing two damage to the boss, so he's at 93. Unfortunately for us, our hand is pretty terrible. We will gain three of four five six seven eight ether, but one of that ether has to be used for cards if we can. The eight ether is good. I'm going to spend one knowledge to be able to gain my third charge. Means I definitely want to be able to spend two ether to get my fourth charge. So, I'll use these two ether for my fourth charge. I'll trigger that in a second.
Means I still have one four plus one more is five six if I go for a card. You know what I can do? Three ether for this. That means I have three left. Uh but then I'll gain this, so I actually have four left to buy a card. And I'm going to buy this mega flux slice again for some more pulse tokens. That's for the four that I had remaining. We're then going to activate our ability and we have one that cost three. That looks awesome. Uh ooh, or do we do this two? I think we do the two first. The first time a spell is cast from stakes prototype breach each turn, we gain a charge. It's going to make it easier then to get the next ones going for it. So, that cost us two knowledge and now we've upgraded twice.
I almost forgot we should gain two trinkets. Is that good or bad? Let's gain two. You may cast any player's prep spell. No one has a prep spell. Well, put that in the discard pile. Any ally draws a card. So, we're going to activate this one. It'll go to the bottom of that deck and Wolf gets to draw another card. Wolf has the atomized ash in her hand. Then we're going to discard this first followed by the sage followed by the two crystals. We're going to flip this one card. It's a crystal. Flip this over two, three, four, five. We have our banner. And okay, we at least have one spell in our hand. You know bad stuff is going to happen. Now here's the Nemesis card. We'll remove two power tokens one from each card and then we'll flip oh it's another one. That's a power two. Spend seven to discard. Place a Nemesis turn order card in the turn order discard pile on top of the turn order deck or unleash twice. Any player loses three charges. And you can't do this one if someone has less than three charges to lose. That was a level two card as well.
So we're getting up there now. The foe is going to activate. We either have the creeping dark gaining two charges or any player discards a gem. Remove one power token from spreading shadows. I think we're just going to discard a gem. We're going to discard this crystal. It doesn't have to be a gem one or more and we're going to discard one power from the spreading shadow. Then we'll discard this and shuffle them up. We now have the snuff out attack card. Our next turn order card is the Nemesis. The spreading shadow will go from five down to four. We're going to remove this one. That's going to go off. So now it says uh set this next to the tear in a brass mat. For the rest of the game when the last power token is removed from regeneration advance the world's bitter track by one.
Yeah, I kind of just felt like I had to deal with that because I did not want to discard four cards in my hand. And we have a bad guy with 10 health. Do not resolve effects on the armor chart. Any player suffers two damage. So while he's out we don't gain the benefit of the armor chart. We need to kill him. But I'm so close to the armor charge. Uh I have to decide what I how I want to do this. Our last turn order card, I think it's going to be a wolf. Yeah, yeah, it is wolf. Wolf had no prepped spells, so during her main phase, she's got doom, a howl, and mega flux slice. And now we're going to have some fun. First thing, rift ring. We're going to gain two more charges. That puts us up to four total charges. We're then going to use Chrononoid, giving three ether tokens to our friend over there, Steak. Oh, I can't forget I have two ether tokens.
Oh, this is great. So, I've used both of these. That means for total ether, I have 1 2 3 4 5 6 total ether. Oh, I need to use seven to discard that card. 2 3 4 5 6. I don't have enough. With our six ether, we're going to gain two more charges and then use this again, get rid of this, get rid of all of our doom. Our friend's going to be able to draw three cards. We can't forget we have to gain two trinkets and put them on top of our deck. That's because of the rift ring. That was only four total ether, so I can spend two more to gain another charge. Steak will get to draw three cards. Crystal. Ooh, the mega flux and another mega flux. We'll then discard our cards, most certainly Chrononoid first, rift ring second, this one third, these two at the end. We have two trinkets, one two, and then one two three. No spells. Golly. We're starting that next round, flipping our turn order card, that'll be Steak. Steak has three ether tokens. We're using that to make the boss vulnerable. Unfortunately, we don't gain the benefit here, but now all damage will be double damage to him.
[gasps]
Oh, that's so great. We will though have to place regeneration out, and we have an immediate move the tear and brass token to the start space. If you're playing We're not playing with more than two players, and this will have three power tokens on it. We now can place two spells onto this breach. I have a third one. That's going to deal four damage, but I can't put it there. We have in our hand a total of four ether, or we could do a three, and we could gain two charges for die. I don't think that's worth it cuz we'd give a charge to the creeping dark. No, we're not going to do that. So, four ether here, and I'm going to have to hold on to this in my hand cuz I don't have a place to put it. I think what I'm going to do is get another mega flux slice for the four. I'm going to spend one knowledge, so I can gain one ether thanks to my sage stone. That means then I will discard my cards, and I can only draw four because I have the stone fury eruption in my hand. That's okay. So, I've got all of these. Yes, I will at least have a spell. It is now time to start hitting the boss at least for a little bit. We're going to flip this over. That is Wolf. Wolf is going to use her mega flux slice. Deal three damage, double that to six damage, and gain a pulse token. It's three because of the plus one here. So, that's six damage, and then we're going to deal three plus on a known plus one times two. Three times two is six damage as well for this, but we gain two doom. That was 12
total damage to the boss. 81. Wow, I finally feel like I'm going in the right direction. Here we have our discard pile. We have two recall abilities. I don't want to lose a pulse token. Uh look at the top card of the turn order deck, so we can do that. We'll take a look at this card. It's the foe. We can place it at the bottom. Let's place it at the bottom of the deck. We then have two trinkets. This one will be one charge for us. That's our second charge, and we'll place it at the bottom. And then we get one uh ether, and we can give an ether token to our friend Steak, and we'll place this at the bottom. Well, I'll do that in a second cuz I need to remember how much ether I have. So, I have 1 2 3 4 and I can make this 5 6 7. I think I'm going to I'm going to gain two more doom. So, that means I'm 1 2 3 4 5 6 7 with seven ether. This persist is gone.
We can spend all seven. Oh, yeah. That was good. We'll place the doom stone first followed by the foster nugget and then the banner of unity. We'll draw back up. Here's four cards. Really terrible cards. And then our fifth one, oh my gosh, just brutal. Right when we can damage him, no spells. We place the foe card at the bottom. Okay, at least the friend's going to activate now. We have the option of die gaining one charge and any player focusing their closed breach with the lowest cost or any player with no closed breaches gains two charges. We're going to choose that one. That means stake will have three out of those four charges he needs. I want to keep leveling up. Let's level up that breach. I'm going to flip this over and we now have prepare for battle. Our next turn order card, it is the nemesis. Spreading shadow, we'll remove one of these. We need to deal two damage. That'll be to stake. He's going down to eight. Damage has not been a problem against this boss. We'll remove one of these tokens from here. We only have two more times the nemesis is going to activate and then we remove all of those tokens on the armor chart. And we have another one. This is a two discard.
Unleash twice, gravehold suffers three damage. That will have power two. Then, let's see for our next turn order card. Player one, that is going to be stake. Stake is going to gain two knowledge tokens because he's going to cast both of these. First one, it's going to deal two damage and we're going to gain a pulse token. That will deal four damage. That will knock the boss to 77 health. Haha. Are you ready? We're going to do this one. We're going to lose three pulse tokens to deal 14 damage for this one. Heck yeah. Oh, and then the first time a spell is cast from Stakes Prototype Breach, we gain a charge. We're fully charged up as well. This means that Tear in Brass is down to 63 health. We're then going to place out our Stone Fury Eruption, and then we're going to activate the Clouded Trinket.
You may cast any player's prepped spell. We'll put this at the bottom of the trinket deck. We'll gain another knowledge, so this is our third knowledge, and activate the Stone Fury dealing eight damage to the boss. No one else has a Stone Fury in their discard pile, so that won't go off. That means that Tear in Brass is down to 55 health. Then we can trigger our ability. We've got all of these charges ready. We've got three knowledge tokens right here, so we'll discard those to upgrade. When a spell is cast from this breach, an ally draws a card. So, every time we cast one now from that breach, we're going to be able to have our ally Wolf draw a card. We only have three cards remaining in our hand. We will gain two trinkets, place one of them in our hand, an ally draws a card or money. We're going to do the ally draws a card. The money will go to the discard pile. We also have one ether, so we're going to use this, and that will allow Wolf to draw a card. Oh, that one's going to give additional money. That's great. And then we have three four three four five six six money actually. Well, I have a hard time saying no to gaining this last one for four. Let's do that, and then for the remaining two, we'll gain a simple charge. The boss being down to 55 health makes me feel like there's a good chance that we can actually do this. Oh, did I have any recall abilities with any of these cards? No, I don't have any recalls on Steak side. We'll draw one
card, blasted crystal, and then we'll draw four more. We at least get our banner. We get one mega flux in our hand. Next up for turn order, we do have Wolf going. Sadly for Wolf, the only spell we have is the Doom Howl, and we're going to need to use that to get rid of Doom, I think. We then will use our Doom Stone to just get rid of one Dooms. We're down to only three Doom instead of four. We have three ether, and we're going to give uh three ally to our ether tokens to our ally. And with that three ether, we are going to get the atomized ash, which when we gain it, we can gain a pulse token. That'll be our third one. We're going to hold on to that just in case, cuz if I mean, what I could do is just cast it out for one damage, or I could deal up to 14 damage to the boss if I get lucky enough. Then we'll place these all into our discard pile, and we will draw back up to five.
Here we have our five cards. We have that rift ring, which is quite nice, and the mega flux slice. I think there's only bad things left. Yep, it's our nemesis. We're going to remove a power token from here, a power token here, and here, and any player's going to suffer two damage. Wolf will go down to six. And then we'll draw our next card. Oh, any player gains a trinket and suffers one damage. Repeat this twice. So, we have to do that three times. I don't want trinkets. Steak will gain a trinket and take a damage, and repeat it twice. Two more trinkets. trinkets Two more damage, down to five. Last to go then will be the foe. We either have the creeping dark gaining two charges, or any player discards a gem. I'm not going to do that and remove one token from the spreading shadow. I think we're just going to give him two charges. That doesn't send him off, so we're fine with that. We're going to flip this next one over.
Add a power token or any player discards two gems. Starting that next round, we'll flip our card. We have our friend activation. Die can either gain two charges or any player gains a relic from the supply that costs four or less. Now, if I give him two more charges, you can have more than what's here. They'll just then roll over when you use four of them. I think we're going to have Die gain two charges. Let's do that. And then we're going to spend four to do this ability. Now, if I get rid of a relic, I can increase the cost of whatever I'm getting by three. I don't I do have a No, I do have a relic. Could do this one. I could get a card that costs six. I don't really want to do that though. What I'm going to do is get rid of atomized ash, which is a three, and then I can get a five, and this goes to my hand, right? Yes. Stone Fury Eruption, that's in my hand. We'll then discard this card and flip over the next one. I should have called out that was in Wolf's hand, just so you know. We will flip over the next one. It's the foe. We can either add a power token to the Spreading Shadow, and any player destroys a card in hand that costs one or more, or any player discards two gems. I think Stake will just discard the two gems. Seems like that's easier.
Uh so, we'll flip this over, and our next one is removing a power token and repeat that twice or gaining two charge. We'll then flip over our next turn order card. That's Wolf. Oh, how Wolf would love to use this to deal six damage to the boss, but now I have to just use it to get rid of a doom. That hurts so much. Mega Flux here, we'll do the Stone Fury Eruption here. We'll then use our Rift Ring to gain two more charges. And then we have two crystals here, which we will use to gain one more charge. And oh yeah, I should see before I discard, I have any Oh, I do. We could lose No, we could look at the top card of the turn order deck. You may place that card on the top or bottom. So, let's see who is next to go. We'll flip this. Nemesis, put that on the bottom because if the Nemesis goes, he's going to no longer be vulnerable. Then I'll discard these and draw back up. I've got 1 2 3 4. We'll flip this over. Here's our fifth one, the Ash. Flipping over the next turn order card, player one is Stake. Stake only has three cards in hand. He had nothing prepped. This is what hurts so much. We can gain two either.
Yeah, I think we're just going to gain Well, two plus the three, that's five either. You know what? With five either, let's go ahead and buy a Stone Fury Eruption. I would need to destroy a spell that costs six or more to get rid of this one. I'm not going to be able to do that. So, we're going to put that right here. We're going to buy that for the five. That uses the three that's here. And then we're going to discard these two and draw back up. 1 2 3 4 5. Now, all we need is for one of us to be able to go before he heals. Now, I get three spells. We'll flip over our next card. Oh my gosh, it is Stake. That means we can cast the mega flux. That will deal four damage and a pulse. We will get a knowledge. We will get uh one of these charges and an ally gets to draw a card.
So, that means Wolf will have the chronoid in her hand. That also means that Tare in Brass is down to 51 health. We then can prep two more spells to this spot. I'm going to do these two. I have to hold on to this. I am going to use these two just to get a third charge. That means I only need one more to be able to level up, but I need some more knowledge. I'm going to draw four cards and flip these over. Oh, yeah, we've got the golden trinket and we've got more ways of getting those silly trinkets. There are two Nemesis cards here, which we know one's on the bottom and one player two card. And it's the player two. You know that means Wolf can do one last shot before the tear in brass is going to become invulnerable again. This is actually awesome. We're going to use the mega flux first. You may lose three pulse tokens to deal seven damage. Oh, but it's plus one because it's in our third breach, so that's eight. Eight times two is 16 damage. That will put the tear in brass down to 35 health.
We're not done. Then we're going to deal eight damage with this one and each ally who has one of these in their discard pile gains a charge. That puts the tear in brass down to 27 and do I have one of those in here? I do for Stake, so Stake will then have a full set of charges. That means we'll be ready to go to level up or just to get a spell at this point so we can put it back out into that breach. I'll then place my Doom Howl here to be able to deal extra damage and that means I might wait to actually activate this until I have four Doom and then burn it all. I think that's a good idea. Or I'm realizing I have the Doom Stone here. I can just gain three ether and gain two more Doom. I'm going to do that. So I gained two more Doom. This is going to give us three, four and the friend has one charger less, so I'll give them a second charge, which is great. So three, four, five, six, seven, eight and three ether tokens to our friend and nothing here that I have in the discard pile for recall.
With eight ether, let's spend four to focus this breach. We'll spend two more, so that's six. We're going to do this ability and then do another two ether here for eight. We're going to let uh Stake draw four cards. Stake better have a good turn next time. One, and then we'll flip two, three, four. Then we have to discard our cards. We're going to put this one first, this one second, third, fourth, and fifth. And then we'll draw 1 2 3 4 5. But now bad things are going to happen, real bad. We got the boss down to 27 health, but now he's going to activate. We'll remove one power from here. We have to have someone suffer two damage. That will be Wolf going down to four. We have this. We are going to remove it, and it says remove each Nemesis token covering a space on the armor chart, then set this aside.
And because we did not get rid of the cruel majesty, this will immediately move up one space. We're then going to have to activate violent detonation. Unleash twice. Gravehold suffers three damage. So three damage, 1 2 3 down to 19 health for Gravehold. You know what the unleash twice is? Oh, gaining 10 health and dealing two damage to Gravehold. So Gravehold will go down to 17, and he'll go back up to 37 health. And now he's invulnerable again. And we still have a card, which is a minion. Unleash any player places a card in hand on top of an ally's deck. After that Nemesis play, we've got another Nemesis play. First, we remove the last power from here. For each Nemesis token, Gravehold suffers three damage, so that's nine. So Gravehold will go down to eight total health, and he gains another Nemesis token. That's four. Then we'll place five power on this. Then someone has to take two damage. I think it's going to be Wolf going down to two health. And then we have our unleash, and any player places a card in hand on top of an ally's deck. Stake is going to place this trinket, the clouded trinket, on top of Wolf's deck. Gravehold then is going to suffer three damage. That means Gravehold is at five health. If the Nemesis unleashes again, then we're going to lose the game. Oh, and I can't forget we still have to draw a card.
This is unleashed twice. That just made us lose. I just said that and I drew the card. Ah! Yeah, we were too dang slow. Well, that my friends is Aeon's End Beyond the Breach and oh boy, did I botch playing that well. That's okay, it was still a fun first time. I will say I don't like trinkets. I don't like them at all. They clog your deck and I think that you're not supposed to love them. So, the abilities of these cards are good, but then they give you those trinkets. Yeah, uh you know, I really should have gone for this deadly accord to maybe start destroying cards in hand and because I didn't do that, I was getting trinkets and gems which were really slowing down any sort of awesome combinations that I had. I also I did really enjoy the do my mechanic, but just letting us draw cards, it didn't let us do other things.
Eh, I don't know. I'm going to try some of the other mages. Overall, it was still fun. This boss is super cool. I love this idea that you have to spend either but there's so many things you want to spend either on and you're having to spend either for these small benefits one, two, three, four, five times just to make him vulnerable. Ah, and then dealing double damage though, really sweet, but 99 health. Yeah, and I will say that foe was super annoying because that's what killed Gravehold. That's why we lost. We uh ran out of health on Gravehold. What's so great about this game is after losing, I just want to play it again and that's what's so fun and it plays so quick. It's a great game for solo or co-op and there's just so much variety now. So so different bosses, so many different mages, it's kind of insane. I could only play this game and would have at least a year to two years worth of content alone with the mixing and matching. Do let me know if you've gotten your copy and if you were able to beat this guy and I want to give a huge shout out to our patrons and subscribers. It's because of you that Baron and I do what we do on this channel. And if you're excited to see what Baron and I have coming next, then I need you to meet me at the table.
Goodbye everyone.