Cyberpunk 2077: The Board Game - Gamefound Playthrough
Games in This Video
1 game is featured in this video — it unlocks as you watch.
Transcript
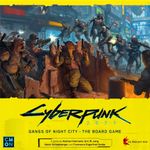
hi everyone my name is Monique and I'm navine from before you play and today we're going to be doing a playthrough of a game that is currently on game found called cyberpunk 2077 the board game yes this game is designed by Lucas wak and published by go on board who are helping sponsor this playthrough and in this game we are in the cyberpunk 277 Universe where we're going to be playing through an alternate story line yes this is a fully Cooperative narrative driven tactical action board game for one to four players and so today we're going to be playing through one of the three tutorial prologue scenarios that with our demo copy and hopefully demonstrate some of the main mechanics of the game while also showing how the real-time component is implemented now of course this is a demo copy like Monique stated so uh things are subject to change in the future if you are interested in the campaign there's a link in the description which you can check out and lastly if you like these kind of videos and you want to see more in the future please consider subscribing and with that we are ready to begin so if you please direct your attention to the center of the table we're all set up here for a two-player game of cyberpunk 2077 Welcome to Night City now if you're not familiar with cyberpunk 2077 this board game is actually based off of a very popular video game by CD project red yes but the story and all the elements of this are from an alternate story line right and so this is a narrative Mission based game in which each player plays as a different character from the video game who must work together in order to complete various missions through a series of fights now it's important to keep in mind that this is a demo copy of the game and so we were only given three tutorial prologue scenarios that sort of incre incrementally teach the rules over
the course of the three scenarios the final full version of the game will come complete with many different missions including a mapbook that you can explore various locations from as well as the option to complete Standalone jobs in the afterlife and the campaign itself is also replayable and so today we're going to be teaching and playing through prologue number two which is the middle scenario that does not include every single rule in the game but it goes through enough to have a good idea as to what the gam play is going to look like and so like I was mentioning the game has played over the course of several missions and each Mission has a main objective as well as possibly a few side objectives and so in order to win you'll need to cooperatively complete the main objective within the allowable amount of time which is a certain number of Maximum fights AKA rounds and we'll discuss our specific objectives right before we start the playthrough so then each player has their own character a deck of cards as well as what is known as a quick hack that are all specific to the character that they're playing as now in this game a round is called a fight and over the course of the fight players are going to be taking turns playing a card from their hand in order to move around the board defeat enemies as well as complete mission objectives now before each fight starts players will draw four cards from their deck into their hands but you cannot look at it until the fight actually starts then once all players are ready we hit start on the app and it counts down and as soon as it's done counting down then you get to look at your hands and the first player will start taking their their turn now on your turn you'll only be
playing one card from your hand and resolving it in addition you can also play as many free actions also known as instant actions during your turn but you'll only ever be playing one and then you'll always end your turn by drawing back up to a hand of four cards and once you're done then the next player can go but it's important to keep in mind that the next player cannot start their turn until you've drawn your card to end yours now in this game there are four main types of cards they are colorcoded and they each sort of pertain to the four different skills that we have on our player boards each skill or color also correlates to a specific type of action and so red relates to the cool skill and these are skills that typically deal damage blue stands for body and these are more healing and movement green is intelligence and that helps you gain Ram which is one of the resources in the game and yellow is a technical skill that has to do with crafting as well as interacting with the environment uh and in our prologue specifically we are going to be using it to open doors now our skill chart here is very important because this will determine the strength of our actions when playing a card from our hands and so let's just start with movement and combat now on your turn when you play a card you're going to play it into your discard pile and that's important because when you play the card it actually aligns with your skill chart here and depending on where your marker is for that corresponding skill you can resolve any number of the symbols on the card in any order and so at the start of the game our skills are going to be at the very lowest uh threshold here which
means as an example if I were to play this card I can only resolve the symbols at the very top here but as soon as I'm able to gain an additional skill Shard because that's what it's called in the red column I'll now be able to resolve all the symbols in the first two rows and again in any order of my choosing so in this case Monique could move twice and deal damage once yes because feet represent movement now in this game movement is just to an adjacent orthogonal space so you cannot move diagonally but the space that you're moving to has to be through an open door or a broken wall now both of our characters are starting on the starting space here which has no closed doors which means if I were to play a movement uh effect then I can just move into any adjacent space like that in addition red cards that show this target symbol allow you to deal an enemy damage and so combat is going to play a large role in this game each enemy in the game will have a health tracker of sorts our demo came with these uh standies that show a health marker that you can sort of rotate like this but the final version of the game may look a little bit different and in order to deal damage to an enemy they have to be within range now range in this game is very straightforward an enemy or you are basically in range within an enemy if you are either in the same room so if it were like this then we would be within range of each other yeah cuz you guys are both in the same Corridor here or if we are within the same column or row and there is no obstruction in between us
yeah so a good example would be if this uh enemy was here uh I would be in this particular room but there's an open door here so they can see me so we are both within range of each other right now if in this example this character or enemy was here now they would not be in range because they are not within eyesight of my character right they're not within the same column or row they are in a different room and so when uh dealing damage via a symbol like this you would basic just deal one point of damage to an enemy within range now one thing that is very important to keep in mind is if you ever start your turn within range of an enemy you always start by rolling your dice so each player has two different dice one is technically a weapon and in this game weapons will be able to be upgraded to stronger or more variable uh weapon types and each player will also have an enemy die and so uh whenever you roll these you're going to roll them at the same time and you will potentially deal damage to the enemy and the enemy will also potentially deal damage to you sure and so in this example if I were to if naven actually were to roll this against that enemy over there they would take one point of damage and naen would lose two health and so our health tracker is on the left hand side here if you are ever at zero when you need to lose additional Health then you take a wound these wound cards go to the top of your discard pile and they don't do anything for you these are going to clog up your hand and if ever in our specific prologue scenario if ever uh you run out of wound cards because we each can only take three when
you have to gain another one then we will lose the mission right now the wound card all have different art on them but they all essentially do the same thing right and on your turn if you ever have these in your hand you can't discard them but if you have a lot of wound cards in your hand and they're just really clogging up your hand you can instead of playing a card on your turn discard your entire hand you can still perform uh instant actions in a turn like that but at the end of your turn you would just draw back up to four and that is essentially how combat works it is fairly straightforward but you do have to keep in mind that you must roll these dice at the start of your turn if you are within range of an enemy next we have these interaction symbols that are found on the yellow cards typically and so for each of these hand symbols you're allowed to open or close a door that is within range and doors are these yellow chits here and so as an example if I were to play this card I could open um both of these doors if I wanted to because they are both within the same room as my character and obviously you have to open a door before you can go through uh the passageway into that room alternatively you can use each of these hand symbols to craft and so at the start of each of our fights we are going to draft these crafting cards and each card will show a certain number of these cubes on them for each symbol I can remove a cube from a crafting card and as soon as a card has no more of these cubes on my turn as an instant action I can dis discard the fully crafted card in order to use its ability so in this example I would be able to discard this to move twice and there's a wide variety
of uh card crafting cards in the game so we'll be discussing these as we play the playthrough next we have abilities that allow you to heal and so these blue heart symbols just allow you to gain uh an amount of Health equal to the number of symbols if ever you are fully maxed out at four and you gain additional Health then you can refresh one of your boosts and so at the start of the game each player will have one boost that's installed and it is on its active side and basically on your turn as an instant action you can inactivate your Boost in order to do one of the four symbols that are on it and so again gaining Health when you're already at your maximum is one of the ways in which you can reactivate a Boost now over the course of the game you'll have the opportunity to acquire more boosts but you can only have up to a maximum of three and the main way in which we'll be doing that in our specific mission is by picking up these loot tokens and so one thing that it didn't mention is when moving if you ever move into a space that contains a loot token you're just going to pick it up and place it onto your player board any loot tokens that you pick up won't actually get resolved until the fight is over which is at the end of the timer and when moving you are also allowed to enter and pass through spaces that contain other characters as well as enemies but if you ever enter a space that contains an enemy then you lose one Health mhm now the last type of card that you'll see us play are these green intelligence cards and anytime you see that symbol there that pertains to gaining RAM and so Ram is one of the main resources in the game we're going to be able to use Ram in order to take
actions that are listed on our quick hack cards which again are specific to our characters and as an example as Judy Alvarez my starting quick hack here is breach protocol for one ram I can open a door that is anywhere on the board so that symbol means anywhere on the board or for three Ram I can open a door anywhere and I can gain us Time by hitting a button on the app that'll allow us to do so some quick hacks such as the one that navin's character has over here allows you to perform the effect on yourself or on another player and so that is what those symbols here represent anytime you see a white field in character that's for yourself anytime you see a black field in character that's for any other teammate and quick hacks can be used on other players turns so this is the only action that you can take when it's not your turn and that is essentially it those are the main types of actions that you're going to see do over the course of these fights and by the way whenever you draw the last card in your draw deck then you simply reshuffle your discard pile back into your regular deck and continue playing now as soon as the app timer runs out whoever's turn it is can finish their turn so you don't have to stop immediately as soon as that ends then we'll go into a cooldown phase and at that point each player will discard the rest of the cards in their hand so that you can't plan anything for the next fight and we'll go through a series of steps that includes gaining more crafting cards as well well as moving enemies and uh spawning additional ones at this point we'll also resolve any loot tokens that we've picked up including installing any boosts or uh skill shards and if ever you gain enough
skill shards to fill in the bottom row here that symbol means you get to take a Legends card and these are asymmetric very powerful cards that actually go to the top of your deck when you gain them and we'll discuss them as we play the game but that's essentially it at that point as soon as everyone's ready we draw a new hand of four cards and we start the next fight and again as soon as we are able to complete the main mission objective then our characters need to get back to the start space and on your turn you can take an instant action to advance and you would remove your miniature from the board and as soon as everyone's able to do that then we win the mission but that's essentially it are you ready to start prologue 2 let's do it all right so key things to keep in mind are because it is a technically a real time fight we're not going to be able to fully explain our actions we're going to do our best when we play our cards and you're supposed to play your cards to your discard pile but I think we are both going to play our cards to the middle here sure and any loot tokens that we pick up we're going to place to our right but just know that in the real game it's the inverse right you're supposed to place out here and then everything else would go there in addition we've already done some preset up so these crafting cards you're supposed to lay out and each player will get to draft them back and forth and so these are the three that we each have chosen and before we discuss our mission if you did not join us for the teach today I'm going to be playing as Judy Alvarez and I have breach protocol as my quick hack which means for one or three Ram I basically get to open a door and maybe save us some time sure in addition I have a card in my hand that has a unique
symbol here which lets me distract an enemy by moving any enemy on the board into an adjacent room and I would basically place them on the opposite side of the door uh removing a door there if there is one and today I'm going to be playing as pan and Palmer and I have ice pick as my quick hack which helps me you also move and my unique card is this one this symbol right here is unique to me because it allows me to deal one damage to any enemy on the board so as you can see there's a sniper rifle here and I'm kind of creeping up on this one yeah that's that's going to be me so you probably want to try to upgrade your yellow skill so that you can really get the best bang for your bu Fair true now today our mission is prologue 2.0 No More Mr Nice Guy nine would you care to read our mission objectives sure so our main mission here is kill guards to get to decks okay so that's our ultimate Mission so we need to kill at least six guards hence why we have six of these images here uh in order to complete this Mission and we also have to of course uh get into the center spot and then Advance the elevator right now in addition to the main objective we also have four side objectives and so we are not required to complete the side objectives but if we do we gain the benefit that's on the right here which is going to be uh upgrading our weapon to a better weapon more interesting one as well as gaining a skillard depending on of the objectives able to meet and in order to do this they're all basically the same they just have to do with the different points that you see on the board so as an example the side mission a is open the weapons cabinets so these
are all a bunch of weapons cabinets to get to these better dice uh and what you want to do is another player uh spends one ram while you are on the specific section so if I was here yes on a on a and then Monique had Ram as one of her anytime actions she can spend one ram in order for me to get the red shard to make this better and I would now upgrade my weapon and I would have a new weapon yes and when you have multiple weapons you choose which one you want to use whenever you're going into combat that's right and that is essentially how all of these side missions Works they just require you to be standing on a different uh letter on the board yeah again these do not technically need to be completed but they can help us complete our main mission of course which is to destroy or kill six enemies you want good weapons to do that and we are going to have more enemies uh joining us at the end of each fight and so at the top here it tells you how many enemies will be uh coming onto the board during the cool down phase and the top right also tells you the maximum amount of fights you are allowed before you lose the game and so our mission card has a typo it's actually supposed to be seven fights all right so we are now ready to begin we're going to shuffle our decks and draw our hand up four but again do not look at it we're not allowed to look yet what is our plan well I think uh since we have to kill six of them right uh and we know the red shard will ow us to do more attack yeah I think one of us should definitely be gunning for a okay can I go that way uh yeah sure you can go that way so this is me this one's naine uhuh okay so I'm going to go that way I'll probably end up going for B just so uh I could be kind of efficient all right um who wants
to go first do you what do you think maybe you me yeah why not all right and we can redecide that uh when the timer starts but again do not look at your hand four so we got to start the app let's do it now again you don't have to play with the app but we are going to and so in the final version of the game there will be a video tutorial uh the app also drives some of the narrative so there's going to be some story based aspect and we basically just hit continue until we get to our mission whenever we're ready we hit start so the app is ready to go we just have to hit that button to start Mission we have our four cards that we have not looked at yet right are you ready so you're going to go to a I think I'm probably just going to move out towards this B all right start three two 1 go okay so I'm going first right yes you're going to go first two look okay oh uh oh I'm going to play I'm going to play this and I'm going to craft I'm just going to craft this now right this is a red shard so I'm going to do it now and I'm going to install it so now I have two okay I'm going to heal and move so I'm going to heal and just move one over back to you all right I'm going to play this so it's the top row I'm moving for one and I'm going to open this door cuz it's within range and now it is back to you okay so I'm going to play this one uh this one allows me to hit any eneme on the board I'm going to hit the one that you're going to towards and then I'm going to I'm going to craft this I'm going to get this off go ahead okay all right I'm going to play this so just the top it's going to be moving and healing for one and I draw a card back to you okay so I'm going to open a door and move so I'm going to move and open this door now it's back to you okay okay I'm going to play this which is also
moving and healing so I pick up the loot which will'll resolve later I heal for one that's back to you let me set up the ram real quick so okay I'm going to get myself some Ram all right and then back to you okay go ahead okay um I'm going to play I'm going to play this okay so two Ram one two back to all right so now I'm going to go into the room here so we're going into the room we're moving we're going to hit him for one and then on the next one we're going to oh and then I'm going to spend this right here as at any time and then hit him for two more one two okay so I'm going to hold these dice cuz I have to combat afterwards okay okay all right I have to shuffle go go did youw good okay I'm playing that so I'm moving for one opening this door okay and I have the ram if you want to step on a it's back to you though I can't perfect okay no problem uh so we have to roll for the combat okay I go down one and then he gets one hit which is great because then I'm going to play this one and I'm going to move and then get this and hit him for his last one so he's dead he's out he's out all right draw a card okay good so it goes back to me I'm going to play this and I can do all three at the top symbol so I'm moving in for one hitting them for one and at the start of my next I'm going to spend my Ram so then now you have the die nice can I have those and now you have a third Shard I have a third Shard which I'm going to install now good good are you done with your huh I'd like to take your turn if you can go ahead okay uh I'm going to heal and just move real quick one okay go ahead back to me so I get to roll I have to roll so I'm going to roll these two and I can go you keep going so I take one damage so this is probably a good time now that the timer has stopped to talk about this particular die so um you've taken one damage here and by the way we're talking because once the timer
ends the octop player can still finish their turn so now I don't have to sweat there the pressure's off so this die will basically allow me to keep on re-rolling it until I get blank so that's one uh and then let's talk about your your uh your hurting yourself die here so uh right now uh you see two symbols here uh Monique is going to take one damage for that which I think you did uh if there was a second enemy within range Monique would be basically fighting both of them and she would take a second hit right so that's not the case in this particular instance yes and I would keep on rerolling the uh my weapon I don't have to roll that anymore so that was one I shoot them again for two uh three can you get the last one can I get the last one so they are now out awesome and I'm no longer in combat with them it is still my turn and also I know this happened really quickly but because I was on a naven spent a ram which allowed us to complete the the side objective here and so it gave me that weapon that we just demonstrated as well as the red shard that I had installed very good and so I'm going to play this card it allows me to craft I'm going to craft this okay and now I have three movements if I want to spend this now we're going to get new craftable items uh in the cool down so I might as well use it and I'm going to move a total of three yes 1 2 three I'm going to pick up that loot and I draw a card because I have to discard my hand so now now the fight is over that's it yeah the round aka the fight yes we are in the cool down phase so first we are going to breathe out so discard your hand because uh that's it
how that works and I'm going to put this in its true discard spot is over here now we check our loot what do you got so this is a happy yeah I have two so I have a red shard oh ni and uh o a legendary card Yep this is great because I'm going to install Shard now and that gains me a red legendary so I get two of them and they're going to go at the top of my uh my draw deck so I will take these going into let talk about these cards as well yeah yes so uh a lot of these symbols you already are aware of for this one if you are able to uh reach the very bottom which of course we you have to have in order to get a legend card you did well I guess it's not technically true because if you get one of these right but I am I am there which me I get to do four damage a lot of damage that's this is a big big powerful card this one has two new symbols we have this symbol here that allows me to destroy a wall within range so you're basically blowing up a wall and you'll Place one of these tokens on it to show that the wall has been destroyed and uh this symbol here allows me to roll my weapon die specifically not my enemy die that could be great so that yeah that is great and these two are going to go on top of my my draw pile so I'm just going to go like that that'll be in my hand all right PR so that's it for my loot tokens do you have one as well I have a blue one uh let's see what I got so I got okay so I'm going to get a Shard a blue Shard please so your blue so now uh I basically unlocked yeah the second which is the healing so then maybe I could be uh using a lot of these boosts uh to heal a lot all right and that is it for our loot tokens next we are going to gain new crafting cards so we're
going to draft these we did not showcase the drafting uh at the start of the game but during each cool down sure you will do it again so um naine do you care to draft first what do you think um let's see you're pretty red specialized right I'm red specialized maybe I should be pretty green SL blue specialized I'll I'll take this green one right here okay yeah I'll just I'll just stuff that over there you have good healing abilities should I take this I think you should yeah because you're finding yourself in a lot of fights I also have this but um and then let me just put can I have one of those Cubes To indicate it sure and you can replace any um any items that you have up here even if it's already fully uh fully crafted you can still replace if you'd like to uh we don't have to draft all of these though since I have this one which is kind of a universal wild I think I'll just kind of hold at this because this is literally the same card okay this allows you to install a boost another one of these um that's very tempting but maybe I'll just go for this so I can have a a blue Shard sure do I need all of these Health well if if you do because remember every time you go here and and you go beyond you can reactivate that so so maybe I should take this instead you know what I mean oh to have another one yeah instead of one of these all right that is my final answer I see I see do you like your your Lup uh I'm okay with it this one right here uh this will be nice uh if I can get it going then I could unlock this and then we could be moving faster so that would be nice cuz right now I'm like kind of away from everything all right then these are done we also killed two enemies so I'm just going to go ahead and place uh two cubes
on here just so we can keep track so we don't make a mistake so we have four more to go and speaking of enemies now the enemies will move so we have three left on oh no two two left on the board so first things first if there are any enemies who are currently engaged in combat then they would not move and so that is not the case for either of these two then any enemies that are in rooms that are adjacent to the starting tile would just move to the space closes to the starting tile so that is also not true uh because they are at least one room further away and so in the case of our enemies over here they would just move to the next room that goes closer to the starting tile so the enemies are always moving toward this start space yeah cuz that's where we're going to be trying to get out of anyway so it's going to create kind of like a backlog or a a bottleneck there yes so uh you actually go in order a b c d so we don't have any enemies On A or B but we do have one in C so I think this one would go here right and it would open this door in the process and then this enemy same thing they're just going to move into the adjacent room closer to the entrance breaking open the door or maybe opening it kindly who knows yeah who knows next we are going to deploy reinforcements so in our specific Mission we only deploy one uh during each cool down right and you deploy them in order of the uh the side mission sequence but you skip over any of them that have already been completed so because I completed a then we are not going to get a an enemy here which means we're getting one in B and it looks like
you're standing on the spot he just showed up yeah bang and if ever you are in the same space then you lose a health I lost Health you lose a health now again if you did not join us for the teach these are prototype uh Miniatures that are included in our demo so the final versions are going to look a little bit differently they're going to fit better in the the health uh the health bases yep I'm just going to move them so that they're facing me and so that I can also uh be quicker with the health tracker the health tracker so I'm not going like you know awkward angle yeah that makes sense all right that is it for cool down so now we just going to draw a hand of four cards and we're going to start the next fight so this will be fight number two out of a possible seven hopefully we can uh defeat six we only need four more four more yeah three of them pretty much going to focus on this one uh you are way stronger than me though so so then nine whenever you're ready you can stand on B cuz I do have two Rams that'll probably be one of the first things I'm going to do just let me know my plan going into this next fight is to go this way cuz there is a door here so I can go through this way to try to get to this enemy and collect some loot along the way what do you think yeah yeah do you want to go first or second uh let me go first first yeah all right let's draw our hand one two three oh good I'm in a good spot so I get to reload now I also Drew my fourth which means I will reload as well and again for this next fight we're going to be doing the same thing playing our discard here and putting our loot tokens here right um or if you kind of get lost in it then you can decide in the moment I know so there we go so now I have my fourth I have not looked at it so I have my four cards all
right all right so I'm going first you going I'm going to hold these because I am in the middle of a combat then right now so I know for a fact nice good point okay are we ready yes all right continue mission one two three go oh here we go countdown one one go okay no matter what okay uh you lose the heal I got hit okay so uh you know what I'm going to play this one I'm going to go heal twice one two and then I'm going to move now I'm onto that thing right there so whenever you're ready to help me out help me out okay are you done yes I'm playing this but now I am fully skilled so I can destroy a wall first I'm going to destroy this one here and then I'm going to move so that's one movement and then I have 1 two three I can deal I am within range now so I'm going to deal down to two so I did one two three I can roll my combat die keep going so I'm going to do that oh blank that's okay okay I do have one more movement though so I'm going to move down this way now you're in range so you're going to be in a combat to start your turn don't forget to help me out the whole R I'm spending a ram okay perfect so I'm going to get rid of this card I'm going to take this I'm going to put this one on I'm going to hold this here I am all right calm down three damage to them nice okay we got one two and three I take two hits you do two okay and that's before I do anything so then I'm going to play okay I'm play this one right here so I'm going to hit them for one okay so then they're down to just one oh man I do not want to take it damage that's it good okay so I have to roll so can you grab your dice yes I'm in combat with them I can keep
rolling so I take I take one he I got but they're down to one and nothing that's fine because I'm going to play this so I I basically wipe them out they're now out and I can move twice so one two and I'm not in rins anymore so that is it okay perfect I'm going to heal myself for one okay two three actually and then I can move so oh before I do that I'm so sorry I supposed to do this okay I hit them for three uh they hit me for one technically and then I did all that healing so they're done they're out they're out yeah and then going to draw a card go ahead all right so it's back to me I'm going to I'm not in combat so I'm going to play this this is my distract okay so I'm going to distract this enemy they're adjacent here I I can hurt them just hurry H H hurry just draw a card okay I draw a card back to you okay I'm going to play this card right here so I'm going to open uh this door and then I'm going to cause one damage to them nice so now we can relax this this five that's five down to four go down to four yeah all right and the again the symbol I use as my special card here at that Target I can uh basically hit any one enemy that's on the board so I really wanted to get this in Play Because during the cool down I lose it that's true goes to my discards I was like please draw so I can take my as and similarly I played my card that has my special disra sybol so I just brought them into an adjacent room on the opposite side of the door and opening any doors they went through so that was pretty solid um I just I I defeated one uh so did I so we should have uh two more cubes here two more cubes and we're just going to use these you're not it doesn't really matter you don't it doesn't really matter you're not it doesn't say to do it but we just do it to be efficient to be efficient
there we go one so we got two more to go and that is the end of our second fight sorry if we were kind of in in a real game you wouldn't have to describe every single one of your turns because you there there is an element of that though you're kind of saying like hey I'm going to be playing this I'm going to attack them I'm going to go okay move so the real time component timer is just to establish pressure but pressure yeah you really can just like finish out your turns you feel it too yeah all right so let's breathe out discard your hand are all out and let's resolve our loot so I've collected I have no loot yeah but what did you get I have one Loot and it is a yellow oh nice so yellow orange this one so now I'm a little bit more skilled pretty skilled yeah in that which is nice because being able to open doors and you know I haven't had to use this yet well and then also just getting these these uh these crafted uh cards in play that's true crafting these are are very very useful So speaking of craftable items let's get our new slooh for the third fight which could potentially be our last one could be right two three four five six navine what are your thoughts well I'm going to ditch this one because frankly I don't really need too much of that I guess okay so I'm I'm just going to ditch it and then I'm going to get I'm going to take this triple Target the triple Target yeah cuz you're very strong so I might as well get something at least so I can start battling you know I'm just G to I'm going to ditch this one okay I don't necessarily know that especially since we're approaching the end of this
uh Mission I don't know that I need toine bump that up I would like to move a lot though this is kind of nice because it's a boost but what what you how do you feel about me taking this yeah please okay I just want to be able to do it so okay let's just take this should I do this one should I just be able to have a lot of movement be able to move yeah that would be great I'm going to replace this okay so the thing that's nice is they're all cheap only require me to to and what's nice is now that you've set up two orange you're most likely going to have two hands so you can you know pluck pluck simple that is true and so you have we both have our I think I'm good with what I have right here yeah okay all right so now our one enemy that is left on the board will not move because we are currently engaged in combat since we are in the same room you techically in line of sight same room or same row or column that is unobstructed yeah so if you were here you would not be in line of sight but because you and now are in the same room even though there's a Bend you guys are are within range so now our single reinforcement will arrive a was completed and so was B so they are going to go to C all the way over here we need to run over there yeah right we do okay it's very far well if you can somehow make your way over there and we just defeat these two then we'd have completed the mission I think with all my green Ram uh I'm going to try to take this uh the ice pick as much as I can just move as fast as possible now again you have to spend two RAM for yourself you can spend one ram for me um and also we the mission doesn't just end as soon as we complete it we need to get to the start space and as an instant uh
action you must advance and remove your miniature from the board in order for you to be done okay let's go ahead and draw our hands two perfect so I get to reload ah so nice to reload before the timer starts all right so who wants to go first can I go first actually you absolutely because I'm in combat I'm basically kind of freely just kind of hanging out so yeah it's kind of nice that we're not taking any wounds right so um I'm going to don't forget to hold your dice in hand cuz you are going to be engaged yes good point I'm going to go ahead and hold these two now I'm not sure if we mentioned it but if you had multiple weapons you can choose which one to use but I'm going to use these two of course ready yes go three two one click the button there we are three two okay go go okay so I must roll uh they hit me for two one two I hit them for one so I keep on rolling to two two hits okay so they go down to two you need to heal yourself I need to heal you don't technically have to oh I don't have anyine I'm going to play this okay so that's how many hit I hit them for three oh nice so they're already so they're they're out and I'm just going to move forward one all right and your turn okay perfect so I'm going to play this card I have up to the three so I can heal for one technically I'm going to spend this before I do that actually so I'm going to I'm going to spend this as a boot so I'm going to spend boot which would shift this down shifting it back up because I've overhealed and then now I have one two three moves okay back
to you okay I'm going to play this so I now can do the to the top two I'm going to uh craft that and use it so that I can gain some health and then I'm going to move twice so I'll move one two okay and that's it all right so I'm just going to get some Ram so would you like to spend your RAM would you like to go would you want me to move you uh sure okay I'm going to move you for one for one okay good all right um I'm going to play this it lets me gain two Ram good options but I guess I could no that's it I guess back to you uh okay so I'm just going to oh man I don't have much okay so I'm just going to move okay okay done go ahead all right I'm going to play this my very very powerful card I'm moving to here picking up the loot and now I can attack them so I have one two three so this goes down to two but I can also uh roll my my weapon so what do we got nothing okay uh just draw just draw dra okay I'm hitting them for one for you and then you have your Boost you have your Boost don't I have my Boost go finish your action so I can take my turnam okay oh I have to I have to I have to go in combat okay so I go down two and I'm going to play this and that that gets them out boom and I have to walk I have to walk yeah walk so one two okay all your turn okay I'm going to move so I'm moving back okay I realized I made I made uh two discard piles fun that's okay so now I I can exit you can I can it's so funny because we just need to get over there and advance I I think
it's still technically my turn right the timer went out and it's anytime action I can advance so I'm I'm advancing I'm out all right you are out I'm out of the game that's it and honestly normally I would also have to go here and take my instant action to advance since I wasn't able to do that I would have to do it in the next fight but it's not entirely uh necessary because during the cool down we would just gain more enemies you get an enemy here um they would they would just stay there and then you would go 1 2 three there really is no threat there's no reason to have to restart so let's just say I was here and I advaned Y we did it we defeated uh we completed the mission I guess I should say No More Mr Nice Guy and we are one step closer to Dex I believe that is the ultimate goal yes oh Dexter now Monique and I are very versed at this particular scenario um so that's why we were able to kind of know exactly what we needed to kind of get done in order to uh get the weapons that we wanted and find ourselves in positions to to cause as much damage as possible on a given turn exactly that's why you're were able to to basically complete it in three fights right because we while filming this we only have really one go at it so uh we wanted to make sure that we could showcase exactly like how the dice works and all that so future scenarios will be much more difficult yes in fact our demo did come with three prologue scenarios the third one adds additional mechanics that we did not get to showcase for example uh when you defeat an enemy you can actually take their body as loot yeah kind of like in in video games like if you ever play like a first person
shooter you can kind of walk over the the dead body and get some stuff yeah you can also disassemble your weapon and there's also trading so that is going to be an element of the game that we did not get to uh showcase here we also didn't use our boost but I think you and I were just focused on our cards I think I had moments to use it and just in the even with the experience like I said like you just forget that like you know this is something that you you can kind of account for right right right and we also didn't get to Showcase too many of the leg cards but just keep in mind that there are additional symbols that allow you to do um more intricate types of actions as an example this Arrow here allows you to move as far ahead to the closest door or wall some effects will allow you to gain more time yeah let's kind of show you what that kind of looks like in the uh the app over here so we're just going to pretend as if we're going to play another scenario okay okay so then time would start and then if you have get time if you have that particular symbol on a on a card you just press this button and then the music kind of slows down and it just adds more time to it so it's it's an element of the game that they that this is how they've kind of Incorporated it in it so that's just something to be aware of so that is specific to the app now again you do not have to play with the app but if you do and you see this in a the final version of the game you may notice that that button might look a little bit different yep but there you go that is cyberpunk 2077 the board game now again the final version of the game will be about four times the size of this it'll have a replayable campaign that has about 13 missions and a Standalone job mode in the afterlife right so if you have any questions about
anything you saw here feel fre to leave them in the comments down below we'll try to get back to you as soon as we can thank you all so much for watching the video uh there is a link in the description to the game found campaign if you are interested in it uh thank you again for watching the video we hope you enjoyed it if You' like to see more videos like this in the future please consider subscribing thank you bye