Risk: Dune Review
Games in This Video
1 game is featured in this video — it unlocks as you watch.
Transcript
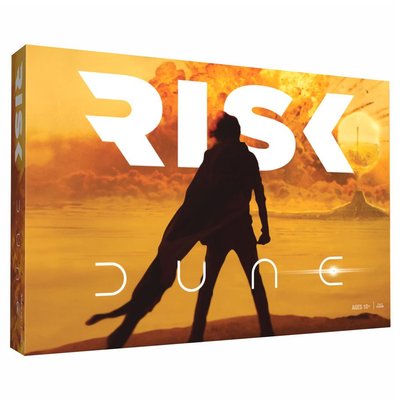
hey everybody Welcome to drive the view 795 today we're going to talk about risk Dune uh this is a new game from Hasbro and the op that's just come out and what this is is not your typical Risk game it's more along the kin of the risk Star Wars edition that came out probably 8 nine years ago at this point I'm not sure exactly um and that was like this game a two-player head-to-head game although you can play this game and that risk Star Wars edition four player which is two versus two in a team uh and then that Star Wars game and this game's design it's sort of a descendant of an older game uh which is long on a print called Star Wars Queen's Gambit kind of a gril game basically Queen's Gambit was sort of a representation of episode one Phantom Menace Star Wars risk is kind of a um representation of Return of the Jedi and this of course is kind of a representation of the probably more L the second Dune movie If I had to really split hairs about it but you know it's a representation of the of the battle on oracus in Dune uh so let's go down to the table I will say this up front um a little bit of spoiler I think this game's a lot of fun which is why I was getting the video but there's a couple of things that are a little bit Loosey Goosey now there's a somewhat official howto video it's there
on the board game geek page if you want to go search for it uh I'm not sure if it's technically official but I know the guy was sponsored um by Hasbro to make the inst instuctional video that video has some clarifications in the rules um you know just a just kind of frankly just some Nuance that didn't really affect gameplay but there's a couple of other things that you kind of affect gameplay but not too much in my practice with the game but I just want to bring it up because I think people will run into it uh so when I go to do the walkth through I'll recommend to go watch uh his video again it's on Board Game Geek as the how to play that's up there and then uh I'll give you the how to play here and then talk a little bit about the I know the wiggly room of some of the rules and then I'll talk more about that in the review but just so you know it's I still enjoy the game but there's a couple of caveats okay I've got the game here set up as it might look at the beginning of the game one player will sit on this side this is the fighters the Paul M and a trady sign over here we've got the oppressors this is fade Ral is standy there here's Paul and they have some of their troops and stuff over there in these different sectors we'll zoom in a little bit so the objective of Paul and his team is to get here invade Arin and then slay fade rala and then you can see there's two types of troops both sides have two types of troops you've got the Harin in blue and then you have the Sardar in Gray all of that means is that you can kill a hekinan troop with a four plus sard car you can
kill with a five plus a little bit harder to kill and when you move a sard car they can actually move two of these zones here now there are some steps that need to happen before Paul and the fman and the fedin can actually assault aren and then slay fate Raa there's some steps they have to do before they can make that attack fade rala this figure here will not move around it's just sitting there just kind of as a token piece there uh you need a six to kill fade rtha at the end of the game when you do combat however if there are other troops in here they all have to be eliminated first before you can actually kill feda and then you can see on the board here you've got the starting amount of troops at setup and then down here you can see we start with some fedin and fman troops in red Paul starts here and the fman and fedin are similar fman you can kill on a four plus fedin on a five plus Paul is only killed or conquered or be defeated on a six plus but when Paul's defeated he goes back to this spot here now the way that the opposing player the oppressors win is if they destroy these sies you can see there are two sees that start in the game there are two more that can come into play and you can see the Silhouettes Of The Shapes will show up here on the board they can come into play and then they will uh act as respawn points for the fedin and the freman units so you can respawn them in any sieg that's available of course the heinens can destroy the sies once those sies are destroyed for the particular type you can never respawn those troops
however when the harken and Sardar players troops are killed they are move from the game permanently they there's no way for them to come back however um let's just zoom out a little bit here you can see these these different tracks here so this track the Fe fman player m d will be going up that track and then since the Hardon player will be sitting here they'll be coming up this track in this direction as you come up this track this will have little spots in here where you will respawn uh troops in aren there so this space is the only place that has like a maximum number of troops you can have up to 10 either har our Sardar uh units uh so if you have to spawn some and there's no room they just don't come in so you want to keep them you know moving out of there so cuz you you are going to spawn some up so you want to keep them moving forward and in a similar way down here uh you want to keep these troops out of here because once these get destroyed any troops that are on there are permanently destroyed and then again it it removes kind of a respawn point there for that now how does the game work okay so I gave you kind of the objective there basically do some steps get to our raakin defeat fade Roa the steps for the harken players basically destroy everything destroy all the sies then you have no more respawns once you destroy all the sies then you got to destroy Paul and then he has nowhere to respawn technically so each side has their own deck of cards here's the oppressor deck and similar to Star Wars risk and um Queen's Gambit you're going to have a hand of six cards each round each
player's going to choose three put them in a certain order put them face down and then always starting with the oppressor player you're going to reveal the top card and then you're going to be able to choose one of these options here so sometimes they will be it'll like double up so you can just do this action twice and so on and some of these actions won't really be available until you move up your indicated track here so let's just quickly go through some of these cards so here is obviously you can activate sard card troops you can activate Harkin troops twice you can go up the oppression track which is the oppressor player track over there which I'll explain you can activate a dread knot and the dreadnots is has to come out by going up the track but then you can start to destroy the sies that way and it's worth noting that the hearken and player has these two of these cards which is you do the dreadn action but instead of rolling two dice you roll four when I'll explain how you do that so you have two of these that you can do um and so you want to make you know make sure you time those correctly cuz there's some other little benefits and stuff that you can do and then let's just take a quick look at the fman side first of off you got the fedin the atres and the freman here so fman is the fman troops fedin and then the atres is basically where Paul is when you activate the atres is a little bit different so typically when you activate a set so if you activate fman you can do them or you can do the fiden now if Paul's with either he can go with them
when you move but if you activate the atres he can also jump two spaces and take nobody with him or he can go uh one space and then take troops with him in that case and then there also is some bonuses later in the game if you activate them with the atres ability so we'll get to that in a minute then you have the vision track which is the atres track here they how you activate that and then finally you have the ability that you have to unlock moving up the track here of using the thumper which will call this little worm token here to come out and attack the opposing team's troops so like I said each team has a hand of six cards um and then you drop you choose three put them in the order that you want and then you reveal them back and fourth and then that's the end of the round and then you draw back up to six and then you just keep playing until one of the sides has a victory so when you activate the troops so let's say you play a fedin card or in this case a harkening card and you activate them you choose any uh region that you've got here and then you can pull in all of the troops going across like so and then at that point whatever region that they move into then you can attack out of to any adjacent region so if we had some fed in here let's just put them like that and then we pulled up and we had let's say some Sardar was here right so we can activate the Sardar remember the sard car can move two spaces they could go one two and then they would be in here and then from that point you can attack with any troops that are in that spot but you have always a cap of five dice that you roll so in this case we
got way more than five we'd roll our five dice fedin are killed on a five or six so that's enough to kill these we got very good role in that case the attacker chooses how they want to assign those if Paul was there the six could even be used to to defeat him and push it back so it's basically very simple you pick whatever type of troop you can move that type of troop or activate that type of troop and then everybody in the region that they end up can then fight so you don't actually have to move either because you could play you know a hearken and action there and just choose that and don't move with them and just activate and just have a combat there so that's like you know 60 70% of the game is picking a troop type activating them and then attacking you attack to adjacent regions you don't ever share spaces with uh troops there now like I said on the atres side you can also activate the atres so Paul can move up to two spaces by himself so he could like arrive in a spot and then attack and then he can also carry troops with him as he attacks but he'll also get a bonus later in the game which will make his attacks more powerful now Paul by himself will add two dice to the combat so he doesn't need to have a whole big entourage with him because he's already bringing two dice so that most I mean it's nice to have extras there for defense and acting as a buffer but then you just have you know add dice for the rest of your troops there so it's still capped at five dice that way once you go up these different tracks so again this track here which I'll explain how these
tracks work but on the hekinan side the main thing you're worried about is activating um this dread knot and that because there's the dread knot ability on the cards once you have the dread knot in play you the rules will say put it here like by arane just to you know signify that you've activated it you can tell because you'll moved up so far in the track anyway so the token ser superflous and then when you play uh dreadn on action then you will choose one of the target sies here roll two dice and then on a six that seat will be destroyed any troops on there will be permanently destroyed and then you know that's your one step towards Victory now remember I said you can get those two special cards where you can actually roll four dice where you need a six but if you go further up the track you can start to unlock these extra plus ones and so you only can get four of these in the game and before you roll you can choose to apply these to your roll so this is good to kind of combo up with the one that makes you roll four Di cuz then you don't need a six you could have a four or five if you spent these so you want to be pretty choosy about how you how you do those um so that's that's the other card that's in the deck for the hekinan on a similar sense you have the thumper cards which allow you to activate the sandworm and so what you do is you just pick a spot here we can just say we going to pick that spot and Target that and in this case you also roll two dice uh the rule book has a typo I think in the table cuz there's a
table here on the one page that tells you everybody's attack values and all that stuff that says you actually rule three but in the quotequote official video as well as the rules in the in the text it says to roll two dice and it makes sense cuz it's kind of paired with the um the dread knot anyway you roll two dice here and then on a five or six you will actually defeat every enemy troop that's in that spot however that player can also get to a spot on their track where they unlock these three uh warning uh vessels here and these are spotters worm sign spotters so when you activate that spot on the track you can put these out in three different spots on the board and then anything that's adjacent to it which you can pretty much cover the whole board at the beginning uh they get a chance to have some of those troops evade now this is where the rule book gets a little bit unclear so let's say this action I've got these laid out here and so the way it would normally work is if I I say okay I'm targeting this spot I'm going to try to roll or five or six I whiffed okay so at that point the way that it seems to me based on the rules in the videos is you don't actually have to activate those to evade cuz this missed but do you leave the sandworm there because it seems like a very extra piece just to say this is the spot that I'm attacking which is fine it's a little bit cool it's a plastic mini whatever but if you do succeed let's say a roll a five or six what happens is
then that will remove one of these worm sign spotters from an adjacent spot and then they will roll a die and then oh that was a good roll and then that many of these troops will go back to aren so they kind of save them they're not removed from the game permanently but it doesn't tell you what to do with sandworm token after or what happens when you fail so if I rolled that as a sandworm I failed nobody gets eaten but it doesn't say remove that from the board and you also cannot move into uh you know regions with an enemy piece and if you look at the rules this classifies it as enemy piece cuz the F kind of own this they sort of control the sand worms now if you leave it there that acts as kind of an interesting sort of blocker you know for movement because they have to move around that but if you fail do you still leave it there even if you succeed do you still leave it there I don't know it kind of makes sense to it's just kind of a glorified little piece to say I'm targeting that you know just to sort of declare and that's all it is and then it comes off the board that's what I think happens but and that seems to make the most sense because sand worms don't just hang out they're always on the Move they're like sharks so you know they're just always swimming um so to the next Thumper to the next sort of rhythmic you know vibration that's where they're going so I think it's just to mark that so I found that a little bit confusing that you know okay what do you do with that piece um so anyway that's that's just a little bit of rules thing the other rules sort of caveat is let's say you know you had moved some pieces into
here like so okay so now these guys are adjacent to a SI can you attack into a sieg I don't think so doesn't make a lot of sense because if I attack into the SI these guys are just going to respawn into the sieg right cuz they respawn these guys respawn there's not you know they don't get removed so I don't think you can attack I don't think you would attack anyway it'd be dumb but it doesn't doesn't clarify that now the one thing that brings it up interestingly here is this is where Paul comes back to spawn these other guys they come back into the sies right the rules tell you to respawn Paul there uh you know when he gets defeated but you're not supposed to have enemy pieces in the same spot so but if enemies have moved in here where do you put Paul I think that's probably a typo I think Paul's supposed to respawn into a sieg he starts out here kind of ahead of the game a little bit into the field but once he's defeated I think you should get penalized a little bit he goes back into a sieg otherwise why would the rule be if there's no sieg for Paul to spawn into then and you know what I mean like that makes sense cuz there's you kill him there's nowhere for the spawn then okay you win the game if you put him here this little rule thing so I think a little bit of a typo though Paul must starts here but he goes back into a Siege I think that's the easiest way to um interpret that other than that um I had I had one or two issues that I had with the rule book but the other video clarified them for me so it was no big deal and like I said these are no big deal either I think this is
self-explanatory but it's just like it doesn't tell you what to do with that piece and I think this is just a mistake this is a mistake that when Paul gets defeated he goes there he must go back to a siege that makes way more sense than just going to some random desert spot okay so let's talk about the tracks because you're going to go up either the vision track or the or the Haron track on that side so whether you're doing the vision action as the atres or the oppression action as the Harkin player you're always just going to take and roll five dice every time and then you just to roll those dice up and then take a look so you have a token on your side in this case the atres player you need a two to advance there so okay we'll spend the three that's higher two let's spend the four and then two fives bang bang so we rolled way over our weight there this one is useless so you just keep moving up here now as you hit these special Spots You're going to actually stop so even if I'd rolled five sixes I'd go 1 2 3 and stop cuz you once once you get to these big boxes you stop and then that's the end of Your Action no matter how much dice you have left so on the ATR side you're going to start implementing and attaching these sies here you can see the spot for the SI so in this case I would go and grab this guy here which you can see there has some extra troops so this is a way to get extra troops and you have extra sies in there um to spawn from and that's extra targets that the hearken the player has to destroy so as we're going up the track here you can
see you get the other SE in here with the fedin this is where you get the thumper so now you can start calling the sand worms here is you get the lady Jessica token and this has a special ability written on the back which is kind of nice so this is choose one at the end of the round move a group of fmen or fed into an adjacent region so you get like a free move which is very useful or you can discard up three cards like if the hand that you have left over after the round doesn't look good you can discard and then you can draw back up to six so it's very useful this is certainly don't ignore that and then we're going to move a little further here here we get gurnie hoc and then this one here you put this with Paul and or you can just put on the side but it's good to put with him so you get plus one to all dice when Paul and his friends attack but that's only when you activate it with the atres action if you activate them with fedin or fan action they don't get the plus one but with the atres you get the plus one which is huge I mean that's just going to make attacking much easier so you get that here the next thing is interesting so you have to as the at Tres side uh and this other video clarifies this uh nicely is uh you have to get all the way to the top so you got to get your token all the way to the top and uh so if you have you first you have to get here to unlock the family atomics so when you get there you're going to put this out on a random spot on the board which I'll show you and then you then you have to get to here which then allows you once you've
got the atomics you can effectively you know spoiler alert blow a hole in the shield wall and then swarm into aaken and kill everybody uh but what if Paul is eliminated from the game cuz you could have all your sieges eliminated have Paul eliminated but still have a bunch of troops on the board cuz remember the harken and player has to kill everything all troops all sieges so you can collect this the family atomics without Paul but if you have Paul still alive Paul has to be the one to collect it that's clarified much better in the video than it is in the rule book and similarly you know if you've got the atomics before after Paul's dead then you can still complete the mission so like his you know his vision or whatever his his message is carried to the people and they can still win the game so you can still win the game without Paul okay just so we're clearing that so again uh once you you get to this spot you're going to roll one D6 and then we're going to just scooch over to the board here you can see these spaces here uh with numbers so let's say I roll a four this would go here okay now there could be troops here and so before you collect that you have to defeat all of these troops like so and then on your turn you can move in and then you collect that now once there are no troops here troops cannot then move back in So once you've defeated who was there who was kind of guarding the spot for whatever reason then the enemy player can't move in there and so you've taken
that so again once you've got that and then you move to the top of the track then you can start assaulting aren from an adjacent spot there so now let's look at the hearkening track okay as you move up this track again here you're going to see some troop spawn so here you can put five heinens cuz you know it's because a blue diamond these go right into aen always troops are going into aan so again you want to keep troops moving out of there cuz you're going to start adding them and if there's no room to put them you can't put them in so then we go up here we get five more troops and then we get the dread knot which is here so then this becomes available and you can start bombing the sieges here's lady fendering similar to Lady Jessica she's got an ability a little bit different says choose one have your opponent Shuffle their order cards so that happens at the beginning of the round cuz remember you always go first as the oppressor and so they may have a specific order that they're trying to play things in and that will be important towards the end of the game the beginning of the game it's not a big deal but you can make them Shuffle their order because they may want to do things in a certain order of operations or at the end of your turn discard three cards at the end of the round similar to Lady Jessica so that becomes available again don't sleep on her and then these spots you can see there's like the little silhouette around there a little outline this is where you start to get those plus one tokens um to add to your dreadnots ability you don't have to stop on these like you do the big ones but again there's four of these up here and then here we get the worm sign tokens you get all three of these you get some
more troops in we'll go up here now we start to add the stard car troops cuz the emperor shows up here here and then at the top one up there again so just more troops and then more plus ones so that's all that you really get on the the hekinan side and then that is pretty much the game okay so that is risk Dune we'll just go into my pillars of review now I've not played the four player Team game of this only two players I it would be fine I played uh Team games of the other ones I mentioned Queen's Gambit and uh Star Wars risk and I really enjoyed those I think it works well and it's just this is really very similar to uh especially Star Wars risk Edition and I really enjoyed the team game in that so I expect it works well uh two player game works great I'll talk more about that in a minute but I like that player count uh play time does the box say play time I think it said somewhere on here well it's about an hour at most I don't remember I saw it somewhere I think I said 45 minutes to an hour that's totally right it's a very quick game you know unlike a normal game of Risk which takes 2 years uh you know um this play super quick it's a very nice quick head-to-head filler type of game but it's a lot of fun uh so we'll get into my sort of third pillar there which is what is the game like well I've already spoiled that a little bit by mentioning Star Wars risk and Queen's Gambit um but you know beyond that it's like a lot of these sort of smaller two-player games that are just like a quick fun you know head-to-head just
smash each other in the face kind of filler game uh I mentioned some of the kind of weirdnesses with the rules I think that could have been a little bit better cleaned up language and stuff like that the other thing I wanted to mention was I saw some questions on Board Game Geek before I started recording this piece um you can't really see it but these sies that come into play uh for uh the fman player they're actually divided so the sies that you start with there's like one space but these have two spaces each with four troops each so it's kind of like is it one group or is it two groups I think it's just two separate groups so that you don't when you get the SI in the game you're not pushing like eight troops in at once so it's got to be two separate movements so you're not just cuz that it would be quite a quite a bit so they're kind of like strangely labeled here it would just be a quick easy clarification in the rule book to say hey treat this is two separate sies but then when you respawn you can put them whichever one you want anyway so it doesn't really matter um so again it just the Rook could to use a little bit of cleanup but to me it played very intuitively um very viscerally and you know it was quick and snappy um but I just wish it was a little bit better cleaned up and then like you know it's a it's kind of a cheap Big Box store game but I don't think the price is cheap I think it's like 50 bucks um which is like a little bit I think too much for this game cuz the little plastic figures are pretty cheap the card stop stocks cheap little
Paul and fade um standies are cheap like it's it's not this is the thing like I'm okay with that like it's perfectly fine like I really like I said I would actually recommend the game I think it's a ton of fun I think it's a little bit overpriced um for what you're getting because you know because if you're going to pay that much like you'd kind of want a little bit more the board is cheap like it's a little bit warpy you know what I mean um which is can be easily fixed but it warps a little easy um that kind of stuff so just like ah who I recommend this yeah but I think I don't I think it's like a $30 game you know because I think that's fine I think that's a good good sort of Entry Gateway type of vibe like that's that's what this is and it's a lot lot of fun it's super fun which I'll talk about now but again like you can't give me like almost premium prices and then yeah that's not good but let me talk about the game play though so again it's used that kind of tried and true formula with the three cards reveal the cards and then you know do them one at a time and that's it's such a simple mechanic but that little bit of like planning of like okay I I know I can kind of keep these cards for later because maybe I haven't activated up the track and that kind of thing and you know so I'll hang on to these and then I'll use these other cards to kind of position but the game is really kind of
driven by that track so the the early game is getting some places in position with your troops to sort of plan out a kind of a route where you're going to try to get to arakan or get to uh protecting Aran or getting to Paul and sort of getting to the sies and sort of trapping them in that way um but then capabilities don't really come online for either side until you spend some time you know taking those Vision or oppressor actions that's a cool kind of like balancing act because if you just you know drive up the track then you're not going to you might be on your back foot and you might be like doing playing a lot of recovery once you get up the track and you're able to spawn troops on either side of the game here um so there's an interesting sort of tick and Tack between okay I need to get some Technologies or troop you know infestations injections versus you know spending a turn just rolling five dice and moving three spaces up a track you know we not really doing much with your turn or with that card and that's pretty cool but then once you start to unlock those Technologies and you start to you know the the game feels like it has this sort of narrative acceleration where you know sieges are getting bombarded worms are coming out you start to get the special abilities of the two uh Benny jzs that are on either side and that adds to your choice and none of the choices are like very you know headache inducing but there is Choice there and it's just a lot of fun cuz
you're always rolling like a you know bunch of dice five dice five dice five dice and it's got some good little swings there which are fun back and forth for this type of game um and then you have that real tension towards the end of the game where you know maybe like a couple of sies are destroyed but now at trates is coming down the lane to get to our keen and he's got B gurny HCK with him you know and so he's just going to start laying waste because they have that sort of collective um you know uh skills and and knowledge and just power of you know the atres skills combined with the fman skills and all that stuff and they start steamroll and so the harken player has to be again balancing the troop movements and everything with those very risky you know dreadn attacks cuz that's how you win the game is is get so you got to focus on that because you're not going to win the otherwise the friend are just going to keep coming so you got to start taking those out but you don't want to like forsake those actions to you know coring and building walls of your troops in front of you which again aren't going to respond until you move up the track so again it's a good kind of back and forth sort of tug of-war internally with what you're trying to do but the game don't take forever takes 45 minutes or so it's a lot of back and forth really fun so you find this on sale totally get it cuz it's a lot of fun but yeah I mean if you're paying like premium for this sucker I don't know cuz like here's the thing I'll leave you with this the Star Wars risk Edition
they had two additions of that they had the cheap one like this I can't remember what that cost it it was like 30 bucks and now granted it's like 8 nine years ago but then after that you could get the Black Edition which was like little peer Minis and like just better components overall better card stock and little better cardboard components and all that stuff and when that came out it was like 30 or 440 bucks too I think maybe it was 5050 but if you're going to get 50 for that and then like 50 for this like you know if if this had upgraded components in some way then I would say yeah that'd be good but um it's just a little tricky to to recommend that when you're going to pay this much for a game and it's just like really fun really really cool especially if you're like Dune this is a great like easy Dune game that's still I think rewarding and you're going to feel like the impact of it um but it's hard to hard to recommend that with that component quality the rule book sort of you know it's not super clean so anyway you you get what you get but I still recommend it with some of those caveats if you can find a cheap one thanks