Risk:G.I. Joe - HowToPlay (Official)
Games in This Video
1 game is featured in this video — it unlocks as you watch.
Transcript
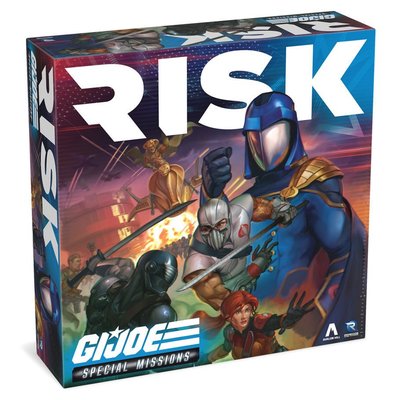
Grab yourself a coffee and pull up a seat because today I'm teaching you how to play Risk G.I. Joe Special Missions from Renegade Game Studios. I'm Mark Maya and this is Board Game Coffee.
Get back here.
Thank you. Oh, I love you too. I couldn't have done it without you. Thank you. Thank you.
The world is in chaos, and both GI Joe and Cobra are racing to take control of the action. Whether you're out to save the day or seize the world for yourself, your mission is clear. Complete daring operations, outsmart your rivals, and lead your faction to victory. Welcome to Risk G.I. Joe Special missions, where two to four players battle it out as either G.I. Joe or Cobra. Your goal is to complete missions, stop your rivals plans, and earn more objective points. Each game plays out over one to five master scenarios, sending both factions to hot spots around the world. After three rounds, the faction with the most objective points wins the game. Yo, you're um Cobra. Cobra.
Cobra. In this video, I'll be teaching you how to play a two-player game of Risk G.I. Joe, special missions. Rule adjustments for three and four players can be found in these calledout sections of the rule book, making them easy to find. For your first game, the rule book recommends that you learn how to play before setting up because there are a few strategic decisions that you'll have to make during the setup that will affect your play experience. And as you've probably heard, knowing is half the battle. had to say the least once. But if you're like me and not overly concerned about how well you perform in your first game, then just keep watching from here. But if you would like to learn more before we start the setup, then just skip to the game term section of this video using the index in the description below. All right, with that all said, let's get to the setup. Let's start by placing the game board in the middle of the play area. Then grab eight scenario tokens and the objective point tokens and keep them close by so everyone can easily access them. Next, put the round tracker right here. And finally, place the battle bonus card and battle bonus tracker tokens nearby.
Now, it's time to choose your side. Each player picks a faction, either G.I. Joe or Cobra, and selects a color for their units. If you're playing GI Joe, you can select from either green or tan. If you're team Cobra, you'll choose between blue and red. In a two or four player game, each faction has an equal number of players. But in a three-player game, it's always two G.I. Joe players versus one Cobra player. Once you've chosen your faction, sit together on the same side of the table. GI Joe players on one side of the board and Cobra players on the other side. Then grab your faction screen and place it in front of your team along with your faction's dice. Red for Cobra and yellow for G.I. Joe. In addition to that, Cobra also takes the plot tokens and keeps them behind their screen. Next, let's pick your leaders.
Each player chooses one leader card from their faction and places it in front of them along with the matching leader token. Hey there, Mark from the editing bays of the future. Now, at this point in the video, I've inadvertently placed the Baroness leader card behind my faction screen, where in fact, all leader cards should be placed on the outside of your faction screen where they're visible by both factions because leader information isn't secret information. Now, with that in mind, the Baroness card will be placed behind the faction screen for the remainder of this video, but when you're setting it up, make sure you place it on the outside. That is all. Enjoy the rest of the video. Now, you'll notice that Serpenttor is in the Cobra lineup, but he cannot be selected. Serpent is a special leader that only joins the game when a scenario card calls for it. Once everyone's chosen their starting leader, shuffle the rest of the leaders from each faction except Serpent and place those decks face down near your team side of the table. Now, each player should collect the following components in their chosen color. All your infantry, tank, and aircraft units, all your command tokens, and your recruit value tracker, which you'll place on the 11 space of the recruit value track. Next, collect a set of action cards in your color and remove any cards that don't match your player count. You'll see the player count represented as stars along the right side of the card. For example,
in our two-player game, each player should only have seven cards marked with two stars. Any cards that don't display two stars can be put back in the box. You won't be needing them for this game. In some player counts, factions might end up with a different number of cards, and that's totally okay. Next up, let's draw some objective cards. And just to be clear, the term objective card refers to both G.I. Joe's mission cards and Cobra's plot cards. Start by giving the balance of power mission card to G.I. Joe and the balance of power plot card to Cobra. Then shuffle the remaining objective cards into two separate decks and place each deck near the corresponding faction. Now, one player from each team draws one additional card from the top of their objective deck and places it next to their balance of power card. These objective cards stay face up behind your faction screen so that the other player can't see your plans. Now, let's get those starting forces ready.
First, give each player two command tokens. Then, each player collects their starting units. The number of units you gather depends on your faction and how many players are in the game. For our two-player game, each player gets 20 infantry, six aircraft, and four tanks. You can set these aside for now. We'll need them again later in the setup. Then, from your remaining units, place five infantry on your faction track where this infantry icon is displayed. And three aircraft and two tanks where these plane and tank icons are displayed. Note that each faction has its own track. So each GI Joe player places their units on the green faction track and Cobra players place their units on the red faction track. For three and four player games, you'll collect a different number of units as listed on this chart.
Now take any remaining units that you are not using and place them near your faction track. Do the same with your leftover command tokens, base tokens, and leader tokens. This is your reserve, and once it's gone, it's gone. No substitutions. Okay, time to claim some territories. Start by giving the USS flag territory card and matching token to G.I. Joe and the Cobra Island territory card and token to Cobra. Next, take the remaining territory cards and sort them into six stacks, one for each named region, like North America, Africa, and so on. Shuffle each stack separately and place them face down, taking note of where the North America and Asia stacks are. Now, one player from each faction will draw one card from each region, plus one extra card from the North America stack and one extra card from the Asia stack, giving each faction a total of eight territory cards each. Place the territory cards you drew face up behind your faction screen, along with your Cobra Island or USS flag card. Make sure you keep this information secret from the other faction. Now it's time to choose your scenario. There are a couple of ways that you can go about selecting the scenario that you'll be playing. You can either let the Cobra faction decide which scenario they want or just pick one at random. Although, if this is your
first time playing, it's recommended that you start with scenario one. Once you've chosen your scenario, give the mission card for that scenario to G.I. Joe and the matching plot card to Cobra. then follow any setup instructions at the top of those cards. In the case of scenario one, the setup instructions are listed at the top of Cobra's plot card. Now, this next part is done by the Cobra player only. The first thing those instructions ask you to do is draw one random territory card from each of the six regions. Then, shuffle up those cards and separate them into two equal stacks, stack one and stack two. Next, reveal the territory cards in stack one and place a scenario token tan side up on each of those territories. Do the same with the second stack, but this time place the scenario tokens redside up. Once that's done, return the territory cards to the territory deck.
After you finish the setup on the scenario card, each faction should read their objective out loud so that everyone at the table knows what's going on, which might impact what happens next. Because now it's time to place those starting units that we set aside. Each faction places all their starting units, including their leaders, on up to six of their nine territory cards. And they do this in secret behind their faction screen. If your faction has more than one player, work together as a team to decide who controls which territory and how you want to divide your units across them. Now, before you do that, there are a few rules you need to keep in mind when placing your units. First, you can't place your units or your leader on a territory that's already occupied by another player from your faction. So, if GI Joe's green player has units on Alaska, the tan player can't place their units there as well.
Of course, this rule only applies when playing three to four players. For our two-player game, this isn't a concern. Second, both factions must assign at least one of their units to their home base. That means G.I. Joe has to place at least one unit on the USS Flag and Cobra must place at least one unit on Cobra Island, but you can place more. That leaves up to five other territory cards for each faction to spread out their remaining units. All right, this last rule is specifically for Cobra. Cobra can pick up to three of their territories, not including Cobra Island, to be secret territories. Units in these secret territories won't be placed on the board. Instead, they stay on the territory card which remains behind your faction screen. But keep in mind, a territory cannot consist of both visible and hidden units. It's one or the other.
But we'll cover secret territories in more detail later in the video. Once everyone's finished placing their units and leaders on their territory cards and you've all announced that you're done, that's it. Your placements are locked in and cannot be changed. Now it's time to transfer those units from your territory cards onto the board. Take the units and leaders from your territory cards and place them on the matching spaces of the game board. Unless you're Cobra and you want to keep some of those territories secret, in which case your hidden units stay hidden behind your faction screen on those territory cards. This represents those units being in that territory but hidden from the opposing faction. In addition, units on the USS Flag and Cobra Island do not move to the board until all the other units have been placed. Aside from Cobra's hidden units, that is. But once they are all placed, G.I. Joe is the first to place their USS flag token in any one of the eight ocean zones along with all the units they assign to it. Then it's Cobra's turn to place Cobra Island in any of the remaining empty ocean zones along with all the units assigned to it.
Lastly, let's set up the territory deck. The Cobra player is the one in charge of the territory deck. So, at this point, they need to collect all the territory cards held by both factions, except for those used for tracking secret territories, and return them to the territory deck, which will be kept near Cobra's play area. All right, now that we're all set up, I'd like to go over some common game terms that you'll be hearing throughout the video and a few overall game rules that you'll need to keep in mind as you learn.
The map is made up of six regions containing 42 territories. These two faction specific bases also count as territories, but they don't belong to a specific region. A territory with no visible units on it is considered to be an unoccupied territory. A territory occupied by visible units from only one faction is considered to be controlled by that faction. And it's important to note that hidden units cannot control territories. More on hidden units later in the video. A disputed territory is a territory occupied by visible units from both factions. Neither faction may move its units out of a disputed territory unless an effect allows it, such as retreating.
Secret territories are exclusive to Cobra. A secret territory is any territory card that Cobra keeps hidden behind its screen containing either units, plot cards, or plot tokens. From G.I. Joe's point of view, as long as there are no visible units on that territory, it's treated as an unoccupied territory. When a secret territory card no longer has hidden units or plots associated with it, Cobra must return that territory card to the territory deck. Under no circumstances can two players from the same faction occupy a single territory. You can pass through a territory controlled by a friendly player, but you can't stop on it. Mind you, this rule only applies to games consisting of three or four players. A visible unit is any unit that you can see on the board.
A hidden unit can only belong to Cobra. These hidden units are not placed on the board, but instead occupy a territory card hidden behind Cobra's faction screen. Visible and hidden units cannot exist on the same territory. So if a visible unit ends up occupying a territory with hidden units, the hidden units must instantly become visible. And if that happens, a sneak attack is triggered, which we'll cover later in the video. And just so we're clear, this rule also applies to Cobra. If visible Cobra units move into occupy a territory with hidden Cobra units, the Cobra faction must make all their units in that territory visible. However, for obvious reasons, this will not trigger a sneak attack.
It's important to note that this only happens if visible units end their movement in the territory with hidden units. If the visible units are just passing through, then the hidden units stay hidden. There are eight named ocean zones on the board. Each is indicated with a border and a printed name. Some ocean zones that have the same name on both sides of the board, like the South Pacific Ocean, are considered adjacent, but still separate zones. This allows units traveling over the ocean zones to wrap around the board like so. Also worth noting, the Arctic Ocean runs across the entire top of the board. So, if you're moving from Alaska to say Greenland or Scandinavia or maybe Siberia, you only need one maneuver and this anchor icon to get from one of those locations to the other. We'll cover what these anchors are all about later in the video, but basically they allow you to cross over ocean spaces. And finally, these lighter blue water spaces aren't ocean zones at all. They don't have names, and you can't move through them unless an action specifically allows it.
The dash lines on the map connecting territories are sea lanes. Territories connected by these sea lanes are considered adjacent for all reasons pertaining to adjacency, except when performing a maneuver or reinforcement action. Unlike some other map-based games you might have played, sea lanes on this map do not represent paths for your units to move across. They're simply there to indicate adjacency. Unless otherwise stated, rewards listed on cards are earned the moment you meet their conditions. This is especially relevant to objective cards. If you meet the condition at the top, you'll instantly earn the reward listed at the bottom. If a card reads at the end of a round, then you'll have to wait until the end of the round to check if you've met the conditions to collect the reward.
This is your round tracker. It not only tracks the round and phase you are currently in, but also indicates which faction has initiative. If the round tracker were here, Cobra would have initiative during that phase. If the round tracker were here, then G.I. Joe would have initiative. Oh, and one last thing I'd like to mention. I know we just spent a lot of time setting up the board and laying out our units, but for the sake of clarity, I'm going to remove the units from the board and place only the necessary components needed to best explain whatever it is I'm teaching at the moment. All right, now that we're all up to speed, let's learn how to play. Risk G.I. Joe's special missions is played over three rounds and each round is broken up into two phases. In each phase, you'll use your action cards to move your units, recruit new units, deploy them to the map, launch secret plots, or gather intel through reconnaissance.
Each phase of the game plays out over five steps. Action selection, where you select the cards you want to play and place them face down in the order you want to resolve them. Action resolution is when players flip over those cards and take turns resolving the actions on them along with any leader actions they might have available. Faction track advancement is when you advance all the things along this track. Battle resolution is the part where you compare dice rolls to conquer territories. And lastly, debrief. This is the part where you clean up your play area, advance a few things on some tracks, and prepare for the next phase. Once all five steps are done, you'll repeat the process for phase two. Then, when the round is over at the end of phase two, you'll do the following. Establish bases in territories where you qualify. Score objective points for anything that scores at the end of the round and draw a new objective card for your faction. After that, you'll move on to a new round. When the third round ends, the game is over and the faction with the most objective points wins. All right, now let's go over each of those steps in detail. Starting with action selection.
At the start of a new round, also known as phase one of a round, players are going to take all their action cards into their hand. In the second phase of a round, you'll only have access to the cards that you didn't play during the first phase. So, plan accordingly. At the start of each phase, players secretly choose their action cards and place them face down, left to right, in the order they want to resolve them. Once all cards are placed, you cannot change their order. How many cards you play depends on your player count. So, for our two-player game, both players will play three cards each. Once all players have placed their cards face down, everyone at the table flips over their leftmost card at the same time. Then players from each faction take turns resolving their cards following the initiative order shown on the round track. If there's more than one player on your team, choose which player will act first for your faction. Once that's decided, that player will perform one or more of the listed actions on their card. The two actions listed on the top portion here are your basic actions, and you must perform at least one of these actions. If you want to perform both actions, you can do so by spending one of your available command tokens and placing it on the action card. This action here at the bottom of the card is your special action. Special actions are entirely optional and sometimes even free, like in the case of this shadow ops action. If a special action depicts
a command token, then you'll need to spend a command token to perform it. In addition, you'll also have the option to trigger your leader action, which will cost you one command token. Leader actions can only affect the territory your leader is in, unless their card says otherwise, as is the case with the Baroness. And if you have multiple leaders, you can perform each of their leader actions, assuming you have enough command tokens to do so. And just to clarify, leaders on your faction track can't use their actions. They have to be in the territory for their actions or abilities to be activated. This includes secret territories. It's also important to note that you can perform these action card actions and leader actions in any order you want, but you can only perform each of them once per phase.
Once you're done performing the action or actions that you can or want to perform, your turn is over and play passes to the opposing faction to do the same. In a game with three or four players, this back and forth will continue until everyone has had a chance to play the actions on their first card. Once that's done and everyone's finished resolving their first action card, players will flip over their second card simultaneously and repeat the process. Then do the same for the third card if you have one. In certain player counts, you'll only have two. To keep things all clear and organized, I'll explain how each of the actions on your action cards work later in the video. If you're looking for something specific, you'll find everything nicely categorized in the video's index.
After all players have finished revealing all their faceown cards and performing their actions, both factions advance all their units and tokens on their faction track one step forward. If any of your units reach this deployment zone area or were already there, they remain in the deployment zone until they are deployed using a deployment action, which we'll cover later in the video. When a command token reaches the deployment zone, it is automatically reclaimed by its owner for use on a future turn. If a Cobra plot token reaches the deployment zone, the effect of that plot is triggered right away and the plot token is removed. If multiple plots are triggered this way, Cobra decides the order in which they resolve. More on plots later.
After you've advanced your faction's track, it's time to check the map for disputed territories. If there are any, like this one here, then a battle is triggered in that territory. If there are multiple disputed territories, then you'll resolve a battle in each of them. And to be clear, battles only ever take place during the battle resolution phase. If territories become disputed during an earlier phase, you'll have to wait till you get till this point to duke it out. No pun intended. What the hell? Pun intended. Now, let's learn how to battle, also known as the rules of engagement. In this section, we're going to cover the rules of engagement, which is another way of saying this is how you do battle.
There are two stages to every battle. An air attack followed by a ground attack. The air attack, as you might have guessed, is for aircraft only. So, in stage one of a battle, the air attack portion, if you have aircraft in the battle, you'll roll up to three dice to attack. If you don't have any aircraft, you can only defend. And when defending, you can only roll one dieice. No matter how high you roll when defending, you'll never score a hit because you have no units to attack with. The best you can hope for is that you'll avoid taking a hit. If neither faction has aircraft in the battle, then just skip the stage altogether. Once you've resolved the air attack, you'll move on to the ground attack portion of the battle. The rules for ground attacks are the same. The only difference is that you'll be using your tank and infantry instead of aircraft.
And just to clarify, when a battle takes place, both factions are considered to be attacking if they both have units for that stage of the battle. Neither faction is defending. The only time you're defending is if you don't have units for a particular stage of battle. This is an important distinction to make when it comes to applying defensive bonuses, which we'll cover later. Let's walk it through. For this example, let's assume that both factions have air and ground units, meaning they can attack in both stages. During each stage, players with attacking units roll one dice per unit to a maximum of three dice. Keeping in mind that leader tokens do not count as units for this purpose because leaders do not attack. However, they may have special abilities and bonuses that will contribute to the battle. Once both factions have rolled their dice, arrange them from highest to lowest like this and line them up to compare. Your highest dye is considered your first die. If you have a tie for highest dice, then just select one of them to be your first. Now, keep in mind during each stage of battle, each faction is only going to roll their dice once. You'll roll one time during the air attack stage and resolve that. Then you'll roll one time again during the ground attack stage and resolve that. Then you stop.
No more rolling until the next round of battle, which we're getting to shortly. When comparing dice, you'll do so in descending order. Now, typically when you compare dice, there will be bonuses applied that will increase their value for one reason or another, but for the sake of this example, we're going to forego any bonuses and just focus on the dice. We'll cover bonuses right after. Now, where was I? Right. When comparing dice, you'll do so in descending order, starting with your first die. Whichever side rolled the higher number scores one hit against the opposing faction. If the dice are tied, both factions score a hit.
If you both rolled more dice, compared the second and third die in the same way. If one faction rolled more dice than the other, then any extra dice are ignored. Now, let's assume that one faction had no aircraft for the first stage of battle, which is the air attack stage. If this were the case, then the player who did have aircraft would still roll one dice per unit, while the player with no aircraft would only roll one dice to defend. The defending player can't score hits, but if they roll higher than the attacking player, then they'll be able to avoid a hit. Now, the key there is they have to roll higher. If the defender's highest die is equal to the attacker's highest die, then the defender still takes a hit. For every hit you take, remove one of your units from that territory and place it on your faction track in the section that displays that unit's icon. You choose which of your units you'd want to remove. And you're not limited to the stage of battle that you're in. This means if you take a hit during the air attack, you can sacrifice a ground unit and vice versa. But you can't select your leader unless they're the last remaining unit. Once both air and ground stages have been resolved, the first round of battle is complete. At this point, if there's only one faction remaining in that territory, that faction has won and the battle is over.
But if both sides still have units remaining in that territory, each faction will have the option to retreat. The faction with initiative decides first if they want to retreat. In this example, Cobra has initiative and they choose to stay. This means it's now G.I. Joe's turn to decide if they wish to retreat or stay and fight. The faction that retreats is considered defeated and must move all its remaining units to an adjacent territory that they control. And for the purposes of retreating, territories connected by these sea lanes are considered adjacent and can be retreated to without requiring any special actions. This includes retreating from Cobra Island or the USS Flag. In the case of both these faction bases, treat it as if they were connected via sealanes to territories bordering the ocean zones those bases are located in. Now, if you don't control any of the adjacent territories, you can move to an unoccupied territory. And just to be clear, you cannot retreat to an unoccupied territory if a territory you control is an option.
If you find yourself in a situation where there are no unoccupied territories or territories you control adjacent to your location, then you cannot retreat. And if neither side retreats, the battle continues starting again with the air attack. followed by the ground attack and the option to retreat and so on until one side is defeated. Oh, and if a situation occurs where GI Joe retreats into one of Cobra's secret territories, Cobra's hidden units are revealed and trigger a sneak attack, which we'll cover shortly. After the sneak attack is resolved if the territory that G.I. Joe retreated to is still disputed, a battle occurs following the same rules of engagement that we just covered.
All right, now that we know how to resolve dice in battle, let's learn how we apply bonuses to those dice to improve your odds of winning. The more common bonuses you get are listed here on your battle bonus chart. Before we run through an example of how we apply bonuses in battle, it's important to note that all bonuses you receive during battle are applied to your first die only unless otherwise stated. If you're defending because you have no attacking units, you only roll one dieice and you don't get bonuses unless you have a base or a leader ability says otherwise. With that in mind, let's run through an example. In stage one of this battle here, we see Cobra has four aircraft and G.I. Joe has one. This means Cobra can roll all three of their dice and G.I. Joe can only roll one. Now, let's add some bonuses to those dice using our battle bonus chart as a guide. Since we're in the air attack portion of the battle, any bonuses provided by ground units do not apply. This next section is telling us to add plus one to our first die for every two aircraft our faction has. In this example, Cobra has four aircraft, which means they'll add plus two to their first die. GI Joe only has one aircraft in this battle, so they don't get a bonus. Any bonuses you apply during an air attack is tracked here.
There's a separate marker for Cobra and G.I. Joe. Next, we'll take a look at any bonuses that leaders in that territory might provide. Cobra's leader is the Baroness. And as we can see by looking at her card, the Baroness will add plus one to the first die of an air attack if there are one or more Cobra aircraft in that territory. GI Joe's leader is Covergirl, but as we can see here, her bonus only applies to ground attacks where tanks are present. And as we covered earlier, tanks could only contribute to ground attacks. So her bonus does not apply at this stage. Down here, the bonus chart is showing us that if we had a base token in this territory, we would add plus one to our defense. But since neither faction is defending, and we don't have a base token in this territory anyways, that bonus does not apply. Lastly, we have the terror drrome token, which adds plus two to all attacks. However, that doesn't come into play until scenario three. So, I'll let you discover that on your own. Now, as you can see here on our battle bonus chart, we've added a total of three bonus points to our first die, changing its total value to seven.
So, by comparing dice, we can see that Cobra scores a hit with their first die. And since no other dice were rolled by GI Joe, these extra dice will be discarded. Since they suffered one hit, the G.I. Joe player decides to remove one of their infantry units, which they place here on the faction track. Next, move on to stage two of the battle, the ground attack. When it comes to ground forces, GI Joe appears to have the upper hand with five ground units compared to Cobra's three. But each faction still only rolls three dice because three is the maximum number of dice you can roll. Now, let's add those bonuses. As we did with the air attack, we'll track any ground bonuses we earn on the battle bonus chart. As we can see from this ground units bonus, players get plus one per tank applied to their first die. And since GI Joe has two tanks, they'll add a bonus of plus two. Cobra doesn't have any tanks in this battle, so they don't get a bonus. Next, we'll skip the aircraft bonus cuz this isn't an aircraft battle, and move on to the leader bonuses. The Barness's bonus only applies to air attacks, so she's no help to Cobra at this time. Covergirl, on the other hand, not only adds plus one to the first die if G.I. Joe has at least one tank in the battle, but she also adds plus one to the second and third dice, as stated here in her ability window. Not too shabby.
Now, if we compare dice, taking all the bonuses into account, we can see that G.I. Joe rolled higher on the first dice, so Cobra takes a hit. In addition, we can see here on the bonus chart, if the first dice scores a hit, it removes one additional unit for every two tanks involved in the battle. So, since GI Joe had two tanks in this battle, Cobra loses one additional unit, which they'll remove and add to their faction track. The results of the second dice show a tie, which means both factions take a hit. And the third dice, even with bonuses applied, ends up in Cobra's favor. So G.I. Joe takes another hit. Now that the battle is over, we can clearly see that both factions still have units remaining in the territory, which means we move on to the retreat portion of the battle. Since Cobra has initiative, they're the first to decide if they want to retreat or stay. They're feeling pretty confident, so they decide to stay. Now it's G.I. Joe's turn to decide and they're feeling less confident and choose to retreat. In doing so, GI Joe moves all the remaining forces to an adjacent territory that is already under their control. So, since GI Joe retreated, leaving Cobra as the only faction remaining in that territory, Cobra is declared the winner of that battle. At this point, if there were any other disputed territories on the map, the player with initiative would select which territory to battle
next and repeat the rules of engagement. Now, there are two possible scenarios that could happen that I'd like to cover. After both stages of a battle are complete, if the last remaining unit for both factions is a leader, the faction with initiative gets to decide first if they want to stay or retreat. Nothing new there. But if they choose to stay, the other faction's leader is defeated and must retreat if possible. If there's nowhere to retreat to, that leader is removed from the board and placed on their faction track. Either way, the faction with initiative in this situation wins the battle. The other situation that could have occurred is that the GI Joe player unwittingly retreated into one of Cobra's secret territories. If this happens, all hidden units are revealed and a sneak attack is triggered. And after the sneak attack resolves, if there are still multiple factions remaining on that territory, then that territory is in dispute, which means a battle will have to take place in this territory before we move on to the next step.
Anytime a Joe unit stops on a territory with hidden Cobra units, a sneak attack is triggered. Sneak attacks can also be triggered by a strike team action or leader abilities. Sneak attacks are surprise attacks that happen outside of normal battle and they follow a different rule set. The biggest difference between a sneak attack and a regular battle is that there are no stages and you always roll the same number of dice. Here's how it works. The faction performing the sneak attack, in this case Cobra, always rolls three dice, regardless of how many units are used in the sneak attack. The defending player always rolls one die, again, regardless of the number of units. And it's important to note that battle bonuses are not applied for either faction during a sneak attack. Compare the highest die from the attacker to the defender's die. If the attacker scores a hit, it's the attacker who chooses which enemy unit to remove. Although, you can't target a leader with a sneak attack unless it's the only unit left to target. Once all battles over disputed territories have been resolved, or maybe there were no battles to begin with, it's time to move on to the final step of the phase, the debrief.
The last step of the phase is the debrief step. This is where you get everything set up for the next phase. Here's what you do. First, move all your spent command tokens to the starting space of your faction track. Green side for G.I. Joe, red side for Cobra. Next, discard all your resolved action cards into your discard pile. Then, advance the round tracker one space to the right. This may result in an initiative change. Once that's done, you'll repeat all five steps again for the second phase of the round. Select your action cards, resolve those action cards, advance the faction track, resolve battles in disputed territories, and back again to debrief to wrap it all up. At the end of phase two, each player should have one or two action cards left in hand that they didn't use and won't use this round because at this point, the round would be over. This means it's time to move on to the end of the round steps, which consist of establishing bases, scoring objective points, and drawing new objective cards.
At the end of the round, factions take turns establishing bases in initiative order. Each faction can place one base per region per round, but only if they meet these conditions. First, the territory must be controlled by your faction. And secondly, you must also control two of the adjacent territories. In this example, Cobra meets all the conditions in each of these territories, which means they can establish one base in whichever territory they want. And remember, hidden units cannot control a territory. Now, even if you meet those conditions, there are some restrictions. You can't place a base in a territory that already has one, whether it's active or inactive.
And you can't place a base if the territory is next to an active base from either faction or next to one of your own inactive bases. Now, it's time for end of round scoring. All right. After both factions have established their bases, score any objective or scenario cards that trigger at the end of the round. For example, our balance of power objective indicates at the end of the round on the card. This means at this point, you would check to see if you've met the conditions on that card. If you have, earn the rewards listed at the bottom, unless specifically stated as end of round, any conditions required by reward would be triggered as soon as they happen. You wouldn't wait until the end of the round to collect your reward or earn any benefits listed. When it comes time to collect your reward, any objective points displayed here are taken from the reserve and placed in your play area. These tokens will then be tallied up at the end of the game.
The last thing each faction does before you start a new round is draw one new objective card. If you're playing as GI Joe, you'll be drawing from your mission deck. And if you're playing as Cobra, you'll be drawing from your plot deck. Once you've drawn and familiarized yourself with your new objective, collect all your action cards and move on to the new round, starting with your action selection step, followed by your action resolution, and so on. When you reach the end of the third round, the game is over. So, no need to draw new objective cards. Just add up all your objective points and check your scenario cards for any end of game points you might have earned. Then the faction with the most points wins.
As you probably remember earlier in the video, we learned about the steps you would take to select and resolve the actions on your action cards, but we didn't go into detail about how those actions work. Well, this is the part of the video where we do that. If you're looking for rules for a specific action, you can use the index in the video's description to jump to the section you're looking for. With that said, let's go over all the different basic actions that you'll find on your action cards. Starting with the maneuver action. Actually, before we learn how to maneuver, let's go over a few of the basic rules of movement. When a unit moves, it can move up to its total value, as indicated here on the back of your faction screen. Infantry, tanks, and leaders can each move two spaces, while aircraft can move three.
Movement is counted from one adjacent territory to the next. Although sea lanes indicate adjacency between two land masses, ground units cannot freely move from one to the other, unless you're playing an action with this anchor icon or you're retreating from battle. There's also a case for using the USS flag, but we'll get to that later. Oh, and aircraft can move across freely because, you know, they fly. In addition, as soon as your ground units enter a territory with visible units from an opposing faction, their movement stops immediately. Aircraft, on the other hand, can pass right over enemy territory because, you know, they um they fly. All right, I think we've got a good handle on this whole moving thing.
So, let's get to that maneuver action. The maneuver action allows you to move any number of your units up to their move value from one territory you control into one or two unoccupied or enemy territories. So basically any territory where you don't already have units. It should also be noted that Cobra can't use the maneuver action to move its hidden units unless they reveal those units first. Now, that's all fine if you're just traveling across land, but what do you do if you need to cross an ocean zone? Well, I'm going to tell you. Suppose you want to maneuver your ground units across an ocean zone into another territory connected by that same ocean.
In that case, you're going to need to play a maneuver action that displays this anchor icon. Think of the anchor icon as an additional movement point that can only be used for crossing a single ocean zone. So, if I played this action card here, it would allow me to move my ground units across this ocean zone for free and then continue to spend my remaining movement points for those units once I reach dry land. I can also do something like this. Spend one basic movement point. Use my anchor to cross the ocean for free. Then spend my last point to move again. If you have a card with two anchors on it, it means that you can cross two ocean zones for free, which lets me do this. Free anchor move, free anchor move, one basic move.
Now, aircraft, because they fly, don't require an action to move across ocean zones. But if they don't use an anchor, they must spend one of their movement points for every ocean zone they cross. So if I moved this aircraft from here to here, it would cost me three movement points. But if I used an anchor, crossing one ocean zone would be free, which would allow me to get further. Clearly, using anchors is a great way to navigate the map, but for G.I. Joe, it gets even better. If the USS flag is present in the ocean zone that you want to cross, then you can cross that ocean zone for free when you play a maneuver or reinforcement action. Think of it as having a built-in anchor. But this anchor is not accessible to Cobra.
And Cobra Island does not offer a free anchor. Sorry, Cobra. Reinforce lets you move any number of your units up to their move value from one or two territories you control into a single territory that you already control or that's currently in dispute. So basically into territories where you already have units. Other than that, reinforce follows the same movement and anchor rules that we just covered. Advance allows you to move all your units and command tokens one step on your faction track, but not your plot tokens. When units reach the deployment zone, they're ready to be deployed. You still need to play a deploy action, of course. When command tokens reach the deployment zone, you immediately get them back.
The plan action allows you to draw two objective cards. Then you have a choice to make. either keep both or keep one and discard the other to advance up to three units of your choice one step on your faction track. If you choose to discard a card, place it on the bottom of your objective deck. Deploy lets you move any number of your units from your deployment zone to any number of territories you control or secretly occupy. If you deploy to a secret territory, those units are placed in one of the hidden territories you have behind your faction screen. The last basic action I'd like to cover is the recruit action. Recruit lets you spend your recruit value to buy new units from your reserve along with command tokens and even objective points. The cost of all these things are listed here on the back of your faction screen. two points to recruit infantry, four to recruit aircraft, six for tanks, and so on. Any units you recruit are placed on your faction track in the space with the matching icon. If you recruit a leader, draw the top card from your faction's leader deck, place it in front of you, and place the matching token on your faction track. Command tokens you recruit are not placed on your faction track and are available for use immediately. Objective points obtained this way are stored in your player area until end of game scoring.
When it comes to recruiting, Cobra has a bit of an edge, which is explained here on their territory card. You see, as long as Cobra controls Cobra Island, they get a bonus every time they take a recruit action. They can either place one free infantry from their reserve onto Cobra Island or perform a free maneuver action with any units currently on Cobra Island, ignoring one ocean zone. Not bad. During the recruitment action, you don't have to spend all your recruit value. Just use as much or as little as you want because it resets every time you take a recruit action. And it increases and decreases based on your current status on the board. Let me explain.
Let's talk about the recruit value track. This tracks how much recruit value you have available when you take a recruit action. Now, when you recruit, your value temporarily drops as you spend it, but it resets as soon as the action ends. So, no need to move your tracker. Just keep it where it is. This means if you take backtoback recruit actions, you'll have the same amount to spend each time. The only reason you'll need to move this tracker is when you're recalculating your recruitment value. Your recruitment value always starts with a base value of six, but increases based on what you have on the board. Let me show you. Each active base you control will add plus three to your recruit value. For each territory your faction controls that is adjacent to one of your active bases, you'll get an additional plus one. But if that base becomes inactive, not only do we lose the three recruitment points from the base itself, we also lose the recruitment points awarded by any adjacent territories that are faction controlled.
Having active leaders on the board is another way to increase your recruit value. If you have one leader on the board, you'll add an additional two to your recruit value. Two active leaders will get you an additional three and three leaders will get you an additional four. This means that your total recruitment value is changing throughout the game. And as it does, you'll need to update your tracker. Okay, so we've covered all the basic actions and what they do. Now, let's learn about the special actions. Each action card has a special action listed at the bottom, and there are eight in total. Some are free, but others will cost a command token, which you'll just place on top of the action when you use it. Most special actions are unique to each faction, but there's one exception. Strike Team. That one's available to both G.I. Joe and Cobra.
So, let's learn about that one first. Strike Team lets you launch a sneak attack on the enemy. For the cost of one command token, you can move one to four of your units from either your deployment zone or one of the territories you control to any other territory on the board. If the destination has enemy units, you can immediately perform a sneak attack. Okay, these next few are G.I. Joe specific. The recon action allows G.I. Joe to investigate a region they occupy. And since Joe has units stationed in Africa, let's recon there. To do so, the GI Joe faction picks one or more territories in that region. Let's say they target Egypt and the Congo to investigate. If Cobra has any hidden units or active plots in either of those territories, they simply respond with yes, but they don't say anything else. So that tells the Joe faction that Cobra's got something going on in one of those territories, but you don't know which. If there's nothing hidden in any of the selected territories, then Cobra simply says no.
Then regardless of the answer, G.I. Joe chooses one of those territories and claims the matching territory card. And whenever anyone is claiming a territory card, it's the Cobra faction that will search the territory deck and hand it over. If the territory GI Joe chose had hidden units assigned to it, Cobra must give them the territory card from behind their screen and immediately reveal the hidden units that were assigned to that territory by placing them on the board. Any plot tokens or objective cards revealed this way are discarded, effectively foiling Cobra's plans in that territory. And once GI Joe has claimed a territory with the recon action, that territory can never be used again to hide Cobra units or establish plots.
The SAT recon action allows G.I. Joe to scan any region on the map, even if they don't have presence there. So the Joe player would say something like, "I'm scanning North America." And then if Cobra has any hidden units or active plots in that region, they would simply answer yes and provide no further information. If they do say yes, GI Joe gets to immediately take a free recon action in that region. But if Cobra says no, G.I. Joe gets to claim anyone territory card of their choice from that region. The ship maneuvers action lets G.I. Joe move the USS Flag to an adjacent ocean zone. In addition, if GI Joe is currently in control of the USS Flag, they also get to advance all their aircraft one step on the faction track.
And as an added bonus, if any of those aircraft reach the deployment zone, they can be deployed right away. This also includes any aircraft that might have already been in the deployment zone. Thwart allows you to spend one command token to regress up to three Cobra units and or tokens of your choice one step on their faction track. And on top of that, you get to take a recon action. Pretty sweet deal. All right, these next special actions are all cobra. This shadow ops action gives you two sneaky options to choose from. You can either move your hidden units and keep them hidden or deploy additional Cobra units to establish a new secret territory.
If you choose the first option, then you can move any number of hidden units from one of your secret territories to any adjacent territory. So my hidden units in Egypt can move to the Middle East and remain hidden. I would indicate this by placing the matching territory card face up behind my faction screen and placing the units I wanted to move onto it. Now, if the territory your hidden units are moving to is occupied by visible units, then the hidden units that moved must be revealed and placed on the board in that destination territory. The second option on your Shadow Ops action card allows you to secretly deploy one to four units from your deployment zone into an unoccupied territory that is adjacent to a Cobra controlled territory. And remember, Cobra can only control territories if they have visible units present in that territory. So, since Cobra controls this territory here, I can deploy up to four units from my deployment zone directly to this territory. But since they're hidden units, I wouldn't put them on the board.
I would put them on the corresponding territory card hidden behind my faction screen. The scheme action allows you to spend one command token to regress up to three G.I. Joe units andor command tokens of your choice one step back on their faction track. And after that, you get to take a plot action. Not too shabby. Okay, we have one special action remaining, the plot action. The plot action is a great way for Cobra to advance their plans. But before we get into how it works, we need to talk a little bit about plots and how to hatch them. Some Cobra objectives and scenario cards have the keywords hatch a plot written on them in bold. When Cobra pulls one of these hatch plot objectives from their objective deck, it'll stay face up behind their faction screen along with their other plot cards. The only difference is that these plot cards remain inactive until a plot action is used to activate them. Once a hatch a plot card has been activated, just follow the instructions written on the card. For example, when I use a plot action to hatch my Summit of Snakes plot, the instructions tell me to place this card along with a plot token under a territory card that belongs to a region where I don't have any Cobra leaders. So, since I have no Cobra leaders in Europe, I'll choose Western Europe as my target territory. And keep
in mind, this is all done in secret. So, make sure you keep it hidden behind your faction screen and don't let the G.I. Joe faction know which territory you selected. Now, as the card instructed, I'll take my Summit of Snakes plot card along with a plot token and place it underneath the territory that I just selected. You'll then take a copy of the plot token you used and place it at the start of your faction track. The part about putting the plot token on the faction track isn't written on the card, but you do that whenever plot tokens are used. And which plot token you use doesn't matter as long as it's part of a matching set. Whenever a plot token advances all the way to the deployment zone, it'll trigger some sort of effect on your card. Now, the goal of this specific plot is to get my visible Cobra leaders to the summit that is taking place in the territory I selected, Western Europe, and its neighboring territories. And I have until my plot token reaches the end of the faction track to do so. If all my leaders are present when the plot token reaches the objective zone, I have successfully completed my plot and receive the reward listed on the bottom of the card. But if all my leaders didn't make it to the summit before the plot token reached the deployment zone, then the plot has failed and the card is discarded.
Now, what constitutes a pass or a fail when performing a plot varies from card to card, so make sure you read the instructions carefully. All right, let's get back to our plot action. When you play a plot action, you have two options to choose from. You can either trigger a hatch plot effect on one of your scenario or objective cards if you have one of those, that is, or you can advance any number of plot tokens on your faction track one step. If any of those tokens reach the deployment zone, you immediately resolve the corresponding plot and return the plot token to the supply. All right. Well, that's it for all the actions that you'll find on your action cards. Now, let's take a look at the leaders.
This is a leader card, and each leader comes with its own magic leader token. Whenever you recruit a leader, their card is kept face up in front of you, and each faction can have a maximum of three leaders, and that's it. Each leader has an action that you can use once per phase, and it will cost you one command token to perform. Now, we won't be going over how each of these actions work, but what they do is written on the leader card itself, and they're pretty self-explanatory. This icon here indicates a unit and bonus value. It means that if you have one or more of these depicted units in the current battle, you will get plus one bonus added to your first die. As long as this leader token is present in that territory. And remember, if your leader card is showing a ground unit with a bonus, that bonus only applies to ground battles. And if you see a leader with a shield icon, then it only applies as a defensive bonus if you're defending, which means you have no units to participate in that stage of the battle.
And this here is the leader's static ability. It's something that's always active and triggers as soon as the condition written on the card is met. And just like the leader action, what the ability does is written on the card. Leaders are indeed powerful allies, but they do have their limits. For example, there can never be more than one leader from the same faction in a single territory. Leaders cannot attack. They can only defend and they never count as an attacking unit of either type. But although they don't attack in the traditional sense, they do have abilities that can contribute to the battle. Leaders cannot be assigned hits or be removed from battle unless they are the last remaining unit. though there are some effects that may override this rule. Technically that still falls under leader restrictions, but it's actually a good restriction if it's your leader. And just a note, Serpentto as a leader works differently, but he doesn't come into play until scenario 4, so we won't be covering him in this video.
We've covered most of what you need to know about bases already, but there are a few little details I'd like to bring to your attention before we wrap up this video. Now, it didn't come up during our battle example, but if you have a base in a territory where you're battling, you have the option to roll one of your attack dice once for each stage of the battle. All the benefits your bases award you only apply when the base is active. And to keep a base active, you must always have at least one unit in that territory. If you don't, the base becomes inactive. A base also becomes inactive if the opposing faction takes control of that territory. If you want to reactivate one of your inactive bases, you'll need to regain control of that territory that the base is located in. And in the case of the USS Flag and Cobra Island, each of those tokens counts as a territory unto itself. I know I didn't come right out and say this, but just so there's no confusion, Cobra Island cannot move. And that's it. I hope this video helps, and I hope you enjoy playing Risk G.I. Joe Special Missions. See you next week.
Thanks for joining us. If you like this video and you want to see more, subscribe to our channel. It's the best way to keep up to date with everything we do here at Boy Game Coffee. But if you want to see more right now, we got plenty of videos to choose from. And if that's not enough, follow us on Instagram, Facebook, and Twitter. I'm Mark Maya, and this is Board Game Coffee. And remember, have fun, keep gaming, be social. See you next week.