How to Play The Calling
Games in This Video
1 game is featured in this video — it unlocks as you watch.
Transcript
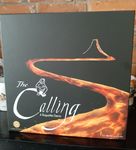
Ooh, that looks tasty. Welcome folks. Stay the Hungry Gamer is back with another how to play video and today we're learning how to play The Calling, a roglike game designed by G. Wesley Conn and published by Mere Pursuit. And I do apologize if I mispronounced that name. Before I get started, thank you to the publisher for sponsoring this video. Additionally, I do need to point out that what you see here is still in the prototype phase and is subject to change. Additionally, please make sure you turn your cling on subtitles because if things change after this video is completed, that's where you'll find those corrections. Now, what this game is is this is a one to four player adventure running game with some character upgrading and just a smattering of resource management. Your character is going to be racing to the end of this map here. And then the roglike part is it will then reboot and you'll come back over here, but you will be stronger. All the while your character will be running from the suit.
And the suit is a corrupt government official. Now, to jump in, let's talk about how you set up the game. And the way this video is going to be structured is I'm going to start out by talking about the solo version of the game because that's where you're going to get most of the rules. and at the end I'll talk about the changes for multiplayer because at its core this is a very similar game either way and I think that'll be the easiest for us to digest. Now to start the game obviously you've put the game board in the middle. You'll take all the black cubes and then you'll take a single black cube which you will then place over here on the round marker and you'll note that these black cubes are also called scars and you'll place it on the number one. In the solo game none of the rest of these black cubes will be used. Then each player will take one of the four different character minis like so. For our example, we'll take this one right here, which is the main character of the story. You will then collect all of the cubes and dice of your chosen color. In this case, I've chosen white. Each player will then take an occupation card. And I'll talk about this in just a moment. A player board and your double-sided player reference.
Here we have the player turn and encounter summary over here. And on the other side, we have all the different abilities. Then you'll take the stack of feet cards and in the solo game you'll put these to the side. They are only used in multiplayer. Additionally, you have this multiplayer in-game goals. As you can guess, you do not use that in the solo game either. We'll talk about this when we get to the multiplayer section of this video. Finally, you will collect all of the black dice. You can take all the d12s and set them to the side of the board. And the same with all of the d6s, which we'll set right over here next to the board because we'll be using those every single turn. Then you'll place the suit right here. And you will place your character here at the start line. And now you're set up and you're ready to move into character creation. The way character creation works is you will have 15 points that you can spend across your speed, your defense, and your hit points. You'll also notice there's a space here for emergency kits, a space down here for your XP, and space up here to mark what abilities you've unlocked.
However, the first time you start the game, it's going to recommend one of these three basic classes. You have the skyrunner, the market inspector, or the philanthropist. In other words, you have a speedrunner, and you have a fighter, and you have an HP tank, as it were. And up here, it's going to tell you how you can create a custom character, but we're not going to dig into that in this video. It's clearly outlined in the rule book. And as you set up your character, you'll look at the stats that you have over here, and you will place them on the board here. First, you'll note you want to have one of the white cubes all the way down on the zero of all of the different statistics. And then, since for this example, I'm playing the Skyrunner, I will put my HP up to three. I will put my defense up to three. I'll put my speed up to nine and my XP and my EK start at zero. Additionally, every character will start with a single ability. And the rule book tells you what the recommended starting abilities are for the three starting classes. And for the Skyrunner, that is shadow. While for the market inspector, that is awareness. Or if you are playing multiplayer, that is battle scars. And for the philanthropist, that will be hide.
Then you'll collect your single d6 and we are ready to start the game. Now, as we can see here, the turn order is laid out for you. The first thing you're going to do is you're going to do your movement roll, which to do that, you will roll a single d6 and you will add your speed value, which if we recall, as a skyrunner, my speed started at nine. So, I have a total of 14. And what you'll see here is we have the main path here, which is the gray path. You also see off to the side, we have these smaller paths available as well. And these represent the side alleys. And you'll notice the entrance, all of them are marked with this yellow line here. Now, on the side alleys, what you're looking at are these yellow numbers right here. That represents amount of experience point you'll get if you step on those spots. You'll also notice there are spaces like right here that say EK. That's an emergency kit. And I'll talk about how those work in just a minute.
So, on your turn, you will be able to start moving. And the rule is if you start your turn on the main alley and you enter into a side alley, you cannot leave the side alley on that same turn unless you have stepped on one of these yellow marks. So in this case, perhaps I would take my 14 movement and move 1 2 3 4 5 6 7 8 9 10 11 12 13 to here. And that would gain me five experience points. Then 14 15 and make my way back. Now, I'm going to pause here to point out something that you may have noticed on the board, and that are these black dots. What those represent are five spaces along the path of the side alleys. So, as we look right here, we see 1 2 3 4 5 to get to that space. And then, since there's no other black dot, that actually helps you see that it is less than five to get here as it is only four. And you'll see those all around the board. Now, if I had had a big enough number, I could have come all the way to here, gotten this, and come all the way back out. Then the next thing that you do is you do your encounter roll and you'll see the encounter summary over here. What you'll do is you're going to roll a simple d6.
However, I'm going to pause here and highlight a couple of the different abilities that you can have during the game. Now, when we started, I pointed out that I had the shadow ability. So, since I'm in a side alley at the start of the encounter turn, I can roll my d6. And if I had rolled a six or I had rolled a one, I would gain one more experience and I would not have to make an encounter rule. The other one to note is this ability down here, this flex ability. And again, we're going to talk about how you can get new abilities later on, but I could spend three of my experience points to adjust this number up or down by one. So perhaps I had a two and didn't like that encounter. I could then spend three to push it up to a three. I'll also point out now that if you're doing a custom character creation, all of these abilities here you cannot start the game with. Then depending on what you roll, you will deal with your encounter. So if you rolled a one, you you are faced with a victim and you have a choice. You can help them, which allows you to spend a single EK, which if you recall are the emergency kits, and we started the game with none. So if we rolled this, we couldn't do it. But if we were later in the game, we had some emergency kits, we could spend one and then we'd be allowed to move 10 spaces. So that might be something we want to do if we had it and then we could simply start moving back.
1 2 3 4 5 6 7 8 9 10. And then we'd find oursel back out there on the path. Or we could say we have no time or we had no emergency kit and you would lose 3 XP if you had it and then you move on. Next there is the two where this is the which is the river guide sighting. You have a choice again a or B. You can do a boost, which will gain you one speed point or one defense point on the corresponding track, or you could do a refresh and simply gain three HP. And I will point out here that even though we started the game with three, we're not limited by that. So, we could take the refresh action and move up by three and have a total of six hit points right now, and you can go all the way up to a maximum of 10. Next, we have the trap, and you are simply going to lose two HP. Period.
You have no choice. However, if you are in the main alley, which as a reminder is the light gray here, then you're going to get a reward. And the rewards are going to be if you did not hit zero HP, then you would gain the reward. You'll roll two dice and that's how much XP that you're going to get. So, in this case, if we were in the main alley and we survived, I would roll the two and I would gain four XP. It's important to note that if you were in the side alley, you get no reward. Now, I'm briefly going to talk about how you can have zero HP and not be out of the game. So, in the calling, there is one way to lose the game, and that is have zero hit points. However, that is what the emergency kits are also for. So, in this case, let's say I only had two and I hit the trap and I went to zero. I do have an emergency kit. So, at this point, I can use my emergency kit, which would technically stop me from actually hitting zero. I would go back up to three and then I would gain three XP for it. Then next we have a hoorde encounter and you have a choice again. You can either defend or you can retreat. Though you cannot retreat if you are not in the main alley. And once again reminder here the main alley is the are the light gray spaces in which case you would then go back three spaces if you were in the main alley you wanted to retreat.
However, if that would take you back past the start line, that option is not available to you. or you can defend against the attack. And so what will happen then is you will roll your defense die plus whatever the total is of your defense, which again, as a reminder, we started the game with three defense. So I'll roll that. And I have a total of five. Then depending on the round, you will roll hoorde dice. And as we see right here at the bottom of the chart, round one, you roll one, round two, you roll two, then four, then eight, and then eight again at the end. But you're going to multiply it by two. But for our example, pretend we're in the first round. So I would roll the single die and it is a four. My five equals or beats theirs. So then since I'm in the main alley, I would get a reward. Again, I would not get a reward if I was in the side alley. And my reward would be whatever number was rolled on the die. In this case, four XP. So in other words, if in the second round I defended against an attack like this, I would gain 15 XP for that. Now, let's just say that I was not successful in defending and they had rolled a six.
If we remember, I had two plus my defense value of three. So, my total is five. So, I lost by one. I would lose the difference between their attack and my defense, meaning I would lose one HP. The next thing that you do is you get to take your level up actions. And this is where you get to spend the XP that you've been earning. And as a reminder, you'll gain XP from stepping on the yellow numbers, from winning fights against the horde while you're on the main alley, or surviving traps again while you're in the main alley. And there may be some abilities that give you ex XP. For example, the shadow ability. If I had rolled one over six, I would have gained one XP for that. Now, as we look at the level of options, we have this here on the chart, and you'll notice you can do three separate purchases each turn. Anytime you get any of these, it counts as a separate purchase. You can do a simple rest, which is spend one XP to heal one point of health. You can do an upgrade, which is you spend three, and you can upgrade your defense, or you can upgrade your speed. So, in this case, I go from 9 down to 10. And I would mark that C is something that is only available in the multiplayer game. And this will be notated with an a and this will be notated with an asterisk right here in the final version of the game. I'll talk about how dream works at the end of this video. Then you can go shopping which would spend seven XP. So we'll just pretend that we are right here. So I could spend seven like so and then get an emergency kit. Next you can do a grow ability which is for spending 10 XP. You can gain one new ability. And the abilities that you can gain are all of
the abilities up here which again are on the back side of your player aid. And as a reminder after the first turn you can buy these abilities down here. One that I will highlight right now is the adrenaline ability, which if you've purchased, you'll then get a second die every time you do your movement at the beginning of the turn. I'll also point out if you take a look that the adrenaline you can get two dice for. Same with insight and toughness over here. Now, I'm not going to go into what all the different abilities do as they are relatively straightforward on the ability guide. And I will point out that there's also this four scars option here to gain a new ability that is only available in the multiplayer game. And the same goes for the riverborn ability down here at the bottom. So I'll explain those when I get to that part of the video. Then the next thing that will happen is the suit will move. And the suit has the same number of dice as is equal to the round. So it starts the game with one die. I'll also point out that in the solo game, in the introductory game, the suit does not move on the first turn. However, after that, it will always do so. Though in the full game, you do move the suit on the very first turn. And you simply roll a d6 and it will move. 1 2 3 4 5 6 and it's always going to follow the path.
You'll notice right here there is a plus die. And so when the suit gets to that point, then it will get another die for the rest of that round, which means each time through the path, it will gain one more die until the end of the game when it has five dice. And the danger of the suit is twofold. One, if the suit would ever catch you landing on the same space as you are, your hit points will immediately go to zero, and the only way you can save yourself is with an emergency kit. The other danger is if you find yourself in a side alley like I am right here. If the suit ever reaches the entrance to that alley, you get pulled out of the alley and placed directly in front of the suit. And again, your hit points will go to zero unless you have an emergency kit that can save you. Then that would mark the end of the round and you would start again, which again means rolling your dieice, adding your speed, and then moving and either going into the alley to gain XP and emergency kits or simply making your way to the end. Now, when you get to the end, a few things are going to happen. First, you'll have one more chance to do a level up. Then the round token will skip forward and you will find yourself teleported back to the front as will the suit and you get to start the round again. As a reminder though, the suit will now start with two dice. When they reach here, they would then go up to three and the horde will now roll two dice instead of one. Then you'll go through the game all the way until you've gotten through five rounds.
Though you do have the option of stopping at any point prior to that and scoring right away, though the intent is to play all five rounds. When you get to the end of the five rounds in the solo game, you will have an interesting choice to make. However, that dips into spoiler territory, which I will not get into, but just understand that there will be some interesting choices that you get to make at that point. Though, in general, you will end the game and you'll do your scoring then. Then, at the end of the game, you'll make note of however much XP that you have left over. In other words, did not spend, and whatever your rank is. And your rank, as you can see here, is based on these various descriptors. You are a student if your HP hits zero and you fail to escape around defeat, but defeat is temporary and failure leads to victory. And you'll see the other descriptors for the rank here. The goal is eventually to be a level 10 sky captain. To play through the full campaign idea, you're going to actually play through four different games with the goal being to get all four of the different ranks and finish with a certain amount of XP total. Now, I mentioned having different ranks, and so then those total ranks are going to be over here, which is at the end of the four games, if you've managed to get a,000 plus XP left over, you'll be level 10. And if you accomplished all the other ranks, then you would be a sky captain. And that's how the solo game works. The multiplayer game is mostly the same with a few key differences. The first one being, of course, there are multiple characters out there, but every turn is played simultaneously. If there is ever a moment in which one player feels like they want to wait and see what another player does first, then
it's always done in the order of the highest speed goes first, followed by the next highest speed. But for the most part, you can play this simultaneously. So both players will be moving through going off into the side alleys and trying to avoid the suit. One key difference is if the suit would ever pass an alley where there's one player, it will immediately stop there. So in this case, if the suit was right here and we rolled a five, it would actually stop right here, pulling this character out right here, and it would have to use an EK not to be defeated. However, in that case, hitting zero does not actually defeat you. You would simply place one of these scar tokens onto your player board and then you would reset at one health. Though, there are some abilities like the battle scars ability that would change what you get reset to.
The next difference comes with the purchasing. At the beginning of the multiplayer game, each player receives three feats of which they have to keep at least one. And all of these are different goals you have to accomplish by the end of the game. For example, right here, minimum of nine hit points. If I had at least nine hit points at the end of the game, like so I would gain one more point. And all of them are uniquely different. In the multiplayer game, you're also to in the level up portion of the game spend 5 XP. So, we'll pretend that we were here to draw two more and then keep one. The final one is the riverborn. And this is only available if you have at least 10 movement or speed, 10 defense, and at least five HP. If you're going to do that, you'll then receive the riverborn goal. And I'll talk about goals in just a minute, but then you would reset your health, your speed, and your defense all back to one. Now, in order to understand the goals, let's talk about in-game for multiplayer. When you're playing multiplayer, the idea is that you're only going to play for two rounds. However, you do have the option to play for more if you want, but the game's designed to only play for two rounds. And there are two different ways that you can decide who the winner is at the end of the game and see how much XP you have left over or you can use the multiplayer end goals. And you'll note that goals can go to multiple players and you place your cubes as they happen.
So I mentioned the riverborn goal. You could place that right over here and you have five points at the end of the game. You'll notice you're going to gain one point for every feat that you've accomplished and you lose a point for every feat that you fail. If you have the most HP at the end of the game, you'll gain a point. the most defense, the most speed, the most emergency kits, the first person to end round one or the first person to end round two will also gain points. I'll also point out over here that you're going to lose one point for every skull. That of course is in direct contrast with this war stories, which is whoever has the most scars will gain four points. One does not cancel the other out. So in other words, if I finish the game five scars and that was the most, I would have a net of minus one. I'd lose five for having five scars, but then I would gain four points for having the war stories. So, there you have it, folks. That's how you play the calling. As I said before, if you're interested on my thoughts on this game, you can check out my preview video, which is linked down in the description.
As always, if you found this video useful, please like, subscribe, share, maybe become a channel member. As always, thank you so much for watching. Have a wonderful, wonderful day.