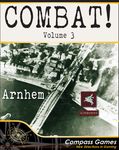
Combat Volume 3 Arnhem First Look & Overview | World War 2 Man-to-Man Solo Combat Wargame
Games in This Video
1 game is featured in this video — it unlocks as you watch.
Transcript
Hi everybody, I'm Zilla Blitz and welcome. Today we'll be doing an overview of Combat Volume 3, Arnham from Compass Games, designed by Adam Starkweather and Ross Martell. In this solitire game of World War II combat, each counter is an individual soldier. For this volume in the series, you're in charge of British soldiers for seven historic scenarios set in the city of Arnham during Operation Market Garden. Let's jump in and take a look. So, here is Combat spread out in front of us with its three maps, seven counter sheets, two decks of cards, and various documentation. Before we jump in and take a look at the components, let's do a general overview of Combat Volume 3. Most importantly, this is the third game in the series. Volume 1 is a standalone game set in France in 1944. Volume two is an expansion to volume 1 that adds vehicles and a number of other mechanics, including a full branching campaign system. Now, volume 3 uses, for the most part, the same rules from volume 1 and volume two, but this is a standalone game in the series. You don't need volume 1 or volume two to play this game. Now, some basic details of the game. This is a solo game only. An AI procedure will guide the Germans in the scenarios while you command your British soldiers. Gameplay length is listed as three to four hours, so these scenarios will have some meat to them. The scale is small and fast. Counters are individual soldiers and vehicles, and the time scale is just 90 seconds to a turn. A full scenario represents less
than an hour of historical time, and each hex represents just 10 yards across. This is truly a tactical scale. Let's now go through some of the key mechanics in Combat Volume 3. The game models man-to-man World War II combat at the individual soldier level. So many of the mechanics are at that level of action. In addition to individual soldiers, we've got some tanks, support weapons, anti-tank guns, mortars, offboard artillery, grenades, smoke, and even an umbrella. Yes, an umbrella. There is a story behind it. So, there is a wide range of actions available for soldiers. You've got run and gun, aimed fire, suppressive fire, reload, charge, sprint, hide, rally, and sneak are just a few of the set of actions you can be having your soldiers do. The map is a section of Arnham near the bridge of Arnham. And so this is a very urban combat game. There are multi-story buildings. There's the bridge, factories, bushes, walls, trees, rubble, etc. And as one would expect, there is a line of sight mechanic for determining targets and visibility. The game also has melee combat, morale, and wounds.
Interestingly, although the back of the box mentions a dynamic campaign where the results of one scenario scenario will impact the next, this doesn't appear to be the case. I can't find campaign information in this particular volume of the game. To accomplish all this action, the game uses a combination of cards and orders in a sequence of play that sees the player giving orders to his or her soldiers, the German AI doing the same thing for its soldiers, and then players executing these orders in a series of impulses based on initiative. Leaders can make plans for their teams, which can help organize cohesive actions. Combat volume 3 comes with three documents. the rule book, an excerpt from the volume 4 core, the upcoming volume four core rule book in a scenarios book. The rule book weighs in at 36 pages, although there are a fairly robust set of graphics that reduce the word count. And now, I've yet to play volume one and two, but from what I can tell from cruising the internet, it sounds like with the exception of some simplification of the vehicle rules in this edition, if you're familiar with the volume one and volume two rules, you'll find the rules very familiar from early volumes and will have no trouble picking up this game. Um, now looking through the rule book, there is a good amount of stuff going on here. Uh to be fair, probably the two largest sections are the rule sections for friendly orders and then for enemy orders, but there is a lot of detail here and the player will be learning the system to play as well as the as the rules for all the different actions. Terrain is varied as well. Um so while nothing in here
seems overly complex, there is a good amount of content to get familiar with. The back of the box mentions the complexity as a four out of five, four and a half out of 10. My estimate at this point would probably be a touch higher, maybe a five or a five and a half. But this also feels like a game that might not be that complex as you actually start to dig in and play. For a solitire rating, well, that's a full points 10 out of 10. Of course, this is designed as a soliter game only, and that's where it excels. In addition to the rule book, we have the scenarios book, which has all of the details and specifics on the seven scenarios included in the game. And my understanding is that all the scenarios here are based on historical events, which is a nice touch indeed. Um, the scenarios vary in size and scope. The first scenario, for example, is designed as a learning scenario for getting used to moving your soldiers and executing orders. In that scenario, you'll very likely not even run into enemies. Um, one thing that I want to mention with these scenarios, too, is that the game comes with three large maps and a bridge extension. But the maximum footprint that any scenario requires is two maps budded together. So you don't need a table footprint for all three maps together. We'll take a look at this more when we look at the maps specifically.
Lastly, the game comes with a short excerpt from the volume 4 rule book. Uh with the popularity of the system, Compass Games is producing a fourth volume. In this volume, we'll overhaul the rules with clarifications, adjustments, etc. So that one rule book can rule all the ru the games in the series. This is great to see and it's great to know that the series will continue to grow. Counters galore. The game comes with seven counter sheets. Two of the counter sheets, the ones we're looking at here, are double-sided 1-in counters that represent the individual soldiers and vehicles in the game. My understanding is that if mo in most, if not all, scenarios, you'll be controlling about 10 friendly soldiers, and the enemy can have a similar amount. To that effect, you don't need a lot of unit counters. Um, I must say, however, that I do really like the look of these big counters. I can also see that it looks like for the enemies, there are some uh dummy units here, so that might be kind of ways to keep you guessing where the enemy is. The remaining five sheets of counters are 5/8 in double-sided counters. And these seem to be exclusively of the marker type, you know, counters that are going to be aiding in gameplay. Um, we can see here even like almost a half sheet of counters alone for smoke. Um, and this sheet here looks to be the counter sheet for friendly orders as you determine what each one of your troops is attempt to accomplish during a particular turn.
Um, these three sheets here, this one contain a lot of enemy order counters. Almost two full sheets to cover the range of actions that enemy soldiers can take in a turn. Now, all of these are double-sided with adjusted or identical information on the backs. Let's take a quick look at a counter for a British soldier before we move on. Um, we can start to parse out some of the games information systems here. So, this is Sergeant Kemp, for example. His name is along the left side with his image beside him. And the right side of the counter contains his information and data. The top left black number represents his leadership rating, which impacts what he can do when performing a plan order. The top right is his quality, and all troops have an individual quality rating. The middle right section shows an image of a weapon. To the right, and to the right of that image is the soldier's skill with that particular weapon type. For Sergeant Kemp, he's a six at the Sten small machine gun, a five at grenades, and a six when using his pistol. Now, SL at the bottom indicates he's a section leader. And to the right, the T indicates that Sergeant Kemp has the additional skills of tough and medic, which seems to be the case for all of the British soldiers. Now, the back side of the counter is a shaded gray and indicates Sergeant Kemp when his status is hidden. All in all, I think this is a great set of counters. I mean, I really like the big individual soldier counters, and it's just a counter set that kind of just makes you want to dig in and play. Combat volume 3 comes with three player aids. The first that we're
looking at here is the main player aid for managing the cards in the game, the initiative order for turns, and then the turns, and the four impulses that are part of each turn. The second smaller player aid has the anti-tank and vehicle information for the game. Here are the range, penetration, damage values for things like the 88 mm flack gun, pats, the panzer 3's, and even the umbrella. Lastly, we have one more player aid that has a variety of information on it. The sequence of play is in the top right here. And then handheld weapon information is on the left side of this. And on the other side are the two main charts for everything related to terrain, how it impacts line of sight, combat values, and spotting. There are over a 100 cards in Combat Volume 3, spread out over two decks. The decks are multi-functional. In front of us here, we can see some examples of the friendly deck. One of the big uses of the cards is determining the initiative of your teams during a turn. For each turn, the British player will have to play one of his cards. And the top left values will determine the order that his or her teams will act in a turn. Cards can also be played for events like this poor shooting effect if you were forced to play this card as your initiative card in a turn. Lastly, cards with discards on them can be played as events at various points in the turn to try to swing battles in your favor. Lastly, cards are also drawn to determine wounds. Here now are the German cards, which are both used to determine enemy
initiative, but also to figure out what enemy soldiers will do in a given turn. These cards have been especially made for volume 3 to represent the improved skill of the Germans who are who participated in the Arnham battle. Roughly speaking, you first determine if the enemy soldier is in cover or open terrain. This dictates whether you use the top or the bottom of the card. Then you determine if the soldier has a line of sight or not. This determines whether you use the left side or the right side of the card. Lastly, you reference the morale state of the soldier to determine what he will try to do in that turn. For example, if we were trying to determine the action for a German soldier who was in cover, so we would use the top half um has a line of sight on one of our friendly soldiers and then is in a bold morale state. They would use aimed fire for that action. Next up, the maps. And there is a lot to look at. So, the game comes with three big maps and one smaller one. Now, these big maps, this is one of the big maps. 25 in on the vertical by 38 in with big 1 and 1/4 in hex's to accommodate the 1-in unit counters. This map here is the map for West Arnhem. Now, uh, a couple things I just looking at this, we can see a lot of the different buildings and the terrain that you're going to be fighting in. It's very interesting to note here too that some of the buildings are named. So this is the public works and traffic building. Up here we have the provincial government office. And I believe as well that this is a historicalbased map. So it is roughly if
not exactly the way it was Arnham was in the time of the battle that happened for the bridge. Here's the palace of justice over here. I saw a comment somewhere that it reminded the person of those carpets you used to get as a kid with all the roads and buildings outline on them and you put them down on the floor and then drive all your trucks around them. And I think there's definitely something to be said for that except now we get to fight with British soldiers on them. Now here is the east map. We can see we've got a train depot down here. The communist milk factory is up here. Bunch of urban trucks and cars lying around. As I mentioned earlier, if you're worried about the footprint of the game, several scenarios only use one map, and the ones that use more than one use two maps at most. So, the biggest footprint you'll need for the maps in any case is 38 in x 50 in. Now, some scenarios use this uh bridge expansion uh as the second map. And this is 11 in x 17 in. So, a very modest size. for scenarios that use this and the central map. The footprint is 49 in x 25 in as this extension will stick out. Now, this is the central map that we're looking at here. And I should comment this is a heavy card stock, so I feel like the durability will be pretty good for this.
Now, I I must say from a gameplay standpoint, I am very I'm very curious to see how all this comes together. Um, the rules mentioned there is no stacking limit for hex's and there are a lot of markers you can use in the game, but I know from talking to people that they have really enjoyed this series and a lot of people have suggested that I try it out. So, I'm very much looking forward to getting some units on these map and seeing how this system works. And there you have it. Combat volume 3 arm from Compass Games. Now, I've mentioned this in other videos, but I grew up as a huge fan of the old SPI sniper game. And to see a solo game system growing like this for man-to-man combat is just is is really exciting for me. And I look forward to digging into this game. At some point in the near future, I hope to post some gameplay for the series. But in the meantime, you might enjoy checking out my current campaign game with British Tank Ace, another Compass game where you in this game, you control a single British tank through three campaigns in World War II.
Thanks so much for watching.