Severton - Official How to Play. Complete, Clear, Concise Board Game Tutorial
Games in This Video
1 game is featured in this video — it unlocks as you watch.
Transcript
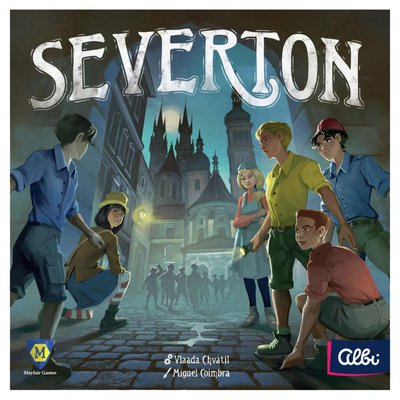
The secrets of Severton in the mysterious streets of 1930s Czechoslovakia are the ones to uncover.
Based on the rapid arrows comic book series in Severton and
today we'll be teaching you how to play Severton game design by Vlad Fatil and art by Miguel Cora published by Ali.
And hi everyone, it's Stella
and Tarant. Welcome to Maple University.
And hey, if you enjoy this video after watching, please like, comment, subscribe. You know what to do right now. Let's get to the classroom. Severton is a cooperative game set in the world of the RLE Sheepy series of Czech comics by author Yaruslav Fogler. Players take on the roles of the group of five kids known as the Rapid Arrows as they use cards to make their way around the board trying to resolve quests and to either avoid or encounter the groups of older boys known as the vaunt. It's a battle of competing tracks as players advance their marker for completing quests or increase unrest and bring extra challenges into play as time passes or as they fall victim to the vaunt.
Complete enough quests to reach the top of the rapid arrows track before unrest is maxed to win the game. As with many of Vladil's games, Seatan can be played at several different difficulties, leveling up as you become experienced. In Sevetan, this is represented by five numbered scenarios coming with these envelopes and this scenario book. But be clear, you shouldn't think of these as a story which follows a chronological order. Each scenario represents a different rule set and a different complexity. Specifically, the focus of this video is going to be scenario two, which is the complete game, and scenario four, which is the advanced game. These are the fully replayable and standard modes of play, and they feature decks of quest cards, which you'll shuffle up randomly to determine the quests in the game. By comparison, scenarios one and three are both tutorial scenarios. They have some modified rules and a scripted specific set of quests designed to help you get ready for scenarios two and four respectively.
Scenario five, the Sorco scenario, is the advanced game as standard, plus a final boss called Sorco. I'll be setting aside the two tutorials to teach you the complete game and advanced game and give you a flavor of what's to come with Sorco. The other thing to know is that the game specifically plays with five characters, each with two functionally identical sides and an onboard character token. If you're playing with five players, each player simply controls one character. With four players, you'll choose either Fleetfoot and Red Cap or Jerry and Henry and combine them into a single entity known as a double character, which plays under slightly modified rules to the single characters. Each of the four players controls either the double character or one single character. At anything fewer than four players, you'll still need to set up four character cards as if you were playing four players.
Each player then chooses one character or double character they'll control themselves and all other characters will be placed in a common area and controlled collectively. Through the video, I'll begin by explaining the five player rules, then returning to explain the differences at four and fewer. To set up the complete game, take all components which were free in the box or in envelope 2 with the exception of the scenario one quests. Set them aside. Lay out the board with the round tracker and shuffle decks of action cards, vaunt movements, vaunt group cards, and quests. Also, shuffle the items which sit to the side of the board.
Keep the colored cubes here. These are generic tokens and represent anything that a quest card in the matching colored slot needs them to represent. Shuffle and place the different decks of shape tokens here. These are randomizing tokens that can be called on to select locations for any random effects on the Seven map. Find the five purple colored secret passages and place a lock token on each. Thematically in the game, you'll need to discover these before you can use them. Find the complete game's progress path pieces and flip them to choose your difficulty. Zero stars, one star, two stars, or three. Line them up to the right of the board and place the unrest and arrows tokens in their bottom spaces.
Next, set up the vaunts. The bottom of the unrest track tells you which vaunts you'll start with. And for each one, you'll draw a faceown movement and group card and flip and discard one of the matching shape token to choose starting location. Reveal three starting quests. If a quest has a blank location, then draw the appropriate shaped location. And if there's a when revealed effect, then do that. Now, quests can show a sun, moon, or both. And all start of game quests must have the sun. If you draw one with moon only, then redraw until you have a valid set before shuffling the moon quests back into the deck.
Choose your character. Place all five character discs on location one and gain starting resources as shown here. Four action cards and an item. Hold your action cards in hand or lay them face up. There are no communication restrictions in this game, but you must keep your item face down. No one is allowed to look at it, not even you. You're now ready to play. Severton plays in rounds and each round plays in seven phases. Three main phases and four administrative ones. First is actions. Players may spend their action cards to take actions on the board. Second is the va phase. You'll reveal how all the vaunts move them and trigger encounters if they meet the characters.
Third is the quest phase. Anyone in the right board location to complete or progress a quest resolves the quest. Step four is unrest, where you move the unrest marker two steps up the track. Step five is to refresh vaunts, readying them for the next turn. Step six is refresh characters in which you redraw action cards. And finally, refresh quest where empty slots left by fully completed quests are refilled. So let's have a look at each phase in detail. First is the action phase. And here each player may take as many actions as they wish to take. and in any combined order. That is, you could choose to have one player take all their actions, or you could alternate back and forward among the players.
There are three main actions: move, explore, and search for item. First is movement. There are a few different ways to move, but across all of them, no individual character is allowed to move more than twice per action phase. At its most basic, to move a single character alone, discard one card from hand to move one step along a path of the matching color. If characters share a location, then they may move together. The player taking the primary action must discard a card matching the path being taken. And players in the same location may join by spending any card. The color does not matter.
Secret passages begin the game locked. And so though you can use a purple card to move through an unlocked secret passage, you cannot move through a locked one. You can discard a wild card to move along a single unlocked path of any color. And you can discard three cards of the same color to treat that as if it were discarding a wild again, allowing you to move on any color. If a movement takes a single character or group into the same location as a vaunt group, you must immediately resolve an encounter with those vaunts before moving to your next action. I'll talk about vaunt encounters a little bit later. The second option is explore. And to do this, you must discard a card showing the torch icon. This could be either a purple card or a wild card or discarding three cards of the same color since once again this counts as if you'd played a wild.
Exploring lets you do one of two things. The first is you may discover an adjacent secret passage, remove the lock. Players can now move along that passage or treat the spaces at the opposite ends of that passage as adjacent. The other option is to investigate a group of vaunts. Play the card and then choose a vaunt group that is within two movement steps of your character. These must be valid movement steps through unlocked paths. Here, orange could investigate A, B, or C, but is too far away from either D or E. Upon choosing a group, flip both its movement card and its group card face up. You now know how that group is about to move and how it will act in an encounter.
The third option is search for an item. A character who has not moved and will not move in this action phase. And to be clear, you can take explore actions, you're just not allowed to move, may rumage around in their pockets to locate the item they were dealt in setup, flipping it face up. Items may thereafter be used as described on the card, and each item is single use. Once you've finished using it, discard it. Players can also exchange items. If two players are in the same location, they may give items to each other. Finally, pay attention to your character's abilities. Each of these is a special once per round ability and represents a more enhanced or powerful version of one of the standard actions.
There are also a couple of these abilities which are passive. Once players are done with actions, move to the va phase. One at a time from top to bottom. Resolve the movement and any encounters of each Vance group. First, reveal the Vance movement card if it's still face down, but don't reveal the group card. If the card simply shows a single movement color, then move the va along that path and discard the card. Two vaunt groups can never share the same location. And so if the movement is impossible, those vaunts do not move at all, but instead regroup. That means if the group card is face up, discard it and replace it with a new face down one, losing you the information you'd previously gained.
Vaults may move two spaces at once. And if the pathway is empty, simply move both spaces. A two move vault may move through another vault to reach its destination. But if the final destination is filled, then the vault moves only as far as it can and then regroups. With this icon, a vault group moves along any color of path, including a locked secret passage, to the highest numbered location it can reach that doesn't already contain a vault group. And finally, a card with an icon like this at the top represents the vaunt potentially hunting groups of characters. Check to see whether the vaunt group can reach a stack of characters at least as tall as this number following the amount of movement steps next to the icon. So here it's finding a stack of two characters with a single movement step on blue, red or yellow.
If such a group exists, the vaunt group moves there. With multiple such groups, the va target the larger group or if tied, the group in the higher numbered location. If no group of the appropriate size is in range, then it reverts to the standard movement at the bottom of the card. When characters move together in groups, they'll be better placed to handle quests and encounters, but they'll be more vulnerable to these alerted vaunt groups. Pay attention as some of these cards may move one space, one space, including secret passages, or up to two spaces. Anytime characters or a va group enter a location with the other, an encounter is immediately triggered. reveal that vaunt group's group card if it wasn't already revealed. This will reveal up to three challenges: fighting, outwitting, and hiding.
And if you want your characters to avoid being caught by the vaunt, you must succeed at one of these challenges using the matching icons on your cards. You may choose to fight. This is called a collective challenge as indicated by the multiple discs on the icon. Collectively, all players in the challenge must find cards in their hand which add up to at least that amount of strength. So here they could combine these cards for the total 14 strength, discarding them and would defeat the vaunt remove them from the board for now and discard their movement and group cards. This is sadly a temporary reprieve. These vaunts will be back at the next vaunt refresh phase.
The second option is outwit. This shows a single disc and is therefore a single player challenge. One of the players involved must find enough cunning and eloquence cards in their hand to at least meet the outwit requirement in order to win. This does not remove the vance from the board. Instead, it misdirects them to another location. Move the vaunt away along the single unlocked path of your choice to a location with no other vaunt group. Discard the va's movement card, but leave the group for future encounters. The final option is hide. This is an individual challenge. However, each player present has to hide to avoid being caught.
individually. Each player discards an amount of stealth, at least meeting the encounter threshold to hide. You now remain hidden from those vaunts until either you or the vaunt leave the location. Or if you voluntarily come out of hiding, triggering an encounter. Through all types of encounters, you may treat this whirl icon as if it were any one of the other icon types. Wild movement cards have no icons to help you in challenges, although any card can be discarded for a single wild challenge icon as part of any challenge. This set, for example, would be enough to meet an outwit eight. If you fail to fight or outwit the vance, then any player who fails to hide is caught. Remove the character's token, discard all action cards from the player's hand, and increase the unrest track by at most one step per encounter, even if multiple characters were caught.
Caught characters return to the board in the next players refresh. A couple of specifics. If a vonta triggers an encounter on the first of multiple movement steps, you'll first resolve that encounter and then if you either won a fight or successfully outwitted those vaunts, then you discard the movement card and the second movement doesn't happen. However, if you lost the encounter or hid, then the vaunt will keep moving, possibly causing another encounter. If you so desire, after outwitting some vaunts, you can redirect them to a location with other characters, and this will trigger a new encounter there. During the action phase, encounters are triggered immediately after a group moves to meet the vaunt. As such, if these two moved in here, they would have to face the vaunt as a pair and wouldn't be able to wait for, for example, purple to join them.
If the characters trigger an encounter and there's already hidden characters present, each may choose whether to come out of hiding for the encounter or not. After resolving all vaunt moves and encounters, move to the quest phase. It's possible to interact with some quests during the action phase, but quests can only be completed in the quest phase. Most quests require you to get the characters, vaunts, and cubes into some sort of configuration on the board and still be holding that configuration when play passes to the quest phase. As such, you need to be careful of the vaunt phase ruining your plans. Sometimes a quest involves completing a challenge, and this follows the same rules as a vaunt encounter challenge.
Here, for example, it's a blue eloquence challenge, which is a collective challenge of difficulty 21. It's collective, so all players in the location could contribute cards to the challenge. Sometimes for a quest, you'll simply mark its location with a cube to make it easy to identify, while sometimes cubes represent objects or characters which can be picked up and moved around the board in the action phase. If you do complete a quest in this phase, then remove it. Retrieve any of its cubes and progress on the rapid arrows track a number of steps equal to the points value on the quest, resolving any bonus icons that you cover. Be aware, some quests have a variable number of points depending on how well you achieve the objective.
After the quest phase, resolve the four administrative steps. Unrest, Vault refresh, players refresh, and quest refresh. First is unrest. Advance the unrest marker by two steps and resolve any icons you reach or cross. Fifth is va refresh. Deal a new face down movement card for each vault. And for any which don't have them, deal a new group card and draw shape tokens to deploy those groups. They must deploy to completely empty locations. If there's a character or another vaunt present, then check the next number increasing until you find an empty slot, even one of a different shape.
If you get all the way to 22 without a valid space, then count down instead. Sixth is player refresh. First, players may choose to discard any number of action cards. Now draw new action cards based on this table here. Henry has no cards so draws three cards. Red Cap has four cards so draws one. Any player caught by Vance in the previous round now returns to the board either in location one or two as long as they contain no Va and draws four cards like in setup ignoring whatever's on the character card. And finally, if either track marker advanced onto or past a bonus card icon last round, all players draw one extra action card to a maximum of two.
Final step is quest refresh. Refill any empty quest slots and resolve any when revealed effects. As progress and unrest increase, more effects will come into play. You'll add new vaunts who will be deployed in the next va refresh phase. You can gain once off bonus card draws. If unrest hits one of these icons and progress is behind unrest, advance progress one step. Likewise here, advance unrest one step only if it's behind progress. With this icon, there's a small change to quest refreshing. From this point forward, all new quests must have a moon. If you draw a quest with only a sun, discard it and keep drawing until you get a valid quest. Moon quests aren't any easier or harder. They just tend to be shorter because they're coming in towards the end of the game.
With this space, you're into your final turn before unrest maxes out. You get an extra card and all characters have one extra movement next turn. Reach the top of the progress track before unrest reaches its, then you win. You can track your score in the chronicle, determining your final score as being 10 points, plus one for each step short of maximum the unrest token finished, plus five for each difficulty star you've chosen. This would be a score of 17. However, if unrest reaches the top before progress, then you lose and your score is negative points equal to the number of steps you are short minus a further one if the unrest token had unspent movement points.
Also, check the back of the chronicle for any achievements you've unlocked. With fewer than five characters, two of the characters are combined into a double character controlled by a single player. When playing with this mode, it's important to distinguish the characters, each of which is represented by one character disc, from the player who controls that double character with a single hand of cards. The two discs of a double character must always be moved together and can be moved with a single card. This otherwise follows all normal movement rules for a single character. So here, if orange were to move along this red path, the doubles player could join with a single card of any color.
Effects which count the number of characters count the doubles separately. So here the double and the single is the three discs required for the vaunt to hunt them down. In any collective challenge, whether that be a fight with Vance or a quest, each card played by the doubles player counts double. So if these were the cards, the doubles player could play these, doubling them for 12. And adding the singles players two to meet the 14 and defeat these vonts. The same is not true for a personal challenge. Here the double would have to play a total of eight, not a doubled four. Although the doubles player only needs to achieve the hide challenge once to hide both characters.
When there's a double in play, use these lighter colored wedge steps in addition to the darker steps on the unrest track. This will give you an extra one or two turns to win the game. If there's fewer than four people at the table, then you'll play these same four player rules, but with unchosen single or double characters controlled collectively by all people present. Despite this, the game still considers itself a four-player game. Any game rule or component referring to a player can equally refer to a person controlling a single or double character or to one of the phantom hands controlled by the collective. Once you've mastered the complete game, move on to scenario four, the advanced game. For this, you'll need everything from the complete game plus everything from envelope 3 except for the nine largesized cards. Those can be set aside and everything from envelope 4.
In addition to some new advanced quests which you shuffle straight into the deck, there are six new elements in the advanced game. Personal events, upgraded characters, heroic cards, advanced vaunt movements, vaunt upgrades, and the dog bubble. First, when setting up, decide whether you want to include the advanced vaunt cards in the movement deck. If you do, simply shuffle them in with the others. These don't behave any differently. It's just a way to increase the difficulty. As you can see, there's another star here, which could let you take your difficulty up to four. Keep the basic and advanced character cards. The advanced ones have this border, separate. You still begin with a basic character and only get the advanced one when you upgrade through the game.
In setup, shuffle the heroic cards and the personal quests. And as shown here, each player gains one quest. You're allowed to look at your own quest, but aren't allowed to show or discuss it with the other players. In a game with fewer than four actual players, the personal objectives of the shared players should be flipped face up. Finally, set up bubble. Place the card near the board on the side corresponding to whether you have a double character or not, and place Bubbles's token in the same location as the characters. Like most dogs throughout the history of children's literature, Bubble is a loyal and helpful companion with an uncanny knack for gathering and communicating information, but who may occasionally get the group into trouble. Bubble must always accompany at least one character.
If a character moves from Bubble's space, they may take Bubble with them, but they cannot leave Bubble alone, meaning they must take Bubble with them if they're the only character leaving their space. Once per round, the players may choose to take Bubbles's movement action called the reconnaissance run. Move Bubble up to three spaces or four spaces depending on the side of the card along any color of unlocked path from one group of characters to a different one. He then explores all vaunts and counted along the reconnaissance path. If finishing reconnaissance in a location which has both vaunt and hidden characters, Bubbles's barks bring all those characters out of hiding and trigger an encounter.
Bubble counts as a token when resolving vaunt movements and has an impact on encounters. If bubbles present in a fight, then gain an extra three towards the challenge without spending a card. The downside is that bubble makes it more difficult to hide. If hiding, one of the players present must choose to hide with bubble, and that player gets a penalty of three. Here, Fleetoot would need at least nine to successfully hide with Bubble. These apply only in vaunt challenges, never in quests. If you're caught with bubble, remove both tokens from the board, refreshing both as usual in the next players refresh.
Through the game, you'll aim to complete your personal quests. And these could resolve in any game phase, not just the quest phase. You can't discuss them directly with the other players, but you can try to encourage the other players to take actions which will help you achieve it. Upon achieving it, reveal and discard it and gain two bonuses. one random heroic card, which you may keep face up, and your upgraded character card. Your new powers and card draws apply for the rest of the game, and the heroic effort is a once- off ability, which you may discard to resolve its effect. Completed personal quests also score one additional point in the scenario scoring.
While the characters can now get stronger, so too can the vaunt. And when the unrest token reaches one of these steps, place one of these upgrade tokens on its appropriate side on the matching va. The red upgrade permanently increases the difficulty for all group cards in that va slot. And this doesn't create a new option. You can still only fight or hide from this particular group. while with a speed boost from the next vaunt refresh phase onwards draw two movement cards instead of one. These always largely act as if they're a single card. When they're flipped over, flip them in a stack like so. And when they're resolved, start with the left card top to bottom, then the right card top to bottom. If the vault group loses an encounter and discards its movement cards, discard both at once.
Finally, I won't take you through it in detail, but I'll give you a quick introduction to scenario five. Sorakco. Sorco is a shared adversary who carries the caged hedgehog. He is neither va nor arrow, but both groups seek to find him. Follow the advanced rules of play until the progress marker reaches or exceeds the Sorco space. Stop there. Discard all other quests and spawns Sorocco on the map. Sarraco always moves last in the Vance phase and will draw three cards for movement, but doesn't follow the standard rules. Instead, following modified rules, which always involve trying to avoid both characters and vaunts. Sarako doesn't want to be caught by anyone.
Players need to use hiding and manipulating the board such that a group is in the same space as Sorocco during the quest phase. Engage Sorco in as many fight and eloquence challenges as you can. Advance progress one step for each successful challenge and reach the top to reclaim the caged hedgehog and win the game.
Thanks for watching and if you like this video, maybe you'd like to watch this next one. Have a great day. Bye.