RONE: Invasion - Solo Gameplay Overview - 1st Round | DaniCha
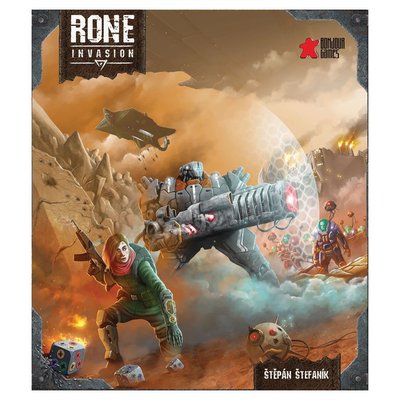
Games in This Video
1 game is featured in this video — it unlocks as you watch.
Transcript
hi everyone Danielle here I'm doing a solo overview of rone invasion I'm going to try to keep this pretty quick so that you can get a really good um really high Lev overview of how this game plays in a round so in a round you do start with the invasion's turn so let's take a quick look at the invasion board before we get started with their turn we have the round tracker at the top there is a scenario that you play with the uh Invasion board and this one is the first one defend the base there are two and we are going to be trying to survive through until the end of the round which is round 16 we are going to focus in on just this bottommost level of difficulty if you wanted to do a higher difficulty both of these rows would be visible when we stack some of their cards and then if we wanted the hardest all three of these rows would be visible when we stack the cards so stacking the cards will be important I'll explain that later we have the deck of invasion cards over here put that on the deck section we have uh additional cards here which will be um uh placing one card in each of these training zones and uh we will be activating two protocols during setup so that's why these two are face up here and these protocols will be activated towards the end of their their turn um so yeah we'll we'll take their turn and then I I'll I'll kind of focus on the player area during our turn so first thing we do is
we move up the round tracker by one and now we deploy The Invasion cards based off of the number of players which is just one and number of protocols so that's going to be three we resolve them one at a time we'll draw from the top here okay we have tamic when deployed The Invasion stores one blue resource okay um and then we're going to place this into a stack showing only the first difficulty row on these cards so we're going to place one blue resource um here and when it's stored it just goes into the training Zone that matches the color so the second card this is aoo so when deployed The Invasion stores one red resource okay go ahead and do that
then third card which is the last one we have a Gau when deploy The Invasion recycles one card and we see on the top right this icon as well that means they will store that Resource as well go ahead and put it here so recycling means they're either looking at their garbage dump or their discard pile and placing it on top of their deck and in that case uh there's nothing there to do um to do a recycle action all right so we have this stack and basically um taking a look here the the bottommost row of each of the cards are now visible but this one does show everything so this is currently active as a uh potential attacker it will give us uh it will give itself two Health three armor it will deal one range damage and 1 2 3 4 melee damage so that'll be important in the cleanup phase but now we have to look at their training Zone each of these cards have a number on the top left if they have enough screws that meet or exceed that number they will train that card we'll put it in discard Pile in this case none of these are ready to be trained so we'll we'll not worry about it now we look at the protocols if any of them are exhausted we will refresh them if uh The Invasion has no
technology tokens um currently they're not needing to be refreshed but they will gain a technology token during this phase um o which is already on the board okay so basically this says when The Invasion has no technology tokens it refreshes all the protocols then gains a technology token for each player in the game so if it was a two-player game they would have gained two for now it's just me so they gain one now they use the protocols so go ahead and activate each um protocol all right and this one says The Invasion recycles three cards and stores one resource of the Player's Choice for each card that can't be recycled by this effect so unfortunately they can't recycle three cards so they get to gain three of those resources which is not great but I do get to choose so I will be giving it probably the black ones 1 2 3 um maybe I will spread it out I think I could choose different colors so I think in this case no I think that's fine I think that's fine I'll put the three black screws on there um this needs a total of five so I think that's okay so the second protocol we have trojen distribution each player exhausts two cards in their base if they can't exhaust they sacrifice a card from their deck that's not great I only have two cards in my base um which I will get to later but they are currently now exhausted so I'll just tilt them a little bit just to show them exhausted so now that we've activated
the protocols it's currently now the end of turn for the invasion so The Invasion would activate any end of turn abilities if it had any so now it is my turn as a player so my turn if I have any beginning of turn effects I would do it now but I do want to explain kind of my area here first so as you can see I have four of these chunky dice during setup I put on the screws according to the rule book so basically one of each resource fills up this this dice um with one resource on each side and one being completely all neutral and that's goes for all four dice during setup I did choose a leader um you get to choose a leader that you get to put into your base so this one gains two Health um but currently exhausted unfortunately and then you also gain a technology so electric field gain three armor so right now um I won't be able to exhaust and use them which is unfortunate unless I have an ability to un exhaust them but for now they are exhausted during the setup you're also going to be drafting three Training Center cards you'll be drawing three from The Invasion uh R rone Invasion card deck picking one and discarding them so that's why I have this discard pile here that's recruiting a card basically when you recruit a card you draw three from this deck you pick one destroy the other two so you do that uh three times so that you have a total of um no you do that four times so let me do it one more time um yeah I think it's four so let me just
do that real quick and I will choose this one and destroy the others we also have a deck of starting cards that we shuffled and put into the deck section of our board and I think that's pretty much it for um the overall setup you do put a blue screw on the armor you start with 16 a green screw on the 14 for the health um it's important to note that the armor would always take the first um 16 hits of melee damage and then it'll start impacting the health range damage only impacts the health so it skips the armor we have stored resources on our board and spare parts actions so hopefully we go through some of that during our turn so let's just dive right into it so we have the draw phase and it's interesting that we don't have a hand size we don't have a specific number of cards we draw we get to decide when we stop drawing cards um and I'll explain how that works later or right now actually so this is a card I just drew you draw one at a time and looking at this top left that's that's how many resources or the type of resources I would need to play this card so knowing potentially I'll have up to four resources hopefully um if I roll this this doesn't get me anything um but yeah I'm going to keep drawing okay we have a skirmish and I'll draw one more and see what happens we have a
scalp um I guess I'll draw one more and see okay we have a jugur so we'll need a total of five resources um we'll see how that goes I'm not sure if we'll be able to to roll roll all those but we'll see all right so now that we've decided to stop drawing because I think it's getting a little bit too risky of of not having enough resources to play play those I'm going to roll my my dice all right so it looks like we did get a total of four colored um resources which is awesome so let's see I get to decide what to play so I think uh I'll play this scout so this requires a yellow resource which I'll use it says gain one yellow resource and one of any so I'll go ahead and play that again a yellow and I will put it on this um this only needs one to train so all of these CS in the training center have a value on the bottom right of how many screws it needs of any color on the card to train it during the train phase I also gain one additional um of any let's see
oh actually I think that's a reroll token sorry that's not a yellow that's a reroll token so I have a r reroll token silly me okay so yeah maybe I will still gain that um as the wild uh or uh screw that I could have gained here that's fine okay so the reroll token is helpful helps me roll a die um and then I do have this Skirmish that I could use this black on and then I do have this red which will be use for ARA and unfortunately this card I can't play I only have a blue left um and so this blue won't help me so this will have to go into my garbage dump which means it's not going to make it back into my deck which is very unfortunate so it's a pretty big bounds of knowing how you know what's going to impact your deck or not um but in this case yeah this is how I decided to play so now um I get to do some d image so I will look at my cards here that I played and look at the left side right here so I do a total of three melee damage and one range damage and looking at this first um card here it has a total of two Health it carries out all of the stats basically with the top card so two Health it has three armor and so I have yeah the melee won't won't get through um all
of this unfortunately um because of the oh wait it does it only has three armor so I've taken out the armor with the melee and then the range it would get hit with the one Health yeah not enough unfortunately so yeah I won't be able to take it out with these cards that's okay um that's just how it is so I won't be able to deal damage to to this stack unfortunately it looks like with with what I've got um so we'll skip to the next next phase which is using spare parts so when you play your cards there's icons on the bottom of them with a number of spare parts just so happens this one has uh one each but the card I discarded had two spare parts so um unfortunately it's in the garbage dump pile which is not great cuz that's a pretty strong card but I decided to play these cards which give me three spare parts and the spare part can be spent in this section so going through them we could spend one to gain a screw um and we could place it on any of those Training Center cards we could spend two to recruit a card and then place a screw on it and then we could spend four to train any card from the starting card Supply deck or we could also spend a certain number to replace the screw in one of my Dice and this is the fun part about the dice crafting um the question mark is basically uh two plus the number of Technology tokens you have have so you you you don't want technology tokens but
I could actually uh spend basically two of my spare parts on it right now since I don't have technology tokens um to replace a screw with one of my choice and then I gain a technology token so it gets tougher to do this and then I could spend a certain amount of spare parts to research a new technology so that's drawing off the top of the technology card and the cost is basically three plus the number of cards in my base So currently it would be a five all right so I spending my three to actually train so I'm going to gain a total of three screws and um I'm going to actually I don't need to what I'm going to do is I'll Place one of them here and then spend the other two spare parts cuz I would have just spent one for that one um to recruit a card and place one on it so I'm going to draw three recruit a card and pick one to keep so it will be these are huge um I think recruiting is important to me so I will say I'm keeping this card putting into my training Zone and then I get to place a screw on it immediately which is pretty neat all right so that was using my spare parts next I I get to clean out my um played card Zone area so I basically put it into my discard Pile in any order and
then I get to train cards the only card I get to train is this one because I have one screw and that Meer equals the number on the bottom right which is one so I train it I put the screws back into the supply and it says when you train this card gain two armor and two health and then it says um then destroy this card so at least I get to buff up a little bit I gain one and then two one two and destroy this card card so this is now destroyed all right so now that is the end of my turn if there were any end of turn abilities I would do it now but then we go to the cleanup this is like the most interesting part so we look at the invasion cards that still exist which unfortunately is all of them and we look at all of the ranged numbers so this has one we get hit with ranged directly to the health now we're down to 15 and then we look at the melee so that's going to be 1 2 3 4 so we take four 1 2 3 four into our armor cuz melee hits the armor first and then we discard the rest of the cards
okay so that is a full round of Ron Invasion um I did Skip some of the you know intricacies obviously I think I failed to mentioned there are player actions I could have done with certain resources on The Invasion board itself um in the competitive uh mode you don't get those actions so I would you know probably if I was strategizing use them more to my advantage and um yeah the storage resources if you had any leftover uh resources to store you could place them here and you could do uh a series of actions as well that's that's stated on the board all right well I hope you enjoyed this overview of Ron invasion I find this game to be uh very interesting um this feels like kind of a brand new type of deck building game um of course with the dice crafting I didn't get to do yet um definitely mid game you'd be able to do that a lot more but overall a very interesting game so far I'm really enjoying it let me know what your thoughts are did you back this game um I I did end up backing it in October 2022 and got it now in February 2025 so it did take a bit for it to fulfill but I'm very happy with with um how it turned out all right I'm going to stop rambling here if you're not already subscribed please consider subscribing a like or a comment also helps me as well so any of that would be appreciated and in the meantime I hope you're doing well staying healthy and thanks for watching bye