Shiloh: The First Day Overview & First Look | US Civil War Wargame | Board Game | Revolution Games
Transcript
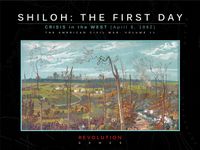
hi everybody I'm Zilla Blitz and welcome today we're going to take a deep dive first look at Shiloh the first day designed by Steve KY and published by Revolution games this game covers the pivotal first day of the American Civil War battle in Western Tennessee on April 6th 1862 as we take a look at all the Glorious components of Shiloh the first a which is now the volume 11 in Revolution games blind sword system covering critical battles of the Civil War uh it's this is the biggest game to date in the blind sword systems we've got five Maps uh three counter sets and the long campaign there are seven scenarios in the game the seventh scenario scenario is important note is the only one that uses both Maps so there is a ton of gameplay even if you never play that larger 7eventh scenario that covers the entire 12 hours of the April 6th confrontation now to set some historical context this was a confederate attack to try to wipe out Grant's Army of Tennessee the historical battle last in two days from April 6th to April 7th the designer has focused on the first day with this game so this game focuses exclusively on April 6 with the point being made that the union reinforcements at the end of the first day really made the second day more a matter of fact and if the Confederates were going to win this battle they needed to win it in the first day so the seven scenarios all focus on the first day we have five Maps three counter sets a lot to talk about let's jump in and get started first some context on how game play works so each turn in the game
is 30 minutes of historical time and the Seven campaigns we've got one of the campaigns that uses a very small map and only lasts 90 minutes and then the seventh scenario we'll talk more in detail of the scenarios as we go forward the seventh scenario lasts a full 12 hours of historical time 24 turns using both maps in this uh kind of sprawling chaotic uh classic Civil War battle gameplay length I'm going to estimate for that shorter initial scenario one that's almost like a tutorial scenario is probably about an hour in length and then the rules mentioned or the scenario booklet mentions that the scenario 7 the full 12-hour entire day of April 6th takes a substantial amount of time given the number of counters and the number of turns I would guess that's probably looking like a full day type of gaming experience and again we have a lot of scenarios that go in between that that are going to be more like 2 hours 3 hours 4 hours in length and we'll take a look at those in detail as we get in there unit scale is at the regiment scale there are some battalions in the game uh each strength point on a counter represents about 50 men and each artillery strength Point represents one gun let's highlight some of the key mechanics to kind of give an overview of gameplay with the the caveat again that this is volume 11 in the blind sword system so if you've played any of the first 10 games you're going to be largely familiar with the core rules and we'll need to add on just kind of some of the specific rules that capture the uniqueness of this battle one of the unique elements of this battle there are no Cavalry units in the game uh there
weren't very many present but there are some events that can happen that can represent some of the Cavalry actions that influence the battle over the course of the day now at the heart of the blind swword system too is its chit pull system which means that actions are going be back and forth as brigades get activated so it's a very Dynamic fluid experience where you're not going to be sitting around waiting for your opponent to play for waiting while your opponent plays for a long time you know that chit pull means that you could go on the very next poll a lot of things back and F back and forth and every game is going to play out more in a unique fashion um there are orders that you're going to be giving Once you pull a chit out we'll talk about the sequence of play later but at the Brigade level once your Brigade activates you're going to be giving it either an attack defend maneuver or regroup uh order line of sight plays a role and this is a very as we look at the maps later we'll see this is a very wooded campaign tons of forest and trees played a role in this battle so we'll take a look at at that but line of sight especially for artillery of course is a factor close combat modeled as well from a morale standpoint we have things like cohesion rally shaken units all reflecting the emotional nature of civil war combat units can also go to a battle warn State and the backside of the counters have that depleted State on them now in terms of Unique Mechanics in this game to represent the unique nature of this battle there are some us gunboats that played a role in the battle and they are modeled in the game there's also a looting mechanic the Confederate forces were slowed down in their initial surge during the surprise attack in the morning by when they started looting the union camps and
that's modeled in the game and there is an entire alertness uh method to kind of handle the surprise attack by the Confederates in the early start of the day and so that's modeled in the game with the unique mechanic that's unique to this game in the system as well lastly the length of the battle and the nature of the battle leads to a low ammo mechanic that's modeled here too let's take a look at our documentation we have three things to look at the blind swords core rules the exclusive rules for Shiloh and then the scenario book that has all of the seven scenarios in it the blind swords rule book here is 16 Pages it's black and white not a lot of Graphics it's fairly uh text heavy here but the explanations are are sharp and clean uh and again kind of going back to the idea that this is volume 11 of this series right now so a lot of the the the weaker points perhaps in the rules have been cleaned up along the way and this is an extremely mature rule set that has been tested over a number of games so it's nice when you know that the rule set has had this typee of maturity and this type of clarity brought into it and the writing is really clear and easy to learn uh the exclusive rules Now cover the Shiloh game here and these have all of the unique rules some of which we talked about things like looting things about how the game handles the Confederate surprise in the early morning of April 6th when they they caught the Union forces off go off guard um how some of the commanders work in here Johnston was the Confederate commander who was killed so there's some special kind of mechanics around how the game handles that we can see us gunboats down here this is in color uh with some
nice Graphics to enhance kind of the explanations and again a good bit of it overlaps with the core rules so kind of reinforces or strengthens or tweaks a little bit some of the core rules in the game there is an extra stage in this game that talks about wrecked units uh that adds a special uh point in the sequence of Play That's Unique to this battle as well so very clean very easy the graphics enhance that and now we can take a quick look here at our scenario book this highlights the seven scenarios that are in the book this 24 pages lots of information and one thing I think i' I'd like to point out with this too is that again only the seventh scenario the last scenario uses both Maps so this although you have the potential to play a big game there are six uh very well-developed scenarios ranging from this first scenario here that's that's small uh just covers one little map and with the smaller scenarios often have their own Maps as we'll take a look at those as we go forward then we get another short scenario 162 we are in for it now and then these go up into the medium 16.3 is medium and there are as we look at these three of these scenarios use a small unique map just to them three of them use one map and again only that last one uses all of the the the two maps put together to cover the entire day and we get down in here there is a nice scenario here covering the the scenarios tend to cover different points and the key points in the battle 16.5 here is the Hornet hornets nest where some of the bloodiest fighting of the
day happen and this scenario is dedicated uh just to a historical Recreation of that element of the battle then we have a uh scenario six here is a hypothetical mini scenario about Grant's last stand so that's gives a little bit of a deviation from history to kind of explore that and then 16.7 is the big one the the one that uses both Maps goes 24 turns so 12 full hours of gameplay in terms of complexity um I would give this a four out of 10 I think your core rules are very clear it's not extraordinarily hard things are nice and sharp and clean exclusive rules really don't add a ton of of chrome to this particular version so I don't think you'll have uh any trouble especially if you're familiar with the series in terms of letting the complexity of the game kind of uh get in the way of your enjoyment of the game in terms of soliter rating I give this as I did with the other game that we looked at Grand Havoc in the series I'd give this a 6 and A2 I think that there is no solo bot or any uh special rules made up particularly for soliter play but the chit poool system I think works really well with soliter play and there are a couple of scenarios scenario one and then I think it's Grant's last stand that talks about it's particularly well suited to soliter but I think this is a game if you're a soliter player with the chitole system there's no real hidden movement or hidden mechanics in the game this is going to play brilliantly as a soliter experience so again 6 and half out of 10 let's take a look at our counter sheets there are three of them in the game so 528 counters Al together
these are all 58 of an inch and printed uh very beautifully on both sides this is the battle worn state of the the second side of the counters and we can see the Confederate forces here on the front mostly we've got the units over here on the left side we can see artillery and and the Infantry here again no Cavalry units designated in the game they didn't play a major role and they're handled by some of the events that show up in the game then in on the right hand side we can see the leaders and then the leaders also have an Associated chit that is going to be in that chit pull bag so when you pull that leader out that's when that Leader's Brigade gets activated and you can activate the the regiments and the units that are in that Brigade then down here also we have some of the unique Confederate events this I think again adds a lot of flavor to these a lot of these uh most of the scenarios have one key event that you can designate and put into the bag for the particular turn and then there's usually some amount of random uh events that are going to get dropped in there as well which again really creates kind of a an unpredictable nature of it when you don't really know who's going to go when these events can trigger what some of those events are going to be kind of recreating a lot of that chaos and ambiguity that surrounded civil war combat down here we have those low uh ammo markers that we talked about let's slide over now and take a look at the uh the Union forces similar to the Confederate Force sheet we've got the Union forces over here on the left artillery and infantry then the uh Commander uh leader counters and the commander chits that you're going to be pulling out as well as Union events that sit in here over as well here are the US gunboats the Tyler and the Lexington that played a role in the battle and
they show up in some of the scenarios too again Union forces on second side here we can see the depleted status for those then if we come in here lots of markers uh so the union camps uh played a role in the game and some of the victory points for the Confederates are gaining control or in the Union forces are gaining control of those Union camps especially early in the day on April 6th the shaken markers here the special recck mechanic that shows up in this game and then fire and move markers over here uh lastly if we flip over we can see again uh this is kind of completely disrupted that kind of Greater status after shaking and then more fire and moved and Camp controlled markers over here really nice clean counter set they look really well printed and good nice registration on them so great job on those moving on to player AIDS this is the general time record track that we've got this is uh double-sided but the second side is just uh kind of artwork here as this will always be face up during the game Victory Point track here we'll talk about when we look at the map how Victory uh Victory is designated in the game uh broken units as they kind of move their way back to available and then the general time record track here with the starts and ends of all the different scenarios that go on as well as the Confederate Army surprise uh element if you're playing one of the scenarios that starts at 8:00 a.m. two identical combat results table one for each player this is the cohesion test how you survive on that terrain effects Mar map and then over here the combat results table that tells to what degree you need to to have a cohesion test and what kind of damage has been done as well as all the fire combat shifts and then close combat shifts and then weage range and Effectiveness so all of the
combat uh charts and mechanics that you need here are all on one nice sheet flipped over for the second side where you get the cohesion tests and again always nice to see one for each player so that you don't have to pass the thing back and forth we have two uh Brigade activation displays that help with organizing which uh brigades IND divisions have been activated throughout the day we can see here this is the Confederate one really nice look to have a clean look at the order of battle too this again is single-sided because they're always going to be facing up and here's the one for the union again showing the order of battle with leaders and be using able to use this to kind of keep track of the activation as the the scenarios unfold more player aads this i' call kind of the miscellaneous play a chart we've got some terrain effects charts down here stacking roles are explained artillery stacking General casualty uh and then this is the fog of war table for scenario 16.6 we'll explain more of that in a moment here backside is face up so you can keep this one face up and there are two of them one for each player so a lot of the miscellaneous tables here let me get to scenario reminders I really like this this is I can often times I think save a lot of rules diving so basically these are the reminders and and kind of particular rules that apply to a particular scenario kind of the Chrome elements that you'd want to kind of keep in mind as you're playing that scenario the things that can often be easily forgotten it's really nice to see these because I generally do forget or have to look up a lot of these little odd bits and ends that attach to each scenario so it's really nice to have them in one place have them all listed so when you're playing the scenario you can kind of look at them and have them all right in front of you and then lastly we have
the event descriptions and the fog of War execution here here so these are basically when these chits are pulled within a particular scenario and they list when they're used and when they're not used in scenarios this event triggers and you carry out the instructions here so again creating a lot of variety in gameplay and the timing of these can matter as well here we can see one that is actually the Cavalry one that we talked about where there aren't units for designated for Cavalry but Cavalry Cavalry is handed by handled by this event over here so look at the Confederate ones here and then on a separate uh play a we have all of the Union events and the clarifications and how to execute those and then if we flip these over we can see the fog of War tables and there's a specific fog of War almost for each of the scenarios so this one triples up for scenarios 162 163 and 164 fog of war table but there's a fog of War chit that can get pulled out and when you pull that out you make a die roll on this chart depending upon What scenario it is and for example if we're playing the 167 the grand scenario it says here roll 2d6 and add them together then we get this here for example if you get a seven possible leader casualty roll the two dice and roll the number from 11 to 66 and it gives uh instructions here here then consult the general leader table on the player aid for the results so again adding more variety unpredictability and depth to the game as these fog of War events can be anywhere from uh you know a very
minor impact on the battle to none at all or to something rather significant and it's great too that they have fog of war for each of the different scenarios I mean these cluster together but for the large part depending upon the scenario those fog of War events can be uh be different of course depending upon what time of day it was and all those kinds of other factors that are playing a role in here so you know I would almost look at this again as not so much one game but you've got really seven games baked into one larger module so a lot of depth apparent and a lot of thought and research put into making each one of the scenarios work really well and lastly we come to our Maps we have five map sheets in the game these are paper maps uh full color of course we have what we're looking at is the larger one on the left here and then on the right here underneath the top that are on the three are the two 22in x 34 in maps that buted together to form the 44x 34 in map for scenario 7 but again you only use the two maps together for scenario 7 you don't need that for the other six scenarios indeed uh three of the scenarios have their own dedicated smaller Maps so rather than making you take out one of the larger Maps or butt the two together to play a smaller scenario we have three small Maps here this is 8 1/2 by 11 this one here is 11 by 11 and then 15x 15 so a really nice touch to be able to play those smaller scenarios without having to to work around the larger map sizes now three of the scenarios as well so that those are for the three smaller ones the two together are for the seventh scenario
then three scenarios use one of the two 22x 34 in maps so again kind of beating the same drum here but it's not just the one large scenario there's a lot of gameplay in the other six scenarios too I'll show some close-ups for the map here so you can get a sense for the artwork involved I think these are really crisp and clean and clear and good-looking maps that are going to be very very functional especially looking at the differences in altitude they're really easy to pick out so I don't think you're going to have any challenges with that another thing to note here as we look at these there is a ton of forest in these maps I mean just Woods everywhere kind of highlighting the particular nature of this battle we can see over here too the Tennessee River that's playing a role in in some of the scenarios too additionally we talked about how the camp control can play a role in some of the scenarios and we can see here the the union camps that are involved with the combat hexus by the way are 13/16 big and then the counters again are 5/8 so I shouldn't be any trouble uh kind of moving things around I should mention as well stacking is 12 strength points uh or if it's one unit then that's greater than 12 strength strength points then you're limited to that one unit so not a very high stacking game which I think is going to make it again the system itself is designed to be fast to play and easy to play let's talk a little bit about Victory conditions they're generally dependent upon two things thing number one is controlling objectives on the battlefield and thing number two it's dependent upon casualties so you're really trying to balance both your losses inflicting losses and minimize
your own losses as well as executing the objectives for a particular scenario so relatively straightforward in terms of how you'll be determining victory at the end of a particular scenario and so there you have it a first look at Shiloh the first day designed by Steve krey and published by Revolution games Volume 11 in the blind sword system that they've been working on for a number of years now this looks like a fantastic addition to the series just in terms of the number of scenarios with the big seventh scenario that covers 24 turns and a full uh full days worth of civil war war combat as well as the other six scenarios and then when you look back in with like the fog of War elements and the event shits and stuff like that and the chit pull system I think these battles can play out very differently each time you play them so a lot of good depth and replayability this looks like just a brilliant addition to the series I can't wait to jump in and play it thanks so much for watching Everybody if you've enjoyed a first look overview of this one I can also point you to a first look overview video we did of volume 8 in the series which is a grand Havoc I'll put a link to that one here if you'd like to check it out thanks for watching everybody have a great day