Cascadia Rolling Rivers and Hills | How to Play | Learn to Play in 13 Minutes!
Games in This Video
1 game is featured in this video — it unlocks as you watch.
Transcript
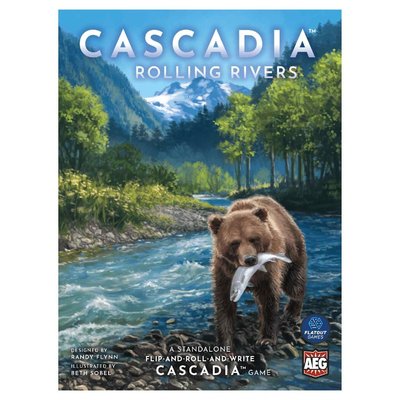
hello everybody my name is Ilia and my name is Tyler together we make up c a couple that loves to play board games and today we'll be teaching you Cascadia rolling rivers and Hills Cascadia rolling is designed by Randy Flynn the art is done by Beth Sable and it's published by flat out games who helped sponsor this video Let's head over to the table and learn how to play just to note these two games are a prototype and the final version may be subject to change as always you'll begin by setting up each player will receive two personal dice the dice are slightly different so make sure you have one with a bear and one with a split salmon Hawk as one of its faces each player will then receive a tally sheet a player Aid card and a writing utensil you'll now decide which environment you want to play each plays differently with a varying complexity which can be found listed on the top right of your sheet we'll use environment sheet B to teach the game but stay tuned for the end of the video for explanations of the other environment sheets now that each player is set up let's look at the Central Area you'll place four Central dice Within Reach of all players you'll then prepare the habitat cards by separating the decks into tier one and tier 2 piles you'll place all the cards face down and remove one of each of the five habitats from each deck this will leave you with 10 Tier 1 and 10 tier 2 cards you'll Shuffle the decks and place tier one on top of tier two this is your habitat deck for the game you'll flip one card to start this will form the first four card space that the habitat cards will
occupy as the game progresses finally you'll Shuffle and reveal four completion cards you'll place the cards left to right in the order you revealed them either below or above the four card spaces discount completion cards cards the blue background Will Go On Top while bonus completion cards Brown background will go on the bottom if it's your first time playing we recommend that you use the cards numbered 1 to 4 as denoted in the bottom right you're now ready to play Cascadia rolling rivers or Hills is played over exactly 20 rounds each round dice will be rolled Wildlife collected and habitats completed filling your environment sheet at the end of the game the player with the most points wins now before we start we'll know that there's five different habitat types and Wildlife types as you've noted from setup you'll see the same amount of habitats however there's a hierarchy of Rarity and value for the Wildlife with bears being the most valuable and rare while salmon being the least valuable and most common now let's give you an overview of a round each round has three steps which all players will take simultaneously let's start with roll dice each round one player will roll the four Central Dice and all players will roll their two personal dice in their own play area that's the first step the second step is collect Wildlife based on what was rolled in the center and your own playing area you'll collect Wildlife now you'll primarily collect one Wildlife type but the central special die and dice actions provide you
opportunity to take more animals or multiple animal types in a single round the first step here is to reference the central special die it has six unique faces let's quickly go through them two are just Wildlife a choice of a bear or two salmon or a hawk or an elk one is a wild animal which represents one animal of a wildlife type of your choice this one let you use your one personal die twice so when choosing a wildlife type if taking one of your personal D you'll be able to take it twice this one is called plus one other after selecting which Wildlife type you'll collect you'll select one other die that was not part of that collection and take the wildlife on it last but not least this die will reduce dice actions by one nature token this does mean that the down convert which usually costs one can be taken for free the Rolling Hill special die will have an additional two faces one that lets you take any three Dice and one that lets you roll your personal dice up to two times these are all the die faces and the great segue into the next part of the step take dice action now this step is optional but it may help you out in your Wildlife collection there are three dice actions you can take but you may only choose to take one action per round these utilize the nature tokens you have to help maximize the value of your Wildlife collection down convert you can pay one nature token to convert all faces of one Wildlife type to the wildlife below it up convert you can pay two nature tokens to convert all faces of one Wildlife
type to the wild type above it two types you can pay three nature tokens to take two Wildlife types rather than taking a single one an important note here these dice actions can only be taken for the Wildlife you take from the dice you cannot convert your existing Wildlife on your tally sheet lastly you'll record the collected animals on your tally sheet let's go through an example the special die here allows me to take one of my personal dice twice I'll choose to take take foxes and I'll use the nature token to downconvert the elk into foxes meaning I'm taking five foxes this turn and that's step two finally the third step which is optional complete a habitat card if you have enough Wildlife you may complete one of the habitat cards in the middle in the first round only one habitat cart will be available for completion however as the game continues you usually have an option of four let's fast forward a few rounds to give you a better idea of this phase to complete a habitat card you'll go through these five steps number one apply discounts if the habitat you're completing has a discount completion card above you may choose to apply the discount on this card for example you can pay a nature token to reduce the cost of the habitat by any one Wildlife number two pay costs you'll cross off the required animals for the habitat type off your tally sheet number three take the habitat and completion card bonuses you'll check if the habit habitat grants you any nature tokens or
if there's a completion card bonus below you may take these bonuses in any order number four Mark environment sheet here's where the game differs depending on environment sheet you're playing you completed a forest habitat here on your sheet you will outline the hexagon starting left or right equal to the value of the habitat which is three you'll then proceed to the final step number five taking environment sheet bonuses we surrounded an elk which we will add to the tally sheet two victory points which we'll Circle to remember and finally a rain icon since we've obtained a rain icon we'll proceed to the matching icon below and choose a bonus that has not yet been taken from that section bonuses here can be Wildlife nature tokens victory points or even a free habitat space crossed off anywhere on your map now if you ever end up filling one row completely and the additional habitats of that type or any type you've completed will go into the Overflow section which will score your additional points and Grant you bonuses generally the more habitats you fill in the more points you'll obtain and of course you'll want to strategize on which to fill out as bonuses you obtain can help you further progress your game earning you the most victory points now you may choose not to complete a habitat card as this is an optional action and save your Wildlife for a future round once all players have completed the three steps the round will end at this point you'll slide all the habitat cards to the right and flip over a new habitat card from the draw pile if there are more than four cards face up you'll take
one on the furthest right and discard it the game ends when there's no more habitat cards in your draw pile at Round end this means that once the last C is flipped this round will be the last one played after finishing the last round you'll proceed to final scoring you'll first tally the farthest value of each habitat you've reached you'll then proceed to tally any bonus points on your sheet these are the bonus points between your habitats and sun and Rain bonuses finally you'll receive a point for every five leftover combination of wildlife or nature tokens you'll compare your scores and the player with the most wins now let's give you a quick rundown of all the other player sheets environment sheet a here you'll write down the number of the corresponding habitat you've completed from top to bottom each time you reach a bonus by filling out either a row or every two of each habitat type you'll Circle the victory points and select a sun bonus below your final score will be the tally of the values in each row along with any bonus victory points this sheet in Rolling Hills and rivers is essentially the same with the exception of the Thematic text described the Columbia River and rolling rivers and the zomalt Prairie and Rolling Hills the theme differentiation will be present in each of the sheets environment sheet B you've seen here it works slightly differently in Rolling Hills as instead of the Sun and Rain bonuses you'll collect landmarks which can score your additional points for each row or column you complete along with Wildlife types and additional habitat bonuses you'll
always cross these off in order following the arrows environment sheet C here you'll outline the hexagons equal to the number and type from the habitat card you've completed you'll start adjacent to hexagon already outlined on your sheet which in the beginning is the star spaces outline hexagons will score you points at the end of the game and Grant you bonuses which you can use immediately you'll collect sun and Rain bonuses as before Crossing off your choice of the bonus in each column making sure to follow the arrows when Crossing off each icon you'll also obtain landmarks and gather bonuses for those as well each habitat type you completely fill out will earn you an additional four points and if you complete additional habitat spaces of that type you'll fill in the Overflow section the difference between Hills and rivers here is a layout of the map and some of the bonuses finally environment sheet D we'll speak about these two separately en rolling Rivers the sheet is played the most similarly to cascad at the board game when filling out the habitat you'll not only fill in the number for the type but you'll use the wildlife spent here within these hexagons you can only use the quantity of animals on the habitat sheet but in any combination of your choice for example in this mountain habitat I can write in two hexagons I can use the wildlife spent meaning I can take two Hawks one Hawk and an elk one salmon and an elk ET ET I'll choose to take two elk now each animal scores differently and
this will be the primary way of scoring in this environment sheet for example you'll score three points per pair of adjacent Bears you'll gain bonuses for filling in adjacent hexagons or surrounding an area with three additionally each habitat you'll complete will grant you three bonus points and if in the habitat all five Wildlife types are present you'll earn an additional three points as a wildlife diversity bonus and there's also an overflow area area here granting you additional points and habitats for you to fill in now for Rolling Hills you'll fill in the habitat spaces as you did in Rolling Rivers marking each space with a wildlife type from the habitat card but here you'll work to complete as many of the 15 regions as you can each region you complete will grant you points and a bonus if all the animals are identical in the region you'll also gain the same Wildlife bonus you'll score points for wildlife diversity and each habit types and lab marks as before and that's the environment sheets now there's also solo mode and scenarios and achievements as seen in other Flatout games many different ways to play and goals to achieve finally the last thing we'll mention is mixing versions there's a significant amount of variation here for instance you can use either of the central dice sets when playing you can also combine and mix all the habitat cards from both versions in Tier 1 and tier 2 decks when setting up you'll simply Shuffle and choose two from from each habitat type for each deck to make your deck of 20 you can also mix up the completion cards for even more variety
combine them and Shuffle and deal four for each game and last but not least you now have eight sets of personal dice which means you can play with up to eight players using both copies and technically even more with even more copies and that's Cascadia rolling do you have any questions feel free to leave them in the comments down below we love rolling race and we love to chat more Cascadia roll rivers and hills with you and of course if you'd like to learn more about these games check out our description down below for some links where you can learn more so much learning now if you enjoy this video give us a thumbs up hit that subscribe button and check out our channel for more roll and right content cuz we sure love them until then we'll see you later bye