Dinosaur Island: Rawr 'n Write - How to Play Board Game
Games in This Video
1 game is featured in this video — it unlocks as you watch.
Transcript
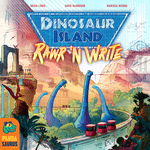
Hi, it's Taran and Stella from Maple University. Today we'll be teaching you how to play Dinosaur Island Roar and Right. Coming up, let's learn to play Dinosaur Island Roar and Wright. Game designed by Brian Lewis, David McGregor, and Marissa Msura, and published by Pandasaurus Games. If you find value from this video later, please hit the like button, subscribe to us, hit the bell, and leave your feedback in the comments for others to find. For now, let's get to the table. From the creators of Dinosaur Island and Dinosaur World comes the newest way to make a dinosaur theme park, the Dinosaur Island Roar and Write. Over six rounds of play, players will draft dice to add facilities to the park as well as earn money for buildings and specialists and DNA for creating dinosaurs and then do worker placement with those dice to gain more resources or create their dinosaurs.
Three times during the game, players will run their parks, gaining benefits from their facilities and specialists, running tours around their parks, and gaining benefit for their excitement. But players also need to be wary of the growing threat of having multiple dinosaurs in their park. And if their security can't keep up with the threat, then they'll suffer deaths and disasters on their visitors. The player who scores the most points across six rounds and three runs of the park will win the game. To set up, each player takes one page of each of the two types in the game. Write your park name in the top left corner. Place the main board between all players using this side in a fourplayer game. Put the round marker on round one. Separately shuffle the building and specialist cards and then deal out three of each type into these slots. For a beginner's game, leave out any which show this expert icon next to the name. These are the buildings and specialists which all players will be able to construct or hire during the game. Now, set up the costs of each of these cards on the players sheets. Here, for example, building A, the Teryaki Grill, costs eight coins. And so in the building A slot of each player's park board, cross out two of these 10 coins to leave eight remaining, the price of the building. Do this across all three buildings and all three specialists.
Place the 10 dice into the cloth bag. Finally, give each player their starting DNA. All players get one yellow, one red, and one blue. The first player chosen randomly gets the first player token. The second player gets a teal. The third player gets a teal and a purple. And the fourth player gets a teal, a purple, and an orange. You're now ready to play. The dinosaur island roaring right is played in three seasons. Each season is played in two normal rounds and ends with running your parks. Each of the normal rounds will be played in two phases. Firstly, there will be a dice draft. Each player will end up with two dice and will gain the resources from those dice and the one left over which no one took. Then there will be a worker placement phase where players will get to place their dice onto these action spaces and take the actions or resources shown there.
Once all players have taken their two placement actions, you'll move on to the next round. So now let's look at each step and each resource in detail. To set up the dice draft, randomly draw dice from the bag and then roll them equal to twice the number of players in the game plus one. Then starting from the player with the first player token and going in a snake draft order, players will draft these dice into their collection. So here the first player would take one dice, then the second player, then the third, then the third player again, then the second, then the first, leaving one die left over. All players now gain the resources showing on both of their dice and the resources and threat represented by these red dots in the corner showing on the leftover die. DNA is the simplest resource to gain, and this is what you'll spend to create dinosaurs in the game. When you gain DNA, simply circle one of the boxes in that DNA's row.
Here, this player gains one yellow, one blue, and two purple, like so. Threat represents how dangerous your park is. And you'll usually get this when you clone the more dangerous dinosaurs, as well as getting the threat from the leftover dye. For each threat that you gain, place a dot in one of these spaces on the threat and security track. Threat is counteracted by hiring security represented by the padlock. And when you gain a padlock, you represent this by circling a box in your threat and security track. A circled threat is counteracted and poses no threat to your visitors. While an uncircled threat dot could result in one of your visitors being eaten when you run your park. A die like this is an either or option. So here the player could take another security which would provide protection against a future threat or could gain the teal DNA.
In the game buildings are represented by hexagonal icons and there are three buildings that you can gain from the dice. These all fall under the category of attractions, and these are the merch stand, the ride, or the food store. When you gain one of these buildings, place a tick in one of the open circles of that type of track. Once these are all full, you can't gain another. Then draw that pattern of building. In this case, it's an L shape like so. somewhere in your park. Following the building placement rules, buildings can be placed anywhere in your park without needing to be connected by roads, which we'll speak about shortly. And the shape can be flipped or rotated in any orientation.
The main restriction is that buildings cannot touch either on a corner or on a flat edge. And your HQ preprinted on the map counts as a building. Each of the attraction buildings shows a benefit in this box. And this is not gained immediately. It's gained when you run your park. And anything you gain when you run your park is indicated by this right arrow icon. If these were the three dice that the player ended up with for this round, the full turn could be completed like this. This resource represents a road, and roads are how you can connect buildings and attractions together in your park. This can allow you to do dino tours which will gain you extra excitement and to connect up paths to these points scoring exits around your map. When you gain a road, you have two options.
Firstly, you can draw a road which consists of two lines in a one by one square anywhere on your grid. Roads may be straight or corners. They can connect between two, one, or even zero buildings, and they can join to others to make longer roads. But you're never allowed to tee off from or cross other roads. Your other option, if you haven't decided where you want to put the road yet, is to place it into one of your five stored road boxes down here at the bottom of your sheet. Once you've done this, you can come back later at any point and cross this out to place a road as described before. Once you've stored five roads in the game, you can't store anymore, and any subsequent roads you gain must be placed immediately.
The last resource type is coins. Coins are primarily used for constructing the special buildings or hiring specialists. And when you gain a coin, the most common thing to do with it is to cross out any one coin in a building or specialist row. Once you've completed the last coin for a specialist or building, tick it off to indicate that you've completed it. Immediately and once off, gain any benefit printed next to the lightning bolt. So here it would be to security. And then for the specialists, anything printed next to the arrow will occur during the run park phase. The same thing goes for specialists A, B, and C. When you complete one of these, tick it off and then gain the immediate benefits showing on the corresponding card here. It's a security. When you complete the cost of one of the three buildings, then again, tick that off, gain any immediate benefit shown on that building, and then add that building shape into your park in the usual way, following all the normal rules, unless that building has its own special placement rules. These buildings have no ongoing effects, but will have an end ofame scoring bonus shown here.
Your second option when you gain a coin is to store it like you do with the road. Circle one of the storage boxes in the coin track. At any later stage, you can cross that out to spend the coin elsewhere. And once you've stored coins five times, you cannot do so again. Your last option for coins is to spend two coins to gain one of the other resources shown here at the bottom of the main board. an advanced DNA that is orange, purple or teal, a road or a security. You must gain and spend two coins in the same phase in order to do this. So, for example, from a two coin die, two one coin dice or a one coin die and spending one from your storage. Then immediately mark off whichever one of these bonuses you pick.
That's everything that you can gain off dice. But there is one other resource you can gain in this phase which is excitement represented by the green triangle here. For example, you would gain three excitement. As you gain excitement, circle the corresponding number of boxes from left to right, top to bottom on your excitement track. As you do this, you'll circle some resources which you'll gain during the run park phase. You do not gain these immediately. Once everyone's gained resources from their dice and the leftover dye, it's time for the dice placement phase. This phase occurs starting from the first player and going clockwise twice around the table until all players have placed both dice. This is different from the snake draft order of the first phase.
When you place a die, you can freely place on either an empty space or on top of a die that's already been placed to do the associated action. However, when you place on top of a die or a stack of dice, you must gain the threat which is showing on the top dice in that stack. So, here the player would gain one threat. Four of these actions are variations on things we've already seen. This action lets you gain two coins or two security. And this action lets you gain two basic DNA, that is red, blue or yellow, or one advanced DNA, teal, purple or orange. This action lets you build three roads or one attraction, a merch, food, or ride. This action lets you regain the resources that you've already taken on your die. The player who places this gains double what's shown on the die. So here, four security, while all other players gain one time what's on the die.
Each selection is independent on a die like this. So the player placing could get for example two purple or one purple and two blue. However, as a restriction, players are not allowed to gain attractions by taking this action. So this die could not be placed. And this one could only be used for the orange DNA. The final action is make up to four dinosaurs. And a player who places here can start spending DNA to produce dinosaurs up to four times. Dinosaurs are represented by the circle icon, and there are three types: herbivores, small carnivores, and large carnivores. The steps to make a dinosaur are shown in the top left corner of your park board. First, choose a dinosaur you can afford and then tick off one of the four circles on that dinosaur.
Then, cross out DNA corresponding to its cost. So, here, a yellow and a teal. Next, if this is your first dinosaur of that type, you must construct a paddock for that dinosaur, which is represented by the corresponding hexagon. These are buildings and follow all the normal building rules. So, here you would need to build a 3x3 grid building legally into your park, marking it with the initial of the dinosaur that you've just placed. You only need one paddock to hold four dinosaurs of the same type. Next, if this dinosaur comes with any threat, mark off the corresponding number of boxes in the threat track. And finally, the dinosaur will generate excitement, and you circle the corresponding number of boxes on your excitement track. The last number representing victory points is gained at the end of the game. Continue gaining dinosaurs in the same way until you've made four or you no longer wish to make anymore.
Once all players have taken two actions in this phase, put all the dice back into the cloth bag and then advance to the next round. Give the first player marker to the next player clockwise. After every second round of actions, you'll run your park. And to do this, you'll go through the five steps from top to bottom, left to right on this side of your sheet. First, you'll do attractions, gaining the benefits for each of the attractions that you've constructed in whichever order you wish. For each merch stand, draw a random die from the bag and then roll it, gaining whatever is shown on that die. You gain only the resources, not the threat. For each ride, you gain one excitement, and for each food, you gain two coins. As a result of these, it's possible to trigger some of the effects we've already seen here. For example, I've just completed a specialist, and so I would gain its immediate bonus as usual.
If resolving an attraction gains you another attraction, you'll resolve that as well. Next, resolve the run park effects of each of the specialists that you've hired, both on your board and on the main board. Again, resolving them in whichever order you wish. Here you would gain a security, two roads, one excitement per merch stand, and some extra security based on a die roll. If one of these benefits grants you another specialist, you gain that specialist's immediate and run park effects as well. Now, it's time to run a dino tour. And you'll do this in order to gain excitement and the victory points showing on these park gate icons.
A legal dino tour starts at your HQ and then follows roads and buildings, finishing anywhere in your park or at an exit. You cannot double back or enter the same building twice. So, a tour that left HQ towards the Velociraptors would have to end there. A tour can get to a park gate either by a road or by being directly adjacent to a building. So, these three gates are all currently reachable. Plan out your route and then put a cross in the corner of each new building that you've never previously gone to on a tour and circle the park gate if it hasn't previously been circled. And you end your tour there. You've now unlocked these points for the end of the game and you gain one excitement on the excitement track for each new X that you've placed on that tour. You may only do one tour per round. But on the subsequent round, you would be able to run a tour from HQ through this previously visited food store, then to this ride, this pen, and this special building. Finishing here, adding three new X's for a total of three new excitement.
After resolving your tour, gain all the benefits which have been circled up to this point of the game on your excitement track. Here it's two security, two basic and one advanced DNA, and three coins distributed however you wish. Completing a specialist in this phase grants you the immediate benefit but does not grant you the run park bonus as we've already passed that phase of this round. The last phase is death toll. If your security exceeds or meets your threat, then nothing happens. But if your threat exceeds your security, then cross off one box on this track for each excess threat.
Each of these is worth negative one points, and each exclamation mark you cross off requires you to suffer a disaster. There are five different disasters in the game, and you're not allowed to suffer any of them more than twice. So, mark off one of these boxes when you choose to suffer it. The five disaster options are lose any four of your currently stored DNA, lose any one previously hired specialist, you'll no longer be able to use their bonus effect or their endgame points, but you keep anything you've gained so far. destroy any one attraction, scribbling it out on your map, as well as crossing the tick out on your attractions board to make sure you don't gain its benefit again.
Destroying a dinosaur paddic, scribbling it out on your map area and crossing out any ticks that you already have on that type of dinosaur, but keeping any excitement or threat that that dinosaur had already given or destroying any three roads. either scribbling them out on your map or crossing them out from your storage area. Any buildings or roads that you've scribbled out are now known as destroyed areas. You can never build on a destroyed area, but you can build adjacent to one. If you've lost a dinosaur paddic, you can gain that type of dinosaur again, but treat your next dinosaur of that type as the first one and build a new paddic. But you're limited to four boxes in each dinosaur and on each attraction and any that have been destroyed count towards that four.
Dino tours can never take a path through a destroyed area. And bear in mind that although you may have unlocked points for gate scoring, you lose those points if you don't have a valid dino tour route to that gate at the end of the game. So destroying areas on a route would lose you these points. As such, there are some disasters which can have a really devastating effect on a player's score. But there are also some which have a relatively modest effect. And this is part of balancing out the game. Players trying to work out whether the points they're gaining for their threat outstripping their security outweigh the points they're losing for selective disasters. Before we cover final scoring, there's a few other special rules which won't come up that often, but which can feed into your plans. Each DNA type has a maximum of 15 that can be gained or stored during the game. If you ever fill up this track, you can't gain anymore, and each subsequent DNA of that type grants you one coin.
The excitement and death toll tracks max out at 60 and 20, respectively. For each subsequent one you gain, keep a running tally nearby, and then at the end of the game, put the total amount into this box. These will translate directly into positive or negative points at the end of the game. There are some buildings in the game which specifically are required to be placed adjacent to another building. Here, for example, the goat pen goes next to a large carnival pen like so. This can only go adjacent to that single pen. It must follow all other building rules related to all other buildings. If you complete a building but have no place to fit it on your map, then you simply gain the immediate benefit of that building, but don't place it. You will not gain the points for an unplaced building at the end of the game. After the parks have been run for the third and final time, the game is over and proceed to final scoring.
Score points for any dinosaurs who were not lost in disasters. Two points per herbivore. three per small carnivore and five per large carnivore. Here there is four remaining herbivores for eight points, three small carnivores for nine points, and six large carnivores for 30 points. Each specialist you've hired and have not lost from a disaster is worth three points. So here there are two remaining specialists for six. Each of the special buildings you've constructed and still have on your map scores according to its card. So here, for example, the deluxe breakroom scores three points for each attraction connected to it by a legal tour route, which is five for 15 points. Carnivore coliseum scores two points for each of your large carnivores. So here, 12 points. And the terasaur aviary is simply worth 12 points. here giving a total of 39 park exits that you've circled during dino tours and that still have a legal tour path to your HQ are worth their printed points. So these two are worth 11 while this 10point gate is no longer connected. Score points based on your highest filled row on your excitement track. So here 10 points. Each excitement above 60 will score you one
point. Leftover DNA is worth one point per two. So I have seven leftover DNA for a total of three points. Finally, lose one point for each death in your park and lose two points for each death above 20. Add up all your points and the player with the highest score wins. If tied, the player who has the highest total number of dinosaurs in their path breaks the tie, and if still tied, victory is shared. The game also comes with a solo mode, which utilizes the 10 card AI deck. In setup, draw five cards on the objective side and then choose three of them to use as your objectives. Shuffle the rest back into the deck.
Each round, you'll roll and place six dice in order and then draw one card on the AI side. This tells you which dice the AI will take and where they'll be placed to make your worker placement harder. In this case, die number three goes on raise funds and die number six goes on duplicate. None of these actions are resolved. They simply add a threat cost for you. Next, you get to draft three of the dice out of these four, gaining the resources on those dice, and then the threat on the fourth one. Return the leftover die and one of your drafted dice. And then take your two actions as usual. In addition to normal scoring, add the points for any objectives you've completed and compare your final score against this table in the back of the rule book.
And that's how to play Dinosaur Island Roar and Wright. We hope you enjoyed this video. If you enjoy this video, please help us by hitting that like button. Subscribe to us. You can also hit the mele in the corner to do that and hit the bell icon so you'll be one of the first to know when we have new and exciting videos. You can also follow me on Instagram for my board games genie. And if you have any questions, comments, or feedback, please leave them in the comment section below. See you next time.