A Most Fearful Sacrifice | Wargame First Loook | US Civil War Gettysburg | Board Game | Flying Pig
Games in This Video
1 game is featured in this video — it unlocks as you watch.
Transcript
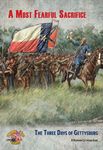
hi everybody I'm Zola Blitz and welcome today we're going to do an unboxing of a most fearful sacrifice the three days of Gettysburg designed by Herman lootman and published by flying pig games now this game comes in a massive box with which perhaps I will say is the mother of all wargaming maps there's a lot to look at inside tons of counters there are 13 scenarios four of which use both of the Magnificent Maps Innovative gameplay based off a well-established system cards to drive play Let's Open this one up take a look at what's inside and offer some Impressions I love the cover artwork I mean it feels like Gettysburg it's really sets the mood for this I think epic game that we'll be looking at now I'm going to turn this sideways because this is a rather creatively sized box now before we jump in I want to mention that this is a first edition of the game and as we go through this I'll highlight the differences that I know of that are different between the first edition and the second edition and I'll talk a little bit about how to rectify those issues they're not major but and there's ways to kind of sort them all out too so we'll talk a little bit about that as we unbox this first edition game because the first edition is sold out second edition is in production and I think there's a Kickstarter starter for it now and speaking of kickstarters I want to kind of quickly go through the kickstarter editions because I think those are available for the second edition too and I think a couple of them are worth mentioning here one of them is you get Union and Confederate dice three dice for each side and you'll notice that the numbers have different colors so in the system when you're rolling dice you're not always just adding them up sometimes what you're doing is reading black red
and white and you can see the numbers are different here for both sides and then the ones Union flag and the one is the Confederate side so kind of a neat little touch these are not my favorite of the kickstarters I'm going to talk about my favorite two things from the kickstarters but the dice are a nice addition for sure and there are some dice in the game as well now another thing that you get is this handy dandy mouse pad I actually need a new mouse pad so I'm going to put this one to use right away map of Gettysburg with a couple of counters on it it's nice good kind of I mean it's a mouse pad right so it feels like it's going to work fine and I'm excited to put that to use that one's not my favorite yet either though we also get some card sleeves I assume there's enough of them for the cards in the game but I haven't really done the math on that yet but this is a card the cards play a big role in how this game plays out and we'll take a look about that as we get into the game a little bit more but those are the card sleeves for them my second favorite Kickstarter Edition are these map borders so you get four of them and there are two Confederate ones uh artillery and then rifles here and four altogether so the game has 13 scenarios in it and nine of them use a single map for them use both maps and the big map we'll take a look at the maps later but they're big but some of those smaller scenarios that only use one map only use a very small portion of the map these are map borders for those scenarios and I feel like that's actually going to be really helpful these are kind of the same consistency and fabric and material as them excuse me as the mouse pad so I feel like they're going to work really well and then you have to worry about where the the limits to that particular battle are so kind of a neat little
Kickstarter addition there this is my favorite Kickstarter Edition though because I like Kickstarter editions that add gameplay features so this is a set of cards activation cards core activation cards for Stonewall Jackson and this asks the hypothetical question what if Stonewall Jackson didn't die at Chancellorsville how would he have impacted the Battle of Gettysburg so cut just a few cards but they add a whole another angle of depth to the game which is really nice I really like Kickstarter elements that add gameplay additions to play now that's the Kickstart editions let's get into the current edition of the game here and take a look at it I'm going to flip this over and show the back side first here first up two player game but in parentheses it says four can play the larger scenarios so three or four I'm sure you could do and some of these larger scenarios the double map scenarios are Big Lots of counters and they can be long as we see here playing time rather either humorously says one hour which I'm sure are those the smaller you know first two or three scenarios to three days for the three days of Gettysburg and game scale is each turn is one hour so a three day game you can kind of do the math I'm not sure if the Knight turns are accelerated they very well might be but still you know that's a lot of turns a lot of gameplay so um you know this has got I would say it's got a monster Edge to it at that larger scale but I think the thing I really like about it is looking at those the nine single map scenarios there is a ton of gameplay without ever feeling like you need to get to those three day ends of the scale there so tons of stuff
in here I wouldn't say oh I can't play the full battle there's nothing for me in this that's definitely not a fair assessment of this game now a couple of other scale things that I'll point out each hex in the game is 200 yards each strength point on a unit is about 100 men so that gives us roughly 100 to a thousand men per counter there might be a couple larger certainly aren't any smaller than 100 but you you get the idea and we'll talk about that as we look at the counters then as well I mentioned each turn is an hour and then the counters themselves are either batteries or regimental levels so kind of that small operational High tactical level type of game that we're looking at so with that being said I'll mention complexity and I'll mention uh what I think is the Solitaire rating for this as we take a look at the gameplay elements in some of the cards inside because I want to comment on both of those things I think they'd be very helpful for people that might be thinking about picking this up and I have a lot of things to kind of say about that after looking at the components and reading the rules and things like that so let's get this creatively opened here now all right so here we go now first up um this is I think this is fantastic this is uh dedication this game is dedicated to Rick Barber now I think many people are familiar with who Rick Barber is but he is the creator of the maps in this game he passed away in 2021 and is widely regarded as one of the most brilliant map creators in wargaming and this game is dedicated to his memory so at I think an absolutely fitting tribute to as we shall see when we look at these Maps an absolute brilliant Master at his craft so a tribute there
to Rick Barber in very uh very elegantly and nicely added to the game here let's take a look now at the rule book and then the scenario book and we'll start going through the components so lots of things to say about this I'm excited to dig in and to show this to you first up the rule book it is 32 pages and yes so uh boom boom Pub boom Pub battles who has his own YouTube channel commented one of the other other videos about when I showed an index on the back of the back of the rule book he said what a great idea to have the index on the back of the rule book and I thought about that and I said yes what a great idea to have the index on the back of the rule book so take note so the index is on the back of the rule book it's a perfect place for it 32 pages and we'll to kind of give a scope of how many of these are actually rules we have some designers notes on the last page and then a Brantley exact kind of graphically Illustrated gameplay example that goes all the way back to page 25 so we're talking about two dozen pages of rules but you know the cover and then the table of contents with some background information here you know kind of really Whittle that down to say 22 22 full pages of rules now the text is you know moderately sized to kind of I won't say small but it's you know they're they're pretty text Heavy Pages here and pretty some dancing although it's got two columns and I just absolutely love the way the text has been graphically laid out so just the way it Cascades down to some of the smaller rule elements here you've got the letter the number and then it breaks down to the examples it's so easy to visually parse this rulebook the way the boxes are colored to kind of highlight key information and breaks in the rules and important notes and things like that
important important note it's just so easy to kind of make your eyes work through this and find the information that you want the column titles the the titles here are bolded in just the way they stand out nicely brilliantly laid out and and actually that stuff matters right it just makes it so easy to parse these rules now having said that there are a good amount of rules and there is a good amount to text also a close-up on a couple of pages here and things like that there are some graphics to help Landry I've read through them about 45 minutes now and you know my initial Judgment of the rules are very thorough and very clear now there's definitely you know the expansive rules for a game I would rather have expansive thorough and clear rules than a narrower rule set that looks relatively straightforward and then when you get into gameplay you realize it doesn't cover a lot of the edge cases so I I really like the way this is written I found it's very simple to understand the paragraphs and I like the the articulation here now I also want to mention one of the differences between the first edition and the second edition is the rules so if you have the first edition rule set I don't think there are significant differences but there are some so if you have the first edition rulebook and you want the second edition rulebook there are two two ways to do it you can either go to their website the flying pigs games website and you can download a PDF of the PDF of the rules and print it out I've done that my printer is a little bit off so that's why it looks a little bit goofy so I definitely will use those to play the game I just want to show these because these are visually more representative what you'll get if you get the game now there is also going to
be I think a set of player AIDS in the second edition rule book which constitute the items that are changed between the first edition and the second edition available for sale on the flying pigs website at some point in time with a rather relatively limited order set so if you want that you want to keep an eye on their website it's not up there yet as the middle of February but I assume it would be some coming sometime soon so if that's important to you you want if that's the route you want to go and we'll talk a little bit about the player AIDS when we get there too that's something to be aware of now there's one thing in the rulebook too before we jump on that I want to call attention to that we're going to talk about when we get to the cards because I think that that's the best play place to do it I want to highlight one of the mechanics in this game that I think really distinguishes the gameplay and distinguishes the system and is good to know about before you buy the game because I think it's going to influence kind of the complexity of the game and I think it's going to also influence in a very positive way the ability to play this game solo so there's a Command Decision phase and then there's a card draw phase and they both influence how cards are used in the deck of cards are used to manage gameplay and I think this is one of the Unique Mechanics of this game that you're going to want to know about before you buy the game and I think it's a really exciting mechanic I am very excited to play it and we'll talk about that in the game system when we get to the card deck but I wanted to mention it there I do think at this time you know having looked at the rule book and how many rules there are and what's here and what's going to say there I am going to say this is like a 5 out of 10 on the scale of complexity I think it's a very manageable game and I wouldn't let the
complexity or the size scare you off I think this is a very very manageable game and I'm very encouraged I mean you don't know it until you bring it to the table right and we're doing an unboxing but as of where I am right now I'm very encouraged by the clarity of the rules by the thoroughness of the rules by the scope of the rules and I feel like a five is a very good way to do it I think it'll be a very enjoyable learning experience too I've enjoyed reading the rule book so far so very positive things to say about that so far now let's jump in and take a look at the scenario book not too much to say about this other than to kind of show some ideas on what are here and here we see you know scenario one the slaughter pen this uses just down here you can see just this little colored section of one of the maps and then it is I think it's how many turns is it here five o'clock it says it lasts only three game turns starting at four pm and ending 6 p.m so this gives you an idea of you know a small game scale this one here is sex scenario two is only four game turns getting perhaps a little bit bigger a little bit bigger section of the map pretty close to Gettysburg there as we go through we can see scenario three which again is four turn four game turns long a few more units and things like that taking up a little more page but you've got a number of scenarios here that kind of are manageable in a very small amount of game time and yet I think you're going to offer some pretty fun and unique gameplay here then scenario four uh covers the entire first day of the battle and has three possible lengths medium large and a full day so even within scenario four you've got three options there to play it in different ways 9 A.M to 3 P.M 9 A.M to 6
p.m and 9 A.M to 8 P.M so you can keep going and this one this is where they start to get a little bit bigger and this one uses a full entire map so we kind of we won't go through all of these but just want to give an idea here's another smaller one it's only fake four game turns long so a lot of these scenarios are very manageable in a small amount of time smaller amount of units in a kind of exploring different days in the battle and different portions of the battle from different angles so I think this is a kind of thing that you know these smaller scenarios allow you really to play different parts and kind of significant moments in the battle and yet if you want to go big you can start to go big when we get later on in the bigger scenarios here as we'll start to take a look for them here so that scenario seven here's scenario eight like hailstones upon the rooftops this scenario covers the situation around Cemetery Hill and culps Hill in the late afternoon of July 2. so kind of in a bigger battle here this one goes on for up four game turns from 6 p.m to 9 p.m but there's a good number of units in here too this is called a media and actually by each way by kind of comparison each scenario is listed as a size so this one is called medium and it tells you right up front and it's listed that way because of the great number of units involved not because of the gameplay length and here we go we start to get these the enemies here scenario nine that's our full one right there and this one here is the enemy it covers the key fighting on the second day of the battle so it starts to get really exciting we see these big ones and we'll take a look at the map in a while too because that's I think going to be the highlight scenario 10 is a small scenario that creates one of the most
iconic and Infamous charges in military's history pickets charge three game turns 1 pm to 3 P.M scenario 11 one continuous Roar and then we get to scenario 13 is that it here or did we pass it there scenario 13. oh this is a more open Grand battle this is a variant that's right on the three-day battle scenario 12 here then is our yeah this is massive right this is like four pages here all this is my fault this is the historic Grand battle scenario that will cover all three days of the Battle of Gettysburg unless one player or the other concedes before the third day so just a ton of stuff going in here reinforcement schedules using both of the maps so I think there's gameplay in here for you know people who want to play for a couple hours gameplay in here for people want to play for three days the grand scenario challenge accepted right I mean that looks pretty cool so okay so that's scenario book and that is the rule book now let's jump in and take a look at the counter sheets here now there are five of them here and I think I measured them out at roughly three quarters of an inch and I think the rule book says they're 13 16 of an inch so maybe a little bit bigger here so the gold here oops one of them is coming out here ready to play that off to the side the gold here are the Confederate units and they all have two sides to them the front side is the kind of the ready State here the full State and then the back side is What's called the battle worn State there is also a shaken state for units by which you're going to drop a shake and kind of marker onto the unit itself but the battle worn side is the
reduced side and we can see that the numbers are smaller and as we're here on this so we're looking at some of the Confederate units here as we look at nice high quality units all pre-rounded and again nice big size as we're going to look at this this is going to be pretty easy to to manage as we get on the on the maps out there too so here are some Confederate and Union forces here and let's take a moment I'll show some of these I just want to kind of highlight some of the information on the counters so there's really six pieces of information on each counter the top left is the core identifier so one two three four and various things like that and then in the middle you've got the Brigade commander and then connected to the Brigade LM moment on the right hand side we can see just kind of little red splashes that's how many counters are in that Brigade so looking here at the rally counter the counter here we can see there's two so there's going to be two counters two regiments that make up this rally Brigade and then you've got the division identifier here in the top right and these are abbreviated to signify the leader of the division now down below we have two numbers the left number is that strength Point number and again each strength Point signifies about a hundred men so this is going to be about 900 soldiers and then the battle worn side is going to be less down to like five there so a little bit half strength so that's they've been beat up there as they're going forward and then the right side here is kind of the indicator of the Elan and the experience of the unit so two four and things like that dictating their kind of quality a little bit there so that's
kind of what and then a pictorial representation of what type of unit it is as well so that's a little bit of information on each one of those counters there and again these are gorgeous they're just really nice artwork work here are our markers as well so we've got Victory Point hexes bivouax again for probably the Knight turns there re-roll any dice turn Skirmish order lots of different things you're going to be dropping on these game turn marker and things like that and these two are double-sided for various other functions that they're going to be performing too so these look fine now these are not pre-rounded so break out your counter Clipper if you want to round these off but again these are the markers and not the units themselves then we have a couple more here again a big sheet of Union uh markers Hazard artillery I really these I think these are going to work really well on the map visually too so really nice to look at there we'll put those off and then we have some more Union counters a lot of artillery on this one here and then these are our shaken markers which are of a rather large size and then all units shaken another one here on the other side as well we've got to loosen I'm not quite sure of the distinguishment between the two different states of shaken but I'm sure that's explained in the rules there so there are counters really nicely done now I want to go before I go to the player AIDS let's take a look at the cards because this is where I think it gets at some really interesting elements of gameplay and one thing that I want to talk a little bit about in terms of how I think the game is going to work in a solitaire mode so the game system that manages the gameplay is called the Black
Swan system and this is built off of the blind swords system and the way it's modified the blind sword system is to make the game more manageable for a larger conflict like the conflict of Gettysburg and so what you have is kind of a core level and divisional level activation element that's been molded into that blind sword system now I might get some of these details fuzzy on the edge but that's the general thrust of it is that this Black Swan system is designed to help manage a larger game scale element like the Battle of Gettysburg now Within These we can take a look at some of these cards here so what we're looking at here this is a division activation card and we'll talk a little bit about those because what happens in the very first one of the very first things you do in a turn is you're going to be building the deck of cards that are going to be drawn for that turn and this seems like a pretty cool mechanic so what you do is you're going to be putting in your core activation card so let's see if we can find a core activation card here that I'll go through those so right here here's a core activation core for Howard's 11th core and so this card if you had that this unit in the in the particular scenario you're going to be adding this for example to the deck that's in the going to be drawn in that particular turn then you also have a number of event cards here as well so let's see if we can find a couple of events here here is a default event redeployment to play immediately faulty fuses default defend I think a lot of
the events might be in this one over here here we go here and so as you're going through and building up your turn Confederate player in the union player are looking through their event card decks and you can pick two that you definitely want to appear into that Dex that turns deck and you put those over then you're going to use this process to randomly determine say another six event cards and those are going to get added to the event deck and then you could have some other unique cards that are for that particular scenario that are going to be in that particular deck for that scenario so now you're going to have like 20 something cards or so that are all going to be in this big pile of one Confederate deck and one Union deck and then what you do is you shuffle them all together and you build one gameplay deck and how you play is as soon as you go past an artillery bombardment phase then you're going to go through and you're going to draw the top card from the deck and that's what gets active innovated now there's a further element here because this core activation deck activates divisions that you've designated a priority for so say for example one of your core might have two two divisions or three divisions you're going to set the priority for those divisions on a priority car we'll take a look at one of the players you're going to set the priority for those divisions and that's the likely order an emphasis that they're going to be activated in but not necessarily how they're going to get activated depending upon how the dice roll works on the core Activation so the the sum of that some of that might have been a little lost in the fuzziness there but the general idea is you're
going to be kind of trying to mandate gameplay but in a system that kind of creates the fog of War and the chaos of War you're not quite sure when your activation is going to get pulled you're not quite sure what event's going to get pulled you're not quite sure whether you're going to get some units activated next or your opponent's going to get some units activation activated next you've got some events that you can pull and hold and you've got some divisional priorities that may get may work out right and may work out to a larger or smaller degree the end result as I look at this has me super excited to play the game for a couple of reasons one I feel like this is a very unique system that I haven't experienced before now I know the the blind sword system's been used before so if you're familiar with that you're probably like well it's very similar to The Blind sword system so what are you getting so excited about well I haven't played that but as I look at this I think this is really cool because I I think this is a system that I haven't played like to kind of capture that chaos and fog of War and the unpredictability of command that would have been inherent in a battle like this and it's very different from I want to move Unit A and Unit A is going to move to I want to move Unit A but I don't know when they're going to get the orders and how they're going to move or maybe they won't even get the orders at all and I have to really figure it out so I think it's going to create a lot of fun gameplay and that you're going to be trying to gameplay but you're going to have to react to the cards as they're drawn and that seems to me to be a really cool system and here's where I just want to mention a little bit more so I'm kind of blabbering on about this is too but I think this is a good point to talk to about the Solitaire ability
of this game this system the card play system and the card activation system I think is going to work brilliantly for solitaire because you're going to be able to take the mindset of the union leaders and the Confederate leaders and you're going to be able to kind of put together what you think is your best kind of card deck you're going to get some Randomness built in from the events you're going to get some randoms that's built in because the unpredictability of divisional priority you're going to get Randomness built in because you don't know when the cards are going to get activated in that turn they might be last they might be first so you're going to build this wish list if you would for your for each side then you're going to put them together and you're going to draw that card and as the Confederate Commander if you draw that particular card you're going to have to determine what you're going to do based you're going to react to that card and make the most of the make the best of what could be an unfortunate situation or it could be a very fortunate situation so I think playing Solitaire in that way I think it it's going to be just absolutely fantastic and I see very little in here of hidden elements there was a little bit with when you hold when you get an event card that's yours and you've drawn it your opponent doesn't know what it is and so that creates a little bit of kind of fogginess that you're going to lose playing both sides as single player but that's really the only element that it is so minor I don't think it's really going to play a role in in the overall enjoyment of this game and to go back to that whole idea as much as I love a double map three-day full battle of Gettysburg that's going to take a long
time to play that's tough to get two people to be able to do that right I mean and play it out in a way that's not going to tie up a table for an extended period of time but solo you know you could do that probably in a week or maybe even a little bit less or you know maybe even a couple weeks and tying up a table in your own home when you only have to rely on one player I think that's going to be an accessible way to get at that larger scale game so I am very excited to see how this works in Solo and I think this system is going to work really really well now I've infused enough about that too so let's move on a little bit out to the player AIDS but hopefully that kind of explains a little bit about the the card deck system the gameplay system and then how I think it might work for solo ability so now let's take a look at the player AIDS and I think there's a few things to say about the player AIDS let's take first a look here at these are the command display so these are single-sided the union command display and this is where we get at those divisional priorities so if you have Hancock's second core you're going to place a divisional Priority One divisional priority two divisional priority three then when that core card comes up it's going to tell you to activate a certain portion of division Priority One or perhaps division priority two or perhaps both so there's kind of both degree and scope how many units get activated and what units get activated and this is where you set these divisional priorities so you'll want this off to the side or you know if it's a smaller scenario on the map and there are two for the union given their larger scope here relatively the same so we could take a look at that one and
then we have one for Confederate forces given their their relatively a little bit smaller size there in terms of number of cores uh core that we're at the the battle there so those three players and those three player AIDS are fine now we do have a little bit to say about these other player AIDS so there are three of them here and they are all double-sided and this has been mentioned I think in a few places too I will say it here the print is small okay it's just small this is the combat results table and I'll show a couple close-ups on these but yeah the print is pretty it's tiny I I've been fortunate to have a good eyesight for nearsight I can see things up close pretty well and so I I don't have troubles seeing the combat results table but in less than perfect light I think this one would be challenging and likewise too on some of the elements here too of the combat resolution combat event table and the close flight resolution table these are these are tiny I think if you do have aging eyeballs or some deteriorating eyesight these are going to be a little bit challenging and I'll talk a little bit about some solutions for that going forward to scenario setup guide it small but I think this is fine this is roughly the print size I think of the rule book that looks fine to me this one again here this back side of it this yeah this is kind of tiny you know I think if you are having uh ISO eyesight issues or you're playing this in a low light situation this is gonna be a little bit tricky to read this one here though even I'm struggling with I have good eyesight up close the sequence of play and the command end table results this is tricky for me to see I really have to work to
see kind of the smaller print on this one so yeah and this one here the train effects chart I can see it but yeah these are so tiny oh my goodness they're small now the information and the layout this looks really good but yeah these are small now so the question is okay what what do you do if you've got these so the the good thing to know is that this is one of the differences in the second edition I think some of these are going to be 11 by 17. they're going to be a larger scale so your problem solved if you you're going to get the second edition the question is what do you do if you have the first edition and you want to rectify the situation well what I'm pretty happy with is on the flying pigs games a flying pigs games website they have these for eight and a half by 11 inch size that are actually not my printer was kind of messed up my color printer I had to shake the cartridges and stuff like that so these didn't print out well but I fixed that now and I can print these out really well these solve the problem so I've printed out six of them here all single-sided you could do them double-sided sequence of play and things like that they're all here with the relevant information this one here's the command table results and they're very visual so this I think is probably going to be the solution that I'll go with I've got these printed out on very light card stock I'm going to reset the printer and do it so they come out really nice and then I might even laminate these I'm pretty happy with this a second solution is you can just squint or get a magnifying glass that's that's one possibility I suppose third solution is they do have some 11 by 17 versions that I think you can download from the website you could take those perhaps to like a print center like we
have Kinkos here in Minnesota that we could print out and maybe get some of 11 by 17 ones I actually to be fair I kind of like them at eight and a half by 11 size I think they're a little bit more manageable and I think I'll be able to kind of stack them up and rifle through them a little bit faster so I'm kind of uh inclined to this solution the last scenario if you do have the first edition is that they will be part of that optional set that you can order that has the rule book and the player AIDS and that takes care I think of as far as I know the only difference is between the first edition and the second edition I don't know if they're a map or counter changes to it but I think as far as I know those are the only differences there so yeah I mean the playwrights I like the layout I like the color scheme I like the information everything's really good but yeah there are a couple of them that Unfortunately they just really are kind of hard to read and especially if you have less than ideal eyesight that's going to be a little bit challenging but Solutions are out there for you and if you're getting the second edition you have no worries I'm not sure I mentioned these they get slipped out in the process but here's a set of dice too black white and red one for each side the moment we've all been waiting for the maps this is a long unboxing but hopefully if you're here you're here for the best part so well not that the other stuff isn't good right but this is like amazing I'll show a zoomed out version of this now each hex on this is about an inch and an eighth wide as I measured it you get two maps 30 inches by 41 inches if you put them together it's 60 inches by 41 inches so roughly 5 feet by three and a half feet you know roughly give or
take an inch or two on on one of those measurements there too now I will unfold these but given the scope and size of the maps I am not going to be able to show very many of these here in on this unboxing here but I will show close up images of them and I've shown them that zoomed out one here I don't think there are words for how good these maps are it's so when I open them up I lit I put them out on the on the on the living room floor to kind of take a big drawback picture there and just was kind of staring at them I probably spent a half an hour just looking at the maps it I mean it they just they're so gorgeous you know at some point I want to do a game for the most beautiful maps that I've experienced in wargaming and I I don't think I'm giving away a secret by saying that this map will be in that video for sure I don't know if it'll get number one I can't go that far but it's there this is then we're looking here we can see as I'm looking at this I'll show close-ups on some this is the the town of Gettysburg here we can see the roads and the individual buildings with the roof lines and again this is Rick Barber's work which is just absolutely amazing here we have Cemetery Hill over here Culp till over here Seminary Ridge Cemetery Hill I said right Seminary Ridge over here all famous names if you're familiar with the with the battle here and things like that but it's just absolutely gorgeous stuff I'll open up a couple more let's open up this other one and
take a look at a little bit it's a little bit difficult to manage on this map and I certainly can't fit the whole map on uh you know underneath the camera here but we'll show a little bit here what we can anyway but just amazing it's beautiful and you know as you kind of look around you realize the different aspects of terrain that played a role in the battle I mean you've got the town of Gettysburg you've got these ridges and it brings up just all of the memories of these kind of you know epic charges and tactical Maneuvers and you know it's a very hilly landscape and it's really evident in how you play and I think the other the other aspect of this map that truly shines out as you look at it is that not only is it graphically beautiful it is functionally elegant too so you know there's there's no question as to where a hill ends or where it starts or you know what's a road hex or what's not a road hex and to have something that's visually this graceful and be functionally as outstanding as it is is just absolutely magnificent you know I think back to I have actually a copy of the original Avalon Hill Gettysburg that map is a disaster I mean it looks cool but if you try to play on it I can't figure out which one's a hill and Ridge and where it ends and stuff like that but you got none of these the game industry as the as well our ability to have high quality Gettysburg Maps has definitely evolved in 60 years that's probably an understatement to say the least but my goodness what a treat I
hope you enjoyed I I wish I could show these in absolute grander in other thing and I hope you can you know if you do get the game you'll get a chance to enjoy it but I think that is the other thing that I would say too that that that stands out to me as I look at these Maps is that you know you I I feel like it's you can get a ton of enjoyment out of this game even if you don't have the ability to put both of these Maps together and play the big Grand game you know it's in a little bit ways you know I I what pops into my head is Pacific War from GMT games which has a ton of scenarios and campaigns that campaign game where you can play the whole Pacific War yeah that's there but there is so much value in that individual campaigns and battles that are in the game this to me feels very similar in that I think you can get hours and hours and hours of enjoyment out of this playing the nine scenarios that don't use the full two maps together I mean that just might be me and I again without playing it's it's kind of I'm speculating but just looking at how much details in each one of these kind of maps and how it all works out and seeing how the scenarios are laid out and seeing how the game's design you know there is a a ton of gameplay before you get to that full campaign game so that's where they and I'm also you know as we mentioned probably can wrap this up too because that's it that's the last thing that we've got in the box and this might be my longest unboxing ever so a ton of stuff to look at here but hopefully it was a visual treat here to
look at and as it was to make but I do think too to kind of go back to that I am sure this is a magnificent two-player experience I am super excited to try it Solitaire as well because I think that um the Black Swan system is going to be such a joy to play Solitaire because of the unpredictability of how those card decks are going to unfold as you're playing a particular turn I think that's going to be really fun to react to and play as you're playing both sides Solitaire so I'm very excited I mean again you don't know until you give it a try I'm speculating you know from looking it over from spending about an hour with the rules and looking at the components but yeah I think there's going to be an absolute joy to play so I'm very eager to get in and dig into it and I am going to bring gameplay to the channel probably one of the smaller scenarios definitely not going to bring the full three-day gameplay that would be probably like 50 videos for sure but I want to bring some gameplay there are a number of games in front of it in the queue so it's going to be a couple months probably two or three months before I'm able to bring it to the table but I you at some point it will get here and I'm definitely looking forward to showing some gameplay as we go forward if you have questions that I can answer please feel free to ask them I hope you've enjoyed this unboxing I will put a link to related videos right here that you might want to check out and have a great day everybody take care