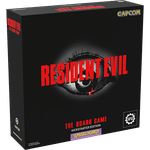
Resident Evil Board Game Playthough Mission 1
Games in This Video
1 game is featured in this video — it unlocks as you watch.
Transcript
greetings I'm baren and welcome to meet me at the table today we're going to be doing a playthrough of Resident Evil the board game we're going to start the campaign there is a tutorial that you can play in here but I'm not going to do that we're going to jump right into the actual campaign of this game I'm super pumped for this this Resident Evil has been I guess you could say something from my childhood that has been persistent and it continues on to this day not only have I played Resident Evil 1 but of course I played two three Code Veronica I played Revelations one and two and all the fun things that went along with it I even played the online one that was absolutely pretty terrible but I've done so many different Resident Evil games I even played them on all the different systems resid Evil Zero that came out for the GameCube resid evil again came out for the GameCube I played that there was a director's cut all these awesome games have come from Resident Evil and this is where it all begins inside the Mansion so we're going to dive into this campaign and we're going to do hopefully a big playthrough of this and a big campaign I'm excited to dig into it but before we do I want to show you exactly how you're going to set this game up and then we're going to jump into the first scenario and if you're excited excited to see if we can and if you're excited to see if we can make it through Resident Evil the board game and if you're excited to see if we can make it through Resident Evil the board game then I need you to meet me at the
table the first first thing we have to do is choose our characters I had our patreons decide who we're going to play with we are going to be playing with two characters and this can be played up to four players if you wish to but we're going to play with two we're going to play with Jill Valentine is one of our characters and right here it shows all of our starting equipment we're going to have a handgun a knife and a first aid spray also every character does have a certain set of stats this first number up here is going to show you how many evasion dice you get to roll when attacked this is going to show you how many things you can hold and this shows you how many kerosene tokens you can hold at one time kerosene is going to be used for multiple things such as removing corpses from the board if you also have a lighter you can light them on fire which you did in the video game which was super cool and they never came back or if you have a flamethrower I believe you can use that as part of your weapon we do have our status track here that's going to show us how we're doing as we go through the game damage wise and as we go we're just going to tick these down of course we do have a first aid spray that we can use an action to use that will heal the character or another character in the same or Jason Square by three levels or resuscitate an unconscious character to caution and yes this is the really I think the only way that I know of that you can bring people back if they have fallen in the game we also have a knife and a handgun these are both of our weapons that we get to do each weapon is a little bit different the first one we have is our handgun it does show you how many bullets you have and that is signified by our little spinny dial over here and these dials are actually pretty well built they they spin pretty nicely and they don't like spin all over the place they actually hold their shape in place really well
I'm pretty impressed by those but as you can see here it shows you what you need in order to hit the enemy and what dice you're going to be rolling so for example we'll be rolling one blue Dy whenever we decide to use a handgun and depending on the different values we see on the die things are going to happen if we get this particular V for this particular weapon we would be pushing it back one if we actually show this on here we'll be able to do one damage to whatever enemy we're attacking this down here is special for the handgun it is a rapid fire motion which means we could use up to three dice but of course that will cost ammo and if you've ever played Resident Evil I don't know if you were like me but I hored ammo like I like nobody's business so using all your ammo might not be the greatest plan but it also might be pretty good in order to get these people down also you do have a knife of course you can use that as many times as you want and it does again roll the dice be able to push them back or you can do a damage to those enemies and this one down here means that they can only used or this weapon can only be used in a space adjacent to it to this character or or in the space that it is I did get a chance to paint up our heroes so we do have Jill right here she is nicely painted up I was able to get her painted up but sadly I did contract the T Virus so I was only able to get our heroes painted up before I got my playthrough ready I really wanted to get this game to the table and I didn't want to have to sit and paint a whole bunch of zombies and dogs I was planning to do a live painting video of those particular Miniatures but sadly I contracted the T virus and was unable to get to that because I didn't feel great all last week so need to say we're going to be playing game with some least pain painted Miniatures are going to be at
least Our Heroes but as we go through the campaign more of this will be painted you'll be able to see some really cool Miniatures out on that board our heroes do each have special abilities Jill's special abilities here is the master of unlocking she can unlock a door if any other character has the required key in their inventory normally You' have to have that person next to the door in order to do it but she's super good also she's a fighting spirit and when an encounter card with this particular symbol is drawn Jill and each of her characters get to heal one if they're on the same tile as her so it is nice to be able to stay together but also of course the more you stay together the longer the time it'll take you to get through the mission and there on more consequences will follow the longer you stick around in each of these areas of the Mansion moving over to our next player we're going to be playing with Chris Redfield as well he have you have his miniature right here nicely painted up and ready to go he looks like this these Miniatures are pretty cool they're kind of small but they're really cool looking he starts with a handgun a knife and he actually has a lighter the lighter right here States this character can spend a kerosene token to discard either each corpse in their square or each corpse in an adjacent Square which is a good thing to get rid of because sometimes those corpses can stand back up and attack you if you remember the game it's so cool there's so many thematic things happening in this game it's super fun he starts with four kerosene up here he can only hold six items and he has two Dodge as well he starts on full and he has his 15 Health he does have a couple abilities here one he does have head shot if Chris kills an enemy and the attack inflicted two or more damage he's going to gain like that
head shot ability here and that would remove the enemy completely and it wouldn't come back as a corpse the target is considered completely killed and decapitated and it ignores the tough hide Special Rule that we're going to see on some of our zombie characters for example it is right here it has this tough hide if the enemy is killed it replaces it with a corpse but instead he's able to blow the head clean off the zombie and the only way to kill a zombie is to blow it up or to burn it and we know that the Survivor after Chris uses a defense item I can roll a black d and if the roll is four five or six I can return the item to my inventory now he doesn't start with any defensive items it would be located up here if it's a defense item but these are not these are this is considered a weapon so we don't have any defense items for him right at the start but we might find some as we're traveling through the Mansion next we have to get all of our decks ready I know there looks like a lot out here but it's not that tough once you get going here the first thing we're going to do is we are going to take our special tactics and rescue service these are our mission Decks that may happen in the game now when you go through each of these decks it's going to tell you to take out certain things when the campaign starts and then as you go through the game it's going to add things into each of these decks to make it either become a little more difficult and for you to be able to continue in the Mansion because some of the places you go in the Mansion need to be unlocked using different items or abilities or I guess you could say events that have happened throughout the Mansion so the first thing we're going to do is we're going to grab those these uh Mission decks and we're going to remove all the ones that have this symbol down here at the bottom and as we I said we go through the game it will tell us to add those to the things so
we're going to remove those and put these out on the board for us and I'll show you exactly where they goes soon on top of that here is our what tension deck our tension deck starts with a lot of all clears some orange and red cards as well then it does tell you to remove everything that has this symbol down here I know these symbols are super hard to see which is why it took me a little while to figure out exactly which ones I was trying to remove but I did figure it out and once you get it all figured out it's super easy next again we're going to take all of these These are encounter cards right here and we're again going to remove all the ones it tells us to it has this symbol down here and you're going remove all the ones with that symbol which is basically everything that comes from this certain decks are going to have certain symbols and the reason they do that is that it can tell you hey add these to the deck based on this symbol and number for example this one has a symbol down here with a number it's a different symbol so if we come across the fact that we have to add these narrative events if we have to add new narrative events it'll be coming from the square deck that we took away so we'll put those out there and get them ready to go the last few decks you have to get ready are your item decks again we have our a deck and we've removed all the ones that have that a symbol like this a triangle symbol then a number doesn't matter at this point but as you go forward it may so we're going to remove all the triangle ones and put this deck out there ready to go same with our B deck here I have our B deck right here we have all of it ready to go now I have removed of course all the ones down here with the triangle symbol so that deck is ready the rest of this deck is going to be really unique this one for first off is a completely a different card and it is going to be completely put to the side this is our B
deck up here we're going to remove that one from the B deck and then all of or sorry we're not going to remove that we're going to put that with the rest of the triangle cards we're going to put that away now these if you notice have stars on them one two three and four and what we're going to do is we're going to take the stars that are number one and give them a good old Truffle Shuffle once these are shuffled up we're going to set them right here then we're going to take the twos and shuffle them up and we're going to put the ones right on top of the two we're going to take the three shuffle them up a little bit and we're going to place them out on this right here and then we're going to take our fours shuffle them up a little bit once we get those nicely truffle shuffled here we'll put those on top of there and we have our a deck C deck ready to go do not ever Shuffle this deck together you have to shuffle it in that way because as you're playing through the Mansion certain things will need to be unlocked based on items that you find in the Mansion so in order to unlock this I need to find this particular item in probably this deck and most likely if it's one of the things you need early in the game it's going to be earlier in that deck than based on the ones you're going to need near the end of the game which are going to be near the bottom of the deck and order to unlock some of the last places you need to go in the game the last thing we have here is our dial that is going to determine how difficult this game is becoming and this will CH adjust as the game goes forward and as it goes forward it may tell you to remove certain cards or add certain cards to certain decks to make the manage become more of a dangerous place so we'll put these decks aside along with this dial and leave it right where it is and be adjusting that as we go now the last one we have is our survivor deck it tells us to put up the or
Reserve only but it's our survivor deck we're going to take all the survivors and mix them up I believe you put these in here I could be wrong please let me know in the comments below but Barry and Rebecca are the LA other two characters you can play with and I am going to tell you I am using only the core stuff for this I am not using any expansions there are some expansions that give different uh they have like a kind of a retro pack that have pictures based on like the 1994 game that looks kind of cool but I'm not going to use those I'm going to use everything you would normally get from the core game except for one thing and that is I am going to use the door pack that I got as part of the kickstar exclusives but I'm not going to be using anything else I want people to realize what you can play with just getting the core box and what there is available to you so we're going to shuffle up this Survivor deck and if I need to remove those other characters I will going forward but we're going to place this to the side but we are going to put Brad on top he is technically the first Survivor or uh yeah I guess Survivor We would find inside the Mansion let's show you exactly where all these cards are going to go and we'll be ready to start before I show you where all those go I do want to make sure the decks are completely set up the way they're supposed to be for the scenario we're going to be playing we are going to be playing to the first floor West a it is the recommended first scenario so that's the one we are going to play and I'll show you a little bit more about that but for now I just want to get our deck set up and show you where those are going to go so the first thing we're going to do is we're going to take we're going to adjust some of the Decks that we just showed you the first one we're going to adjust is our item a deck I'm going to grab all the ones with this triangle one up here shuffle them together and add one of those to to the starting deck a cards so they'll have an extra card in there that may be beneficial to our
group on top of that when it comes to our tension deck we're going to shuffle the card that has a one octagon or hexagon I think is what it is into the tension deck at the start making a little bit tougher and more thematic for this particular place here's our Mansion dashboard I'm going to grab Our Deck here this is our tension deck we're going to give this a little Truffle Shuffle and place it down sadly I haven't had a chance to sh sleeve any of these cards yet that evil vile T virus is keeping me down the next thing I'm going to do is grab my encounter deck we're going to give that a truffle shuffle we'll put that one out there as well ready to go now we do have our a deck that we had remember we put that one extra card into we're going to give that a truffle shuffle as well so it's all set to go putting it here then we have our B deck remember our B deck is only made up of a few items based on what the scenario has listed so we have those four cards I've shuffled them up a little bit we'll Place those down here we do not have any c cards for for this particular scenario this right here is where we'll put emblems or keys of that kind it' be our puzzle track that we're not going to deal with for the first mission unless it tells us as we go forward but from what I understand this first one doesn't start with that but it might happen as we go forward the bottom cards are as follow remember that Brad Vickers card we put on top he is going to go into the reserve area now if you ever have any of the main characters like Rebecca or Brad for example since we're only playing with two players and they go into the reserve you can switch out characters potentially between different missions if you wish to but the rest of the cards are all going to go face down right here into our
survivor deck actually sorry it's going one the Stars place over here that makes sense there's a Survivor deck over here this right here is our item box if you ever find an item box out there you can use an action to be able to put any of the items that you have into that box which then can be taken by other members of the Stars team throughout the campaign at anytime you find a box so that's kind of just like the game it's really cool you can find these boxes all over that have everything uni next we have our narrative cards we'll Place those right down here once those are there we're going to grab our mission deck which is right here we'll see how that plays through the game and the last thing we have is we have to put down our exploration cards we're going to be playing the first floor east or west sorry the first floor West a so we're going to grab all the cards that have to do with that we're going to place them right here and if we ever have to open one of the doors that has to do with these cards it will add more to the mansion you'll see how that works during the game play to start the campaign you start in the main hall just like you do in the video game you come in from running from outside and you burst into this mansion and then you kind of split up and go around the Mansion because why not you know in Resident Evil game and horror games you always want to split up right usually the best plan so in the video games same thing happens you kind of split up between Chris and Jill and kind of go on your Merry way but from here we're going to choose where we want to go you can go to any of the unlocked areas so I cannot go to the Crypt and I cannot go to the uh either A or B Crypts and it does show you a little bit about what you're going to need in order to move into those particular places and like I said earlier there are other ones as well that we have to find things to unlock in order to be a them continue on
through our campaign so you might find them in these different areas that we can actually go to here here here and here and the game does say that the order in which you do these is completely up to you but it does recommend if you've never played this before that you should start at the first floor West a so that is where we're going to start we're going to start in this particular place and we'll go to our scenario book and read and see what happens first floor West a here's the introduction the wind lashes the trees outside leaves and branches scratching against the window panes like nails from some unseen Asal a flash of lightning paints your surroundings and for a moment you're sure you see the shadow of a figure on the opposite side of the window hands pawing at the glass yet when your eyes find the frame there's nothing to be seen perhaps your imagination perhaps not finding a secure place feels feel like your first objective somewhere you don't have to watch the shadows for a moment you can establish a base of operation next thing we have to do is find our objective which is in this scenario the C characters must find and secure a the safe room if each character is in the safe room tile the players can choose to successfully complete the scenario at that time if there are any enemies in the safe room tile when the scenario is completed skip step six during the end phase which I believe is the resolve the end of the scenario phase special rules this is a quiet area if the tension deck runs out during the scenario Shuffle the discard pile and place it face down in the refresh deck additionally if the
scenario is successfully completed skip step two during the end phase and we also have safe haven a character on the safe room tile does not have to draw a card during the tension phase and I'll show you how that works during the playr and if we are able to complete the scenario We'll add the first floor West B scenario card to the map and that'd be a new place that we could go here's the layout for this particular scenario it shows you all the tiles you're going to have to grab and it even shows you them down here as well also from what I understand this is probably how much of the game this will actually take up so when you're building out this particular part of the Mansion start off in your table in this lower area here because more of this will be uncovered as you go through the game this is a paned out view of the map that we're ready to go into the Mansion when we play I'm not going to be this panned out so you can actually see exactly where we're moving and what we're doing in top of this we have to place our characters inside this Mansion I can place one of them here and I can place the other one over here now if you notice not a single one of these is going to connect to each other so we're totally starting in separate places I'm going to start with Jill down here and we'll start with Chris Redfield right there what you're seeing on the map right here first off are the doors again they're not painted I apologize oh that evil Chief I risk keeping me down from my painting and on top of that we have a and b item locations you can spend an action on top of that thing in order to grabb the item from the top of the deck on top of that we have these particular tokens here that are going to have us draw encounter cards when we move into them to see what is in these
rooms we don't know so it might not be worth opening this door you to draw two cards but look there's a token over there we got to go see what that is on top of that look at this one up here there's two items in there we totally want to get this out now of course the mansion's not fully safe we have to put in our zombies and other adversaries that we have to deal with in this particular scenario there are places for these enem to start and then as we spawn enemies they're going to be spawning out onto these little areas here on the board now again sadly I've got them primed but I haven't had a chance to paint them yet so we're going to place one right here one here these are of course just regular zombies the other zombie is going to be in his room right up there oh no and the last thing we have is one of the dogs now I did get a little bit of CH paint on one of the dogs but I haven't fully finished him in of course it's Resident Evil I'm going to make him kind of gooey and yucky and YY and scary and all that stuff so he's going to be right behind that door door that you can't really see right now but as we play you'll be more focused on where the action is now if you noticed there is a door here and there's also a door up here that don't go to anywhere as we go to these doors and open them we're going to be revealing more of the Mansion more enemies more rooms and we don't know exactly what's there so it does give you a little bit of that semblance of when you open a door you don't know what's behind it but of course being a board game they have to at least have some places where they already have things laid out for you it's not always just a random where you're going to go I think this is a really cool system that mixes these two versions together I think that's really cool that's it for the setup we're all set to start Resident Evil the board game let's see if we can make it through
the first floor West a the game is made up of three phases there's the action phase the reaction phase and the tension phase one of the cool things about this game as you're going to see it played is there's not really an enemy turn so the game moves along very well and the monsters are just going to react to What You Do which is why it's called the reaction phase so we're going to move into the action phase for one of our characters chosen by us now once you decide the order that's the order you're going to continue to move in so it's going to start with Jill and then we'll go to Chris and we're not going to be able to adjust that order for the rest of the scenario we're always going to go Jill then Chris one of the ACT some of the actions you can do are move open close doors search trade use item or attack now of course opening and closing a door is very very obvious just open or close that door the second one is moving you can move one space for one action and just to let you know you do have four total actions each turn that you can use being able to search is if of course you're on top of one of these you can use these search and you can check see what is exactly in that spot the trade action is one where you can give any number of items between two different people as long as they're adjacent to each other so if I can ever get Chris and Jill together we could trade some of our items if we needed to the other thing is we can use items so say we wanted to use our first aid spray that would be one of our actions to use that particular item and then you would discard the item now it doesn't take an action at all if you have too many items you want to drop things you can just drop them and they're gone that is a basically I guess a free action but it doesn't take one of your actions to drop things and of course the last thing you can do is you can attack using one of
your weapons so with where I am now I could move one two three over to here and then I'd have one action left to maybe deal with that zombie if I wanted to and when you do move you can move diagonal but you cannot move diagonal if there's a protruding wall like there is right here so I couldn't be able to move diagonally to that space there because this is a protruding wall on that particular location let's put our zombie back and I think for our first action we are going to open this door and we're just going to symbolize that by opening it up just like that and once we open it we could move in if we wish to using one of our next actions for Action two I am going to then move into this
room and at that point I will be revealing encounter cards equal to the number that you see printed here so for this one is one but like I said if you move over here there's two over here of two different cards you're going to draw two different cards but for this one we're only going to draw one so we'll draw the top end counter card and take a look and see what it says it says here spawn a zombie then on the bottom it says search the encounter deck discard pile for any cards with spawn entries that spawn cous enemies and shuffle them back into the deck well this is not going to pertain because we don't have any of them in the discard pile but we are going to spawn a zombie in this room so we're going to grab one of our unpainted zombies here and we'll place it in the farthest location to Jill on the board that we can place it now of course the only problem is if you ever have to place a zombie and the only place is in the place where our hero is you have to place it there but with it being there I'm totally fine with it so that is one to open the door two to move into here three I could move over there grab that and then for four and then grab my item now of course that does mean during the reaction phase all these zombies are going to move on to me but I think that might be okay remember I might not want to use all of my bullets maybe I do we'll find out I am going to move again with my third action and for my fourth action I am going to pick up this item and we're going to draw the top card off of our B deck and see what we have found we have found ourselves a kerosene container it says instead of placing
this card in the character's inventory place it face up on the Square with three kerosene tokens on it a character in the Square can spend an action to remove any number of tokens and add them to their profile card when the last token is removed discard this card well that's not really going to help us very much we'll place it right here especially since it's so far pretty much away from everything but I will place three kerosene tokens onto it so that we have those available to us if you ever decide we need to come back here for more kerosene it is right there now that of course is the end of all four of my actions so at this point we'll move into the reaction phase and that means every enemy that is in the same squares or the same room as I am and any linked rooms linked rooms are rooms that have a open door to them so for example this is a linked room here and if this one was open this would be a linked room as well so you kind of want to maybe shut some of these doors behind you as you go but that's okay we're then going to move these enemies they're all going to move one space towards that particular person so we'll move them like that and this person is going to move actually into my Square now it doesn't make an attack against me it is just moving in there as part of the reaction phase in order to know if the enemy would attack you you look at their card and here is one particular enemy it's the zombies which is the ones we're fighting and the things you're seeing on this particular card is you're going to notice a lot of lot of values and things the first thing up here is that this is the type of enemy it is a zombie the next thing you
see is the Threat Level the lower the number the less of a threat these particular enemies are then it also shows their movement value and their health up there as well this is their special ability over here it has tough hide and these are the two different attacks it would perform the first attack would be that if it is in the same square as me it will roll a die and attempt to try to bite me and do damage to me yuck or if the symbol like this is found in the threat deck or the tension deck I'm sorry then it would change its particular attack to this which means if I had that showing in my threat or my tension deck discard pile then that one from here would have been able to attack me during the tension or during its reaction phase because it is one square way but since it's not it's only going to move into my square and then next turn if I don't do anything about that and it goes to the next reaction phase then it would actually do something to poral Jill but alas that is not going to happen we are going to move over to Chris now it is going to let's see what he can do Chris is in amazing Ville with one zombie the things in his particular area is he of course is in a place with an a token which who knows something awesome might be there let's let's grab that first let's move over here for one and then for my next action I am going to grab that particular item from the a deck and we'll see what we have found we have found ourselves a green herb heal the character or another character in the same or adjacent square one left so put that into his inventory that is a
second action for his third action I'm wondering if I should take out that zombie mainly because he does have a lighter so if we turn this zombie into a corpse I could light that zombie on fire in the next turn and I would never have to worry about that zombie again and sometimes in this game based on the amount of things you've left in the particular part of the mansion that you're in it could affect how dangerous this Mansion becomes as you go forward which is a really cool system most of these Decks that you seen me build are going to persist throughout this campaign so leaving things around means that that the event deck and potentially the tension deck will become more difficult as we go through the Mansion so let's kill that zombie okay we're going to shoot him because he's a ways away I'm going to take my dial I got 15 bullets I am going to use two let's go to two bullets and I'm going to tick that down to 13 and we're going to roll it up and see if we get him our zombie has uh well our zombie our hero I should say is going to roll two blue dice you just roll one blue DY for each attack that we have or each bullet we use I use two bullets so we had a push back and we had a hit which is perfect that's exactly what I want so the first roll we had is going to be allowing us to push this zombie and you can push the zombie into any adjacent space you want to I'm actually going to push him towards me and the reason I'm going to do that is because of course our second action our second die roll is this one and it's going to do one damage and we've already seen that zombies only have one Health so once that zombie takes its one Health it is going to die but remember it does
have the tough hide which means that if I if this enemy is killed replace it with a corpse so sadly I don't have the corpses of course painted either because I'm the evil teyis so I'm going to just place a corpse token down on the ground now you're probably wondering why did you put that in the Square next to you because I can then use my fourth action to use my lighter the character can spend a kerosene token to discard either each corpse in the Square or each corpse in an adjacent Square so I am going to use one of my kerosene to burn that corpse to pieces now one thing about these corpses I'm going to talk about is the they may eventually rise up and attempt to attack you there could be event cards or something from the tension deck that is going to do that the other thing that could happen is if you move onto a space or spend an action moving into or out onto that space you'll roll a six cider and if you roll that particular roll on it that corpse would rise up and go after you again so we're going to burn that corpse the last phase that you're going to do is the tension phase now Jill has completed the reaction phase and her actions so she is going to grab the top card from the tension deck this could be anything from Bad Things To good things we'll see what it says here it does say all clear so it says you pause ears strained for even the slightest sound nothing beyond your own ragged breath so does that mean you're safe for now yes it does I am all clear so I don't have to worry about it with Chris completing all of his actions it is now time to go to his reaction phase but there isn't anything happening there's nothing on his tile to allow to
react to him and this is a closed door so that enemy deck there will not react to him as well now of course his reactions are done but now he has to move to the tension phase so he's just going to draw the top card from the tension deck and see what we found we found cornered so this is an orange card this going to be a little bit worse it says a vicious snarl sends a shiver down your spine as you realize your foe has found you once more locate the tow closest to the active character where there there are enemies but no characters remove the enemy on the tile with the highest Threat Level and place them on the character's tile on the closest biohazard symbol oh that's barf all right so here's the deal there is a tile here and there's a tile here and a tile here they're all basically located closest to him to meet the requirements of this card it's going to be this this person's t uh value is two when it comes to how dangerous it is it has a two Threat Level as we see on the cerberus's card here two Threat Level and it's a it's a it moves two and it has one Health and it does lots of things oh my gosh it can attack three spaces away if it gets that symbol in the tension deck oh that's horrible all right even got this feral it says if the top card in the tension deck discard pile is that symbol the enemy performs two reactions instead of one during the reaction phase wow this thing does a lot of things let's get rid of that thing I've never lik the dog dogs in the game always equal dead I always want to kill the dogs when I played the game because the dogs were always really really dangerous
now a couple reasons it was this and not the ones down in this one is first off she was of course in that room so that would negate that one coming also this is a level one threat where that of course is level two moving back over to Jill's turn now she has a few options here one she can run two she can attack those are her only options if I decide to attack this monster in this space that it's in and I'm not successful it will make an auto attack against me and do damage to me so that's one of the drawbacks now of course the second the good thing is if I do actually hit it and kill it it will die also I could attemp I could maybe push him out of my square with a successful attack also if you attack anything in the room or linked rooms which would be this one are going to be able to perform an outof sequence reaction so that might also be a reason why we might not want to attack this guy my goal is actually to get back over here and close this door so what we're going to try to do is we're going to try to run from this zombie I'm going to use one of my actions to move now of course he's in my Square so he's going to make an attack against me I'm going to have to try to dodge that some things to remember during this particular movement is if I'm not able to evade I'm going to be hit by this particular zombie and take one damage and I would actually have to stay where I am and since he was successfully able to hit me once that's done I'm able to push him and it would still cost me an action so there is a chance that I'm not going to get out of here by just trying to move but I tickets are still our best bet I need to roll two blue dice as my defense and all I need to do is get one Dodge on
them and I did I got this particular Dodge there are three different Dodge symbols on these dice there's this one this one and one other one that shows a triple little line on it those are all going to be good enough to successfully Dodge this particular zombie but depending on the size of the base of the monster you're trying to attempt to prevent hit you or the amount of enemies you have in your Square would decide what type of Dodge you have to do for example since this zombie is a single Bas small Bas enemy any one of those particular symbols will work if I'm going against a medium or if there are two zombies in my space the only ones that would work would be these two particular symbols and of course if I'm in a have medium base or small bases or three small bases like oh so many enemies you can't deal with it then the only way I could Dodge be a and six chance which would be this particular rooll here but we were able to get that Dodge so we're able to move I will move one two three I'm going to close this door which now that room is no longer linked to me which is fantastic so that zombie is not going to go after me anymore now the other next thing I could do is I could move one more space or I could attack now if I don't successfully attack this thing will move towards me and so will this and doing an out of sequence reaction but I think that'll be okay I think it's best to try to take some of these guys down let's rapid fire two bullets into the guy bringing our bullet total down to 13 we'll roll two
dice and see how we do against this particular zombie we did get a hit so he's going to go down he's going to take one damage and because of that thick hide or tough hide he is going to become a corpse that worked out absolutely super good he's going to go right there this thing is going to react to that attack and then he's going to use a reaction step to move one more space towards me now remember if I step on top of this that I'm going to have to roll a die to see if it comes back up for now I think we're going to be okay next turn I might try to attempt to maybe attack this guy hopefully get him up into this area and try to run past him and's see if that works but of course we're done with her steps now we're going to draw our next tension card and see what we have found again all clear lights flickers overhead out of an unseen struggling against the shroud of Darkness surrounding you better you not remain here lest it fails okay it does have this symbol on it though so that's going to adjust what some of the enemies do for the next turn moving to Chris's turn I know I said a good dog is a dead dog in Resident Evil because they're usually filled with yuck and gck and they're usually pretty powerful I don't like dealing with them but in this particular instance I can get out one two three to open this door and then four to move through it so next turn I can potentially close that door and leave this thing in there but let's quick look at our card to make sure that this Fair is not going to fly off the handles here it is he is going to perform two reactions instead of one during the reaction phase because of our
all clear card having that symbol on the bottom of it here so that might oh it's no it's a different symbol okay it's not going to do that okay good this is a different symbol this symbol is going to be his attack which is still going to attack from three away which is going to be horrible so I don't man maybe I should just take out this dog I think we're have to take out the dog I don't want to take out the dog I wish I could get through the door and shut it but I can't one two three to open the door four to get on that side I would like to okay we're going to take out the dog I'm going to shoot that dog I don't like dogs uh in this game I don't get me wrong I like dogs but I don't like I don't don't like feral Cerberus dogs that look like demon dogs of death we're going to shoot two bullets into this dog and see how that goes he's going to go down to 11 on his handgun we'll roll two dice and hope we are able to kill this thing we are not we're only able to push it which isn't going to help us at all that's our first action do I keep on shooting this thing I think we do we're going to shoot it again with only one bullet this time for my second action I'm going to shoot it for one bullet and see how that goes I get to push it again all right I'm going to shoot him one more time we're going to go down to nine bullets there we go we were able to take him out but wow we used a lot of bullets each of those bullets were able to do something the first one was a push so I could push it here the second time we rolled again another push I can push it there and the third time we finally shot him he died so we're able to take him off the board because he does not have that thick hide he just the Cerberus will die from that attack oh oh my gosh now I have one action left I'm just going to move one that was that was Bonkers out of control but we got rid of the curus I'm not a fan of those demon dogs they're totally going to rip me to pieces if I don't deal with them it's uh
the end of his turn we are going to move into the tension phase there's nothing that's going to be tense for him so he's just going to draw his next or sorry reaction phase there's nothing to react to we'll draw our tension card our tension card is shattering glass you jump at the sound of breaking glass and prepare for the worst draw an additional tension card and notice these symbols here if we had made it to those particular spots on our dial inside of the Mansion so as we go through the Mansion this is going to become more deadly like I said if we were up in this particular area we would have had to abide by everything on this card which would be absolutely terrible it spawn additional curus on the active character tile and all this other stuff but we're not we're at the starting point so none of that is actually going to happen to us just the original part of the card which just says draw an additional tension card so we'll take our tension card draw it up and see what we have found fevered assault unnatural Vigor possesses the undead as they hurt themselves toward hurl sorry them TW towards you in a stumbling run during the next player's turn increase the enemy movement value by one and of course this doesn't happen because we haven't reached that part yet this card remains in play for one round if that would have happen so that's awesome I'm going to put this right next to Jill down over in her area so I can remember that thank thank you Chris on a scale of one to horrible that card was a horrib okay we're going to see what we can do about this particular zombie cuz he's going to be able to move one more space during the whole during this entire turn
the next player's turn increase movement value by one all right so I'm going to just shoot him with one bullet I have a plan it might not be the greatest plan but it is still a plan I'm going to go down to 12 bullets on Jill Valentine's gun and she's going to attempt to take him out with one shot I'm not actually expecting this to go all that well it did not I failed but it does move towards me in making an outof turn reaction so it's going to move towards me and since it's move value is increased by one it's going to go two spaces that's my first action my second action is here three four W I'm still not going to get away from him was really hoping I could just run from him but with his extra moving value he's going to give me oh boy well that's the way it goes we're going to try to get by him I'm going to move here for my second action then my third action is going to be to move away let's see how that goes I'm going to attempt to dodge and I did not Dodge so I'm going to take one damage from this zombie and that actually ruins my action for that turn Jill goes from fine to kind of fine and since that action fa failed and she did get hit she does get to push him one space so that was one to shoot two to move here three failed and four to move there during the reaction phase he is then going to be moving one two right back towards me thanks to the wonderful card that Chris Drew now from what I understand this one will not do anything type of re reaction because again we are no longer linked at this point I can discard that one that was horrible and now she's going to draw another card and see what happens during her I oh she's got an orange card too it says here dread eyes flicker sorry dead eyes
flicker open to reveal milky orbs as the colosus corpse Rises unsteadily to its feet oh barf locate the corpse closest to the active character remove the corpse and spawn a zombie in its Square oh my gosh this is so bad for Jill apparently Jill has entered Zombie Land because there's another zombie right there for her unbelievable now I do want to mention that say I didn't have a zombie corpse in next to her anywhere on the board say it looked just like this and there were no zombie corpses since I could not actually resolve that tension card I would draw two cards then and resolve them instead Chris it' be awfully nice if you could get to Jill Jill is in trouble one two to open this
door three to move forward and four four to go right there I'm not going to close the door behind me there is nothing there so I don't think I have to worry about it well that's that's what I say there are no encounter or tokens in this room so I don't have to deal with those I just have to resolve the tension step because there's nothing to react it says here silence calm peace do you truly trust these things or are they Sinister traps tempting you into lowering your guard all clear finally Chris has drawn an all clear card I'm starting to worry about our good friend Jill here here she has two zombies pretty much right on top of her and I need to get by them and I don't even know I was thinking about opening this door but that's two encounter cards with my luck that's again more zombies and a massive Funtime so I think what I'm going to do is I'm going to attempt to move out of the square of that one then I'm going to attempt to move out of this move into here so I'm going to try to go one two 3 four up to there that's going to be our plan we'll see how these rolls that take place to see if that actually happens she has two agility so we'll see how he does against the first one we were able to dodge past the first one so we're able to now go to the second zombie we'll see how we're able to do against that zombie oh wow we got super Dodges against that zombie so we were able to run right by him without us even knowing both of these zombies are still going to do their reaction to move towards me and then we'll draw our next tension card that hopefully says all clear on it it does all good it says all clear soft light paints your surroundings on the other nights in another place you might call the atmosphere relaxing but not here and not now this is a nightmare
back up here in relax mode he's going to go 1 2 3 4 that's his turn we're going to draw another tension card and call it a day for good old Chris low growls torment your Sinister Whispers that bleed from behind closed doors and through thin walls in this hellish Place little respit is offered only moments to catch your breath as for as long as you dare we've gotten another all clear card for him here's the deal I'm going to have to open this door in front of me I and then hopefully be able to close it behind me and that way I can leave these zombies in the dust hopefully we do not need this item here they could need it I don't know but it's it's an a item so I don't think it's really something we're going to need it could be like a medical herb or something which would be really nice but I don't think it's worth risking going into that room so let's open this door and at this point we're going to reveal more of the Mansion opening that door will cost us one of our actions but what how I understand it is when you're opening a door to an unexplored area it not only takes your action to open the door but also get to move into that room for for free I could be wrong but I believe that's how it works and we're going to grab the card that says one on it because these doors are both a one if either one of our characters would have opened these doors I would have revealed this card so since Jill is opening it we're going to look at the card and see what it shows so if we look here s is the starting area where the number is so if that's the number we're doing we are going to line up S and then here's the other s which would be that door here so if we spin the card like this we're going to notice that we're going to set up a a whole
another area of the Mansion over in this area meaning we're going to put these four tiles out on the board with everything placed on the board I am going to put this card right here to remind myself that that is a locked door and I have put all our tiles down and according to how it's explained in the rule book once all the tiles are placed down you're moved into the room as the tiles are revealed so I am going to have to draw an encounter card based on that right there that I have sitting in the tile so we'll see what is in this room it says right here Spawn Two corpses all right that's all that's in this room is two corpses I say that now but who knows what could happen unless she's standing on a space or there's one over here the only two places where the biohazard symbols are to place these corpses is going to be here and here so we'll put our two corpses right down there and move into the rest of her turn I kind of wish Chris was here because he has that lighter to be able to light some of these corpses on fire but instead I'm going to for my second action close that door we're going to move over here for three and since I moved onto that I now have to roll a six Sider and see if that corpse is going to rise up and attack us it got a five so that is not going to happen if I were to have rolled the umbrella symbol then that would have happened so we move we one two three and I'm going to open this door for
four and that is going to be the end of my turn now now I do want you to be aware this is an archway that Archway does mean that these are going to be connected when it comes to the reaction phase now I haven't gone in this room yet to see what's there but once I do if anything was in this room I wouldn't be able to shut this door behind me to be able to prevent those things from doing anything that's the end there's nothing to use for the reaction so I'm going to grab my next T tension card and see what we have found it says here are the footsteps you hear at the edge of the earshot another Survivor or do they belong to something else entire regardless one thing is clear if you can hear them they can hear you too all right it is all clear Chris is behind that door I'm going to have him for one action open the
door for a second action he's going to move in and we're going to have to draw an encounter card to see what's here but it's just so tempting because look at all the awesome loot that could potentially be in that building so we'll draw an encounter card and see what befalls our wonderful character here it's a red one that's usually not good it says spawn a zombie oh no okay so to put a zombie in that room and there's only one place I think I can go nope there's one over here so it's going to go to the farthest possible spot which can be right there on top of that that was one to open the door two to move in three to move right here and then that's all I can do I don't think I have line of sight because of course this is blocking you only go from Line to Line so I could move one more space if I wanted to or I could wait for it to move here and then I can maybe attack it next turn I think that's what I'm going to do I'm going to stop right there I'm going to draw a tension card now of course I've left a lot of doors open if something else spawns behind me that could be big trouble for Chris here oh good it says all appears safe but you don't dare relax in this haunted nightmare the slightest lapse of concentration can lead to an untimely demise again we are all clear and I haven't been saying it but there isn't anything on these cards that we've been drawing so far so we're doing okay now he's I forgot to do the reaction phase he is going to move one space towards me that's my fault I forgot to do that we should do that before the tension phase meanwhile Jill might be hearing something in the coming from the walls over there but not yet one two three four we're just going to go like that and grab an item from a deck and then
move back over to this square right here let's see what Jill has found herself she's found herself a green herb that's fantastic we've already read what that does so I'm not too worried that's the end of her turn there's nothing for her to be reacting to so I'm going to grab my next tension card now from what I understand if I were to link all of this together this zombie over here would react because it's technically all linked together but for now nothing is open like that we'll draw attention card we got all clear for Hungry exhaust well sorry fear hunger exhaustion all are demons threatening to drag you down but you won't let this evening be your last there another might find defeat you only resolve you are a member of star and you have a duty to perform so that's the end of her turn she got it all clear here's the deal Chris needs to just unload on this zombie I need this zombie dead I need it to be burned to a pieces so I can get both of these if I were to start trying to dodge through this and try to pick up all these items it would be just a pain in the butt so we're going to shoot that guy with our handgun I'm going to start with three bullets one two 3 bringing myself down to only Six Bullets with Chris but hopefully that'll be enough to take him out using the rapid fire on our pistol might not be the best way to do this but hopefully we can oh look at this we got two hits that's fantastic remember Chris has that ability called head shot so it says here if Chris kills an enemy and the attack inflicts two or more damage it gains that head shot ability the Head Hunter
which means we were able to pretty much decapitate that zombie and so he's not even need to be burned that is our first action was to shoot that zombie dead our second action is be to move here third action is to grab this item and our fourth action will be to move over here to grab that item eventually as well we're going to grab our B deck and see what item we have found we have found ourselves a first aid spray he is up to carrying five items he can only carry a total of eight I or six I believe so he can only carry one more thing which means whatever we find here is pretty much be the last thing he can carry there's nothing for him for the reaction phase so we're just going to draw our next tension card and see we have found uh oh Fray nerves movement chases through your shadows enemies all around you the ne if the next character is on the same tile at the start of their tension phase they begin their turn on they must draw two additional cards okay we do not want that to happen but I'm going to go put this next to Jill so I can remember that she has to deal with that she's not going to be anywhere near that particular room because she's going to move right out of it she's going to move one two three and then open this door for
four at least that's the plan of course my six might say something different I have to roll for each one of these zombies I'm going to roll for this one first he got a three the second one got a five so neither one of them is going to rise up on me oh I so wish I had a lighter right now but that's going be the end of her turn she's moved one two three and open the door for four she did not move in she'll have to do that next turn hopefully those are hopefully both these cards say oh hey there's nothing but nothing in here that'd be awesome so I'm going to discard this we no longer have to deal with that but I do have to draw a tension card because we and we don't have to worry about our reactions there's nothing around us we have found ourselves Mission update your radio sputters to life an Abrupt reminder you are not alone in this forsaken Place draw a mission card our mission cards are located right here we shuffled them all up let's see what mission we have decoy place this card to one side of the playing area with the assigned character next to it for the rest of the scenario when drawing from the encounter deck you can choose not to resolve the card and instead place this card next to next to this one then draw a replacement at the end of the scenario the assigned character suffers each one of those symbols on the encounter cards then is returned to the reserve if the character is killed they are removed from the game instead okay so she's kind of a decoy I'll put that with Jill next to her player board now what that card is talking about is as I'm drawing
encounter cards if you notice the top of these cards have different symbols so if I ever draw an encounter I'm not a big fan of and it has and and I can just I can get rid of it or kind of get rid of it I can put it on that Decoy card and draw another one but of course if I'm putting these on that Decoy card I'm going to have to take damage at the end of the scenario from how I understand it and of course if I die I'm removed from the game oh sorry not I'm not removed this card is removed from the game and so instead so that is how the decoy is going to work it's time for Chris to come back he's use his first action to pick up that token then three one two three four just like that boom all right let's see what we have found we're going to draw our a deck here hopefully I really need to find some ammo he found another green herb that does not help me at all he's at his maximum and he's got green herbs up to Wazoo maybe when he connects with Jill eventually they can use the herbs he can use his herb on her to heal her up I'm a little scared to go into this room because of the two encounter cards but we have to get in there that's the deal so I'm going to put put one right there we'll draw two encounter cards remember I have that Decoy card so if I don't like one of these two cards I can maybe swap it out the first one here it's red and gold blue there let's see what this one says discard this card without effect oh my gosh I didn't even know there's cards like that in there super pumped about that one let's see what this one says this one says place a yellow unexplored token on this tile well that Pro doesn't that mean I just have to resolve it then I would guess I put a yellow unexplored T token on this tile I'm not exactly sure how that all
results I've moved into this place so if you're in a tile that has an unresolved exploration token I have to resolve it I understand why that card does it maybe there something in the game that the yellow tokens don't longer apply or something I don't know but I think that just means I have to draw another card is the deal because I have to I think resolve this token so we'll discard that token if I'm wrong about this please let me know in the comments below and if there's any errors that I make post uh launch of this video please check the pinned comment of this video and you'll find find any rule erors that you can learn from because I'm hoping everybody can understand and be able to play this game based on this playr that's at least my goal so we're going to continue on I'm going to draw a card based on this token being placed in the room um and we'll see what we have found we have found ourselves what's this spawn a zombie in the active character Square oh yuck interestingly I could have used my decoy card to not have this zombie there but I think it's going to be okay we have plenty of weapons and things to maybe be able to take this guy out so that was my first action walking in my second action is going to be to move past him over to here and that's going to be my second action my third action is going to be to pick this up my fourth action be to move into the corner but of course we have to evade that zombie first I'll roll two dice and we just need to see one evade we got one evade so we're totally fine and able to move past him so like I said we're moving one to here then for our second action we're moving here third action we're going to pick this up and our fourth action is be to move back here I've got a plan if I go back here I'm actually I'm going to go right here that's where I'm going to
go I think one two three yeah that's going to be great okay we're going to go right there I've got a super good plan I'm going to of course it could all be foiled by some of these cards we're going to draw a b token or a B card and see what we have found we found an old key this must supp be what unlocks doors unlocked by a simple lock and this one is a simple lock according to this card right here so that is a simple lock so this is fantastic she can hold on to this which is awesome all right that's the end of her turn now there is a reaction this time this one's going to move towards her just like that and then I'm going to draw a tension card that hopefully doesn't say that zombie jumps on top of you and eats you for dinner this one oh good it says fatigue Burns hard your muscles complaining as much as your frayed nerves on this long night of sustained horror but for a moment at least you found respit please or sorry pause to calm your nerves and consider your next move this does have a different symbol down here meaning it is a more dangerous monsters out there which is not good now I have a small dilemma here if I were to move and open this door it would then link all of this together meaning this one would activate during the reaction phase and when it does react during the reaction phase it's going to move towards the closest Survivor or closest Stars member which would actually be Jill and I don't want it to go into that square I want myself to be able to run past this zombie and get out of that room so I think for now all we're going to do with Chris is move two spaces to here and stop I'm not even going to open that door cuz I do not
want to link all of this together so once he's done nothing's going to react then and I'm going to draw my next tension card now my goal is maybe to get Jill out over this way and maybe he can come in and burn these corpses I don't want any corpses around let's draw our cart all clear dust Falls from above in a thin Trail accompanied by a thump of footsteps they're on the hunt looking for you and again there's nothing different about this card that's going to allow it to attack any better which awesome and now it's going to be Jill's turn Jill's will move one two three now of course she did move right onto that zombie so something might happen go good nothing one two three and at this point I'm going to shut the door four and I'm going to throw it against all the other doors and knock everything everywhere just like that okay now that we've shut that door that zombie in there I don't have to worry about him anymore in theory there's nothing to react because I I've shut all the doors to things that could react I'm going to draw my next tension card and another all clear fatigue Burns hard your muscles complaining as much as your frayed nerves on this long night of sustained horror but for a moment at least you found respit pause calm your nerves and consider your next move okay and again doesn't do anything on the bottom fantastic and that's the end of her turn moving into Chris's turn one thing I could have done or should have done I guess either way you want to look at it is this is easier especially when there's like doors like this that are out here already connected like this but you can remind yourself what these are by placing these out on these doors so you can remind yourself that that's a simple lock and you need that find that particular item now of course there was
only I think only one key in this scenario I'm guessing so with this key I'm hopefully going to get up there and unlock it but for now we're going to go on to Chris he's going to use one of his actions to unlock this door open this door I should say then he's going to move two into this room and he's have to draw two encounter cards because of this token right there the first one that he has found is going to be a spawn a Cerberus oh boy a Cerberus okay we'll spawn a curus I think I'm okay with that I can shoot it it's going to go right there and our second one is going to be what's this say it says down here locate the closest tile to the active character that contains one or more enemies and at least one nonlocked closed door open every nonlocked closed door on the tile um nope I'm going to use my decoy on that I think that's the way that's going to go we're going to place that card let's see is right here next to this one you uh you can choose to resolve the card and instead place it next to this one choose not to resolve it sorry then draw a replacement so that is what we are going to do we are going to draw another one because that was terrible I do not need any doors opening that would be horrible uh oh it says here locate the closest tile to the active character that contains one or more enemies and at least wait this is the same card really same card oh no do can I do it multiple times let's see here or can only be done once per turn it says here for the rest of this scenario when drawing from the encounter deck you can choose not to
resolve the card and instead dra place this card I think I can keep doing it right I don't see why not I'm going to do it again then I don't want to open that door that's terrible there have a zombie in the room all right let's see what this one says spawn a zombie then draw attention card sure we'll do that we'll spawn a zombie it'll spawn right here and we'll draw a tension card let's see what this tension card says it says all clear you hear can hear trees rustling outside swaying on the wind the longest of their branches TI tickle the window pan scratching like nails lightning flashes and a long Shadow stretches over the floor suddenly you're not sure about sure the sound belongs to trees after all that has the more powerful attack symbol too OFA okay so that's two actions one to open it one to move in oh boy the next one I have to again take out that dog that dog is bad news City and that guy standing there is also bad news to because he's going to move into my Square all right I'm going to remove this we already dealt with that I'm going you I'm going to shoot I'm going to shoot again with my gun I never found any bullets I was hoping to find them I've got six so I'm going to go down to three we're going to shoot that dog leaving with only three handgun bullets with Chris this is getting rough I need to kill rough the crime dog there let's see how it goes I did get my attack symbol so that dog is dead we'll remove it from the board I don't have to deal with him sadly this one will react and move into my space with me and I think at this point we're going to go For Broke here I'm going to use all the rest rest of my ammo bringing it down to zero to fire at that zombie that's in my
space before I make the attack I do want to mention that this is showing on the tension deck right now but that isn't going to affect the zombie the zombies have a different symbol right there that means that they're going to attack one space away the one it was going to affect was the dog it allows it to perform two reactions which are absolutely Bonkers terrible so I'm going to roll our Dice and see how we do I need to get at least one hit here oh wow again look at this I got two shots that means we're able to head shot this guy but now of course I'm am completely out of ammo and with that completed there's no more reactions that I have to deal with so I'm going to draw a card again all clear silence calm peace do you truly trust those these things or are the Sinister traps tempting you into lowering your guard and again we have the more difficult symbol down here for I don't think it's really going to matter to anything I am going to move one two three four to right there call it a day nothing's going to react to me I'm going to grab my next tension card and see what happens another all clear soft light paints pants sorry paints your surroundings on on any other night any other place you might call the atmosphere relaxing but here and now this is a nightmare that's fantastic he is going to move one two now I'm going to be I'm going to use one of my two three I'm going to use my lighter to burn this one and then I think that's all I'm going to do then I think I'm going to move back one4 to here I'm going to leave one of those corpses I think it'll be okay I'm not exactly sure we'll find out at the end she's going to draw a attention card which is going to we're getting real close to the end here another all clear I'm not going to read
it I've read plenty of them already we're going to move into her turn she's going to grab that for one two three four she's going to move over there we're going to see what this B card is hopefully it's like bullets or something oh it's the other lighter that's awesome now she has a lighter that's fantastic she's going be able to bring that hopefully into the next game and that's going to be Chris's turn Chris is going to or she's going to draw a a card all clear Chris is going to move one two three to right here he's going to draw a attention card we're going to open that door and get the heck out of uhoh deathly WRA a Sinister growl Echoes from the walls dripping with malicious intent but where is it coming from are you under attack draw an encounter card draw an additional encounter okay we don't have this symbol but I do have to draw an encounter card oh no we don't want that let's see what card befalls us I think it's not going to hopefully be too bad it says here spawn a corpse oh that's fantastic I can put a corpse I going put a that's to over here that's no problem all right that that's the end of his turn I believe I kind of lost track of who was going when I think that was his turn so she's going to use the old key now to unlock this door and hopefully this will be the end we'll see we're going to draw our next card that is going to be from this deck and we'll put everything out there ready to go so let's draw our card and see what it says here so we have our lock door here so it's going to go there there's a few other things left to maybe get and here's that safe room we're trying to get get to it's right there so I'll lay at our tiles and be ready to
go here's the new tiles ready to go I'll Place her right there that's her first action was to unlock and open that door and now she moves in there from what I understand like I said automatically she's going to have to deal with this encounter but other than that here is our safe room that's all we have to get to we could go in here and draw two encounter cards in order to get an A item I don't think that's a good idea so I'm just going to deal with this in counter card and see how much further we can get this one says right here Spawn Two zombies oh we were getting so close and then the zombies come so we're going to put one here and one right here that's her first action was to move in for her second action she is just going to I'm going to mow that guy down with three handgun bullets that'll drop our total down to nine we just need to get one hit to knock this guy on the ground we got triple push back look at that that was not ideal but I'll push him back one two and I don't want to push him over here I can't see him so I'm going to push him back into that square there and now at this point he's going to take a reaction from what I understand I apologize it's not him that's going to be making the reaction it's going to be him that's going to be doing a move reaction uh you don't do it against for the people that you actually attacked but from where she is that was her first action open this door second action to fire she's going to fire again with three bullets why not we're going to drain our guns that's okay we're going to go down to six if I can just at least kill one more of these zombies then maybe we can run past this last one after all we have to get to the safe room once we do that we are good we got ourselves a push back and we got the knockdown or I shouldn't say knock down
the kill shot but for these guys it just kind of knocks them down so we'll push him back over here and we will put a corpse down this will make a move reaction towards me because I fired or made an attack and then it's going to do its normal reaction to move towards me and at this point I will draw a tension card now it's hopefully nothing is going to bad is going to happen we got an all clear so we will not have to worry about anything but this is a different symol it's not going to affect those zombies which is fantastic and we'll move into Chris's turn who's right over here he's going move one two three and then he's going to attempt to he tries to run by it's just going to get him again but oh barf all right he's going to move one to here and I think that's about all he's going to do I know what he's going to do for his second action he's going to use his green herb on Jill Jill's going to go from there back from kind of fine to fine and then he's going to stop for now this will move one up during the reaction and then I will grab his tension card and see what happens he has got also an all clear which is amazing so at this point Jill is going to move one and then she's going to try to move past for two come on Jill let's move past this zombie uhoh I did not the zombie hit me again it's eing me so I'm going to take one damage and since it took me one space to move here my second was to try to get out of the space I failed I have to push this zombie I'm actually to push into Chris's Square sorry Chris it's okay and then I get to move three and then for my fourth reaction I'm no for now I'm going to actually move four to right there that's going to be the end of my turn let's grab our tension card and see what happens hope it doesn't say zombies
attack uhoh gnawing fear bloody hands push the windows and doors a horde of foes waiting to Ambush if this character leaves their current tile during their next turn they must draw two extra cards in the next tension phase if this character so this is going to be on Jill I'm going to put it right there next to Jill hopefully I can remember that that's the end of her turn it's going to be Chris's turn he's going to try to move past that zombie before I draw the tension card I forgot I still actually have to do her reaction this thing that moving over here was from me trying to get past it it still has to do its reaction its reaction if it's in a square and it's in line of sight and range and everything to whatever is there it's going to make an attack so I have to actually be attacked by this thing with Chris so Chris again is going to have to try to evade this attack and this is all still part of Jill's turn he was able to evade the attack from that zombie I was able to prevent that enemy from hitting me and I can then push him I'm going to push him through this door and then for my first action with Chris now now at this point I should have drawn my attention card which is right here then it would be Chris's turn Chris is going to shut the door and then he's going to go one to shut the door two three and then he's going to burn this corpse with her on it but that's okay she doesn't mind she doesn't mind the smell of burned flesh that she's standing on that is going to cost me another one of my uh kerosene but that's okay those are my four actions he is done and that's Fant fantastic we don't have anything that's going to be reacting to us cuz we shut the door on them which is awesome we're going uhoh vigam mortis what's this uh your enemies lunge forward unpredictably
unpredictably Nails chewing through the air as their teeth snaps with beastial Hunger enemies on the same tile as the active character immediately perform a reaction if there are no enemies on the active characters tile draw two tension cards instead so that's what we have to do is draw two tension cards so here's our two tension cards I've got two of them right here we'll see what we have we get our first one all clear come on yeah okay all clear what's our second one come on all clear all clear fantastic all right that's the end of his turn it's go on to Jill's turn and Jill is just going to move one two one two three 4 to open this door now she's not going to leave the tile or she has to abide by this card this card would make her have to draw two extra tension cards on the next tension phase which is now I'm going to just draw one and discard that card because I'm not leaving the tile we've got all clear it's now going to be Chris's turn he's going to go one two three four he is also going to draw a tension card he has got himself an all clear Jill is going to move into this room and she's in the safe room she does not have to draw attention cards and Chris is also going to move into that room on his turn and he does not have to draw attention card key in the safe room and that's it we were able to complete the scenario so we'll go to the end of scenario phase so we can find out all the things are going to happen to our characters now that we've moving into the next scenario there's two different ways you can do this you can either complete it or you can fail it we were
able to complete it if you failed it though you would go through all of these steps then you do have the option if you wish to retry the scenario you can and that is totally up to you it does say if you continue to try to replay the scenario you can remove the some of the cards that are making it more difficult giving you a better chance at completing the scenario on top of that if you do fail you could choose to go somewhere else remember that all the pictures I showed you before where you could travel to all these different places you could try one of these other ones and come back to this one again if you wanted to that way it doesn't feel like you have to keep trying the same scenario over and over again but we did not we were able to successfully completed of course this was the very first mission so I I was hoping it would be somewhat less challenging until we start going forward but of course these are going to get more and more difficult moving forward if we go down our checklist here the first thing we have to do is increase the monsters or Mansion sorry danger level by one so we're going to take our dial and increase it by one we're still now we're on the green hand so if we have any cards that have that symbol on them we would be starting to use those now moving forward into our next scenario on top of that the next one we have to do is if there are five or more corpses on in on the playing area shuffle a one card into the encounter deck for all four one encounter cards have already been added to the deck increase the mansions danger level by one now remember we went through and really did a good job on torching all of those uh bodies corpses I should say though we have to have that special rule that remember from the very beginning of
the game that stated that we're in a quiet area if the tension deck runs out during the scenario we Shuffle it the discard pound place it back face down on to refresh the deck but additionally if the scenario is successfully completed we skip step two of the end phase so even lighting all those corpses on fire really didn't help us too much cuz we're going to skip that anyway but I didn't quite know that was going to be the case next if there are five or more zombies on the playing area increase the danger level by one if uh there are 10 increase it by two now if we look at how many zombies are out there on the board we have one two three four which means we don't have to increase it oh no there's one more five missed it by one okay going forward though at least knowing these parameters we might want to think about that when going forward cuz we probably had some more time I could have gone back and we killed one more zombie in hopes that something would happen so in this case we are going to tick our dial up one more tick so it's up like that then we're going to discard any key items in the characters's inventories and in the and the item box then each character can use these item box to share or retrieve any number of items and of course those item boxes are what we found in that rest room just like that the next thing is number five we get to reset our handgun ammo dials to 15 so even though we had I think both of us were probably down to almost zero if not at zero we get to put our handgun bullets at least to 15 now any other ammo we have if we had other guns of some kind we'd be able to get two more
bullets into the at the end of each scenario on top of that we can use any bullet or sorry ammunition items we have that correspond with certain weapons to give ourselves more ammunition on top of that we get to heal each player's character level by one now of course Chris did not get hit but Jill had taken one damage so we're going to put her back all the way to the top and on top of that we can use any healing items we want to moving forward once that's complete we can then heal each non-exhausted character in The Reserve by two levels we didn't have to worry about that for this Mission we'll Shuffle any discarded item a in and item a tension and encounter cards back into the respective decks creating a full new set of cards that we can use for our next mission then we're going to discard any remaining ink ribbons which we didn't have for this one and then at after resolving the end phase the players can choose their next scenario after choosing but before setting up players can switch characters trade items and use any items in the item box and retrieve them as well so that is the end of setting or the end of the adventure for this time we've made it through the first thing which was the first floor West a scenario so we have completed first floor West a which means we would gain access to card number 10 which is right here but as you can see card number 10 is locked now until we find that particular item so we'll have to start looking for that in the mansion in some of these other places like the second West Floor a or the first floor
east a and first second floor east a one of those could potentially have what we're looking for in order to unlock that next part so that we can continue forward in the Mansion but of course we'll do that in the next video thank you so much for watching Jill and Chris get to their safe room they're nice and safe inside it and moving forward we're going to go to the next level I'm going to let my patreons decide which direction we should go in this particular campaign I'm excited to try all the different areas we have to go to and hopefully we can find those missing items so that we can unlock the rest of the Mansion I hope you enjoyed the play through if you did don't forget to like subscribe and hit that Bell so we'll see you know one more Resident Evil comes out also please feel free to leave anything in the comments below I would love to hear from everyone on top of that don't for get I'm going to try to get all this painted up I had didn't get a chance to do that because sadly I was sick over the last week and so I didn't get a chance to paint much of this game which is I was really hoping for during the week I usually try to do at least one live painting sessions where we can try to paint up some of our and characters or enemies that we're going to be using in future games on top of that I do do live playthroughs with Colin I do do I do do I said that I do live playthroughs with Colin we try to do this about once a week so please look for those we have a lot of fun playing Gam games together here on meet me at the table if you're interested in supporting the channel the link to my patreon is also found in the description of this video please feel free to join the patreon those that have are located on the screen right here thank you so much for your Patron it means the world to me those that join the patreon have
the ability to help not only decide how the game unravels like I said I'm going to have them decide where we're going to go are we going to go to the second floor West a next or we going to go to the second floor east a or the SEC or the first floor east a I'll let them decide where we're going to be traveling next inside the Mansion on top of that on top of that they also get the ability to see any of my playthroughs that I do usually about a day or two ahead of time without commercial interruptions so that is another perk that the patreons also get so there you have it our first RP into the mansion in Resident Evil thank you again so much for watching and if you're excited to see Chris and Jill continue to try to make it through Resident Evil the board game then I need you to meet me at the
eat your master when to set me up against your enemies