Nature - How To Play
Games in This Video
1 game is featured in this video — it unlocks as you watch.
Transcript
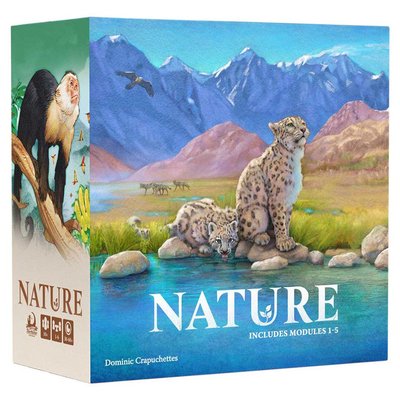
Hi and welcome to Watch It Played. My name is Rodney Smith and in this video we're going to learn the one to four player game Nature designed by Dominic Crapettes and published by Northstar Game Studio who helped sponsor this video. The Earth is filled with a diversity of life and each species is striving to survive and thrive. Here you'll be guiding your species in their quest for survival around a watering hole other animals are also sharing and hunting from. So to win, you'll need to ensure your species gets their share of the food. In this video, I'll be teaching you everything you need to know to play the base game of nature. But if you're looking for new ways to introduce more species, environments, and challenges, there are several expansions you can pick up separately to mix and match into future games, giving you several new ways to experience it and cater it to your play style. Some will introduce more predators, others will emphasize a more relaxed play style, while others will offer more challenging environments or introduce bluffing and various other surprises. As I mentioned here, we'll be focusing on the core game, which has everything you need to play. And this will make it very easy to jump into the other options if you pick them up as well. But for now, join me at the table and let's learn how to play.
To set up, put this watering hole board in the center of the play area along with a supply of these double-sided size dials, which you'll want to keep within reach of the players, and that I like to keep in their provided boxes. There are also storage containers for these double-sided population tokens that I'll leave in their handy trays as well, along with these plant and meat tokens. The cards with this back make up the nature deck, which you shuffle and then set face down. You'll also find 10 double-sided hunter cards, as labeled here at their top, which you set into a pile nearby as well. Now draw and reveal the top card of the nature deck and tuck it under the watering hole so you can see its value printed in the bottom right hand corner here. We'll learn how this value is used in the game later on.
But if it's your first game, they instead recommend going through the deck and finding any card with a value three in the corner here and using that instead. Then since you would have just gone through the deck, you would reshuffle it afterwards. Next, give each person one of these screens along with a player and trait aid. We'll assume we have two players in this video, and the person who now makes the most amazing animal noise is chosen to be the first player and collects this snow leopard. Or you can just pick someone randomly. And that's the setup. Now, your copy of the game may have some other promotional elements, but those are optional extras you can just ignore for now. In nature, you and the other players will be gaining and evolving various species you'll be trying to feed and help survive. The longer you can sustain them, the more points you'll earn, and the player with the most points at the end of the game wins. Nature is played over four rounds, which are broken into four phases each. Starting with the preparation phase, here you first check the value showing on the card tucked under the watering hole. This will be a number from 1 to four. And here we have a three. You now multiply this number by the number of players and add that many plant tokens from the supply to the watering hole. So six in this two-player game. Next, each person gains a new species represented by collecting one of these size dials and setting it so the green forager side is face up. The value
showing on the dial is that species size, which always starts at one. So adjust the dial to that value. Your species also gains one of these population tokens with what is known as its alive side face up. So a species has a dial which represents the size of each member of that species where a one would be something very small like a mouse or a squirrel all the way up to size four which would represent something like an elephant or a giraffe. Your species also starts with one population token and may gain more of these later. These represent how many of that species exists. So one token would mean very few. Well, if you had several population tokens, that means the population of that species is just growing and growing and growing. Once each player has their new species, they each draw five cards from the nature deck, which they add to any cards they might have from a previous round. And there's no limit to how many cards you can have in your hand. So, that covers the preparation phase where plant tokens are added to the watering hole. Each player gains a new species and everyone draws five cards, which you'll find a reminder of here on your player aid. Next, we move to the adapting phase. Here, players take turns starting with the first player and going clockwise around the table once. On your turn, you can take as many actions as you can or wish to with the cards in your hand. And each can be used to perform one of three
different types of actions. And you can take actions in any order and repeat them as you like. So, let's go through each type of action starting with increasing your population. To do this, put any card from your hand face up into a shared discard pile and then collect one of these population tokens from the supply, adding it to any one of your species with its alive side face up. And remember, there is no limit to how many of these tokens a species can have. Now, I should mention during the first round, you'll only have one species, but remember at the start of every new round, you'll gain a new species in the preparation phase. So during this video, I'll also share examples like you would see later in the game. For example, in this case, if I was discarding a card to increase population, I could pick either of these species to add the token too.
And you'll want to ensure you put some space between each species so their tokens remain separate. And remember, you can repeat actions. So I could remove another card and add a population token here or here and so on. Now, another option is to put a card from your hand into a shared discard pile in order to increase the size of one of your species by rotating its dial to the next highest number. And you can do this multiple times, increasing the size of a species for each card that you discard. But you may never lower the size of a species or increase it beyond four. Four is the maximum size a species can reach. Finally, we come to the last way you can use a card from your hand, and that is to play it as a trait. Each nature card features one of several different types of traits with their name in the area here and a description of that trait's effect in the area below. We'll see how the various traits affect game play later. But to add a trait to a species, set that card face down beside it. It's important that you keep the traits a secret from the other players for now.
Each species can have up to three cards assigned as traits to them, which can include duplicates, but each card still counts against the maximum of three that a species can have. And remember, any cards you use as traits, you assign face down. You can look at your own faceown traits, but keep them a secret from everyone else. So, those are the three different ways you can use cards during this phase. But there are also free actions you can perform which don't require using a card from your hand and can be performed as often as you like at any time during this phase. One option is to turn one of your species into a hunter by collecting one of these hunter cards from the supply and adding it to one of your species. At most, each species can have one of these hunter traits. And this does count as a trait towards its three card trait limit.
After a species gains this hunter trait, which unlike the others, is always face up since it's double-sided, you also flip its size dial over to its hunter side. And we'll see how becoming a hunter affects gameplay later. Although there are only 10 hunter cards in the deck, those and all of the different types of tokens in the game are considered an unlimited resource. So, just use a suitable replacement if you would run out of any of them while playing, which is not likely to happen. Also, if you would need to draw cards from the nature deck and it runs out, just reshuffle the discard pile into a new draw deck and continue drawing any cards you are owed. But with that understood, let's get back to learning about the free actions you can perform during this phase. Another option is to remove traits from a species by discarding it. If the trait is a nature card, just put it into the shared discard pile. If you remove a hunter trait, put it back into the hunter pile and flip its size dial back to its forager side. I should also mention you're free to hang on to cards during this phase and save them for later.
Either way, once you've taken all the actions you can or wish to, the next player in clockwise order resolves their adapting phase and turns will then continue like this once around the table. Then afterwards, every player flips any faceown traits they have face up. Then it's time for the feeding phase of the round where every person tries to feed their species. As we know, your species is represented by a few different things. It has a size shown on its dial. It has traits indicated on its cards. It can be a forager or a hunter. And it has a certain population size based on how many population tokens it has. and it is the population that you are feeding. Every one of these tokens showing this side represents a member of the species that is hungry. It will either be fed by having a single plant or meat token placed on it or be killed from starvation or from being hunted which both flip a population token to this side. At the end of this phase, all of your population tokens will either be fed, which again means they'll have a plant or meat token on them and or they'll be dead. During the feeding phase, starting with the first player, turns will be taken around and around the table. And on your turn, you must forage or hunt with a single one of your hungry species if possible. Remember, a species is hungry if it has any population tokens without a plant or
meat token on them. Each species starts as an herbivore, and we'll see how that can change later. But herbivores always forage when they eat. So, let's see how that works. First, check the size of your chosen species as shown on its dial. Here we have a size two species. This is how many plant tokens it will take from the watering hole. But we add to this any extra tokens gained from its traits. For example, this species is clawed. This trait says that its species gains two extra plant tokens when it eats plant tokens. So when this forages, it takes a total of four plant tokens. And don't forget, you can have more than one of the same trait. So if this had two clawed traits, it would take two for its size plus two more from this clawed trait and another two for this one for a total of six. We'll assume it has just one clawed trait and we'll collect four plants. However, a species will never take more food than it has hungry population. In our case, our population size is three for our chosen species. So although we could eat up to four plant tokens, we'll only take three. And we assign one to each of our population tokens. In this way, since each of our population tokens now have a food token, this species is completely fed. But be aware during the game, players should check to see if any of their species has
a trait with this symbol. These are known as trigger traits, and they must be resolved anytime the condition on them would occur. For example, this one labeled as opportunistic says that after one of your species forages or hunts, it will eat two meat if there are still plant tokens in the watering hole. We'll see how hunting works in a moment. But if we assume we also had a species with this trigger, then if this one had just foraged and there were still plants in the watering hole, its effect of eating two meat would resolve. Now, this means we take two meat from the supply and assign one to each hungry population token from this species. If you have several effects that would trigger at the same time, you can resolve them in any order you choose. One thing I should point out is that although a species starts as an herbivore, which means it will only eat from the watering hole, if it has any trigger traits, it is considered an omnivore. If you pick it to eat during your turn, it can still only forage and eat plants from the watering hole, but will also eat meat when its trigger trait activates. Now, keep in mind, a species with no trait cards is still a species, and its population tokens will still be looking for food. So, this would be considered an herbivore species. And if it was eating, it would collect its size and tokens from the watering hole to distribute to its population tokens as usual. In this case, it would collect three tokens. And you always have to collect as many tokens as you are owed
if you are able to. However, you can only collect as many plants from the watering hole as it has tokens. So here, my species would only gain two plants and feed two of its population tokens, leaving the other two unfed for now. Again, players will want to keep an eye on their triggers because species with this tusk trait will gain one meat from the supply anytime the last plant token leaves the watering hole. So, we've seen how some species can eat either from plant tokens they take from the watering hole or meat tokens they gain from triggers. However, a species may have another option as well. If it has the hunter trait card, which means its dial will also be flipped to its hunter side, then it will hunt when it's picked as the species you want to feed that turn.
It's considered a carnivore and may not forage at the watering hole. Instead, a hunter always targets another species, one of your own or one controlled by another player. And it may do this if it has any unfed population tokens and an equal or higher hunt value than its targets defense value. A species has a default hunt and defense value equal to its size. So, this size two hunter has a hunt and defense value of two, while this species has a hunt and defense value of one. So, this species could hunt this one because it has an equal or higher hunt value than its targets defense value. However, a species can have its hunt and/or defense value boosted by values showing on its trait card in the area here. The top value with a claw represents a boost to its hunt value. And the value under it showing a shell increases its defense.
Sometimes a trait won't offer boosts to either value like we see here. While other times it may only boost one of them here with plated, it doesn't have a special effect, but it does provide a plus4 to its species defense. So a hunter species like this one has a total hunt value of 2 + 2, which is four. And that means it could not hunt this species, which has a defense value of 1 + 4, which is a higher total. On the other hand, if we compare this hunter with a total hunt value of four against the defense value of this other species controlled by the same player, this species has a defense value of four. And that makes it a valid target because the hunter just has to have a hunt value equal to or higher than the target's defense. So, if I did choose this species to hunt, I may have to choose one of my own species as a target if it's the only valid one. with one exception. Sometimes a trait prevents a species from being hunted. This effect says a species with a fast trait may only be hunted by a species with as many fast traits as it has. So here, this species has a total hunt strength of three. And this has a defense of only two, but it could not be the target of a hunt because it has the fast trait. This hunter would also need the fast trait to be able to target it. And if this had two fast traits, then the hunter would also need two fast traits. Either way,
let's assume we had a situation like this. Once a valid target for a hunt has been picked, the hunter kills a single population token from the targeted species. The player controlling the target species now picks one population token from that target to flip over to show that it has been killed. A player can pick a token or may have to pick a token with food already on it. And if so, that food goes back to the supply and then the population token is flipped over, but you will normally want to pick a population token that doesn't have food if you have that option. The killed token is then removed from the target species and put beside the screen, not behind, of the player who controls the targeted species. Then after the hunter eats by taking meat tokens from the supply equal to the value showing on the targeted species size dial. So in this case two and then they add each token to an unfed population of that hunting species. As usual if you would gain more food than you can place any extra is kept in the supply. Again be aware of trigger effects like we see on scavenging. This says that after any species hunts, this species also eats two meat, which means it would add two meat tokens, if possible, to unfed population tokens it has. Here's another interesting trait. If a species is targeted by a hunt and has this horned
trait, it kills a number of population tokens from the species that's hunting it equal to its own species size. So if we go back to our previous example where this hunter targeted this species, you'll notice that it has the horned trait. So after the hunter resolves its kill, the horned species checks its size dial, not its total defense, just its size, and then kills that many population tokens belonging to the hunter. So they would likely pick this one here, flipping the token to its killed side and putting it by their screen. And then they would have to pick one of these that has a meat token on it. So, they'd return this back to the supply and put this one face down by their screen. Here's the final trait you'll find in the core box. This social effect says it provides plus two food when eating. This means whatever it eats, it then gains two more of that same type of food. So, if a species with the social trait was eating from the watering hole, in this case, it would get one plant and then two more from the social trait. On the other hand, if it was instead hunting and the target it picked would provide it with one meat, then it would gain two additional meat from the social trait. Of course, you ignore any tokens you can't place as usual. The important thing to notice is that it resolves when eating. If a social species also had the tusk trait, remember each time the watering hole empties, this trait causes it to eat one
meat, which would then cause the social trait to collect two more meat. Now, remember, you can have more than one of the same trait. So, if your species had two tusked traits, each resolves when the watering hole empties. And since they each have their own eat effect, they each cause the social trait to resolve. So after the watering hole empties, this trait would cause the species to gain one meat and then two more from social. Then this would also resolve gaining another meat and then two more from social once again for a total of six meat. And I should mention the effects of traits are always mandatory. If you can resolve them, you must do what they say. All right, with all of those examples of foraging and hunting understood, let's summarize what we know so far about this feeding phase.
Remember, starting with the first player and going clockwise around and around the table, players will take turns choosing one of their hungry species to either forage or hunt with. I'll remind you, a species is hungry if it has any unckilled population tokens without food tokens on them. That said, if a species only has fed tokens and the rest have been killed, then it is no longer hungry. If a species has fed some of its population tokens, but some are still hungry, then it is considered a hungry species and will try to eat again on a future turn. And you must eat with one of your species each turn if you can. But if it gets to your turn and you pick a species to feed and can't forage or hunt with it, you must starve one of its hungry population. Do this by flipping any one of your unfed population tokens to its killed side. A token that's been flipped like this cannot be fed later and it is moved beside but not behind your screen with any other killed tokens you may have. Then it's the next player's turn. And when it's your turn again, if you still have a hungry species you can't feed, you must starve and kill another of its unfed population tokens. But just remember, you must forage or hunt if it is possible to feed one of your species that way, even if that means you have to hunt one of your own species or suffer the negative effects of one of your own traits. That said, as turns continue around and around the table, eventually you won't
have any more hungry population tokens. They'll all have a food token on them or be flipped over to their killed side or some combination of both. And at that point, you must pass on your turn. After you pass, your turn is skipped for the rest of the feeding phase, but other players can still target your species with their hunt actions, and your triggers will still resolve if they would apply. Again, you will find all the steps for performing turns during the feeding phase right here on your player aid. But there is one other option you also have that's printed here. As it says, at any time during your turn in this phase, you may discard one or more cards from your hand to add plants to the watering hole equal to the values showing in their corner here. So before taking a turn to eat, if you saw there wouldn't be enough food for one of your foraging species, you might move these two cards with a total printed value of three in their corner to the discard pile in order to add three plant tokens into the watering hole, which you could then use to feed your species when it forages. Now, that said, there are likely going to be times where there just isn't going to be a way to feed your species. And as we saw, this causes one of their population tokens to be flipped over to its killed side. If you ever flip a species last population token over to its killed side, then that species has gone extinct. Now, to be clear, as long as it has at least one token with its population side face up, whether it's been fed or not, then it is
not extinct yet. In this case, we have a species that is fully fed, but maybe some of its population tokens died off during this phase. Now, this won't starve anymore this round, and it won't need to be fed anymore this round since it doesn't have any unfed population tokens remaining. But, it could still go extinct if it was targeted by a hunter, causing this final token to be killed. When a species goes extinct, put all of its killed tokens and its size dial left at its current value next to your player screen with any other killed tokens you have. These will be used in the next round. If that species had a hunter trait card, return it to the hunter deck. If it had any other traits, return those to your hand. You'll be able to play these as traits during the next round or discard them in this phase to add their food value to the watering hole if that's useful to you. as we learned about earlier. And that covers everything that can happen during the feeding phase. And once every player has passed, it's time to score the round.
Here, you remove every plant and meat token from each of your fed population tokens and put them behind your player screen. These will each be worth one point at the end of the game, and hiding them will help prevent players from being exactly sure how many points you have as the game goes on. After players have collected and hidden their food tokens, the first player token is passed to the left and then that player begins the next round just as before with the preparation phase. Here you'll multiply the food score showing on the card tucked under the watering hole during setup by the number of players adding that number of plant tokens to any still remaining in the watering hole from the previous round. Then once again, each player gains a new species just as before, taking a new size dial set to one and placed on its forager side along with a single population token. However, if a player has any killed population tokens beside their screen from a previous round, all of them are now flipped over and added to the population of their newly gained species. If you have one or more size dials beside your screen from species that went extinct last round, total their value and add it to the size of your new species. So, with these two dials here, we'd add three to our new species, taking it from one all the way over to four. Just know a species in the core box can never have a size greater than four. So, ignore any
extra size you might have gained beyond that. The dials from the extinct species of the previous round are then returned to the supply. And just be aware, these tokens and size dials from previous species can only be added to your new species, not to any other species you may still have. Either way, you end the preparation phase as usual by drawing five cards and adding them to any you still have. Then you continue to the adapting phase and rounds will continue like this until the end of the fourth round where the game ends and you move to final scoring. Here you total all of the food tokens behind your player screen. Each of these are worth one point and then you gain two extra points for each surviving species you still have in front of you. So in this case, I'd earn six extra points for my species. Now the player with the most points wins. If there's a tie, the tied player with the most traits on their surviving species wins. In this case, I have four traits. And if there's still a tie, order a vegetarian and meatlovers pizza and play again.
And yeah, I'm not kidding. That's in the rules. I want to point out you'll also find a frequently asked questions page in the rule book that can help with unique situations that may come up when playing. And along with a trait card player reference, there's also a reference guide with extra tips on how the traits work and interact with each other. You'll also find information on the app version of the game in the rule book, and there are components and rules for solo play, but those I'll leave for you to discover on your own. Otherwise, that's everything you need to know to play nature. But don't forget, there are a variety of other modules you can pick up separately, which can be mixed and matched and combined in various ways to provide new ways to play and experience the game. That said, if you have any questions about anything you saw here, feel free to put them in the comments below, and I'll gladly answer them as soon as I get a chance. You'll also find forums for discussion, pictures, other videos, and lots more over on the games page at Boardamegeeek, and I'll put a link to that in the description below.
And if you found this video helpful, please consider giving it a like, subscribing, and clicking that little bell icon so you get notification anytime we post a new video. And if you'd like to support us directly, you can join our Patreon team, which I'll have linked below. But until next time, thanks for watching.