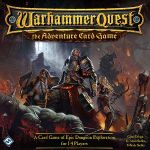
Warhammer Quest: The Adventure Card Game | Campaign Quest 4 & 5 | Playthrough
Games in This Video
1 game is featured in this video — it unlocks as you watch.
Transcript
hello everyone and welcome to meet me at the table this is Colin and I can't believe this took so long we are going to do quests 4 and five of the Warhammer Quest the adventure card game this will finish off our campaign I know the last video I stated I would do it in a week or so and we're 5 and 1 half months later but better late than never right I am super excited for this I got a bunch of feedback on which cards to upgrade for each character remember that each of our characters can now hold four gear items and will each have three upgraded cards we'll only have one non-upgraded at this point as with the other videos make sure to turn on those klling on subtitles if I do make any errors and miss them in editing and people tell me about them I'll put them up as klling on subtitles so they'll pop up as you're watching all right without further Ado let's look at our upgrades for our characters and then start quest for Firepower I decided to upgrade our rest for our Warrior priest so we went from Battle prayers to Faith rewarded lets us roll two dice you can EX one non- Nemesis enemy engage with you and we can choose a hero they become empowered and claim one success token our priest has three different gear items our Lantern after the party travels which that's not going to be helpful in this scenario we're not traveling uh but I'm still holding on to it so we'll ignore that one we do have plus four health so we have 17 health and we have our book after your rest action you may choose one hero that hero recovers two health or discards one condition for our troll Slayer we decided to up upgrade Into The
Fray into honorable death you may engage up to two enemies explore with two white dice during this action for each attack you get plus one additional success and draw resolve a dungeon card we have two hammers one in our left and one in our right hand uh we have our Warhammer after your attack action you may choose one non- Nemesis Target engaged uh with you and exhausted and then we have me father's ax before your attack action if you are engaged with the highest ranked enemy you may discard a success to apply plus two hits finally we have our pendant here that we can deplete once per scenario you may deplete this card before your activation for the party to collectively ready for actions our dwarf iron breaker decided to upgrade Grom meal's bull workk we get to roll two white dice for this before this action you may engage one enemy engage with the target hero then if that enemy is not a nemesis you can exhaust it the target hero readies one action our iron breaker only has two items the uh holy symbol of Shalia you may deplete this card before your activation to choose a hero they recover five health and The Medallion of more you may deplete this card after your activation to choose a defeated hero that hero recovers three health and is no longer defeated that might come into play in this scenario finally our way Watcher decided to upgrade her Shadow watch that's her Aid action this will let her roll three dice the target hero May ready an action you may choose up to two enemies engaged with the target hero each of those those enemies suffers a damage we have our Oaken ciret
which we found in the first scenario before your activation recover one Health limit once per round and we have this awesome crossbow during another Hero's attack action you may discard a success to add plus one success and the nightcloak you cannot receive conditions good or bad scenario 4 Firepower disaster looms an orc wag descends upon scum convinced that the events thus far are a punishment from the gods the citizens of scum rounded up all foreigners and ejected them from the town with catapults you alone were spared as the town's bergo Miser has a special mission for you travel back to the ruined Fortress where you found snack krackle pop and recover some of the ancient dwarf made artillery there when you arrive you are soon beset by mutant ratmen and an enormous vaguely rat shaped abomination in toe die die green thing traitor shrieks one of the rats you could point out that you aren't snack kagle but somehow you doubt it would make a difference time to test those dwarf cannons and see if one still works here we have the list of all of the enemies we'll use for this scenario just know that whenever it says an open enemy it is level two so there'll be level two enemies not level ones we only have one location for this scenario place the ancient redout location card into play the party remains in this location for the entirety of this Quest and can fully explore it multiple times our gear and dungeon deck we Shuffle 12 open gear cards together plus our three legendary So it's 15 cards large we also
need to shuffle the 12 dungeon cards together place the Canon dungeon card in the Nemesis layer a hero can claim it by fully exploring a location and here is the Canon you'll see how that works hopefully as we play cuz I'm hoping I can get that the front side of quest 4 States the cannon is claimed through location effects and can be used multiple times during this Quest each time the cannon is used instead of depleting it place in the Nemesis Lair you're going to see that Canon is going to help us take on this Abomination I did neglect to mention that this Abomination starts out that's our Nemesis he will start in the shadows so he's not going to be in the Nemesis layer he's going to be out ready to attack us right away our Victory is just defeating the Abomination then we resolve the reward effect on the back conversely if ever we get to that last spot on the Peril track the ancient redout is destroyed and unfortunately we've been defeated now we continue on to Quest five which is the best part about these you continue going you don't have to replay but I do hope we can take out this Abomination let's look at the Abomination and our location the Abomination has an afflict value of four oh my goodness we have to defeat him 25 health and four armor now when he activates he just advances though he doesn't actually inflict however read this before a hero's explore or attack action this enemy engages that hero when this enemy engages a hero that hero exhausts one action or suffers one Health and this symbol means this enemy engages the hero with the fewest
exhausted actions soever we roll that that's how that's going to trigger we also have the ancient redout the old fortress stands as a monument to dwarf architecture yet with the monstrosity smashing everything in sight you fear it will not stand for long during any phase when this location is fully explored the act of hero claims the Dwarven Cannon and discards all progress and we need eight progress we're going to spawn two enemies engaged and two in the shadows just so you can see this cannon you may deplete this card after another hero AIDS you to choose one enemy in play aka the Abomination and have it suffer four damage because then we don't have to worry about the four Shields we have to spawn two enemies engaged with two of our characters the warrior priest will have the clan rat and our troll Slayer will be engaged with oh the Warlock engineer that's the first time you're seing that one we're also going to grab two cards face down and put these in the Shadows we've completed our setup let's now start our Quest so this one is a timer Quest we just have to defeat that Abomination our first player is the warrior priest just like every other video I think I am going to start with an explore action now when we're going to do that explore action before we can actually do it this Abomination will engage us and then we either have to suffer a damage or exhaust an action I think for now we'll just exhaust our sigmar's light I think that'll be more helpful later when people have damage so we'll just exhaust that we have two enemies engaged we can roll three white dice resolve a dungeon card and then
distribute two successes among the party my plan is to give our troll Slayer some of those successes three white Dice and two black dice we need to roll up oh interesting the first thing we see is three total successes I'll Place three progress onto the ancient redout so I'll place that on there we need eight to get the cannon then unfortunately we're dealt four damage but I do have one Shield so that's three damage to our Warrior priest just know up at the top of the screen you're going to see my character's Health the remaining health so you can track that as we're playing next the Abomination will engage the hero with the fewest exhausted actions I'm going to have that be because the troll Slayer iron breaker and way Watcher all have no exhausted actions I'm going to have it be the troll Slayer might as well because the troll Slayer will probably attack the Abomination we've resolved our dice now let's draw a dungeon card we have the elf cap fungus you may discard this card after your activation to roll one hero die on a hit perform one additional action otherwise suffer two Health do I want to do that now no let's hold on to that let's hold on to that we then get to distribute two success tokens and I'm going to give them both to our troll Slayer who will place it on his attack and that will end our activation I do need to remember the Abomination just engaged the troll Slayer when this enemy engages a hero that hero either exhausts an action or takes a damage I think I'm gonna have the troll Slayer just take a damage going down to 12 health and that means he won't take the damage if he decides to attack because the Abomination is
already engaged with him speaking of which I do think we're going to use our Demon Slayer for the troll Slayer lot of slaying over here you may engage one enemy Don't Mind If I Do let's grab that Clan rat as well so we have a clan rat a warlock engineer and the Abomination all engaged with us we get to roll three white dice during this action if you target the highest ranked enemy yes that's applying plus one success so I'm going to grab one of these so I don't forget if you do not have any armor equipped you get to recover health equal to the attack value of all enemies you defeat I have no armor equipped I'm also going to use me father's ax so I can discard one of these success tokens and essentially turn it into two so that means right now I have 1 2 three four successes already we're also rolling three black and three white dice for this look look at this blacks are nothing wow we hit for 1 2 3 4 5 6 7even total hits now I could go for the Abomination but I think I'm actually just going to take the Warlock out this warlock needed six hits with one armor I did not want to see him hanging around so I wanted to take him out because that enemy would attack for two we also get to heal the one damage on us we have no damage I'll take that we'll also use our Warhammer here after your attack action you may choose one non- Nemesis Target engag with you and exhaust it so we're going to exhaust that Clan rat our iron breaker will activate next he is going to use his Relentless charge he may
engage up to three enemies well one is going to be this Abomination and when it engages him he has to either exhaust an action or take a damage we're going to exhaust an action let's exhaust our race our rest we're not going to rest right so I'll exhaust our rest for him we're also going to engage the exhausted Clan rat cuz maybe we can just deal it two damage and take it out then we're going to grab one from the Shadows looks like we found a giant bat this attack will be three white and two black dice we'll roll them up oh we've got a burst The Shield we do need so let's get a token for that burst so we don't forget and we'll roll this up and we've got another burst I love this game I love games with bursting dice it is just too much fun okay we have 1 2 three four total successes we do get hit for four damage but we have two Shields we'll take two that knocks us down to 12 Health we can deal with that and with four successes do we want we can't even hit the Abomination he has a shield of four so let's just take out the giant bat and the clan rat both of these enemies are gone our way Watcher is going to use her hail of arrows she can roll three Dice and Aid someone she's going to Aid the iron breaker the target hero May ready one action he is going to ready his Relentless charge that way he can can attack next time which seems worth it you may choose up to two enemies engage with that hero each of the enemies suffers one Health the Abomination does
not move so it's going to stay where it's at and it's going to take one damage only 24 more to go we're rolling three white dice on this oh wow 1 2 3 four total successes that's actually quite amazing we'll Place both on our attack and our explore remember in this game the max you can have is two on each of your different cards we'll place two on our attack and explore that will end the hero phase we'll move to the enemy phase our Warrior priest has nothing engaged with him so he has to look at the shadows and we have a clan rat they will advance and inflict so he actually has four damage he has the most damage of anyone and that Clan rat is engaged with him the Abomination simply advances that's all he does so we're good with him there is no effect on the location so we'll just go to the Peril phase moving this one space down and then we will move our first player over to the troll Slayer our troll Slayer will be the first to activate this round let's have him do his Aid he gets to engage one enemy let's Engage The Clan rat yeah we don't need to engage the Abomination we can't attack it and it doesn't engage you when you do the aid or the rest action it's only when you do the attack or explore we're going to Aid our priest the target hero May ready an action let's have him ready his explore yeah he's going to ready his explore and the big thing is since he engaged an enemy he will gain empowered for his next activation two white to one Black die and we have three successes for the
priest we'll place two of those on the soul fire for attacking and one on The Guiding Light yeah I love all the aiding in this scenario this might seem a bit crazy but I think I'm going to have our iron breaker use the Grom rail bull workk this will let him ready all of his actions and it states before this action you may engage one enemy that's engaged with the target hero we are going to Target our troll Slayer then if that enemy is not a nemesis exhausted so that means this clan rat is going to be exhausted so we don't have to worry about it attacking us this will also allow our troll Slayer to ready one action we're going to have him ready his attack we want him to be able to use that and then we'll ready all of our actions two white to one black we have one two three successes and nothing on the black d we'll place two of those success tokens on our Demon Slayer and one on our honorable death our way Watcher then will do some exploring the silent stalker three white dice drawn resolve one dungeon card you may exhaust one non Nemesis enemy in play uh there aren't any that we can exhaust actually this time cuz the clan rats already exhausted so just three dice we'll give our dice a roll and we have three successes I'll roll this one up again uh one 2 3 4 five successes 5 + 3 is exactly eight once we have eight progress here we'll be able to claim this cannon but first we have to draw a dungeon card and we drew despair the burdens of your quest lay heavily upon you suffer one Health discard one
success token and exhaust an action ow this knocks our way Watcher down to 10 health and she has to exhaust her rest the only action available to her now is an attack to be able to refresh her cards with that though we will spend the eight here cuz we can do this during any phase and we've claimed the cannon which we're going to use on that Abomination as soon as as we can we have to have another hero Aid us to do that and I'm realizing I already missed something that Abomination should have engaged the way Watcher I'm going to say she would have taken the damage instead of exhausting something uh just because so we're down to nine health and we have to roll a black Dy in and it deals us four damage ow that means we have six damage on us we only have five Health it's a darn good thing we have that Canon last to activate will be our Warrior priest he's going to use his soul fire and exhaust Guiding Light because that Abomination will engage him he could engage an enemy I don't think we're going to we've got three white dice before this action you may exhaust another action to Target one additional enemy and add no you know what we're not going to exhaust this we're going to take another damage that's three four that's five damage on us but then we'll exhaust this so we get one additional success I'm going just for the big guy I'm going to have to use this I've run out of these tokens cuz I've used so many so we have three successes and one Shield right now going against the Abomination we'll roll three white to one black and we have a burst which is great I love seeing the burst we are going to get hit for four more damage
and okay let's see we have 1 2 3 four so that means we dealt it two damage it only has three damage on it out of the 25 we do get hit for four damage but we have one Shield so that's three oh boy that means we have 3 six 7 we have eight damage on us and hold on just a second we had plus one Shield because of our soul fire so I'll only take two damage for that instead of three that means if my math is right we're down to 10 Total Health the only enemy out besides the Abomination is this clan rat and it's exhausted so we'll just refresh it and that's going to end the enemy phase the location phase we can continue to skip during the Peril phase though we have an effect the Abomination flailing limbs have broken another hole in the walls shrieking monsters skitter through the hole and leap to attack Spawn Two enemies engaged with the party and one enemy f down in the shadows so we'll have this enemy engaged with the troll Slayer and that's the giant wolf we'll have another enemy engaged with the iron breaker that's the skeleton horde and then this card will be faced down in the shadows the torch then will move over to the iron breaker our iron breaker is ready for a large attack we have two success tokens on there but we need to do an aid to help our way Watcher so she can use that Cannon so we're going to use the aid action before this this action you may engage one enemy engage with the target hero she doesn't have any uh so we're just going to let her ready in action she'll ready her Aid her own Aid and then we'd ready our actions but they're already there so we're good we're rolling two white and two black
dice okay we only have two successes we're going to give both of those to her attack yeah she'll put both of these on her attack and we get hit for three damage that means we're down to nine Total Health but our way Watcher will then spend this cannon shooting it off at that Abomination suffering four wounds that means he has seven wounds our Weight Watcher will be the next to activate she'll start by healing one thank goodness because we have that Oak circlet and then I think we are going to do an attack which does mean this Abomination will engage her the nice part is we can just exhaust an action we'll exhaust our Aid so we don't have to take any damage we will then use these two an attack it's a ranged attack we can Target up to two enemies during this action if you defeat at least one we can recover some health why don't I Target the Abomination and this clan rat if I only get two successes I can at least take out the clan rat and then heal up by two two white dice to one black d oh boy oh at least we have two Shields so we are going to take two damage from that Abomination that puts us down for seven total damage we did however have four total successes so let's take out that Clan rat that means we will heal by two so we're back down to only five damage and then of course all of our actions will be ready our Warrior priest is going to use his faith rewarded you may exhaust one non Nemesis enemy engaged with him well he doesn't have any he's going to roll two dice choose one hero that hero becomes empowered and Claims One success token I
am going to choose the iron breaker for that and then of course we'll ready all of our actions our iron breaker will grab the empowered status and will place that one success on his rest I wish I could do the attack or the explore but I can't do either we're rolling just two white dice we heal by three that means we now only have four damage on us we'll then use our Book of Prayers here to have a hero recover two health I think I'm going to do the iron breaker so the iron breaker will go to only having three damage our troll Slayer will be the last to activate this round he is empowered are you ready for this he does not have to exhaust the next action card he uses he gets plus one attack and plus one defense from that he's going to use the demon layer he's going to give up this success token from the father's a to turn it into two more successes uh let's see he can engage one enemy oh he's engaging the Abomination that means he will take one damage CU I don't want to exhaust anything else right now uh and he might be able to heal depending on if we take out the giant wolf with this action though we have 1 2 3 4 five total successes and one Shield let's roll our three dice we have two enemies engaged with us let's give this a roll okay 1 2 3 4 5 6 7 8 9 we are getting hit for four six damage uh minus one that's five damage to us we have one damage on us already so that's six damage to us ow as much as I'd love to take out that giant wolf I think I'm using all of this on the Abominations
that means 1 two 3 4 is useless but 1 2 3 4 five more hits to the Abomination that'll put him at 12 damage out of the 25 Health we're not even halfway but we're close we'll then use of course that Warhammer and exhaust the giant wolf during the enemy activation our iron breaker has this skeleton horde engaged with him he will exhaust it doesn't do anything but advance and the way Watcher will need to flip this card and activate this one in the shadows it Retreats and inflicts dealing one damage to the way Watcher while in the shadows this enemy cannot suffer damage and we we don't have to worry about traveling anyways we can jump right to the Peril phase nothing happens this time the torch will move over to the way Watcher to start our way Watcher's turn she will heal one I love that o circlet we're down to only five damage Let's do an explore this will mean we'll have to exhaust an action or take a damage we're going to exhaust our rest and the Abomination will engage us but this will allow us to try and get that Cannon again so three white Dice and we can exhaust one non- Nemesis enemy in play oh it says in play well let's definitely do the skele no the skeleton horn isn't terrible let's do the giant wolf because it can make people bleed this will be a three white dice to one black oh boy we're getting hit for another two damage 1 2 3 four total successes though two damage is no joke we're down to only four Health four successes though means we're halfway there to exploring that
location let's draw a dungeon card we found explosive charges you may discard this card after a hero's activation to choose an engagement Zone each enemy in that zone suff ERS one damage where's that Abomination going to be because we might want to do that we'll probably do that during the iron Breakers turn I then think we're going to do another exploration with the warrior priest three white dice that does mean the Abomination engages us we're just going to take a damage so that means we're have five damage right now but we have 17 Health uh in total so I'm okay with that draw resolve a dungeon card and distribute two success tokens among the party yet two success tokens to troll Slayer going his attack obviously we'll use our one success token for this we just need three successes here we have a burst let's just keep rolling cuz extra successes aren't going to matter there's a shield so we only take three damage instead of four but that means we have eight damage on us I think that means we have nine Health ow that will be enough progress though to collect the cannon so I'm just going to grab the cannon right now and remove all progress we do have to draw a dungeon card we have avarest of slanesh you see Priceless Treasures resting on purple satin cushions behind twisting metal hooks and Barbs will you accept a little pain for a little treasure this would be two more damage I can't say no the gear we can use for the next scenario too so I'll take two more damage to claim a gear card we found the gem of auran you may deplete this card before your activation for up to two
Heroes to become empowered well that is amazing and you know what I'm going to use that right now and we're going to become empowered and the troll Slayer is going to become empowered and then we're going to do one other thing we've got this elf cap fungus I'm going to use this roll a die if I roll a success I can take an additional action if I fail I take two more damage here's the hoping we roll a success We Roll two so that's good we get an extra activation we're going to use our soul fire here and we're going to engage this skeletal horde I got to get rid of a couple enemies because we're going to spawn three more at the end of this turn uh we can attack before this action you may EX another action to Target one additional enemy might as well do this we'll exhaust our Aid so that we get plus one success and plus one defense but we also have EMP power so we have two defense and two total successes on this the Abomination is already engaged with us and the skeletal horde is here we have two successes and two defense already let's roll up our dice oh we have a burst The Shield is important so let's grab a token and we'll roll this one up again come on nice we have 1 2 3 four five total hits that would deal one damage to the Abomination or we can just skill kill the skeletal horde we're taking out the skeletal horde without a doubt we do get hit for four damage but we have three Shields that's only one damage to us this does mean we only have
six Health remaining and we have to discard our empowered speaking of empowered our troll Slayer is empowered as well we can engage an enemy with this hack action I don't have to exhaust this well the Abomination is going to come anyways we have to exhaust or take a damage oh we're just going to take a damage five six we're at seven total damage I will then spend one of these to turn it into two successes because of me father's X and then of course we have the one additional success and one defense because of the empowerment and you know we're targeting the Abomination and it states after this action if you do not have armor equipped recover health equal to the attack value of all enemies you defeat let's see how many we can defeat our troll Slayer can only target one enemy with his attack and I think I cheated with that the last time he attacked I'm sorry I don't think I can undo it so we're just going to leave it as is he's the only one that can Target one enemy we're rolling three white to one black let's see what we get oh there's a burst I love seeing burst what I don't love is seeing that that's going to hit us for four damage and okay actually it's not bad one two three we only take one damage that means we have eight damage on us we do hit the Abomination though for 1 two three four then we hit him for one two three more damage that puts him to 15 damage only 10 Health remaining last to activate will be our iron breaker he has the least amount of damage uh he will use this empowered of course gaining plus one success and he does not have to exhaust the action Relentless charge
anyone yes we'll get three successes that will mean this Abomination will engage him he can engage another enemy I don't think we're going to I think we're going to just deal with it and we are going to take the damage so I don't have to exhaust anything so we're at four damage here we have three successes and one Shield right now let's roll these up there's a burst so we'll get another success look at those hits oh that's awesome 1 2 3 4 5 6 7 8 9 minus 4 is five more damage that puts the Abomination down to five Health remaining we are attacked for four damage minus one for three that means we have seven damage on us we can deal with that the only enemy that can activate is this giant bat it will attack our way Watcher for one damage she has 5 six seven she'll have eight damage now on her uh but the uh giant wolf is already exhausted so it'll just ready and the Abomination stays right where it's at we'll then move to the Peril phase we have to spawn more enemies two of them engage this one will be with the way Watcher oh just the skeleton horde and for our priest it will be a a rat swarm that's easy and then one face down in the shadows the torch will be moved over to our priest and we'll start the next round our Warrior priest is going to use his rest action he can exhaust one non Nemesis enemy that's engaged with him that means this rat swarm will be exhausted beautiful we don't have to worry about it then we roll our two
white dice choose one hero we're going to choose our troll Slayer and they are going to become or is going to become uh empowered and gain one success token where do you think that's going to go attack yeah attack definitely and then we'll ready all of our actions this will be just two white dice okay we heal by two which is nice that means we only have nine damage on us and then of course we have our book we can have someone recover to health I'm going to choose my troll Slayer so my troll Slayer only has six damage on him now don't ask me why but for some reason this card I can't seem to get right so we're going to get it right this time we're going to attack with the Demon Slayer now we are empowered which gives us plus one shield and plus one success okay and we don't have to exhaust it but the Abomination is going to become engaged with us and we'll just take the damage so we're going to go down to seven damage on us okay then we're going to spend one of these to turn it into two because of me father's X so we've got two more or one more success because of that now during this action if you target the highest ranked enemy we are targeting the highest ranked enemy we get plus one hit I think I missed that on the last one uh but that's fine because the other one before I gave myself so I could attack anyone I'm so sorry so we have 1 2 3 four total successes and a shield that means anything we roll here hits the Abomination we do have that giant wolf engaged with us we have to roll two black dice oh boy 1 2 3 4 we just dealt only one damage to the Abomination but I
think that might actually work so he will be at four Health remaining we are attacked for four damage we have 1 2 three Shields we just take one that means we have eight damage on us we're not dead yet and because of that Warhammer we can exhaust the giant wolf I then think we can just win this scenario by having our iron breaker use the uh Aid action for our Warrior priest after that happens you may deplete this card after another hero AIDS you to choose one enemy in play that enemy suffers four damage well four damage is just what we need for the Abomination and we just defeated him with a final Roar the Abomination collapses its skin splitting along crude seams and thousands of vermin skittering free from within the surviving rat men flee and you find yourselves alone in the Fortress proud owners of a pre-owned Cannon one hero claims the Canon dungeon card and keeps it in his play area during the final quest that is cool let's give that to the who do we normally let's give it to the troll Slayer cuz we usually assist the troll Slayer and then he can use use that Cannon we now can move into our final sentiment phase we're definitely going to visit the trainer we're going to all replace our final action card so we have an aid bless to lead roll three dice the target hero May ready in action you and the target hero each heal by two we have this one's mine this is an aid you may engage one enemy three white dice the target hero May ready in action if you engage an enemy using this action claim a success and become empowered I love
him being empowered we have a rest for iron breaker you may exhaust one non Nemesis enemy engage with you three Dice and drain this action plus three defense so it's just means we're very likely not to take damage and then the vengeful spites you may exhaust one non- Nemesis enemy engaged with you choose one enemy engaged with you that enemy Retreats and suffers the damage and then you can rest that is cool we'll then have our Warrior priest our troll Slayer and our way Watcher all increase their hero limit for gear by one uh but because our iron breaker only has two he might as well do this the hero draws two cards from the gear deck he may choose to equip one so we'll flip these over we have either the paing dagger this States during your attack action if all the target enemies are engaged with you you may discard one success to apply either plus one attack or plus two defense a pairing Dagger from a dwarf that doesn't make much sense or we have armor apply plus six to your health value after another hero AIDS you you cannot ready an action unless that hero discards one success that's interesting so we're harder to Aid because of our plate but that would put us at 20 Health this seems like a dwarf item so let's grab this one let's check out our final scenario w a dozen soldiers who fled their post hang from the walls of scum the gates are sealed and the town is prepared as it could ever be for the orc assault to follow even with the advanced warning your
investigations provided there's no hope for scum W Gro gorl Lord the Fearsome orc War Boss and his forces are far too large and Powerful for the city's walls and cracked cannons to do more than slow them down unless of course you can find Garrick and defeat him if you could manage such a thing the orc hord would collapse as the bosses fight for dominance and the tribes disperse good luck our enemy sets here are Shuffle the black Orcs gigantic spiders orc boys night Goblin archers Goblin Warriors to open standard enemies which will be level three and one open Elite enemy that'll be at level three together place the Garrick gorl Lord Nemesis card in the Nemesis Lair he spawns when the party travels to the deos bench we have to shuffle two open level three locations together then Place de boss's bench location card at the bottom and then of course there's 12 open gear cards and 12 open dungeon cards and our three legendary are inside of the uh Gear deck before the party travels if there's at least one one enemy in play increase Peril by one otherwise one hero may flip one depleted card face up and the party collectively recovers four Health interesting okay and we spawn one enemy during the green if we get to the blue it's two enemies and then it'll be spawning three enemies every round till we defeat the boss I think that's where our goal is yep Garrick gorl Lord needs to be defeated here we have our green skin Nemesis so it attacks for three has 20 health and only two Shields so
actually easier than that Abomination it has a brutalize as an ability uh when that happens it roll you roll to enemy dice for each of these slash or Nemesis symbols suffer two damage for each blank this enemy recovers a health it also States before each Hero's activation this enemy engages that hero so once he comes out when we get to the Third location he's just going to be going to whever the active player is boom boom boom terrible if we roll This symbol uh the Nemesis symbol exhaust two actions or resolve brutalize because if you can't exhaust two actions one of those actions cannot be your rest from what I understand we have our three locations let's look at our first one we have the villainous sanctum Twisted skulls adorned the pathways leading to a Sinister Throne a terrible evil lives in this place granting strength to its vile minions at the end of the location phase all enemies recover a health oh okay we're going to have one spawn this one will be engaged with the warrior priest so the warrior priest will have oh just you know an elite orc boy and then four will be in the shadows in order to progress to the next location we need a total of nine progress here our Warrior priest will be the first to activate we're going to do some exploring but we do have this orc boy engaged with us which means we have to roll a black dine that could deal us three damage we will draw and resolve a dungeon card and then you know what we're going to do uh the troll Slayer or you know what I'm actually going to do the iron breaker
because he can Target more than one enemy I'm going to give those two successes to the iron breaker later when the boss shows up it's all about the troll Slayer this will be three white dice to one black D look at that 1 two three three successes on the location nothing on the black D I like it let's draw and resolve a dungeon card we found a trap you may discard this card after an enemy engages a hero that enemy suffers two Health we're keeping that for the boss for our troll Slayers activation I do think we are going to use our Demon Slayer we're going to engage that orc boy we want to take him out we only need four successes we have one Auto success because he is the highest ranked enemy so we have one Auto success and if we defeat him we can heal this is three white to one black and we have 1 2 3 4 five six that poor orc boy had no chance he's off the board and that was a waste of a success that's okay I still like it our iron breaker is going to use his Relentless charge he can engage up to three enemies we're going to grab three enemies from these Shadows we have this night Goblin oh that's nice we only need three successes on him our next one is oh a black orc those guys are terrible this enemy can exhaust only after it activates we can't make it exhaust we need six successes to take him out and our third enemy is an elite gigantic spider oh boy if I look at the attack values of these three that's eight damage if we roll poorly with the black dice at least we already have two successes okay that's not bad
well first of all we have a burst with that burst will gain another success and we can roll that up again so come on oh another burst oh my gosh this was worth it I'm so glad we grabbed all of these enemies okay so we're getting attacked for the biggest attack is three minus 1 is two so we're taking two damage then we deal a total of 1 2 3 4 5 6 7 damage so I could actually just take out these two Elite enemies cuz they have no Shields four and three is seven so yeah I think I'm going to take these two out our way Watcher will be the last to activate she's going to use her hail of arrows she is going to Aid the iron breaker the target hero May ready one action that means his Relentless charge is ready you may choose up to two enemies engag with the target hero each of those enemies suffers one damage while there's just the black orc it's going to suffer one damage it's down to only three Health but it does have two armor and I'm realizing because of the location that's not going to matter that silly orc is going to heal oh well we're just going to get him some success tokens and I threw this off the board we're going to get him a total of well three and then we'll keep rolling uh four four total success tokens can't be sad about that we'll place two on the Relentless charge and two on our explore love it moving to the enemy phase we'll start with our Warrior Le the only enemy he can activate is the one in the shadows oh it's another black orc it's just going to challenge this
enemy engages the hero with the fewest damage so that could be the priest the troll Slayer or the way Watcher will do the troll Slayer and then this other black orc will do the same thing it's going to challenge and we'll have that Engage The Warrior priest and I'm just going to heal this so I don't forget during the location phase we can't travel we don't have enough exploration I've already done the healing so we'll just move to the peril phase we have our one free round after this we're spawning at least one enemy every round let's have the troll Slayer be the first player I think our troll Slayer is going to use his honorable death card he can engage up to two enemies well he already has one black orc let's give him another shall we oh this could be a little bit risky but he'll roll two white dice during this action for each of these bad symbols we actually get to apply plus one successes we draw and resolve a dungeon card and then ready all of our actions two white Dice and two black dice so we have one two three total successes so that's six on here we just need nine so we only need three more however we are attacked by one of those black Orcs that's three damage to us we're down to 10 Health we then have to resolve a dungeon card we have a little nudge a stone column appears ready to fall at the slightest provocation perhaps you could use this to your advantage you may exhaust one action to choose one enemy in the shadows that enemy suffers to health ah there's no enemies in the Shadows so that's just a miss our iron breaker is once again going to use his Relentless charge engaging both black ORS we want both of
these off the board if we can so that's two successes right off the bat let's roll this up I'm just realizing something we have this full plate I almost forgot about this after another hero AIDS you you cannot ready an action unless that hero discards a success token our way Watcher didn't have one so we could not ready our attack action so let's go back and redo what we're going to do I love how there's both a positive and a negative to that full plate that's awesome I think now we're going to do an aid action and we're going to Aid our Demon Slayer we're going to Aid him because then he can use this Cannon and deplete it and then that will have one enemy suffer four damage which will take out one of these black Orcs cuz they have exactly four Health that seems totally worth it we're not going to engage one enemy because we can't exhaust them because of their special ability uh so we're just going to roll two dice and then of course we'll ready our attack now we'll roll two dice for this and we have two successes and we have three three total we'll give him two for his attack and one for his explore yeah let's do that my plan is to be able to move to the next location after this round but that means we need to take out that black orc however I also need enough exploration so I think I'm going to explore with the way Watcher and attack with our Warrior priest hopefully that works we have no enemies on us so we can just use this drawn resolve one dungeon card we could exhaust a non- nemesis enemy but we
can't exhaust the black Orcs so we'll just roll with three white dice we just need three successes we've got it that will be the nine on the location we will be moving after this round while exploring we found the Forbidden toome you may discard this card after Hero's activation and suffer two damage to add three progress to the location that seems awesome it's all going to come down to this for the warrior priest and I think we are going to use the gem of assuran you may deplete this card before your activation for up to two Heroes to become empowered we're going to become empowered so we don't have to discard that or exhaust the soulfire and we're going to have our iron breaker become empowered as well we'll then use soulfire we don't have to exhaust it we may engage one enemy we're bringing in that black orc the black orc is now engaged with us okay let's take him down we need six successes before this action you may exhaust another action to Target one additional enemy I don't need to do that but I do want plus one success and plus one defense so I will exhaust my Aid that means I already have two successes and two defense I need four successes on three dice we have double burst are you kidding me uh that sounds awesome that's two more successes we'll pick these two up and roll them again I think we killed that black orc one 2 3 4 5 6 78 damage we only needed six but he does deal us three damage however we have one Shield plus two more is three
no damage during the location phase because we plan to travel if there's at least one enemy in play increase Peril by one that doesn't happen otherwise one hero may flip one depleted card face up and the party collectively recovers for health well we're certainly going to get back our Cannon because that card was depleted and now it's ready to rock and healing four will heal three from the troll Slayer and one from the iron breaker that means we only have one damage right now that was a real good first location let's see about the next one uh we'll flip it over it says at the end of the location phase which is going to happen each hero may suffer one damage to ready an action card well we'll decide if we want to do that oh my gosh six enemies are going to be engaged with us holy moly we'll have two enemies engaged with with the troll Slayer so we have the gigantic spider and we have the orc boys the iron breaker will also have two enemies we have a goblin Warrior and another orc boy we have one enemy for the way Watcher she has the goblin Warrior and last but not least the warrior priest will have another gigantic spider at the end of the location phase I do think our Warrior priest is going to take one damage uh that's going to allow him to ready his assist that way he can do a better attack I think we're just doing straight attacks my troll Slayer and iron breaker have their attacks ready and our way Watcher that's how she Rees so I think we're good there we need 10 progress to
get through this location during the Peril phase don't worry we just spawn another enemy and that's going to be with the troll Slayer so he's also going to have the elite Black orc which has five Health attacks for four I love this this is awesome and we're going to pass this along over to our iron breaker for the next round I think it's safe to say we know what we're going to activate for our iron breaker he's empowered thanks to our Warrior priest we are going to use the Relentless charge I think we'll pull off the orc boy n let's do the gigantic spider we'll pull the gigantic spider off of the troll Slayer so that means we have an orc boy a goblin Warrior and a gigantic spying uh Spider engaged with us but we have three successes and one shield and three dice or we're hoping for tons of successes here oh only one of them hits us oh this is going to go off for the uh Nemesis we'll do that in a second but we have 1 2 3 4 five six total successes that should mean we can get rid of these two both the goblin orc and the gigantic spider spider had three Health the orc boy had two plus one for the shield that means we just have the goblin Warrior engaged with us we do get attacked the highest attack value is two but we have more than enough defense and then we either have to choose to exhaust two actions or resolve brutalize I think we'll exhaust our rest and our explore
because I think we want our health to stay at where it's at our way Watcher will activate her Wrath of the woods she won't engage an enemy because she has a range attack or only two white dice she'll Engage The Goblin Warrior that's on her and the Goblin Warrior that's on the iron breaker if she's able to defeat one she can heal but she's not damaged and then of course she can ready all of her actions two white dice to one black we have two successes uh let's just take out the elite Goblin that's on the iron breaker it just deals one additional damage the one on us really won't be a problem and no impact from the enemy our Warrior priest will use his soul fire he'll exhaust the blessed to lead so he gets the plus one attack plus one defense I think he's going to bring that orc boy from The Troll Slayer and engage him as well as the gigantic spider that's on him let's see how much damage we can do three white dice to two black we'll roll him up and that black went flying okay ow we're going to get hit for both of them that's three damage but we do have two Shields so we're just going to take one eh dinks us for one I'm fine with that we have 1 2 3 four five total successes three of them will take out the giant spider and with the other two we'll just deal one damage to the orc boy because it has one Shield it only has one Health remaining Our Last Hero to activate is the troll Slayer we're going to use the Demon Slayer we're not going to engage an enemy will attack during this action if you target the highest ranked enemy that black orc
we're going to do that we gain one additional success then what we're going to do is use me father's ax turn this into two more successes oh yeah so we need seven total successes 1 2 3 4 five I already have five right here I just need two on three dice three white dice to one black we'll see what we get 1 2 3 4 5 6 7 8 5 + 2 is 7even that elite Black orc is gone that was worth it during the enemy activation step the iron breaker has no enemies that it can activate so the way Watcher will activate this Goblin Warrior taking one damage and then this enemy engages the hero with the most wounds that's actually the warrior priest so it's going to jump over to the warrior priest this Warrior priest then just has the orc boy to deal with and and it just advances that's it so that will end the enemy activation during the location step we could take damage to ready something I think our troll Slayer will take one damage to ready the Demon Slayer and I think that's it so we'll move to the Peril phase this we move down we have to spawn one enemy engaged with the iron breaker it is a warlock engineer we haven't seen these guys they're so crazy they have a warp lightning ability you the lowest ranked enemy engaged with you and the hero to the left of you each suffer two damage then if an enemy engaged with you was defeated spawn an enemy we'll then move our Lantern over to the way Watcher she'll start us for this next round to start off she does have her Oak ciret so she's going to heal by one but then
we're going to use this forbidden toome and we're going to take two damage and then we're going to place three progress on the current location at this point even if we can't defeat all the enemies that are out I want to get to that next location hopefully in the next round and then all we've got to do is take him out we'll then use our silent stalker we'll get to resolve a dungeon card and then you may exhaust one non- Nemesis enemy in play that warlock engineer I don't want to deal with that warp lightning so we're going to exhaust that warlock engineer this will be three white dice we have three exploration that puts six progress on the current location we then find the event perilous path the ground is unsteady ready to give way at any moment it appears to lead HS the way out however you may add two progress to the location if you do roll an enemy die on one of the slashes suffer one and become bleeding but we can't become bleeding because of our nightcloak so I'm definitely doing this that means there's eight progress on the location we'll roll this up and yes we take one damage that's our third one but we don't have to worry about the bleeding status our Warrior priest will go next using Faith rewarded you may exhaust one non- Nemesis enemy engaged with you well this Goblin Warrior it's kind of a wimp but we might as well exhaust it because we can't exhaust the orc boy so we'll exhaust that one we'll roll two dice and then we can choose a hero that hero becomes impowered and claims two success tokens I think I've got to do the iron breaker again because he can hit so many
enemies do note that this is not an aid action so we don't have to worry about the full plate effect and he's going to of course Place both of these on his attack he's going to lay waste to some of these enemies and then of course we'll be able to ready all of our actions two white dice to one black d and we get a burst I'll take that and so that was just a burst but that will mean well it's the same as that one 2 3 four five we totally heal uh but then we do take two damage so we heal up and then we take the same two so we're back down to 15 health I think we do have our Book of Prayers so we're going to use that to heal ourselves by two health so that'll put us back up to full our troll Slayer will activate next using his Demon Slayer he's going to engage the the highest ranked enemy that's out the Warlock engineer so you can see it's a rank three so because of that we will get one Auto success maybe we can take him out we need six successes this will be one so we need five successes to take him out and he's exhausted so we don't have to roll any black dice we have that one success let's roll our dice up double burst and two hits holy moly okay we'll roll these in that's 1 2 3 4 5 six 7 that is more than enough that warlock only needed six he's off the board that means there's only two enemies on the table our iron breaker will be the last to activate we are empowered I'm not going to spend those two successes though we already have one Auto success
we're going to engage the only two enemies that are out the orc boy and the Goblin Warrior okay that means we need a total of 1 2 3 four total successes I already have one so that's one success on each of the three dice I only have to roll one black d because that Goblin Warrior is exhausted we'll roll up our Dice and we have double burst are you kidding me this game this game and burst I love the bursting dice okay let's roll these up and another burst okay I'll take that and we'll roll it up again as I pull that token and that's another success 1 2 3 4 five 6 we needed 2 three four they're both off the board we do take two damage but I've got three Shield so no damage taken and all enemies are gone too bad I can't explore I don't have enough to explore during the location step I do think our Demon Slayer will take another damage to ready his attack he's saying Bring It On oh wait he should have healed because he took out one enemy yeah he would have uh healed by two and he only had one because he took out that warped lightning enemy so he only has one damage totally worth it to be fully ready and operational we'll move to that Peril phase this will move to here we spawn one enemy with the way Watcher it's going to be the elite warlock engineer o uh that's going to take a little bit to take down and then the warrior priest will become the first player our Warrior priest will start us
off with The Guiding Light he will finish off the explore draw and resolve a dungeon card and give two success tokens to our troll Slayer that's going on his attack you know it this will be just three white dice I'm not even going to do the burst that's three successes that means we have 3 6 7 8 9 10 11 we have more than enough progress we have ill Fortune ral's lucky coin Has Two Faces they say today your luck is bad oh either discard to success we can't do that so we'll suffer two damage that's our first two damage though our troll Slayer is going to do some Demon slain why not we are going to engage this warlock engineer seven successes I'm not sure I'm going to be able to take it out but I'm going to get it close uh we will get one Auto success cuz that is most certainly the highest ranked enemy so that will be three successes and I'll spend one of these to turn it into two with our mea's X so that means we have four successes on this rolling three dice here and we have 1 2 3 4 five six seven total successes that's exactly enough it's exactly enough to take them out and we get attacked for two but we have two Shields we then get to heal by the attack value of all the en we defeated so we can heal to full wow we are so epic you know what this means it's aiding time we're going to Aid the troll Slayer with our iron breaker we have no enemies on the board so we can ignore that but the target hero May ready one action he does not have a full plate of armor so he can ready his Demon Slayer we are ready to take down the
boss are you ready for this uh we'll refresh all of this let's roll two dice looking for at least two successes well that's three and wow 1 2 3 4 five total successes you can't get a better role than that 1 2 3 4 and then one more let's put it on our rest I guess we're also going to do an aid action with our way Watcher oh speaking of which our waywatcher heals by one she's down to only two damage thanks to her oen circlet the target hero May ready one action we're going to Target our Warrior priest so he's going to ready his Guiding Light so he's all ready we're going to be all ready except for our way Watcher which is perfect you may choose up to two enemies there's no enemies she gets to roll three dice for this wow one two three and then now that's it three successes we'll place two successes onto our soulfire and yes I'm using different tokens because I'm running out of the other ones and then one on our Guiding Light we're now ready to travel so we need to make sure there are no enemies in play there aren't so that means we can flip one depleted item we're going to flip this one that gives Powers oh my gosh and we'll heal by four we'll heal up the warrior priest to full that was two we'll heal up one on the iron breaker and that means he's at full and the way Watcher will take one she only has one damage we're killing this game we'll then complete our travel removing this card and let's flip our next one over we have the the boss's bench a
fearsome Warrior lose he Bellows a challenge when the party travels to this location spawn Garrick gorl Lord he is going to be spawned with the warrior priest because he's the active player when the enemies Spawn from the Peril effect you may discard three progress to reduce the amount of enemies spawned by one limit twice per round so that still gives you a reason to explore I do like how they do that we do have to spawn three more enemies the first one will be with the warrior priest it's a goblin Shaman ooh those guys stink actually the next one will be with the troll Slayer we have the Knight Goblin Archer those guys are not terrible and then the third one will be a goblin Warrior I am going to have our Warrior priest discard that trap and the boss is going to suffer two damage we unfortunately have to spawn one more enemy because we are moving into the Peril phase and this one will also be engaged with the warrior priest that's the Knight Goblin Archer oh boy lots of enemies so he has three we have one Knight Goblin Archer with the troll Slayer and one Goblin warrior with the iron breaker speaking of which the troll Slayer will become the active player you ready for some fun the troll Slayer will be the first to activate this round and he's going this is what I was made for to defeat the absolute final boss Demon Slayer thank you very much he's not going to engage an enemy because of course this gor Lord will automatically engage him so he has two enemies engaged he's going to use me father's ax giving
up this success token to get two onto his Demon Slayer his Demon Slayer will give him one success because he is attacking the highest ranked enemy so we've got 2 3 4 five damage already coming in let's roll three dice after this we will also exhaust the night Goblin Archer because of our Warhammer three white to two black Will Roll these up look at that oh my gosh 1 2 3 4 5 6 7 8 9 10 eight damage goes through this guy's at half health I'm going to pretend I was smart I had this Ruby of tall and I forgot about it it says you may deplete this card before your activation for the party to collectively ready four actions there were only two actions that we could have readed but I wanted this Aid ready for the way Watcher and you'll see why in just a minute our iron breaker will be the next to activate he has Garrick engaged with him he will use his Relentless charge he's just got the two enemies that's all he's going to have he'll spend these two success tokens as well for his attack three white versus two black we have a burst in there because why not I love it and still Blanks on all of those we have a total of 1 2 3 4 5 six seven total damage he only has two armor that gives him five more damage he only has five Health remaining our way Watcher then will use her hail of arrows now she is engaged with Garrick that's fine he does she doesn't care she's going to Target a hero she's going to Target the troll
Slayer that way he can ready his Demon Slayer and she can choose up to two enemies engaged with him while there's just the Knight Goblin Archer that will take one damage that's fine I don't care this is what I want you may deplete this card after another hero AIDS you to choose one enemy in Play It suffers four damage that means Garrick has only one Health left cuz it just took four damage this poor this poor green skin is just getting annihilated he hasn't even attacked us yet we're aing with three white dice oh we finally have him hit somebody our way Watcher will take three D damage oh we do have a burst so we'll count this as a success and okay actually we only take one damage from he only attacks for three so our way Watcher has two damage although I think I forgot the Oak and ciret I'm pretty sure I did so she just has one damage this is awesome so this will go to the troll Slayer I'm not even going to worry about it because our Warrior priest will be able to take out the warlord he has two successes on his soul fire he will exhaust this to add a third success let's see us take out three white to three black and we only get hit for one and we have a burst are you kidding me oh this game is amazing okay we have 1 2 3 4 five six seven that warlord is done we get hit for three damage but we do have one two three Shields so we take no damage Garrick's death ripples through the Like A Rush of wind the
nearest Orcs Howl in dismay and hurl down their weapons punching and kicking one another in their haste to Escape soon the hord is gone and amazingly scof still stands the party wins The Campaign well there you have it that was the five scenario campaign for Warhammer Quest the adventure card game I'm so glad I finished it I do see I think someone I can't remember who told me but they said that if you won scenario four scenario 5 is a cakewalk having that Cannon and being able to deal four damage yeah we were way overpowered at the end but whatever I had a great time it was fun to activate the different abilities seeing them grow as you play gaining more gear oh it was fun I definitely could see myself playing this again with different characters but I will say that that's all you get in this box besides the delve Quest so really where this game will shine is if you're willing to print out all of the fan-made expansions there's a Lord of the Rings one of this I actually printed it out I kind of want to play it it's through the Lord of the Rings campaign it looks kind of involved but also kind of awesome let me know if you've played any of the fan-made content and what's your favorite I want to give a huge shout out to our patrons and subscribers it's because of all of you that we do what we do here on this channel and if you're excited to see what bar and I have coming next then I need you to meet me at the table goodbye everyone
up enemies