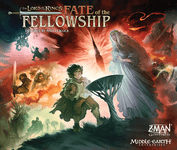
The Lord of the Rings: Fate of the Fellowship | Heroic Difficulty | Playthrough!
Games in This Video
1 game is featured in this video — it unlocks as you watch.
Transcript
Hello everyone, and welcome to Meet Me at the Table. This is Colin, and today, yes, we're going to do another playthrough of Fate of the Fellowship, The Lord of the Rings. This game, I just I can't get enough of it. And now, I have bling to the max. You all know how much I love bling, and I wanted to show off some of it here. So, I thought it'd be great to do another playthrough. We are going to play on the heroic level of difficulty. That means we have to complete five objectives instead of just four, but we still do have the same amount of dark style dark sky cards in the deck. I'd like to show you all the different upgrades I have for this game, so that's what I'm going to do first. If you just want to jump to the playthrough, check the timestamps. You can click on those, that'll get you right to the playthrough. But, if you want to see all the different upgrades I have, uh hang out here, and I'm going to show you. So, the first thing you're going to see, I have the grip mat. You can get this on Etsy, and it is triple the size of the board. I have the camera way back. You can see you have tons more room for moving all of your different armies, which is really, really nice, because I did feel like the board was very cramped. But, this comes in a tube now, and I have to place it in a tube, so the whole game does not fit in the box. But, worth it to me to be able to have a little more space on the board.
The next upgrade I'd like to talk about is instead of those teeny, tiny meeples for all of your army characters, we have 3D printed characters here. So, they're definitely bigger. They're still not huge, which is good if you don't have the upgraded board, uh this I should say grip mat. You can still play with these on the regular board game, and they'll pop a little bit more, but they are slightly bigger. I have an example of the small meeples that came with the game versus the 3D printed ones. Yeah, I definitely like these ones, but it is really nice to have the grip mat. Otherwise, uh they do take up a lot of space. If you've seen any of my playthroughs of Cthulhu: Death May Die, Tim has done all of this fun terrain for each of the different scenarios, and he also did the ones here for Fate of the Fellowship. There are 17 different locations on the board. He made them as landmarks, and they all have little lights underneath them, so you can put these lights underneath, and they will glow, and they look awesome. We got Mount Doom, we got Barad-dûr, we got Udûn, we have Minas Morgul, Umbar has one of these 3D pieces as well. You'll likely see up most of these close up as we're playing, but we've got Dol Amroth, Minas Tirith, we have Helm's Deep, we have Lorien, we have the Woodland Realm, we have Dol Guldur, Erebor, we have Rivendell, we have Moria over here, and I think I forgot to turn this light on.
There we go. Moria is now glowing, it looks great. And for the havens, you can see the base is match the type of mustering that you can do. So, we can muster elves here in Lorien, that's why it has a green base. And then he gave you or he gave us extra pieces for if ever they become a stronghold, so they be ever are controlled by the enemy, you can change it to a red one. Or if ever you have a red one that you've converted to one of your sanctuaries, you can then flip it to a yellow base, so that way you know. That is really cool, and it all comes with that. The final two locations are the Grey Havens over there, and of course the Shire. Next, I have all acrylic tokens here instead of the cardboard ones. I just think they look really nice, but I do think the cardboard ones work just fine. Uh but it has the eye as well as a acrylic token, as well as the hope one, and the threat tracker is the same thing. They're all these acrylic tokens.
I'll put a link in the description for those as well. The only item them haven't found an upgrade for, and if you know of one, let me know in the comments below. As for the heroes, I'm still using just the meeples for the heroes. Kind of sad, but they are they they are very serviceable. So, I'm going to use them, but it is what it is. Okay, those are the upgrades I wanted to showcase. Now, let's go ahead and do our setup. We'll check out our five quests and our four characters we're going to play. I am going to play as a two-player game so that I am not playing with the solo rules. I'm using the regular the rules for two players going back and forth. The first of our objectives is of course to destroy the One Ring. You always have to play this one. So, what we can do is as an action, we have to have Frodo and Sam spend five resistance at Mount Doom, and then we have to survive a final search roll, adding one die for each missing hope. If we can do that, we win the game. That's the last one that we can do.
We are going to do lift shadow from dwarven lands. This one says we have to use Gimli, which is why I'm using Gimli, and I've placed a shadow troop in Ered Luin, which normally you don't start with one there. We can complete this if there are no shadow troops in Ered Luin, and at least four dwarven troops are there, and no shadow troops or our shadow strongholds are in Dale. Once we complete this, the current player may gain two valor tokens from the supply and a hope. Then we have one for Legolas. I just made sure to choose So, actually what I did is I chose randomly, removing all the ones that I've done for my last two playthroughs. This one is "That makes six." We have use Legolas. When Legolas uses his sure shot ability to remove a shadow troop, he may place it on this objective card instead of the supply.
Once there are six troops on this card, we complete it, return the shadow troops on this card to the supply, and gain a hope. Then we have this one that all of these kind of made us decide which characters we're playing with. This one we have to use Eowyn, shieldmaiden no longer. If Eowyn is present when a battle is rolled, she may spend two valor to change one of the combat dice to the Nazgûl die. And the reason for that is her ability, she can actually kill Nazgûl because she's not a man. If Eowyn has destroyed at least two Nazgûl and Rohan is free of shadow troops and shadow strongholds, we complete that one. And then our final one here, we have to unseat Denethor. I'll bring this over here. This one says, "Place four Gondorian troops." That means I only have one in the supply right now because you start with five in the supply. The Gondorian troops on this card may not be used until this objective is complete. As an action, a character in Minas Tirith has to spend two stealth, one friendship, and one valor while at least one other character is present. Then we get to put the troops on this card into the supply and add three Gondor troops to Minas Tirith and gain one hope. And I'm going to try really hard to say Gondor. It's Gondor, Gondor, not Gondor.
Uh but sometimes I'll probably say it wrong. Because we're playing a two-player game, we will have two characters controlled by each player. So, one character will have Gimli and Eowyn. Gimli has two abilities, son of Glóin. So, when Gimli musters in a dwarven location, we don't have to spend a a friendship. And then once per turn he can just gain a valor token. Nice and simple, he starts in Erebor. Then we have Eowyn. Eowyn is cool. When Eowyn musters in a Rohirrim location, she doesn't need to spend friendship. So, we're going to be able to muster really easy with these two. And no living man am I. If Eowyn is present when a battle is rolled, remove one Nazgûl in her region from the game for each of the Nazgûl results rolled. And you don't lose the two friendly troops. So cool. In a two-player game, you start with four cards in hand. So, we have Rhovanion, we have Dale, we have Mirkwood, and we have Rohan. Our other player will be controlling Frodo and Sam and Legolas. Frodo and Sam, of course, start in the Shire and Legolas starts at the Woodland Realm, which is right next to Gimli. So, Frodo and Sam, we have, of course, the ability that when Frodo travels or takes part in a travel, the current player must either spend a stealth or roll a search for that destination location. Then, once per turn when Frodo prepares, if he's at a haven in the region named on the card, he can also gain a friendship from the supply. He has Sam's help, so whenever a search is rolled, he can spend a friendship to ignore the same number of the losing hope results. And we can
always put on the ring. Before a search is rolled, you may ignore all of the shadow enemies present, but not the Nazgûl. If you do this, though, you lose one hope and you have to shift the eye to Frodo's region because, of course, you're putting the ring on. Then, we have Legolas. Walk silently. This takes an action. Once a turn, he can just gain a stealth token. Then, he has his sure shot, which he has to use six times during this game to complete that mission. He can do that anytime, even when it's not his turn. Spend a stealth to either remove one shadow troop from Legolas's location or an adjacent location or to move a Nazgûl from his region to Mordor. So, he can actually do it to get a Nazgûl out of his region. And then, he has keen sight. Once per turn when Legolas prepares, look at the top card of the shadow deck. The four starting cards for them, we have Gondor, stealth one, we have Mirkwood, we have Dale, and we have Mordor. Our current hope level at the beginning of the game is six. Remember, this is the name of the game. If ever our hope goes to zero, that is the only way we lose this game.
Our threat is two, so we'll be drawing two cards from the shadow deck per turn. I've already placed out the 18 of the bad enemies out the orcs. And then, I discarded nine cards additional to that to place out more orcs. And of course, we have the one and Arid Luin. So, we have lots of orcs out. There's only 48 in the box, and that's 18 plus nine, that's 28 of them are already out on the board. Just in case you haven't seen this game played before, which if that's the case, I'm so sorry. Get this game to the table and play it. I have two other playthroughs out here as well. I'll put links in the description below. But, we have our order of play. Do four actions for one of our characters and do one action for the other. And you can do four and one or one and four, you can choose. After that, you're going to draw two cards from your deck of cards over here, and then you'll draw a shadow card's hand limit is seven. There's lots of actions. I'm just going to show them, and then you'll see how they work as we play. One of the main actions in this game is traveling, and whenever you travel, you can bring with you any of friendly troops and any other characters that you would like. We can move on any of the lines on the board, and you'll see how that works, but we will be doing that a lot. Fellowship. If your character is in the same location as another character, give or take one card from that player. It has to match your region to do that. So, Legolas and Gimli are two different characters, so that might be a nice way that we can have them work together and be able to give cards back and forth. Prepare. Only
while you're at a haven, you can discard a card. And because we're not playing solo, it can be any card in your hand to take a token of the same symbol. That's because you have a hand limit of seven, but you're unlimited in the amount of tokens that you can have, unless there's no more tokens in the supply. We can muster, so long as we're at one of the mustering locations, to gain more of our army units, which we're going to need to fight those orcs. We can attack, or we can capture a stronghold and turn it into a sanctuary. That is the only main way for us to gain hope. The other way is completing one of our five objectives. We now have to determine who will activate first. Gimli and Eowyn have the lowest numbered card. This is a 13. 13 dwarves set off from Bag End with Gandalf to go to Erebor. Hehe.
Uh so because of that, Gimli and Eowyn will be first. Gimli is currently way over there in Erebor. I can hardly even reach him. This board is so big, but I love it. Uh our goal is to get him over here to Ered Luin and have three or I should say four other dwarf units with him. So what I think I'm going to do for his I'm going to have him take the four actions. I'm going to have him do three of those actions. Ah, that doesn't seem worth it. I'm going to have him do two of those actions to muster. Now normally when you muster, you would need to spend a friendship, but he has that special ability. He doesn't have to do that if he's mustering for dwarves. So we're going to place two dwarves here with him. After that, we're going to begin our journey over to Ered Luin. So action three, we're going to move here and bring all of our troops with. And then action four, we're going to move over here to the Old Forest Road. We're going to ask Legolas if he wants to come with us. And he's going to come with us bringing his one Elven troop. Or should we leave it just in case? No, I don't think we're going to leave it. We're going to have him with. So that way we have lots of troops. We can maybe take out some of the enemies in Moria if we would like when we're going that way. So that was our four actions for Gimli. We can now do one with Eowyn. Eowyn is over here in Edoras and she's just going to do one action and muster as well. So now we have two Rohirrim with her. She's going to get some Rohirrim and start
running around trying to take out some enemies. So that was a four actions plus one for our other character. Let's now draw our two cards. Our player deck here has a total of five darkened sky cards. And of course we draw one right off the get-go. That is terrible. We're going to have to increase the threat rate by one, and then we're going to do the ICU. If the eye is in Frodo's region, we didn't move the eye. We're going to lose two hope right now. So, we're going to go from six to four hope. That is horrible. Uh then we have Under Cover of Darkness. We're going to add three troops to South Ithilien, and then we will take all of these cards that are here in our shadow discard pile, including the two cards, the Wheels of Saruman and the Drums of War, shuffle them up, and place them on top of our shadow deck. I am now, just so I don't forget, I'm going to draw a second card cuz we will draw two. We have Oh, a friendship card in our hand.
We'll place those three orcs here in South Ithilien. That is not good because I do not have the support of Minas Tirith right now. I only have one additional Gondorian. Oh, boy. The threat tracker, which is way up here, we'll sneak it up. We're still only drawing two cards around right now. We now need to draw our shadow cards. We'll draw our first one. We can see at the top of the next card is a banner. So, we're going to activate the top of this. Isengard to Helm's Deep. We're going to move all enemies one space following the orange arrow. Unfortunately for us, that's only two spaces. So, all of these orcs are going to move here. These are probably Uruk-hai coming in to try and assault Helm's Deep. This is getting real real fast. Our second card, we will flip it's also movement. It'll be Rhûn to Woodland Realm. This is on the orange path that's right here. So, all of these troops are going to move to here. And we need to have no troops in Dale. So, I'm really hoping, if these move again, they'll move on the orange path. If they move into Lake-town, we're going to have to come back here and take them out. We can now move to Sam, Frodo, and Legolas's activation. For this round, I think we're going to have Legolas take the four actions and Sam and Frodo take the one action. So, we're going to have Legolas move with Gimli, one, two, over to the Gladden Fields. Then Legolas is going to use his ability, the sure shot.
At any time, and it's not even an action, we can spend a stealth. We have this stealth card in our hand, we're going to discard it, and we can remove an orc from our location or an adjacent location. We're going to do one from Moria and put it on our trap card. That's one of our six we need to take out with that sure shot. Don't mind if I do. One down, we need five more to complete that objective. That wasn't an action, so we've only done two actions. Action three, we are going to move into Moria. We don't have to pay anything to move into Moria. We're going to move into there for three, and then action four, we are going to initiate a combat. When we initiate that combat, we will pull the eye over here, which is great. That means, and it's in the Misty Mountains, so that means uh Sauron is focused there instead of where Sam and Frodo are. We then can decide how many dice we'd like to roll for this combat.
We can roll up to three dice, one die for each of our troops that we have there. We have four troops. I do think I'm going to roll three. I want to take some of these out, but it's a little risky because we are not at a haven. So, if we roll one of these symbols, we will unfortunately lose one of our units. We'll grab our three dice and roll them up. Oh, that looks overall okay. We're going to take out two of the orcs. Two of them are gone. But, that is a Nazgûl symbol, and there are Nazgûl in the Misty Mountains. We'd have to lose two of our army units. Do we want to do that, or do we have something we can spend to maybe negate that? You are able to spend a resistance to reroll a die. I'm going to spend this card from Gimli.
Even though Gimli, it's not their turn. They're in that space. Anyone can discard that's in that space, and we're going to reroll this die. I'm going to reroll that. Oh, nice. We totally annihilated all of the shadow troops there. My gosh, we could turn that into a stronghold if we wanted, uh you know, or a sanctuary instead of it being a stronghold. That is tempting, especially because Gimli You know what? I think Gimli and Eowyn might do that on their next turn. But, for now, Legolas has completed uh his activation. We now can do an action for Sam and Frodo. Because we're in a haven, we can take one of our cards, this Mordor card, and discard it and gain a fellowship token. That way we can use that, and either Legolas or Frodo and Sam can use that. All right, let's draw two cards. Our first card, and we should be good for Darken Skies here is an Ithilien card. Nice. And our second one is another Ithilien card. We'll then draw our two shadow cards. This one will be a banner. Oh, it doesn't matter. It says, "Add one shadow troop to every shadow stronghold in Mordor." There's three of them, so that's going to be three troops. I'm so glad we took out three to put three out. I'll do that in a second. What's our other one? This will be a banner. Moving Moria. We just took out all the enemies in Moria, but we got to follow this to see if any others will activate going towards Minas Tirith. Each stronghold will get one of these orcs. Cleaning out Moria was kind of amazing because we would follow this line. This guy's going to move to here, and then nobody else is going to move
for that card. We can now move to Gimli and Eowyn's activation. Gimli's going to be the star for a bit, but then we're going to move to Eowyn very soon. Gimli is going to take his action. When Gimli Oh, here it is. Action once per turn, gain a valor token from the supply. Well, while we're doing that, action two, we're going to give up three valor. So, these two cards plus that token, and we are going to build a haven in that location and gain two hopes. We'll go from four to six hope. If you look at our 3D Mordor piece now, we have a yellow bottom, so that means it's a haven. Nice. So, that was only two actions. Action three, we are going to move to Holland. But, in order to do that, you can just see it here. It's going to cost us uh And oh, by the way, I should mention, because we made that a haven, the eye should have moved to Misty Mountains, but it was already there. So, he was already pissed that we made that a haven. We're going to move on this path, but we have to spend a friendship. I'm going to move everybody.
I can discard this Misty Mountain card uh for that friendship, so that we can move over to Holland. After completing that third action, Legolas is going to use his sure shot. We're going to discard this Ithilien card that has a stealth, and we can take out one of these orcs. That's our second one. We need six on uh that makes six. So, we're uh 1/3 done. Our fourth and final action, we are going to move to Tharbad. We're trying to get ourselves to Ered Luin and take out that one orc. Once we do that, we've completed one of our five objectives. Now, what do we want to do with Éowyn? I really hate to do this, but I think I'm just going to have her muster one more time. We're going to get some units, so we're ready to take on either these orcs, because they're now in Rohan. We need to clear those out uh for sure for our What is that? The Shieldmaiden no longer means that we have to have Rohan free of Shadow troops. So, yeah, we're going to need to take these out. I need some units. So, that was our one action. Now, let's draw our two cards. We'll flip our first one, and we have Rudaur. Rudaur will be with Éowyn and Gimli. And then, our next one, ooh, we have the gaze into the palantír.
Select any character, shift the eye to their region, then move any three Nazgûl to that region. That'll be great later. We'll now flip our next two shadow cards, so we have adding one unit to Isengard, and then we need to deploy three Nazgûl from Mordor to the eye. That is phenomenal. The eye is not where Frodo is. We'll place that single troop in Isengard, and then three of these Nazgûl will show up in the Misty Mountains. They are pretty pissed that we took over Moria. Our second card will be the banner. No, it won't. It'll be choose one of the following. Remove any two friendly troops. A single plan must discard a total of two player cards or lose one hope. I really don't want to lose hope, but I don't want to discard cards. Maybe I'll do the troops. I don't want to do troops. I'm going to lose one hope. I'm going to go from six to five.
I know. That's how you lose the game, and here I am doing that, but it is what it is. I've got ways to pump up hope, so I'm just going to lose the hope. It's now Frodo, Sam, and Legolas. We will once again have Legolas take the four actions. It's all Legolas and Gimli right now. We're going to have him do the action where he can gain one of these stealth tokens, and then he's immediately going to use that as a sure shot, taking out our third orc that's over here in Dunland. We only have one orc left there, and we have three orcs on our that makes six. With our next three actions, we're just going to move one, two, three, and we are in Ed Luin. All we need to do is take out that shadow troop, and since there are no shadow troops in Dale right now, we can complete that objective. I needed to rush that because there's a tons of shadow troops just outside of Dale. Now, it is Sam and Frodo's activation. I still don't think we want to move yet. I think we will just do another prepare.
We're going to discard Mirkwood here and get our second friendship token. You can just imagine what I'm going to do with these friendship tokens. We're going to get ourselves over to Dol Amroth, I think. We'll now draw our two cards, and we have Eriador. You know what's great about that? That is another one that we can use for Legolas to just take out that orc in our space. And then we have an event, select any one symbol token from the supply and give it to a character, a gift from the elves. That makes sense. We've got Legolas here. Let's flip our next two shadow cards and this one will be a banner. We have a rune. So we add one enemy to Rune and then deploy three Nazgûl from Mordor to the eye. Rune is way over here and then we have a single Nazgûl in Mordor. It's going to come into the Misty Mountains and then we need to move two more starting with the largest group. You know where the largest group is? Areador. Yes. So one's going to come in from here and since there's only one in Areador, one in Rhudaur and one in Gondor, I'm going to choose the Areador one and have it come in here because they are all the same amount. Now we can move Sam and Frodo and we don't have to worry about searches at least for now. That of course was just the first card. Okay, this is a banner. We've got Dunland to Rivendell following the green. Thanks to Legolas's sure shot, Dunland here only has one unit. It's going to move here and then we'd follow this green line and no other enemies move. It is now Gimli and Eowyn's activation. But before they
even go, Legolas will discard this Areador card which is a stealthy card. We can sure shot this guy right here. It's a free action that is number four. But now there are no shadow troops in Ered Luin. We have four dwarven troops there and Dale itself, which is actually quite small on this board, has no shadow troops or shadow strongholds. So that means we've completed one of our five objectives. This means the current player may gain two valor from the supply. Don't mind if I do. So I have two valor here and we'll gain one hope going from five to six. What was so great about Legolas doing that is that we did not have to take an action for Gimli to do that. So, now we're going to have Eowyn take the four actions. Her first action, she's going to muster one more time. She is going to get an army.
It's an army of Rohirrim, some of the best ever, right? I mean, if you think of the Pelennor Fields, oh my gosh, so cool. That was action one. Action two, we're going to come into here. Action three, we're going to come into here. And action four, we are going to attack. Unfortunately, I'm going to bring this guy from Helm's Deep, too. Unfortunately, this location does not have any Nazgûl. It doesn't. It's a bummer. Uh but, I'm going to bring the eye over to Rohan. It's going, "What the heck is going on here?" I think I'm going to roll Let's see, is this a haven? This is not a haven. Do I want to roll three? I'm going to roll three dice. We'll drop our dice down, and we do lose two of our units, but all three of the orcs are gone. Yes. Losing two, though, means we have three Rohirrim left, but I'm in a location where I can muster more, so that's no problem. We then get one action with Gimli, and I think it's time to start the fellowship, right? We'll have Gimli and Legolas join Frodo and Sam.
And you we all know it's pretty hilarious that I have Frodo and Sam and Legolas as the same character, because they never talk to each other in the books or in the movies. I think in the book, or I should say the movie, all he says is, "You have my bow." That's the only thing I think he says to Frodo. And that was our one action. Let's draw our two cards. We'll flip our first one, and we have a Gondor ring card. That's good. We need to get that to Frodo and Sam. They don't have any resistance right now. And an Athelas card. We'll flip our first shadow card, and this one will place one in Dunland, and then deploy three Nazgûl to the eye. That is great. Wait a second, that isn't great. I was hoping that there are enemies for us to fight, but there aren't any enemies to fight here in Rohan. Uh so I want the Nazgûl where there are some enemies so I can take them out with Éowyn. Our second card, let's see, it will be another banner and this one is Rune and three more Nazgûl to the eye.
I'm a little bit nervous because I left Rhovanion and Dale completely completely undefended. Three more Nazgûl are going to show up here in Rohan. One, two, and the others still two in the Misty Mountains. So that's three they're all flying around Éowyn. Éowyn's going, "Where's the army to fight?" Uh there's at least one more here in Isengard. So if nothing else we can go over there. I was thinking I might try and turn that into a haven. Yeah, but regardless it's Frodo, Sam, and Legolas's activation this time. This is where it's going to get kind of crazy. We're going to take the four actions with Legolas, but we're going to move Sam and Frodo as we move with him. So we're going to move one here. And now when all these move we have to pay a stealth or we have to do a search. But the search only cares if there are Shadow troops in your current location that you're moving to. There aren't any.
And then any Nazgûl that are in the region. Eriador's empty. Absolutely empty. So we're good there. That was action one from Legolas. Our second action, we're going to go from the Grey Havens bringing everybody with. We're going to discard the two friendship tokens that we have so we can use this and take a boat all the way to Dol Amroth. We're going to bring everybody with. I did decide to leave one Elven troop there just in case, but look at this army. However, with this move we either have to pay a stealth or we have to do a search. Well, in this location there are no Shadow troops, but there is one Nazgûl. I'm going to take the chance and just roll one die. We're also in a haven, so that means if we roll this, we'll have no effect. We won't lose hope. We'll roll up our die and it's blank, so no hope loss. We're still at six. For action three, Legolas is going to move to Pelargir, but this time we are going to leave Sam and Frodo. Are we going to bring them with? We'd have to do another search.
Uh no, I'm going to leave them. I'm going to leave them cuz he's in a haven. We're going to bring Gimli with. We're going to bring all of the dwarves cuz the dwarves are awesome. The four dwarves, we're going to bring the two Gondorians, and then we're going to leave that one Elven troop. So, we're just kind of leaving the Elven troops behind just for a little bit of protection. So, that was action three cuz action one was to move to the Grey Havens. Action two was Dol Amroth. Action three is there. Action four, we're just going to gain a stealth. Uh that's from our ability of walking silently and then immediately spend that so that we can take out one of these orcs in South Ithilien. That is five. We just need to take out one more and we've completed that goal as well. This will mean for Sam and Frodo's activation, we'll just do another prepare.
We have, and this is great, we have a Gondorian card and we're going to prepare this so that will give us one of these resistance tokens. We need five of those at the end of the game. Remember that. And we have Elrond's support. Once per turn, when we prepare, if we're at a haven in the region that's named on the card, we also gain a friendship token. So, we gained a friendship and a resistance for that action. We've ended our activation. We'll draw our two cards. We have Mordo. That's great. We can take out one more of those orcs and we complete our objective. And our last one here will be Haradrim. That's also a stealth card. Just so you can see, we have six cards in our hand. Our max is seven. So, we do need to start using these. For our Shadow Card draw, we have Moria to Rivendell. We have one single troop that's going to move to the Weathered Hills. It'll move into Rivendell next time. That's why I have one troop there protecting it.
Hopefully, he can take him out. If he doesn't, we're going to lose three hope if we lose Rivendell. It's a little bit risky, but you can't do everything. We're going to do the bottom here. Moria, we don't have to spawn for Moria because it is now a haven. We do have to do this to point three and Nazgûl. Not from Mordor, it's going to be it from wherever to wherever the eye is, which is in Rohan. Well, that's both good and bad. The good thing is we can get this one out of Gondor and into Rohan, but then I have to take the one out of Minas Tirith, or sorry, the Misty Mountains, and this one out of Rhudaur and put it here. All nine are in the Rohirrim location, and we have no enemies to fight. So, you know, I actually have an idea. I kind of can't believe I'm going to do this, but I'm going to have Éowyn take the four actions. She is going to muster for one to get an extra troop. So, we've got four.
Action two, we're going to move into Isengard. And then, action three, before we fight, we're going to use gaze into the Palantír. We're going to shift the eye to our region and move it three Nazgûl to that region. Seems kind of ridiculous, but I want to take out one of these Nazgûl. So, we're going to bring in three. One, two, three. They see what we're doing at Isengard. So, that was not an action. Action one was to gain the extra troop. Two is to go here. Action three, we're going to attack that single orc. We'll roll up our three dice, and we've got it. Look at that. Now, we do lose one of our own troops, which I thought was going to happen. We'll lose one of ours. We'll defeat that one orc. And then, what we can do, if Éowyn is present when a battle's rolled, remove one Nazgûl in the region from the game for each one of these symbols. So, we're going to remove one of them. There are now only eight out on the board. We took out this Nazgûl. See you, sucker. I do hate to do this, but I don't think we're going to do anything for our fourth action. We want to stay there. I can't do any sort of mustering, but what I'm really hoping to do is capture Isengard, but I need one more valor, so I can't do it. So, you know what? During Gimli's single activation, let's just gain one valor.
So, now we'll have enough valor for the next time. We can draw our two cards. Next, we have an Ithilien card that's in our hand, some friendship, and we have some stealth ended ways. We've got to know that that sky is darkening card is coming soon. We have the banner, Umbar to Helm's Deep. Following this orange path, we only have one orc, I believe, that's going to move. Everything else is good. Our second card, we have the banner that is going to be Umbar, and we have to shift the eye to Frodo's region. If it was already there, we'd have to have a roll. Placing a singleton troop in Umbar, that's fine. And placing the eye in Gondor is actually fine for right now, because nobody is there. But now, he's probably going to start pulling his Nazgûl into Gondor. That'll end Gimli and Eowyn's activation. It's now Frodo, Sam, and Legolas. Once again, I do think we're going to have Legolas do the four actions. We're going to have him move one, two, three. We're going to have him bring Gimli, of course, and we're going to have him bring a certain amount of these troops, all of the dwarves, because all the dwarves want to stay with Gimli.
And then, let's have Let's actually leave Let's leave two of the Gondorians here, bring this other one into our region. Then, what we're going to do for our fourth action is we're going to complete usurping Denethor, or unseating him. As an action, a character in Minas Tirith will spend two stealth. We've got our two stealth. We need to spend one fellowship. We have our fellowship. And one valor. We have one valor. Actually, I'm going to keep the Ithilien one, discard the Dale one. So, we've discarded all of those while at least one other character is present. Yes, that means we can put the troops on this card into the supply. We can add up to three troops to Minas Tirith. That's right where we are. We're going to do that. We are going to have an army of dwarves and men. Dwarves and men, who needs elves?
Oh wait, this is like Legolas was doing this. And we'll gain a hope. We'll go to seven total hope. That also means we've completed our second objective card. Sam and Frodo will still get one action. We're going to discard this Ithilien card. That is our second resistance. I need five for the end of the game, so I still need three more. We used a ton of our cards. We now only have two. I do have the gift from elves, which we could potentially make another resistance if we need. We can now draw our two player cards. We have another resistance card, a Rhovanion. And then we have an Edgewaith. Moving to our shadow cards, we have our banner. So, it's Nurn to Helm's Deep. That, my friends, is a long one. That's this purple line and it is going to impact some troops. These troops are going to move. These are going to move out of Minas Morgul. I think Sauron knows we're starting to complete objectives and he's not happy about it. We'll flip our next card. It is also movement. Dol Guldur to Erebor.
That's following this blue line and sadly there is a one troop that's going to move to the Old Forest Road. It is close to two of our havens. That's six loss of hope if it takes out both of those. Moving to Gimli and Eowyn's turn, we know we're going to start with Eowyn's going to take the four actions. She is going to take off Sauron and Saruman. We are going to turn this Isengard here into a haven. That's going to pull the eye over here and knock all of our troops down, and that's now going to push our hope all the way to eight. How could we not have hope after doing that? So, that was action one, and we've pulled the eye over there. I think that for our second action, we're going to start trying to chase down some of those orcs that are up on the north of the board and pull the Nazgûl over there.
We'll have plenty of them to attack, and hopefully we can get some Nazgûl over there and then take one out. So, we're going to use this Ered Weth card that's stealthy so that we're able to sneak through to the Fangorn Forest. So, that was action two, bringing our three units. We'll then move action three to the estimate and action four to Emyn Muil. And that way, we have all four of our troops here. We're ready to take on some orcs. Gimli is just going to use his Dwarven Craft gaining one of these valor tokens, and that's it for us. We'll draw two player cards. Here's our Skies Darkens card. That is going to push the eye back over to Gondor. Oh, no. We're going to place out three in Emyn Muil. Oh my gosh, when we place those, we're going to immediately have a battle cuz that's right where we went.
Are you serious? Uh, we'll increase and all of that jazz. We'll shuffle, then we'll flip our second one. We do get Mirkwood into our hand. Moving our threat rate up again now means we're drawing three shadow cards around instead of two. I legitimately cannot believe we just moved to the Emyn Muil and then we were ambushed by three orcs. That means we have to roll three dice. We're not in a haven. Emyn Muil is just outside of Rohan as well, so there are no uh Nazgûl here either. We're going to take out all three of them, but we do lose one of ours. But that actually was kind of awesome to take out all of those Orcs. We can draw our three Shadow cards now. We're going to do the bottom Umbar, and we have to roll for a search. The nice thing is there's no Nazgûl in Gondor and no troops, so we can ignore that. We're just adding one to Umbar.
I'll do that in a second. Our second one is adding one to Moria, and now we're deploying Nazgûl. We'll place the second troop here to Umbar. Thankfully, Moria is now a haven. Not thankfully, three of these Nazgûl are going to come into Gondor. We need to get that eye out of here. Now we need to flip one more card. Our third and final Shadow card, we have a banner. So that will be at Dunland to Rivendell. Oh no. This is why we left one single Elven troop here. This one is going to come in. We're going to have a battle. That one's going to move here. If we lose that Elven troop, then this will become, unfortunately, a stronghold, and we will lose three hope. One Orc can't take out the Elves though, right? Beautiful. That means there's nobody taking out cuz there's no Nazgûl. So we'll just leave them as is. If though another enemy would try and move in there, or they're supposed to move into Rivendell, we'll have another fight. It's now Frodo, Sam, and Legolas' activation. We're going to have Legolas take the four actions.
First action, he's going to gain a stealth token. We're not going to use it yet. I don't need the hope, so I don't need to complete, that makes six right now because I'm at eight hope. We'd lose the benefit of that. But essentially, I'm ready to take that down if I'd like. That was action one. Action two, three, we're going to come over here to South Ithilien. We're going to bring our friend Gimli and we're going to bring three of the Gondorian troops. We're going to bring all of the dwarven troops. And we're going to leave these three here in Minas Tirith just in case. Just in case that's nothing crazy happens. So, we're here. Our fourth action then we're going to fight bringing the eye over to the Ithilien region away from Frodo because now a search would be three dice because there are three Nazgûl in our region. I think we're only going to roll two dice this time and we're going to take out two orcs. That's great. Two orcs is only one orc remaining. Sam and Frodo will continue to prepare for the journey discarding this resistance card. We now have three resistance tokens. We'll now flip our cards. We have Anduin that is a valor card and our next one is Hard Wraith. Dang it, I really want one more of those resistance cards. We can flip our shadow cards. We have a banner Isengard we can ignore but three more Nazgûl go to the eye. There are three Nazgûl in Rohan, three in Gondor and two in the Misty Mountains. So, we'll start
here. One of these will go into Ithilien then one of these from Rohan has to go into here and then we'll do the third one since they're all tied for twos from Gondor. So, all three of these will go into Ithilien. Éowyn is completely okay with that. I think we've got some enemies we can fight then. We have Isengard which we can ignore but the eye will then go back into Gondor. We can't trick them. And then our third one, we have Nurn and then three are going to go back to Gondor. Nurn is empty so we'll place one there that's falling over. And then sadly we have to place three more Nazgûl here. One has to come from Ithilien. It has to and then we'll do one from Rohan and one from the Misty Mountains. Actually, I still I only need to have one here in Ithilien for Aowyn to take out, so why not? We'll move this one here, but now there's four in Gondor.
So, if I try and sneak Uh, I was going to get try and get to uh Pelargir. That's going to be a little bit more of a challenge. It is now Gimli and Aowyn's activation. We're definitely going to have Aowyn do the four actions. She is going to discard this Mirkwood card cuz we need to discard a resistance card to sneak down to North Ithilien. That was action one. Action two, we're going to go into Osgiliath. Osgiliath? Yes, that makes no sense, but I love it. Action three, we are going to attack, so that will bring the eye back over to Ithilien. I am going to be smart and say I have Gimli activate first just doing his dwarven craft because now I can guarantee I'm going to take out that Nazgûl because even if I don't roll it, I can spend or It's not in here. It's on here. I can spend two valor to change one die to that Nazgûl symbol. So, that's why I wanted to do that. Sorry, I did that in the wrong order, so I should have Gimli do the one action and then we've had her move one, two, and then action three is attacking. We have three troops. Let's roll three dice, shall we?
Okay, we're going to change this one. We're going to change that one using the two of valor into this. So, that means we can take out the two troops that are there. That could not have been better. And then we're going to take out this Nazgûl. That is the second Nazgûl taken out and we've completed that objective. The only bad thing about that is we gain one hope, but our hope is already at eight. What's kind of insane is we have this entire board and everything is happening in this teeny tiny Ithilien. I think for our fourth action we're going to move back here. We're going to bring our three units. Now our goal is to get out of Ithilien and pull the eye away from this area. So, Sam and Frodo can sneak in. So, that's what our goal is. It's just to go out and take out some orcs. Let's do it. But, that will end our activation. We'll draw our two cards and we have Mordor. That's almost bad. I don't want one of those. Uh and we have another sky's darken. That's not good at all. We're going to increase the threat. So, that's going to go and we'll still be at three. I'll show you that in a second. The eye goes back to where Sam and Frodo is. We're going to place three in Mount Doom. No.
And then we intensify. We now have three orcs sitting at Mount Doom. I think that means we're going to need to take them out to help Sam and Frodo. So, this might be a pull on Gandalf. We might have Legolas and Gimli escort Sam and Frodo. We'll move up our threat tracker. Next time we move it up, it's going to four around instead of three. We've shuffled up our cards. Let's see, we have a banner. Nothing in Moria, but three more Nazgûl are going to Gondor. That's great. Our next one is also a banner. Nothing with Isengard. And then we have a search. Unfortunately for us, there isn't much we can do about this. This is an unlucky draw because we're going to get all three of these in here and we have to roll all seven dice. The only good thing is we are in a haven.
So, it's only if we see the actual tree that we're going to have issues. We've got our seven dice. Let's drop them down. And we have three hope loss. What can I do to prevent that? Lucky for us, we have Sam's aid and I have two of these cards in my hand. It says, "Whenever a search is rolled, you may spend friendship to ignore the same number of those hope loss cards or hope loss on our dice." So, we're actually only going to lose one hope. And we're going to have two Nazgûl retreat to Mordor. We could have used our resistance to reroll, but that's certainly not worth it when I still don't have the five that I need. So, I decided not to do that. Our hope is at seven. We still have one more card we need to draw. Flipping that next card, what do we have? We have a banner. So, it will be at Dunland to Rivendell. This is just so annoying because this one will move here. That's not a problem, but that one is already in Rivendell, so we have another fight. Can Elrond hold on? That's the question. We lose each unit. So, they both take each other out, but that does mean right now it's safe, but it won't be safe for long. That will end those wonderful card draws. It's now Legolas, Frodo, and Sam. I think we're going to be a little bit risky at this time, and we're going to have Sam and Frodo take the four actions. We're going to have Legolas do a single action. He's going to gain that stealth. Remember, that is what I wanted that walk silently, so we have two stealth. Now, it's Sam and Frodo.
First thing they're going they have two cards in their hand. They're going to prepare both of these. So, we have two valor. We can do that because we're at a haven, and we're shortly going to be moving out of a haven. So, we've got two valor. Then, we're going to move one to Pelargir, and we're going to spend one of that stealth so that we don't have to roll for a search cuz there are 1 2 3 4 5 total Nazgûl here. Then, we're going to spend another stealth, and we're going to stealth our way into the South Ithilien. Actually, you know what? Maybe we'll keep that stealth. We'll just move in there. There's only one shadow troop. Let's deal with the sha the search roll. Let's roll one die. Our hope is at seven. So, I I think we're okay. And instead, what I can do Actually, now I you know what? Before he even does that, I can do the sure shot because that's not an action. Give up the stealth, just take out this orc, and then when we move into the South Ithilien, there are no Nazgûl here, so we don't need to roll a search at all. And that's our sixth uh orc that we've defeated. This means we can return the shadow troops on this card to the supply and gain a hope. So, we're back to eight hope. That's what I'm talking about. But now we've taken all of our actions. The only objective we have left now is destroying the One Ring. Let's draw our two cards. We have Eriador that's not a ring card. Come on, give us a ring card. And that is the Orc Infighting. You may remove up to two
orcs from any location. You know, uh two orcs from any single location. Well, when we get really close to having an issue, I'll use that. But I have another resistance right here, but that's it. I have Eriador, Orc Infighting. I don't have another one, but I'm realizing Gimli does. And if Gimli comes with us, he can give us this Mordor card. It's now time to draw three shadow cards. No Isengard. Deploy three Nazgûl. That's amazing. I'm not in Gondor anymore. The only two that can move cuz there's only seven out now, thanks to Éowyn, will go here into Gondor. They're all there thinking that Frodo and Sam are there, and we just snuck out. For our second card flip, we have banner movement, Nurn to Helm's Deep. Helm's Deep is right here. If we follow these lines, these three are going to come to Minas Morgul, and this one will come to here. Now, in order for us to get through here, we need two stealth. But we only have to pay it once, and we can move all of us over there. Unfortunately, though, there are three enemy troops. So, if we move with Frodo and don't spend that stealth, uh we'll have to roll for hope loss with at least three dice. Our third card, we will have a banner, Umbar, and shift the eye to where Frodo is. Umbar isn't a problem. They seem to be content chilling there, but the eye to Ithilien, I do not like that. That's going to end
Sam, Frodo and Legolas. It's now Gimli and Eowyn. I think Eowyn needs to get that eye away from Ithilien. So, she's going to take the four actions. She is going to move herself one here to Dagorlad and then two, we're going to move all the way over here. Where are we? We're in the uh Dor-winion. And then action three, we are going to distract the eye into Rhovanion. We're going to attack, but we're only going to roll one die, I think. I'm not looking to lose all of my troops here. Yeah, we're going to lose one of each. We can deal with that. And then we're going to do one more attack. Uh yeah, let's do one more with just one die. Let's roll it up. Oh, we just took out an orc. Beautiful. We'll take that orc out. That was our four. Gimli's single action, he is currently in Ithilien. We know we can use uh friendship to be able to help with those hope loss rolls. So, he is going to give this Ithilien card to either Legolas or Sam or Frodo cuz they're in the same location. And then that way we have two of those with uh Legolas, Frodo and Sam to help us with searches. The biggest thing is now we just need some stealth.
We'll continue to draw our cards. Our first one is Rhudaur. That gives us yay, something that we don't need and more fellowship, which we're not going to be able to give to Sam or Frodo cuz it's Gondor. Bummer. Drawing our shadow cards, we have the bottom Umbar and shift the eye. This is just killing us. He keeps looking back at Ithilien, of course, and Umbar for another unit. Now, this is starting to look to be a problem. For our next card draw, we have uh banner that is Rhûn to the Woodland Realm. If we look here, the Woodland Realm following the orange, this one's going to move one away and I have nothing protecting Erebor. Uh then these units are going to move here and these units are going to move here initiating a combat with my two sad Rohirrim. Are they going to survive? Let's see. No, they're not, but neither are the orcs.
But unfortunately, that means Eowyn is no longer going to be able to initiate combats until she gets some more units. For our third card, we have Rune. We have to place another one out and deploy three Nazgûl to Ithilien. I'll place that one orc right over here and then three of these are going to come and start annoying uh Sam and Frodo. And what can I do about that? That was my three cards. That's it. It's now Legolas, Frodo, and Sam. I have at You know what? But I don't know if that's worth it. But I could I could do it. I could do it. I could use this to get a stealth and then I could use Legolas's action to get another stealth and then we can move through here dealing with that search.
Uh but then I only have three resistance. We can get our fourth one from Gimli. I think it's worth it. So, we're going to have We're going to have Legolas take the four actions. Sure.
Uh so, the first thing we're going to do is we're going to discard Gifts from the Elves. Select one symbol from the supply and give it to any player. We're going to gain a stealth. That was free. Then we're going to use his action to gain another stealth. That's his second stealth. So, now we have two stealth. Our first action, we I should say second action, we're going to move giving up both stealth. When we do that, we are going to bring both of them. Or you know what? Yeah, yeah, yeah. We're going going it. Both of them. We're going to bring Sam and Frodo. Now, I bring these units. Well, I'm going to bring all the dwarves. I'm going to leave the Gondorians. I'm going to bring all the dwarves. Okay, but now we have to either give up a stealth, which I don't have, or we have to conduct a search. There are no Nazgûl in this location. But, there are three shadow troops. So, we have to roll three of these dice. We'll roll our three dice and we have two uh hope losses. So, I've got both of these that we can discard to cancel the two hope losses, but we will have a Nazgûl. Wait, what does that say? If a Nazgûl is present, recall one to Mordor. There's no Nazgûl present, so I think we can ignore that. We've completed two actions with Legolas. Action three, we are going to ask for Mordor from Gimli. He has it in his hand, one ring to rule them all.
Oh, that's amazing. This is the one ring right here. And we're going to get that into our hand. That's four rings. Now, we need one more, just one more ring, you guys. That's all we gosh darn need. We're then going to for a free action use Orc In-fighting, and we can remove two Orcs from any one location, two from Mount Doom. Then we are for our final action, we're going to move to Mount Doom. We're going to bring just the three characters into here. We'll leave Well, no, no, that's silly. We'll bring the dwarves with. That was our fourth action. We need to do a search. There's still no Nazgûl here, but there's only one shadow troop. We're literally in the most perfect place. We lose one hope. We'll go from eight to seven. We can handle that. That'll complete Legolas's activation. It's now Sam and Frodo. There's absolutely nothing that we can do. So, I think we're just going to forego our action.
We cannot dunk the ring. We only have four resistance and we can't prepare. So, we're just going to draw. We'll draw our two cards, and we have a Misty Mountains card that has resistance. And we have Erebor, which has resistance. We have the resistance we need. We just need to survive to Sam and Frodo's turn. Unfortunately though, we will have to survive six of these cards. We're doing a Moria to Minas Tirith. We've completely cleared out Moria. These ones though will move down to Drago Lad, cuz they're trying to go this way. Thank goodness, moving away from Erebor and the Woodland Realm. Our next card, we have another movement. That's Rhûn to the Woodland Realm. Oh, no, we're following the orange here. So, this one's going to move here. We would have a combat, but we don't have any troops.
This one is going to come to Erebor, and we're going to lose three hope. No way, right before the end of the game. This now unfortunately is a stronghold. Three hope, one, two, three. That hurts so much. Our third card, we have movement. That'll be Dol Guldur to Erebor. Lucky for us, looking at that blue line, we are totally fine with that. It is now Gimli and Eowyn's activation. Gimli, he's just going to grab a valor. I wish he could do something more. He doesn't have a Mordor card, so he can't do anything. I can't help dunk the ring. I don't think so. Let me look at that. Confirmed, I can't dunk the ring. Frodo has to spend the five resistance. Instead, Eowyn is going to do what she can to try and help the dwarves. She's going to move one here to the Iron Hills, pick up this single random dwarf that's just been chilling there. Action two, come to Erebor. Action three, we're going to draw the eye over here and attack. Why not? If only we had one more valor, we could actually turn that back into a haven. We took out that orc, but we cannot do anything with that haven.
So, that's going to end our activation. Let's draw our two cards. Please don't be a Skies Darkens card. We have Dale that gives us some stealth. And then our next one, we now get the Avalor. That's great, but that's not going to help us. At this point, we just need to not lose any more hope. Moria to Minas Tirith, following the yellow. The only troops that will move is these Drago-lad ones. They're going to move to North Ithilien. They're actually two away from Minas Tirith, but I do have it pretty well protected. Flipping our second card, this one we have Dunland and three Nazgûl to the eye. Great. Dunland is right here. We'll grab one Nazgûl from here, one Nazgûl from here, and one from here, and they're all going to go all the way up to Dale.
That's fine. Thanks, Éowyn. Our third and final card it is going to be troop movement. No, it's not. We can choose I'm going to remove two friendly troops. The two here in Pelargir are going to be a removed. I'm fine with that. All right, now it is time. We are going to try and dunk the ring. Before that though, we will have Legolas do the single action. He's going to gain a single stealth. And then he's going to use his sure shot and take out this orc so there are no orcs in Mount Doom. How is that even possible? I don't know. We're then going to spend one, two, three and the two ring cards in our hand. That's five to be able to dunk the ring. Now we have to do a search in that location where there's nothing there, but we have to roll dice equal to our difference of hope from eight. So, we're going to roll four dice. We just can't have all four hit us and we're good.
We've got our four dice. Let's drop them down. We have two hope loss. And that's it. That's actually it. We can even use this to re-roll this one. Let's see. It's actually no hope loss for that one. So, just one hope. We went down to three. That means we dunked the ring. That means we won on heroic. Just like always, I absolutely love playing this game. Having my own Middle-Earth story, yet you still have the overarching dunking the ring into Mount Doom. I think my only pet peeve, I feel like 98% of the time I've almost never I think one time I went through the middle of the board, but I almost always use this path here. I I wonder if they play tested it and found that so many people use that. You just wait till you get two friendship and then boom, you know, you're halfway through the board instead of trying to come from the top section.
I really have never done that, which is kind of a bummer. I want to do that. Maybe Maybe next time I'll just make myself do it. Uh but otherwise, everything else is just so clean and fun. And with this bigger board, the lines don't feel nearly as overwhelming. I find it a lot easier to track. So, I really recommend the grip mat. I do want to call out I bought all this stuff. So, this was not all sent to me or anything. I just love using these awesome blings. You know me, bling is my thing. Uh when I can bling up a game, I love pulling it out and playing it. Hopefully, this helps you determine if some of this bling is for you. I want to give a huge shout-out to our patrons and subscribers. It's because of you that Baron and I do what we do on this channel. And if you're excited to see what Baron and I have coming next, then I need you to meet me at the table.
Goodbye, everyone.
You set me up against your with all your energy. It's a master plan to set me up against your
enemies.