Luthier Review With Bryan: A Return to Form 9 years in the Making!
Games in This Video
1 game is featured in this video — it unlocks as you watch.
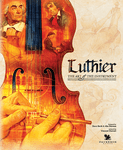
Transcript
H something fun, something artistic, maybe euro, maybe true to form, maybe a return to form. That's right. You know what? It's been a long time since I've done a video like this in the kitchen, shooting candidly, looking straight in the camera, talking about things. But today, we're starting a new era because a new era for me has started at the Dice Tower. And I'm excited about that. And I'm back to form, enjoying the way I used to shoot. So, we're taking a look at Luier today, a game all about making musical instruments for rich people who want to buy them. Let's take a look at how it plays. We'll come back up, talk final thoughts right now.
All right, this is a little chaotic, but this is Luier postgame. And the reason I'm showing you postgame is so we can understand a lot of the concepts. There are 1 2 3 4 five main player worker placement areas. And then there are two on your player board, which I'll show you a player board right here. You're going to start with a family with starting resources. Some of these areas blocked off, a place to hold nine or less fewer resources, and then you can expand that by upgrading this. Then you have your roughing action and your fine action. The reason that is you rough out wood when you cut wood, make wood projects, and then you make it fine. We're fine. Um, you'll notice the numbers here. We'll talk about that in a minute. When you place new patrons, that will go on these spots with those bonuses on it. So, if I were to take this patron here, uh, and put this patron here, I would get four money. And then notice the arrow here. This is kind of their frustration track or patience track. Each round it's going to move this way to where at the end if you don't have their goods serviced they will leave the shop. Now I'm gonna pick a less or more complicated one actually.
What you're going to need for these different patrons is a definite instrument. So this one wants some sort of keys instrument or percussion and also a performance of this genre or repair of that type of of a stringed instrument and the same thing twice. Now, that's the main gist here. When you finish someone by doing all three of those things for this one, you'll flip it over and you'll kind of get the bonus. This is an in-game points. Now, the way that works is or on the round there is a planning phase. There's also a market down here. Planning phase where you're going to take your num numbered tokens here. You're going to place them face down on the different spots. Everybody will do that. And then, as the round starts on your actual turn, you're going to choose one of these action spots to activate. Now, it could be the ones on your own player board, which don't really affect anybody else, or could be a space like this. Now, let's just pretend that yellow has a number on it as well. You're we've now got two people here. And so, we're going to put them over here and check the numbers.
The highest number will go first, followed by the second number, and further down. But also, the priority order, let's say two people put a three here. The person who's on the bottom would go first. Then you will take the actions. And why that matters is some of these slots are going to disappear because people will take them. So, if you hedge your bets and you go there with a really low number last, you're probably not going to get to act because these four things don't refill and it's more expensive if you don't have reputation costs to get in there. This one's fairly simple. You're going to take your strength number plus two of these white dye roll at first. Get the number total and based on here, whatever that total is, if you have 1 to 10, you're only going to get five coins. If you have 11 to 14, you're going to get two coins and you're going to get to perform. We'll talk about the orchestra in just a minute. And also two points.
Plus, it counts as fulfilling the type of performance that someone might want. So, if someone has a pink romantic performance desire like we talked about here, this would be pink if they wanted that. You would fulfill that need for them. Then that's the performance area. Up here is your patrons area. This is where you get patrons. You will also see that each here it shows you the basic action. So, take one of these cards and perform it or take three animal type resources. That'd be like ivory, uh, vellum, skin, things like that. Take a patron or take an apprentice plus two inspiration. And notice everywhere you go, including over there, has a bonus for going there with a higher number. If you go here with a four, you're going to move up this track, which is going to allow you to roll one of the dice, allow you to change one of the white dice for a black dice, give you a permanent special worker, another roll another black dice, and then points. And there's three tracks like that for the different areas. They pretty much work very similarly, except that track's a little different. You're going to take patrons here, and you can move back on that frustration track to get another bonus, but also give yourself some more time.
If you don't have a reputation of two to be able to get these here, normally you can only buy level one for free, tier ones for free. Then if you have level two or tier two, you can buy them for free without this additional cost. Otherwise, you can still get these two cards. You're just going to have to pay the cost listed above it. You'll put them into your area just like we talked about, gaining the bonus over here. These are instruments. Same way, you're just going to take the instruments in. However, you cannot play them straight to your workbench unless you go here with a four or higher. This allows you to take a resource of your choice and put it straight onto your workbench. Otherwise, you're going to have to wait till the beginning of the next round to take one from your hand and put it into your workbench here. Now, the reason that matters that essentially speeds you up a turn or at least in action because you then take the instrument, put it straight into your workbench, which means in the same turn you require it, you could then start working on it in the roughing and and uh smooth or the roughing and finding. If for instance, you had one out there, there was a pretty high level that let you have that. So, four or better out there. And apprentice, by the way, just bumps your number up by as many apprentice as you put on it. So, if we put a five out here with this, that would be a six.
So, let's say I had five there and then a one and one here for or one and two here. Forget the numbers down here for the bonuses right now. But that means I could then take that, put it straight into my workbench. If I already had the resources, I could then rough it and find it in the same turn. And coupled with the fact that the market action does not count against your tokens. It does take one of your turns. You can manipulate this and the market is dynamic. So, this turn animals cost one, wood is three, steel is five, or metal is five. You can sell a metal for five or two for 10 and then buy the cheaper stuff that you need. Now again, these will change to where it's in this order always cheapest to most expensive, but the amount will change. So in our example, you could not have the resources currently. You then go there, get the bonus, put it into your workbench. When the turn comes back to you, take your market action, buy the goods you need to build the resource for that. And we'll show you the resources needed for this instrument that we'll show you. The rough side takes one animal, three wood, and a metal. The fine side takes two animal, two wood, and one metal. Once you spin that on the first one, it moves over here to the fine side. Once you spend it from here, you then finished the instrument. If the buyer you're looking for is wanting that type of instrument, case in point here, they actually want a keys instrument, but they'll also take a string down here. You have to do this one as what they ask for. Here, though, it's the performance, the instrument, or the repair. We'll talk about repair in a minute. Then you're going to get the point space on the bottom. So it's nine plus you'll notice this token. This
means you're going to take this and put it out. Now that one is the third the boat. So that's a diamond which means it goes up here in the strings diamond. Had it been the actual one listed. So like a natural horn, you'd put this here. Again, we'll talk about the orchestra in a minute. The last regular action is repair. Repair works similar to buying instruments except there's not really tied to anything. Yes, you can repair for a guest if they want that type of of instrument. So like this guy wants a repaired strings as well, but it doesn't count as building an instrument and it's not something you can hold. This is a kind of you do the action from here. So if I'm here, I can spend three animal to repair this, which gives me two points plus I get to take one of my repair tokens and put it out on a repair type of strings. That means anywhere on this row. Now let's go ahead and talk about the orchestra while we're at it. You'll notice some people in the first chair spots. that these symbols here, you'll take the first tier bonus if you're the first one there with any token. That's the bonus here in the top right of each one. If you're the second person there, you'll take the bonus down here, which is an inspiration or two. And usually the inspiration counts as some sort of an upgrade to the different places, some sort of a discount. However, let's see this situation. Let's just say that I'm here with blue and a repair token.
Currently, I have first chair and at the end of the game, first chair scored based on this chart. So you can get a lot of points for having a lot of first chairs. But then red goes there with an actual instrument. Say the red builds the violin. Well, now this bumps it to where I still have a token here, but it doesn't really matter anymore. Red is now first chair. You can't bump a first chair instrument with another instrument. So that kind of matters up here in the rare instruments though. Anybody can have an amount of first chairs there. You will play for six rounds. You'll start with one, three, and five in your tokens. Then on round three, you're going to or in between round two and three, you'll get your two. In between round four and five, you'll get your four token. You can always add apprentices. You can get special powers from passing these areas. Like case in point, mine over here, I made my number three with this token. It says after completing any action with this particular action, gain three inspiration. And again, those inspirations can be spent as bonuses to bump your things up. The last action is the balcony up there. Basically, you can you can score a public goal, which are those four goals on the top and get six money or you can get two apprentices there. If you go there with a four or better, you're also going to move up the reputation track. These are really good as well. So, that's draw three instruments, keep one. You can then buy tier two ones without having or get tier two ones without having to pay for them.
You get your special worker. Then that one is two points for every completed instrument you built. You say, "How do we know that?" If we've discarded them, count them based on here, tier three. And then also you'll get to score another one of those third things. At most you can really ever score four. Uh three off your player board, one off there. And that's how you do that essentially. Sorry. You can only ever score three cuz you only have three. My bad. Um but then at the end of the round, six rounds, you'll score points based on the first chairs, any points you've collected during the game, any endgame bonuses, and everything you have in the fine section in your fine work bench divided by two on the points. And then every other thing like inspiration, money, and cubes and apprentices divided by 10 equal a point. Person with the most points wins the game. And that is a rough quick overview of how you play Luther.
And so as we come to the end of our first video backed with a true return to form, Luier, let's talk about some things, some final thoughts here. Number one, art. It's fantastic. It's a new trait. It's my favorite artist in a board game. Does an amazing job. Secondly, the game art on board or the board game art or the actual art. It's hard to see and it makes it look a little difficult to see, but here's the thing. Game is actually gorgeous. All the art on the pieces looks good. The musical instruments looks amazing. The components are great, right? My only wish that and I think maybe the upgraded version has more screen printing on them. Sometimes it's harder to see some of these components, but they are nice. Everything looks really well done. Number two though with the art and components is it just works. Everything seems to have a place and a place for everything and that's art direction as well. Number three is the mechanics of the game. That whole notion of worker placement with the timing structure. I love that. I love the idea of putting your disc down for when it's time to play uh your worker and then on the actual action phase you take the actions in that order. Maybe you didn't bid high enough to get the action you want. To me that's such a cool mechanic. Number three or number four I should say is the uh the the gameplay itself. like the how the game feels and I feel like there's a little repeaty by the action of repeating of actions and kind of a repeating feel by the end of round six where it feels like you have to do the same things over and over and sometimes some of the actions feel like you don't have to do them like you may never do the performance you may never do the repair grant they're good for cheap points at the beginning but if you can see that it's not going to help you that
much to get first chair you're not going to be able to hold on to first chair because you're not making enough instruments well it's very difficult and that also makes it hard to choose which patrons to get sometimes But at the end of the day, it's a really, really solid game. The rule book's great. It teaches you really, really easily how to play in the setup. Um, and overall, it's an eight and a half for me. A couple things just from that repeaty feel of like, okay, well, I don't really have to do that action. I have to do that action a lot. But such a great game. That's Luthier. But I'm Brian Drake here on the Dice Tower with a return to form. How I got started back in the old days. The spark is back. We'll see you next time.
Hey everybody, thanks for watching another video from the Dice Tower. Hey, you want to learn more about us, communicate with us, we have a Facebook group, we have a Discord channel, lots of different ways to get involved with the Dice Tower and you can find that in our Linkree link below. So just click that, it will take you and you can communicate with us on Facebook, join our Facebook groups. There's lots of cool things that you can find and become part of the Dice Tower. Thanks so much for watching. I'm Tom Bassel.