The Dwarves: Big Box - Review
Games in This Video
1 game is featured in this video — it unlocks as you watch.
Transcript
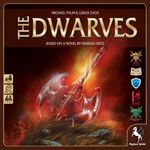
Hey folks, welcome back to the dungeon dive. Daniel here. I hope you're doing well and if you're not, I hope you are soon. Okay, today in the channel we are taking a quick look at the dwarves big box and this is from Pegasus Spiel. So, I've talked about this before, but every once in a while, you know, I just like to go on to Amazon or walk into a local game store and just see what is readily available. Find a game that you don't have to go through a crowdfund. You don't have to jump through a dozen hoops uh to get games that aren't very expensive and games that look cool. And so, a couple weeks ago or so, I was on Amazon and I just I just searched for, you know, fantasy adventure games. And uh this came up and I had never heard of this game. And it was pretty cheap. It was around $55, I think. And it's actually a pretty fun little game. You know, it's not a fantastic game. This isn't a top 10 game or anything like that. But, uh, this big box version of the dwarves, it packs a lot of game into a normalsiz box. And I think the game is pretty fun. It is a pretty typical kind of, you know, fantasy cooperative uh, threat management game. It does remind me a little bit of something like Legends of Andor or Defenders of the Realm. It's a little simpler than those games, but that simplicity is something that I admire. It's something that I find appealing. But, uh, this game, the Dwarves big box version, it adds all of the expansions, all of the things that were made for the dwarves. Now, I know I know nothing about this property. It is
based off of a series of novels by Marcus Heights, all about these dwarves. And uh in this game, we have uh cards. We have these scenario or saga cards for five different books of the series. You don't have to play those in order. This isn't a campaign game. You can just pick a book and play through that scenario basically. But what you're trying to do is each of the books will have a set of saga cards. And this basically controls your scenario. Now, I think book one is the most interesting in terms of variety because the expansions that come with the game for book one, they add all kinds of variety in the saga cards that you can just mix and match. And so, there's a lot of variety just with book one. But these uh saga cards here, we have letters A through B and C. To win the game, you have to complete one of the C saga cards. And when it comes time to draw one of these, only one of them will be applicable. And so you never really know which one. It depends on kind of the state of the board, but one of these will always be applicable. it will trigger and then you have to face off against this uh this final kind of conflict in order to win the game. Then we have uh in the base game for book one we have one B card and this is kind of
like your pivotal moment in a story. This is kind of like you know we're we're working up to this to forge this uh great weapon in order to uh to overcome the final conflict. There are additional B cards, but when you play through a game you will only use one B card. And so this is kind of your pivotal moment in this scenario. And then all of your level A cards, you will choose a certain number of these depending on the difficulty that you want to play on. And you have to work through all of these. So you work through your A cards, then you do your B card, and then you do one C card. And that's how you win the game. And so if we were to set up a game, we would take our C cards and place those down. We would take our one B card. And then I think we remove up to three A cards and then give these a shuffle. And now this becomes our saga deck that we have to play through before our time runs out, before the army of evil uh overwhelms the dwarves and takes over their kingdom. And these are set up over here on this uh this other sideboard. And we'll take a closer look at that in a minute.
In addition to our saga cards, we also have our adventure cards. And book one has a big variety of adventure cards. Books two, three, and four, they use the adventure cards in kind of a different way. And uh book five even adds a little bit of a of a more different way to use the adventure cards. It's more like book one. So there are some differences in how you set up the game depending on which book you are playing. Uh, another way that this kind of reminds me of uh of Legends of Andor is the additional books, books 2, three, and four. They have all of these different tokens that you will be using and kind of different ways to interact with the points of interest and things that will be on the map. Uh, one of them adds a quest for these diamonds. And so, you have to get a certain total of diamonds in order to win that book. So, there is quite a bit of variety. And I think the expansions do add quite a bit to the game. But we have these adventure cards. And so we have a pretty large uh stack of adventure cards. And there are even more adventure cards in the expansion for book one here. So lots of variety in the adventure cards. And the adventure cards, these come in kind of two flavors. We have the white border ones.
And these when you complete them, when you overcome the challenge, you will get some kind of benefit, some kind of reward. You might get an item or you might be able to kill some of the army of evil without engaging in battle or you might be able to move uh the dwarven council. We'll talk about the dwarven council in a bit too because I think that's kind of interesting. But these will give you a benefit if you overcome this challenge. And there are different challenges. There are stat tests. There are kind of a there will be kind of fetch quests where you will have to take an item to one location. You might have to go to a location and maybe overcome a challenge, a certain kind of stat test. But all of these have, you know, a little bit of flavor text and and unique art. So, I think the game actually looks really nice on the table. But then we also have these black border adventure cards, and these are threat cards. These you have to overcome, but they don't give you a bonus. They don't give you anything good. You just have to overcome them before the bad thing triggers. and the bad thing will trigger if you progress through one of those saga cards without removing this card from the board. And so this becomes an additional kind of pressing threat that you have to overcome in order to uh win the game or in order to progress the game without taking further kind of penalties. And so you will mix up the adventure deck. You will draw three. And so there will kind of always be three adventures out for you. And so right now we have what are dwarven women like magically trapped bag
and accompany Namora. And so these would be our three adventures that are out on the board. We would flip over our first uh a saga card and we have conquer zon bulsar. So we have to place twoar and two trolls on this card and those are represented by these meeples here. And so these uh correspond the these create the army of evil. We have trolls, we have orcs, and we have elar. And the uh ranging in difficulty from easy, medium, and hard. And so this game does use a dice pool system where you are rolling the number of dice that correspond to the stat that you are testing. And usually four, fives, and sixes are successes depending on the strength of the challenge. To kill an orc, you need a four or higher. To kill a troll, you need a five or higher. to kill an Alfar, which is kind of like the dark elves.
You need a six or higher. So, uh, these guys are really strong. These guys can really kick your butt. But here, we have to place two of the two trolls on this card. We have to travel to the location on the map of Zon Bolsar to defeat these troops. The quest is complete when there are no more troops on this card. So, that's kind of our main goal right now is to take care of that while also looking at our adventure cards, doing what they do so we can get those bonuses. And then what you do is you take your threat cards here and you will shuffle those up. So, these are the bad threat cards. And then you will randomly seed two of those in your adventure deck. And so when the time comes to draw new adventure cards, you might draw one of those black threats that you will have to deal with and you want to deal with that pretty quickly so the really bad thing doesn't trigger. As the game progresses, more of these bad threats will be added to your adventure deck. So there is kind of a feeling of progression while you're playing the game. And I think that is pretty cool.
And it does kind of, you know, the the tension does ramp up in this game pretty quickly. And you do feel that fire, but I think it works. You know, I don't mind the timer in this game because this is uh you know, we are entering this world on the cusp of darkness and so we really need to deal with those threats. Uh the final deck of cards here that we have is the item deck and completing your various quests, completing your sagas and doing things will allow you to draw uh these uh gear cards, these item cards. And in typical fantasy game fashion, you know, these will allow you to add to your stats. They will allow you to add to your movement, the uh healing potions, magical items. So, all kinds of things for your dwarves to find and equip to help them on their quests.
You can play anywhere between, I think, two and four players. I've been playing with three, two to six players. Actually, I've been playing with three heroes, but uh the heroes, they could feel a little more different. There could be a little more variety. I guess there's just enough to make them feel a little bit different, but as the name suggests, most of the heroes you will be playing with are dwarves. And the stats, we have our health track on the side. One of the main ways to lose the game is if any of your heroes uh takes their last hit point, if they die, and that can happen pretty quickly in this game. You have to be smart about how you engage in combat. But we have our health track and then we have three stats. We have a battle stat, a crafting stat, and a movement stat. And so these will correspond to the number of d6 that you will roll in your dice pool. And then again, usually fives or sixes are successes. Sometimes a four is is a success depending on how strong the challenge is. But we have all of these different dwarf characters. And then we have a few different of these kind of human uh characters here. And this character here is the most different.
And I wish there were more characters like this one here. But this is Andokai the temp the tempestuous. And they actually start with a ski with a spell deck. And so they are kind of a wizard and a magic user. And so you will have this deck of spells that you can use if you choose to play with that character. So that's pretty cool. I wish there were other characters that had that kind of variety to them that added a little more spice, just a little extra thing to make them feel different. Okay, so over here is your dwarven council board and this is where you will keep your saga cards and your adventure cards. So these are the things that you have to do. And then along the bottom here is this kind of political trek and I really like this. This is pretty cool.
And so we have two kind of compos uh we have two opposing sides. We have a Bell &il and uh Bispelar or something like something like that. All these dwarven names. But as the game progresses, you will be able to influence the dwarven council by taking certain actions, by uh rolling dice, by hitting certain target numbers, and it can move to the right or to the left. As the dwarven council marker, as it moves closer to be bellend, things get easier. You start getting bonuses, extra bonuses that you can do on your turn. Such as if if if the dwarven council marker is here, it says after completing an adventure card, so one of these cards, you may discard one face up threat card without the consequence. Or here, after rolling the number dice, you may roll one dice of your choice. the new result counts. Or here you can take an action. You can test your crafting ability and you can actually uh craft items. You can draw items. So this is really cool. And there will be quests where you have to get this uh dwarven council marker all the way to the right. As it moves to the left, things start getting worse. The dwarven council starts to lose faith in the adventuring party and things will get harder. You will take penalties. And uh so this is kind of like a tugofwar of this kind of political battle that's going on in the background at the uh
dwarven stronghold of a black saddle. So there's this kind of political turmoil that's bubbling away under the surface of this game while the dwarves while the adventuring party while the heroes are out having to complete quests and stop the army of evil from taking over the land. And I really like that. It adds a really cool kind of eb and flow kind of a give and take to the game and it makes this kind of it makes the political turmoil of of of a kind of epic fantasy kind of come to life while you are playing the game. So the main board and this is where all of the action is going to take place. It's a really cool hex map and I think the art looks really good. This is one of the reasons why I bought the game because I think the hex map is really nice. And so we have all of these hex's. We have these kind of like seven kingdoms of the dwarves. Up at the top here, we have the places the places where we can keep our army of evil meeples. So, we have our orcs, our Elfar, and our trolls with the reminder of what we need to uh beat them, what we need to roll in order to beat them when we take an attack. So, this is a one, a one, and a three. So, you need at least a four to kill an orc. So, that would have been a completely missed attack.
And then we have all of these meuples. I think the meuples are pretty cool, but I do have an issue with them. I do actually have two issues with this map. And we'll talk a little bit about those issues uh when we get a little a little later in the video. And then also along the upper perimeter of the board is the doom track. And so this acts as kind of like your timer. And it also triggers certain things that will happen on the board when the kind of when the game fights back against you. Most of these spaces are these black circles and those will tell you where recruitments of the army of evil where they spawn corresponding to these numbered gates. And there are four gates around the board when your dwarven when the hero marker reaches one of those black circles and you move that at the beginning of each hero's turn. And so that's kind of how the game scales as well. the more heroes you are playing with, the more players you are playing with, the more chances the game will have to fight back. So, I think the scaling mechanism is pretty good. It makes sense to me. But when you reach one of those black circles, that's when the army of evil gets recruited onto the board. And so, the first time you you move on to the uh first uh track here, the first spot on the track, you're going to spawn enemies at gate five. And so, that always happens every game. It's gate five, gate five, and then gate one, five, four, five, one, five, four, and so on. Apparently, there's no gate three. Uh, something in the lore, I just
looked it up, and the dwarves that were in charge of gate three, they called the the third lings. So, there's like the first lings, the second lings, the third lings, the fourth lings, and the fifth lings. The third lings were like not they chose not to take part in the battle or something. I don't know. If you read the books, maybe you can tell me the lore there. But there's no uh three gate because something about the the third lings decided not to participate in this battle. But when you have to spawn monsters, you will roll these uh three colored d6 and they will correspond to the color of the enemies that are coming out. So green for orcs, purple for black for trolls. And so on our first turn here, if we were to spawn our enemies at gate five, we would roll our recruitment uh d6 here. And hey, not too bad. We would have three orcs that come out. And so we would take three of our orc and meuples and we would put those out like that. And here is one of my main criticisms is these meuples. Um I normally like wooden meuples. I prefer wooden meeples over miniatures, but for this game, I would actually just prefer cubes. And I've actually seen some old versions of this game, some older versions of this game where they did use just green cubes, purple cubes, and black cubes. And if I ended up if I end up keeping this game, I am going to replace the meuples with cubes for a couple of reasons. Uh the main reason is they're just kind of hard to use.
They're always falling over and you end up with a heck of a lot of meuples on this board. And these trolls are big. The trolls are very very easy to uh to knock over and you end up with like 30 or 40 of these on the board and they're kind of tall and so they block a lot of the spaces. They're really easy to knock over as you are uh you know reaching over things. your sleeve might catch on them and then you have to remember where they were and it's very important to keep track of how many are on each space because like pandemic there is kind of this overrun mechanism or like something like um you know defenders of the realm or something and if there are ever more than five enemies on the board then they have corrupted that land that land has become perished and then the enemies will start moving moving and you will start drawing these random hex tiles and those will start being placed on the board according to these little arrows, these little colored arrows. You will be placing those on the board and these will dictate the way that the enemies are marching towards Black Saddle. All of the enemies, every space on the board is converging on Black Saddle at this dwarven stronghold. And as you start laying out these parished land tiles, they start creating these kinds of lanes that will move towards black saddle
depending on the color of the big arrow and how it matches on the board. This is really cool because, you know, uh at the beginning of the game, the enemies are going to be spawning on the perimeter of the map, but as they start uh corrupting the land, as the land starts perishing, as they come in, they will follow the path all the way to its terminal spot. Eventually, as they spawn, when they spawn, they will come all the way into Black Saddle. If you ever have too many enemies at black saddle, that also moves the doom uh counter. The doom counter, I forgot to mention, is the kind of the bad counter. This is your timer. It starts on the opposite end of the board, and it moves towards your hero uh marker, and if the two ever meet, then that signals the end of the game. And if you haven't completed all of your quests, all of your saga cards by the time that happens, then that is the second way that the game can end. So, there are two ways the game can end. One of your heroes dies or the doom tracker meets the hero tracker. So, those are the two ways to win the game or to lose the game. The only way to win the game is to make it through your stack of saga cards and accomplish at least one Card or only one Card. So, very easy win mechanism, very easy lose mechanism at least to keep track of. But, I really like this system. However, like the meeples are a little bit too big. they cover up a lot of the spaces. I feel the
same thing about these uh hex tokens that you add because there are a lot of spaces on the board that will have a little icon and a name and a lot of the adventures or the quests will tell you to go to, you know, Parista or go to Green Haven or go to uh Mephrandia. But if you have one of these tokens and then five meeples covering that space and you haven't memorized where that space is, it can really slow down the game. And I think that's kind of a major issue with this game because one of the best things about this game is it's really fastpaced. Uh the turns are quick. You're constantly moving and going and I love that. It makes it really fun and exciting. However, when one of these cards comes up and it tells you to go to a certain space and you have like 30 or 40 of these meeples all on these various tokens and they're all on the board and you have to start moving stuff around to find the icons and find the name of the territories that you need to go to. You start moving things. You're bumping these meuples over. It just it turns a really fast game into kind of a slow game. And that's only because of the kind of cumbersome nature of the components. So yeah, I wish they would have just kept these as cubes because cubes are just easier to stack and move and to keep track of. And I wish they would have
made these these uh random tokens. I wish they would have made the hex's smaller so maybe they would only cover up a small portion of the hex on the map and then they would have had the name and the icon kind of up at the top. Or maybe if they even added a little number just at the top of each hex and then you could correspond that to the card. You know, it could say still, you know, move to parista, but it would also say, you know, hex 12. And then you could just look for the little number that said 12. It would just make an already fast game. It would it would make it so the pace stays fast because as you start, I mean, at the end of a game, you're going to have so many of these hex's and so many meuples on the board. it can become kind of cumbersome to uh to get through. But on a hero's turn, so uh let's take Namora here and let's say Namora was here. So she would have three health.
She has a battle of three, a craft of two, and a movement of two. Uh let's just say that there were some orcs here. You know, they had like moved into this territory or something like that. We're just going to kind of set up an example here. And so on a turn, you get you get two actions. And so she can move. To move, you roll the number of dice that corresponds to your movement value. So her movement is two. You take the highest and that's how many hex's you can move. So she can move three hex's. Now her special power is she can move through hex's that have enemies. Normally when a hero moves into a hex with enemies, they have to stop. If you ever move through this perished land or this imperiled land, you take uh damage. Some of the heroes can move through that without taking the damage. So, that's kind of some of the ways that the the heroes are different. But, let's say she wanted to uh fight these orc. Let's say there was a quest out on the quest board that said, you know, kill five orcs or something like that. So, she could take her first action. She could move into this hex. And then she could take her second action, which is to fight. And if she had a fight value of three, a battle value of three, she would roll her 3d6.
To kill orcs, she needs a four or higher. So, she killed one orc. And so she would remove that orc and add it to the uh recruitment pool. If you fail to kill anything on your turn, then you take a point of damage. So if she was fighting a troll and an orc, she would have to at least roll a four to kill at least kill the orc. So there she had killed the orc. If she had rolled a five, she could have chosen to kill the troll. The elar, these dark elves, those are really bad because you need a six. These guys always get knocked over. These are probably these two. I I really don't like these two meeples. I think they look cool, but they're just really cumbersome. But so, as you can see, you know, combat can be uh quite challenging, especially when you have to fight these dark elves, the elar.
And another thing that you can do on a turn is you can send a dispatch to the dwarven council. And that's that dwarven council track we talked about up here. And so you would roll your craft value and then you have to hit the next target number to move that council towards the right uh on the game board. There will also be these axes and when the hero marker moves at that uh on one of those axe spaces, the dwarven council will move to the bad side one space towards the left. And then we also have these uh spaces that will add those threat cards to our adventure deck while we were playing. And so that's kind of how how the threat progresses, how it feels like, you know, things are getting more deadly. Things are getting more desperate as more of the army of darkness is moving towards black saddle.
You're having to balance this these kind of political turmoil that's going on uh within the dwarven kingdoms. You're having to deal with all of these requests. You know, these people, hey, go to the go to the elf kingdom and take them a sword or go over to the forge and craft this weapon. But also remember that you have to deal with uh the Boglin raid or the bounty on the dwarves or the high king's last battle. So uh you know the game kind of starts off pretty slow but it quickly kind of spirals. It quickly kind of snowballs as all of these threats start to pile on and you end up having to deal with a whole bunch of things. The board gets overrun and it can make for some really really exciting games. I just wish that the meles were easier to handle. I wish they were just cubes and I wish that the hex's had numbers on them. That would make it easier to find the hex on the map as the map starts getting overcrowded with uh tokens and meuples and that kind of thing. Yeah, overall I think this game is pretty cool. You know, besides those few component uh issues, I wish that the heroes had just a little bit more to them to make them feel different. And I also wish that there were maybe a few more builtin ways, like maybe some kind of currency that you could spin to help mitigate some of the luck because really all of the challenges come down to
rolling dice and trying to hit those target numbers, trying to hit a four, a five, or a six. Sometimes just a six, sometimes a five or a six, but sometimes, you know, a four, five, a six. So, at the easiest challenge, you're going to have a 50% chance and then it just gets worse from there. And just sometimes the dice just aren't in your favor. You know, you could be playing perfectly well and have three turns in a row where you just don't roll a four, five, or six, and that can happen. And until you start getting some gear, there really isn't any way to manipulate those dice to augment that bad luck and to offset that bad luck that sometimes happen in these dice space games. And that can be a little frustrating, especially when that is really your only way to achieve a victory. But so if you're really adverse to bad luck in games, you know, bad luck that can just make you straight up lose the game because you don't roll well, you may not like this game. Me personally, it doesn't um make me that angry. I sometimes like it because I think it tells interesting stories and I think it adds drama. And so I don't mind the reliance on luck in this game, but I can see some people that re, you know, really getting upset that, oh man, you know, I just I did everything right. I moved right. I had a good strategy. I had everything I needed. And I needed to roll a five or a six. And well, on that that roll, I had two sixes. And but I only rolled a two, a two, and a three.
So, you know, there's nothing I can do to mitigate that bad luck. But as you start playing through the various books, the books will have different ways to set up. They will have different saga cards. You have that big deck of saga cards that you can add into your book one games. Uh, book five even has different ways to play. Books two to four have these different tokens that you will have to deal with, different points of interest. I also forgot to mention there are these tunnels and uh there are I think four tunnels printed on the map and those are like fast travel points and so the heroes can move to one tunnel and then kind of come out on another tunnel. There's a quest where you can actually build a custom tunnel entrance anywhere on the map. That's pretty cool. We also have these gray cubes here. And so you can actually put these on the board to represent where your quests are. But again, if one of them is covering, if you have two covering and you haven't memorized what these hex's are, you still have to look at them in order to determine what it is. So that's just that's just a little problem with the game. I don't mean to keep hounding on it, but it did kind of disrupt the flow of the game. You know, this was a fast-paced game, and I was like, "Oh man, this is so cool. This is so fast. I love these turns. It's two actions. Boom, boom, boom." things were moving, the army was moving, and then all a sudden I needed to find this one uh hex and there were, you know, 30 meuples on the board and all of these tokens and I had to like hunt around to find where I needed to go and it just kind of slowed down the game a little bit. But overall, I think I think the dwarves is pretty cool. You know, if you
can find it for cheap, I wouldn't pay over $60 for it. If you can find it on sale or a used copy for around 40 to 50 bucks, I think you can have a lot of fun with this game. There's a lot of variety in this big box version. It's very fast. It's very simple and it's really easy to get set up and to to just start playing. It's just one of those games that's fast and it's fun and it's simple and I think it adds a lot of tension. I think the threat management is pretty good, but you probably won't like it if you don't like a lot of luck in your games because you will be rolling a lot of d6 and you know that can just go poorly for you. You can even you can even have bad luck rolling on the recruitment dice. You know, sometimes you might roll seven guys come out. Sometimes you might roll zero. You never really know. But again, that kind of excitement, that kind of reliance on luck to me adds drama, but I know some people don't like that. So, anyways, I hope you enjoyed taking this look at the Dwarves big box. If you've played it, let me know. If you like it, if any of my uh criticisms of the components uh ring true with you, let me know. Let me know if you have just been playing with cubes because I think that will make the game a lot better. So, we will talk to you later.