Gaia Project Tutorial & Playthrough - JonGetsGames
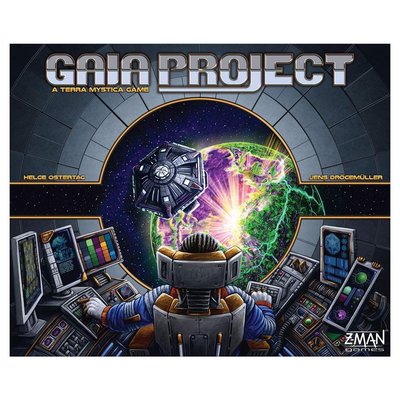
Games in This Video
1 game is featured in this video — it unlocks as you watch.
Transcript
welcome to junkets games this is my tutorial for Gaia Project and in this video I'll be teaching you how to play the game while we're actually playing it now if you'd like to watch the rest of the playthrough you can find a link for that down below in the description or by clicking the I up there in the top corner now I would like to mention that the reason this video is being made is because it wasn't selected by the contributing producer supporters of this channel now that happens over at patreon and if you'd like to learn more about that you can go to patreon.com/scishow against games now I would also like to ask that you please turn on the klingon subtitles that way if I make any mistakes while we're playing through the game I can then put corrections directly on the screen and you should be able to see them now it's going on in this game is each player is in charge of an asymmetric star firing race and they are all competing to take over planets on a communal board now players have a specific home type of planet and if they ever want to colonize any of the other types they will have to terraform those which costs quite a bit of resources now in order to expand out you will have to spend the resources but as you put buildings onto the map you will unlock more income which gives you more resources in new grounds that you can then spend to expand out even more now as players are doing this they are also going to be going up research tracks which give a variety of benefits whether that be income resources immediately or allow you to do previous things more efficiently now there is a lot more going on to this game and I'll explain the details of all of it as we get there but Before we jump into it I would like to ask that if you end up enjoying this video you please click the like button for it down below as well as the subscribe button for the channel also if you would like to directly support this channel in the creation of
future videos like this one then please go to junkets Gamescom slash support there you'll find a bunch of ways that you can really help things out and some of them have cool perks like voting on a couple of the videos that I film each month now again this is one of those videos so what that is why it's being made alright let's now jump into the game out here the game is fully set up and ready to play for our two different players today we will be playing it as the brown at tackle on race and as you can see out here on the board we already have a couple of our mine figures out there now this game is going to be played over six total rounds and within each round there are four phases so let's go ahead and start the first round off and the first phase in each round is income now this happens simultaneously for all of the players and you simply look to your playing area and find everything that has this little hand symbol on it and you then take it those resources or those bonuses now for us we can look out here and down at the very bottom we have three of these symbols showing the white square now white squares are or and that is tracked up here along the top of our board as you can see at the start of the game we have four because of that little symbol there so now we can take three more which brings us up to seven next up there is another income symbol right over here and that is going to give us one technology that is tracked with this blue hexagon so we can move that right over here to the four it looks like that's all of the income we have on our main player board but players also have access to boost strips like this one as well as technology which might also have income symbols in this case we do have an income symbol which gives us two
power bumps in order to do this we have to come up to the top part of our board with these three powers owns now you'll notice we have these power tokens over here and we also have it this special looking one which is called the brain stone now this is an asymmetric benefit that only the taklon player gets and for the purposes of charging power it acts the same way as the rest of these tokens so we have to power charge actions for this income and for every one of these we can move a power token that clockwise to the next zone so we can start by moving this brain stone right here up into the level two area and it's worth noting that you cannot move anything from two into three until there is nothing left in the one area so that means for our one other powerup we must take one of these two and push it into the second zone so we are now done with our income but our opponents the G odin's also get to do this simultaneously now as you can see they're going to gain at three or so that's going to bring them from six all the way up to nine and you may have noticed that they were at six instead of the four and that's because they got an extra two or as part of setup and I'll explain why later next up the gain one and knowledge which brings them to four and also we can see over here they get another knowledge from this boost strip so that's going to bring them to five and they get another ore which brings them up to ten all right the income phase is done so we can now move into the second phase of the round which is the Gaea phase now at this point nobody has anything to do in this phase and in fact I'm going to explain the specifics of how this work later on in the tutorial so with that in mind let's now jump right into the third
phase of the round which is the action phase now the action phase is not simultaneous instead the player who has this starting player pawn it gets to go first now on a player's turn in the action phase they will take a single action out of these eight different options that we can see on this cheat card now after a player finishes their action play we'll move on to the next player clockwise around the table and we will keep it going back and forth until everyone has passed now this means we get to take the first action of the game and I think we should build a mine now the way we do this is we come to the bottom part of our board which has all five different types of buildings on it now at the very bottom we have the mines and over on the left hand side this says we have to spend it to money and one or to construct a mind so that means we can spend an ore going down to six and a to money which brings us down to 13 and that we can then take in the leftmost mine and put it out onto the map so let's now find a planet to build this mine down onto and in order to do this we have to meet three different criteria the first criteria is the planet must be empty and obviously most of them are currently so that should not be a problem the second criteria is we have to be able to access the new planet now at the start of the game we put a mine right over here on this brown planet and another mined right up there now as part of setup you could only put mines down onto planets of your home type and as the tachyons we are the brown race so whenever you have to access a new planet you are essentially co2 flying from a previous planet with one of your buildings now the amount of flying distance we have is shown with this
navigation track over here on the research board you know at the start of the game you can see our pawn is right here on the bottom and then there is a little one now that means we have a distance of one that we can do at the start of the game which means we can effectively go to an adjacent spot and to populate that planet this means at this point in the game a travel distance of one just gives us access to this blue planet that's adjacent to this brown mine and that yellow planet right up here now that's not entirely true because we do start the game with a quantum information cube which is a really neat resource now these cue ICS can be used for a variety of different things and one of those is a four action now if you look at the bottom right hand corner of your playing board all of these are free actions that you can take at any point during your turn now up here we can see there is a cue I see here and if you get rid of one of these you can actually give yourself plus two to your travel distance once of course because this is then discarded so that means we could get rid of this to get two plus one or three movement but I don't think we actually need to do that at this point instead let's hold on to this for now and I think let's build this mine out onto this yellow planet right over here now I did say that there are three things that we have to check first and the third thing is and we actually terraform that planet to become a brown planet so we obviously have to terraform that yellow planet and the way terraforming works is we have to come down to this area in the bottom portion of our board now this shows us the terraforming cost for each one of the other types of planets again and we have the brown planet as our home planet so
if we ever build it on another brown planet we don't have to terraform anything so we can see right over here that a yellow or a black planet is going to cost one terraforming unit if we were to try to build on an orange or the white planet that would cost us two terraforming units and if we wanted to terraform a red or blue planet that would cost three now there is one more way that you can easily visualize this terraforming and that involves the perimeter of this round a track board now again Brown is our home planet so you can see if we go one step over here we hit the black planet and one step over there is the yellow so that is why it's just one a terraforming units to go from yellow to brown now again we have white and orange that are two steps away from Brown which is why that's two terraforming units and lastly red and blue are three steps away from Brown no matter which direction you go so we can come back here and see that we have to terraform a yellow planet which is going to take one terraforming unit and in order to know how we pay for that unit we have to come down here to this terraforming research track now on to the right hand side it tells you how many or you have to spend for each terraforming unit in this case at the start of the game we are right over here and that means we have to spend three or four that single terraforming step now as you can see as we move it this token up farther on this track we will spend less and less or so going up here is certainly nice and I'll explain how to go up these steps rather soon so we have to spend at 3 or in order to terraform this yellow planet which is gonna drop us down to 3 now the last part of this action
involves checking to see if any of our opponents get a passive power charging action now the way this works is whenever you construct within a range of 2 of one of your opponent's buildings they have the option of spending victory points to get power charge actions with their three power zones now as you can see we built over here and that is 1 2 3 spaces away from our opponent but let's just pretend we had built right over here instead now that would be within two of our opponents and that means they would have the option of charging up with their mind now the way this works is they'd come down to their player board and look right over here and see that there is a single purple token within the mine spot of their board now what this means is they can do a single power charge action because there's a single token and they will then lose victory points equal to 1 minus the number of power charging they got so that means if this had happened then they would get one power charge and they would get 1 minus 1 or 0 loss and victory points so obviously they would do it now I haven't explained why we actually want to charge this power yet but I'll get to that soon so let's bring this right back over here because that isn't what we did on our turn all right we have now finished out this bill to action but before we move on I'd like to bring your attention to these two tracks over here on the round abort now as you can see at the end of each of one of these is a token and we randomly pulled these out to put them over here now when the game is over we are going to have a competition and the player who has the most of each of these two tracks is going to get 18 points second place will get 12 and third place will get 6 now
this is a two-player game and whenever you are playing a two-player game you have these dummy tokens out here as well and these will potentially place over here so you have to meet your opponents and these dummy cubes as well now this track right down here is the number of different sectors that you have buildings in so every time we construct a new mind we have to double check and see if we have built into a new sector at the start of the game we are in two different sectors which is why we are on the 2 slot and when we built this that is actually in sector one as well so this will not go up any more but we have to pay attention to that in the future with regards to this top track this is just the number of these Gaia planets that we currently have buildings on and at this point neither of us have any now when it comes to constructing onto Gaia planets the rules are a little bit different but I'll explain the specifics of that soon all right we are now done with our turns so our opponents the geode ins now get to go and for their first action they would like to construct a trading station now whenever you build any of the non mined buildings you don't actually construct it immediately you have to upgrade it from a previous type of building now as you can see these trading stations are an upgrade from a mine because you can see this kind of moves up into that area this also means if you want to create a planetary Institute or one of these research labs you would have to replace a trading station lastly these academies will replace these or research labs right over here so what that means is they are going to have to spend two of their ore which brings them down to eight in order to take this and replace one of their minds now whenever you
place buildings you always grab from the left and move over but you'll notice that they also have to spend money now it says three or six and that depends on the proximity of this new station to one of their opponents with that in mind if they can now come out to the board and they do have two mines available for upgrading now remember before when we built a mine if we built it within two spaces of one of our opponents then they would get a passive charge action well that two spaces is effectively the neighborhood and if you ever upgrade a trading station within the neighborhood of an opponent you just spend three money instead of the six now with this in mind the orange player decides they do want that discount money can be a little bit hard to come by sometimes so they are going to upgrade this area right over here because we are in the overall neighborhood now as a benefit whenever a building is upgraded or when a mine is built then the players who are in the neighborhood get to do that passive power charge now again if we decide to do this we get power bumps equal to the number of little purple symbols underneath the building that is within that neighborhood and we lose points equal to at that number minus one now obviously that is one right now so we don't lose any points for doing this so I see no reason not to do this and remember whatever you charge if you have anything in your one zone you must push that into the two zone now that we have nothing in the one zone we can push these into the three zone with future charge actions and it's worth noting that you can only spend to power once it's in the third zone so we are just charging all of these up and
we're not ready to use them just yet but I hope to get there soon so the G odin's will now spend a 1 to 3 of their money and of course the mind that was just upgraded when they'll come back over here to the de board and you may notice that by bringing this back they have actually reduced their or income by one but they have increased their money income by 3 at this point the orange player is done constructing that trading station but before they move on they are going to come up here to the round track and notice over here that in the first round of the game there is a bonus associated with building out these trading stations now at the start of the game we randomly put all of these bonus tokens out and within each given round we will all get victory points if we do the specific things in those specific rounds now we are currently in the first round of the game and every time any player constructs a trading station in the first round of the game they will get three victory points so the orange player could take three points right now which they will add to their starting ten so they are now up to 13 next up let's briefly come back to this round track to see what the benefits are in the next rounds of the game we can see in the second round of the game everyone will get two points every time and they increase one of their research tokens on the tracks in the third round whenever anyone that constructs an Academy or their planetary Institute they will get five points in that round moving on in the fourth round for every mind that is constructed specifically on the green at Gaia planets that player will get to three points the fifth round at players will get to two points for every terraforming step of a process and finally in the sixth round of the game players will once again get five points
each time they constructed the planetary Institute or an Academy alright the geo dunes are done so now we get to go again so we have a variety of things that we could do at this point but I think what our second action should be is actually upgrading one of our research oaken's on one of these tracks as you can see this will always cost for knowledge and we happen to have foreknowledge at this point so we can drop this down to zero the next thing we do is move one of our research hands up once on the Associated track now whenever you get to a spot that has an icon with is a glowing white border you immediately get that once now this is why our opponent started the game with two extra or because as part of their asymmetric benefit they started with one up on the terraforming track which gave them this two or right here now we already know a little bit about the first two tracks obviously the higher we go on the terraforming track the less or we have to spend for each terraforming step this navigation track is also nice because it lets us fly around to Father planets which increases the options of spots for us to build mines on to now this third track right here is the artificial intelligence track and it's pretty simple all you gain from this is more quantum information cubes which are definitely nice to have moving on this fourth track is called it the Gaia project which is of course the name of the game that we're playing and this track gives you the ability to transform the inhospitable purple planets out on the planet into the green Gaia planets now this next one right over here is the economy track and it just gives you lots of income and lastly the science track gives you knowledge income which of
course lets you do more research bumps which you can then use to of course bump up more of these research tokens well all of these seem pretty great but I think at this point let's go up on the navigation track now as you can see we are unfortunately still at the one distance we don't get to to distance until we go up once more on this track but we are getting closer and as a bonus when we get one qia cube right now so let's add that right over here and our turn is done so the orange player gets to go and for the return and they've decided to do an upgrade again but this time they are going to upgrade their training station into their singular planetary Institute now as you can see this is going to cost them six money and a four of their or so they now have four or left and it looks like they have six money left after this they can replace one of their trading stations with their planetary Institute in this case they currently only have one trading station so this is their only option now when they do this upgrade we can see that we are within the neighborhood of that upgrade action so that means we get to do a passive powerup of course we still have a mind which just gives us a single powerup so with that let's move our brain stone down into our third power after this the orange player can put at their trading station right back over here and you'll notice that they have unveiled some new stuff for themselves now underneath that planetary Institute there is now an icon here which says as part of income they get four power moves and they will have this for the rest of the game now also as part of income they actually have to gain another power now
that is going to come from the supply and it will get added down and answer their first power zone so that means that they will get more and more of this to move around in their system now there are a couple ways to remove power tokens and I'll cover those soon now in addition to these benefits once player has a built at their planetary Institute they also get to the benefit that is listed over on the right now in this case for the geode ins this says for the rest of the game whenever they colonize a new planet type they will instantly get three knowledge now again there are effectively ten different planet types in the game one of them does not actually start on the board but eight of them it can to be built into and so far the geo dens are just in one so they are going to be trying to populate as many different types of planets because of course each time they will get three knowledge which is almost the fourth that they need to do a research token bump alright they are now done with their turn which means it's now time for us to go and I think let's spend this action and building another mind now unlike the last time we did this I'd like to do this with the special action that is printed on our boost token now whenever you see an orange outline like this to in action that actually takes your entire turn and you can take one of these blockers to cover it up showing you that you have now used this at this round now what this says is we can construct a mine and we get plus three to the distance that we have for the accessibility of this turn so we can put this out on the map that is gonna cost us one or as well as two of our money so we can come out here and we have it three plus one or for movement that we can do with this build action and I
think let's start all right over here and go one two three four and we can then construct on this Gaia planet now you may have noticed that I do not describe what kind of terraforming steps it takes to build on the Gaia planets because they are special let's once again come down to our terraforming area and you'll notice the green planet right here is just going to cost one of our quantum information cubes to terrif now that does not matter which race we are for every single race it's just one qia cube to get that terraforming done now there is another way to do this with your Gaia formers as you can see right over here but that involves upgrading the Gaia project track which nobody has done just yet and I'll explain how that works soon so we can spend to this cube to terraform the guy planet and we can now see that we have a building in a new sector and we have constructed a building on a guy planet so let's come back over here to the tracks and we can increase this over to the three spot because we are in three sectors and we can move it this one to the one spot because we have that one guy a planet so pushing both of these tracks with one action felt pretty good to me we've also expanded ourselves out so that we are just two steps away from a brown planet that we do not have to terraform and we are also now two steps away from a yellow planet which is one of the easier ones for us to terraform so that has finished out our turn and it's now time for the geode ins to go and they've decided to spend a for knowledge to bump any research token now in this case we're not too surprised to see them push it the terraforming track considering their goal is to try and build it on as many different types of
planets as they can so now for the rest of the game they only spend - or for every terraforming step instead of the three or that we have to do alright it's now our turn again but before we take our turn I have to correct something real quick it looks like a couple turns ago when we went up the tracks I pushed our opponents and also at this point I am going to cheat just a little bit and to change what we upgraded I said we went over here to get this cube but instead let's just pretend like we had gone over here to get this - or sorry for changing things around but I think this is a much better plan for showing the different mechanics and with that in mind let's now go into our turn and I think it's time for us to upgrade into one of these trading stations so that is going to cost us two of our ore and we are going to build this near our opponents so that means this is just going to cost us three of our money and then we can put this right out here now of course as we do this our opponent is in the neighborhood which is why we got that discount but they now get the option of passively charging up their power and you can see they are doing this with their massive planetary Institute now when they look at their board they can see that that planetary Institute has three of these tokens so that means if they do this they would get three power charge actions but they would lose at three minus one or two victory points well it looks like if they've decided to do that so they will move it this up for one then two and finally three and then they'll lose two points bringing them down to eleven next up we did construct a trading station in the first round so we get three points so we'll go from 10
up to 13 and our turn is done this means the G odin's get to go and if they want to construct a mine and they currently have an accessibility distance of just one so with this they are going to construct it right over here on this red planet now that does mean they have to terraform the planet and for every terraforming step and they just have to spend two of their ore now of course they also have to spend an ore for the mine itself so that means they are at 3 and they spend it to money and then when they look over here they have just one step of terraforming to get to the Red Planet's so that means that they will have to get rid of 2 or to do the terraforming which will bring them from 3 down to 1 and then since this is the first red that style planet that they have colonized their planetary Institute ability will activate giving them a 3 knowledge which will bring them from 1 all the way up to 4 they are now done so now we get to go and I think it's time for us to construct our first research lab now as you can see these are going to be upgraded from our trading stations and this is gonna cost us 5 money and 3 or now at this point you might be saying wait a minute you only have a two or and I think it's finally time for us to talk about these other special actions down here that can use our power now as I've said before you can only use power when it's in the third zone right over here now if we look down here to the free actions this tells us how many power we have to spend from the third zone down into the first zone in order to get the Associated benefits for instance we could spend for power in order to get one quantum
information cube we can also spend that qia to get one or now over here we can see that three power moves will get us one or four power moves will get us a knowledge and we can also always spend a knowledge to get one money now we could spend it just unpowered in order to get a money so that's a much easier conversion rate and we can also spend or into money but that would be pretty painful lastly we can spend one or in order to add another power token into the one zone here on our board so we need just one more ore and if we look down here that is gonna cost us three power now fortunately for us we armed the attack Long's and you'll notice right over here that our brain stone counts as if it was three power for the purposes of spending so that means we can move this right over here and that will give us three power and we can spend at that three power giving ourselves the one ore and now since those were free actions we can do the main action for the term where we constructed this research lab which will cost us all three of our ore and five of our money which brings us down to three so we can now replace a trading station with this research lab and our only option is right over here so after we do that we can see that our opponent could potentially do a passive power charging action if they want and it looks like they have decided to once again do that so that is going to be three for their planetary Institute which lets them go one two three and of course they will then lose two victory points bringing them down to nine let's now come back to our board and finish our turn because we get to a special benefit every time we construct either a
research lab or one of these academies and that involves taking a technology you can see the silhouette is right over there so what that means is we can take any one technology from the research board and add it into our area so let's come back over here and the technologies are these nine ones listed down in the bottom of the board and it's worth noting that every time you play the game you randomly associate these technologies with in the different spots you always use all nine you just don't know where they'll end up being now within each stack you always have the same technology and whenever you select a technology if it's one of the top six then you will immediately bump your research token once on the associated track now if instead you choose one of the three that are randomly put down here at the start of the game you can take any of your research tokens and move it up so that means we could just take this one and immediately take it seven points and bump any of these tokens now at this point I think this is an amazing technology for us because it means it once per round we for power moves and when we move our brain stone around we get a lot of benefit for that so let's take this which means we get to bump this research token up here and now we have one more knowledge income before we move on and I also want to mention that no player can ever have a two of the same technology so this is the only one of these that we will get this game so let's add this right over here and that has finished out our turn so the geode ends now get to go again and it looks like they do have foreknowledge so they are going to spend all of that to boost another one of their research tokens now they certainly have a bunch of good options if they
increased this one right up here they would immediately get three power bumps one time and then for the rest of the game they would just spend a single or for every terraforming step next up over here they do like the idea of flying faster and having more of these cue ICS is obviously good for flying far and also building on at the gaya planets now at this point - they are definitely considering going up on the Gaia project track and in fact I think let's talk a little bit more about how this works now we can see at the first step there is this benefit which gives the player a single Gaia former now you can see each player has up to three of them so when you unlock one you bring it right over here and put it onto your board now as a new action option for the rest of the game you can take an available Gaia former and put it out onto the board but specifically they go on to the purple trans dim planets now when you send a guy áformer out you have to of course be able to access it so at this point the orange player would hypothetically just put it right over here because that's just one space away now you do have to pay in order to put this down but it's gonna cost you power tokens now in order to know how many you have to pay you have to come back to the Gaia project track at this first level right over here you have to spend six and then up here that would cost four and lastly that one would cost three now when you spend power for gaia forming it works differently than normal instead of taking the power from the third area and moving it into the first you can take any power tokens from any one of these three zones and you put them all over here into the gaia forming spot now as part of the following round during the
gaia phase which happens right before the actions all of these tokens will follow this arrow down here into the first zone so that means right now they could spend all four of these as well as these two right over here to do that hypothetical action of course they haven't done this just yet I'm just describing how it works so as you can see that is one way to utilize your power even if it's not in the third sound so that is everything you would do for this action but then in the next round once we got to the second phase which is the Gaia phase in addition to having all of your power tokens come back into your one area you will then take one of these Gaia Planet tokens and you will put this underneath the guy former because it has successfully terraformed that planet now I do want to stress that these Gaia formers will only ever turn these specific purple trans dim planets into the green the Gaia planets now once this transformation has been complete the Gaia former will actually stay on there and in a future action turn that player can then build a mine on that planet and they can build it as if it was their regular home-based type of planet there is no terraforming needed because players obviously can always go down on two guy planets in fact you don't even have to pay the qia when you build a mine onto a planet that has one of your Gaia farmers so obviously the Gaia project track is a great way to increase the number of colonization options out there on the board now in this instance it looks like our opponent has decided they'd actually like to just go right up here that is going to increase their income by two money and a single one of the power moves and they like the idea of having
that two going into the next round all right it's now time for us to go and we don't have much in the way of resources specifically we just have it three money total now instead of spending resources I think at this turn let's spend it taking one of these tokens and we can cover up our technology and that will give us four power charge actions so we can spend the first one in bringing our brain stone and right up here into the second area and with the other three we can bring this here and then there and there so that was a very effective way to get this a brain stone back into action so that we can use it again at this round so it looks like we have five power available to spend with these free actions if we want to but for the moment I'm going to not do that so now our opponent can go well just like us they are definitely running out of resources but at this point they have decided they would like to take one of these actions that are along the bottom part of the research board now as you can see if all of these right over here are going to cost power but these are not free actions they will cost the entire players turn so what they've decided to do is activate this one right here and that is going to cost them for power so they do have for power in their active third area so they can bring all of this over here and then that will give them to or which brings them up to three now after that you actually cover this up so that has now blocked that action option for all players for the rest of the round now while we were talking about these let's look at some of these other options you can see that you can spend all the way up to a seven power to get three knowledge and you can spend at five power in order to actually generate two
with terraforming steps and when you do this action you will do it as you actually put a mine down onto the board now you can do that to a lesser extent over here by getting a single terraform step and you can also just spend a three power right here to get two more powered tokens now over here these three sections are a little bit different they are going to cost the quantum information cubes and this one right here costs four now if you spend the four then you will lock this spot right off and you can immediately take one of these technologies just as if you had just built a research lab or an academy so this is obviously an expensive but very powerful action next up this spot it's gonna cost three Q ICS and when you cover this up you will immediately reactivate a federation token now I haven't talked about these just yet but they look a lot like this so if you already had this in your area and you could go right here spend three cubes and get eight more points and another cube and I'll talk about these in greater detail very soon but we can now move on to this last option which just gives you three points plus 1 points for every type of planet that you have colonized and you get those points by spending two qi seas alright it's now time for us to go again and we don't have any resources but we do have v power over here so I figure let's activate one of those options on the research board now we can see that the one that we really wanted is already gone because this is a really good way to get or and if we spent a five we could immediately help Tara form a planet with this action now unfortunately we do not actually have the or to create a mine at this point so I don't think this is a good option for
us and said I think let's go right over here and take seven money for for power moves now we can tell right now that our money income is not very high so I think getting more money to spend next round is probably going to be a good idea for us so that cost for power moves and we can do that with the brain stone and a single one of these and that has finished out our turn next up the G odin's can go and if they have decided to pass for the rest of this action round now passing is an action in and of itself and the way this works is the passing player will come up here and select one of these three optional boost tiles in this case the G odin's decided to select this one right here and that is going to increase their income by two money in the next round and it also gives them the ability to instantly do one terraform step when they are building a mind now whenever you are passing you select one of these and you flip it over and put it into your area and this helps show to all other players that that person is done and will take no more actions after that the player will take their current boost strip and put it right back here into the supply lastly the first player to pass in each round will take this token so they will be the starting player in the next round so it's now time for us to go again and I think we are likely going to pass but before we do that I want to describe one option that we do have on this turn and that involves this last free action that's printed over here in between our level 2 and 3 zones in the power area now what this is is an action that lets you take a token from the second zone
and you can push it into the third zone even if there are tokens in the first zone now as a penalty you also have to take another token specifically from the second zone and you discard it so you lose it so what that means is if we wanted to right now we can move two of these over here and a discarded these two and I'll lose them until we potentially find new ways to get more and that would give us three power which would let us do potentially one of the actions over there on the main board but I don't think that's actually going to be worth it so let's just leave all of this over here and now take the passing action so we can choose one of these three strips and all of them have pretty good options on them this is pretty simple it gives it to money and a one qia as part of the next rounds income and this one right here gives one or income but then it has a special action up here now this is a passing action and what that means is on in the next round if we took this as we brought this back over here when we pass at the end of that round we would immediately get one point for every mind that we currently have out on the board so it does not help with our engine but it's certainly a nice way to get some more points lastly this one gives an or and a knowledge and I think this is the one that we want so we can take this and to flip it over into our area and then of course take the previous one we had and add it right over here so we can put this right over there and I just realized that we forgot to take our seven money last round when we did that power action so technically we should be up at ten now with that we have finished out in this action and everyone has passed so that means the action phase is done for this first round of the game and we can now move into the fourth and
final phase which is clean up the way this works is we discard all of these blocking tokens from the main board as well as our playing areas and then everyone will flip over their booster tokens so this is once again available for us this round and we also have this and then we can signify the end of this round by removing the bonus token for it so that means it's now time to go into the second round of the game where players will get a bonus two points every time they increase a research token this round at this point we could now start the second round of the game but I think I will actually save that for the extended playthrough now before we wrap this tutorial up it there are a couple more things that I want to cover and the first one of these is the Federation now the way this works is a player can create a federation once they have seven power worth of buildings adjacent to each other out on the main board now again each building has a power level the mines have one these trading stations have two as well as the research labs and the academies and Planetary institutes have three now you may be wondering how you would ever get to seven power worth of buildings adjacent to each other considering most planets are not actually touching well that is where these satellite cubes come into play now as part of this Federation action you can discard one of your power from any one of your zones in order to place a single satellite down into any one of the empty spaces on the board so in this case if we spent three of our tokens from any of these bowls we could put a satellite there and then two more here and these two bill are now effectively adjacent for the purpose of Federation now obviously this
is just to power and this is one so that's three power total and we need to get to seven and you are not allowed to place satellites out until you can get to that seven threshold now it is worth noting that multiple players can have satellites in at the same area so there is no race when it comes to putting these out onto the board so let's pretend we had these out here so now that is one two three four five six seven power worth of buildings so that means we could put these satellites out but you must put them out as efficiently and as possible now you are allowed to choose which planets you want to select for this you could select a building way over here if you wanted to spend all of that power to put the satellites out onto the board now in this case obviously if we federated we would have to put them at just like this because that would be the most efficient way to connect all of these up so in this example we just placed four satellites so that means we would have to discard a four of these power tokens from any one of the zones after this we take a federation token and we put it out next to any one of the buildings in this Federation now that is important because no building can ever be a part of a new Federation so this is it going to show that all of these buildings are locked out and if we want to make any future Federation's we have to do it with an entirely different cluster of buildings now the last thing you do for a Federation action is take any one of these available Federation tokens and immediately get the benefits listed on it so we could take this one and get seven points as well as two or we would then put this face up into our area and that is important because you may have noticed that most of these have a green
background but this bottom one right here is gray now that just gives you twelve points and the back side is also gray but the reverse of all of these green ones is gray now you can actually spend these Federation tokens by flipping them over in order to unlock the ability to get to the top level over here on these research tracks you can see that symbol right there so that means if the orange player wanted to go from here to here they would have to already have a federation they would have to have a token on the green side and then flip it over to make that happen and you can also flip this over in order to take one of these specialized technology tiles you can only take these tiles if you have you or research token on the four or the five spot adjacent to it and when you take this you once again have to exhaust one of your federation tokens after that you will take this and you have to actually cover up one of your previous technologies you can see it fits nicely right over there that will erase your previous ability and give you a new one for the rest of the game at this point the last thing that I'd like to cover is endgame final scoring now once we go through six full rounds in the game we will go to final scoring and players will already have a decent amount of points hopefully and in addition to those points they will get points for being first second or third here on these at majority tracks and they will also get four points for each step above the second level on these tracks there at that means if this token is here that is worth four points if it's right here that is worth four plus four or eight points and if it makes it up here then that's four plus four plus 4 or twelve
points for getting to the five spot on any one of these tracks now the last thing that you get points for is you will add up all of your excess money on knowledge as well as ore and you will get one point for every three of those once you add up all of those points the player with the most will be the winner so at this point I am now going to bring the tutorial to a close there are a couple small things that I've not quite covered just yet but I'm sure I will bump into them in the extended playthrough and if you'd like to watch that you can find a link for it down below in the description or you can click the I up there in the top corner and I hope you've enjoyed learning how to play a guy a project as always I'd like to thank everyone who's been supporting this channel including all of these producer level patreon backers if you two would like to directly support the channel and the creation of videos like this one then please go to junkets Gamescom slash support to see a variety of ways with which you can do that also if you enjoy this video please click the like button down below as well as the subscribe button for the channel thanks for watching