Sagrada Full Playthrough - JonGetsGames
Games in This Video
1 game is featured in this video — it unlocks as you watch.
Transcript
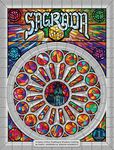
welcome to Jong Gates games today I'll be doing a full three-player playthrough of cigara in this game players will be constructing a colorful stained glass window in front of themselves by drafting color Dice from a central pool these dice must go down in front of them according to a variety of restrictions and they will also be trying to match several public objectives that everybody is shooting for I'll explain how the game actually plays while we're playing it so let's jump in here we have our game fully set up for our three players we'll be playing the game for the perspective of the purple player over here I've already done several pieces of setup the most important being that each player has chosen a window pattern that they've slid into their frame we each got two of these double-sided cards to choose from at the beginning of the game and then once we picked one we got to see down here the number of little dots this is how many favorite tokens we start at the beginning of the game we see that blue has five we have four and red has three and these are correlated with the difficulty of the pattern itself so this pattern over here is easier than this one which is why the blue player got a couple more of these tokens and we're going to spend these tokens over here on these tools which let us do various cool things as we place Dice and move them around on our little patterns we also have three public objectives that were randomly dealt out and lastly each of us was given a private objective we see that ours is blue this says that we're going to get victory points at the end of the game that equal the sum total of Pips on all the blue dice in our window we'll be going first and so what we do is we grab this big dice bag and we're going to pull out seven Dice and then we're going to roll them since we rolled the dice we are first to pick and I think that what we should do is take this blue five right here and put it down into our
window now the first die that we put down must go into one of the perimeter spots and there are a couple uh Cardinal rules as we're playing the game the first is that when we put the D down it has to match the shade of the pattern so if I want to put this blue Dy down here that's fine because it's blue also the PIP value has to match if there is one on your board so for instance I could not put this here because that says six and this is a five I think let's go ahead and take this blue five uh this is good for us because well it blocks over that spot also we know that our private objective is blue so this is five points at the end of the game for us and I think that's a pretty good place for us to start we now move to the blue player and they've decided to take one of these red fives and they're going to put it down right here it's on the perimeter so that's fine and now moves over to the red player and they've decided to grab this yellow six and they're going to put it down right into this matching six location and now they're going to grab another die because the way this works is we actually have a snake draft where we picked one blue picked one Red's going to pick two and then it goes back to blue and then finally comes back to us so the red player grab this yellow four and they want to put it down right here and at this point it's good to talk about a couple more rules the first is that whenever you place a new die down onto your window it has to be orthogonally or diagonally adjacent to a previous die that you have also there are two Cardinal rules of the game you're never allowed to have two dice of the same color orthogonally adjacent to each other and you're never allowed to have two dice of the same pit value orthogonally adjacent to each other but diagonal is just fine this also brings us to a good point to discuss these public objectives this first one right here is going to give any game points for having diagonally adjacent dice of
the same color and this is probably part of the reason why the red player decided they want to put this yellow d right here because now this is effectively a two-point play for the end game because they have two yellow dice that aren't diagonally adjacent we are also going to get two points at the end of the game for every pair of one and two value dice in our entire window though positioning does not actually matter and lastly we'll get five points for every column we have in our window that doesn't have two dice with the same color for probably much the same reason as the red player blue decides to grab this five and they're going to put it right down here so it is also diagonally adjacent to a red it's now finally come back to us and we have to pick one of these two dice right here and I think that we should grab this one part of the reason for that is because it's half of a potential pair for some endgame points from this public objective and also because it works out relatively well by placing right here this is a green forced shade spot right here and also if we look at the PIP values around this one we have a three a five and a two so that means we're not actually conflicting we wouldn't want to put something down that would Conflict for instance if we had taken this purple four and put it here we would have a problem because we need to put a four right here and you can never have two dice of the same value so we're not going to choose this one and with that the round is over there's always going to be at least one die remaining and we're going to take this one and put it up here onto the round tracker to show that round one is done and we can now move into round two we now hand the dice bag to the blue player and they're going to pull out seven Dice and roll these blue starts It Off by grabbing this red six and they're going to put it right down here in the bottom middle of their window red likes the look of this green four and they're going to put it down
right onto this four spot for our first pick I think we should grab this red five right here uh first of all because it works out relatively well for our little pattern because we get to match the five right there but also because we have a sneaking suspicion that it's possible that the blue players hidden goal is red considering the only dice that they've taken so far are red and all high value so grabbing this means it's not in the pool for the a blue pair to potentially grab on their next turn and for our second grab let's go ahead and take this four because it matches our private goal which is blue so this is four points to us right away and let's go ahead and I guess maybe put it over here so that we have the ability to chain off in a diagonal over there with a blue if we put this here then right from the gecko that's not great we'd kind of like to put a red down there uh and also it's jent to something that needs to be a two and that's no big deal for us I wouldn't want to put it over here because then we'd have two Blues in the same column and then we would lose out on Five Points at the end of the game it's back to the red player and they decide to grab this yellow six and they'll plug it down right there and lastly blue decides to grab this yellow five and they'll put it right there the green five is the remainder so we'll put it up onto the track and we can now move into the third round of the game we'll pass the die bag to the red player they're going to pull seven out and roll them red of course gets the first grab and they're going to take this blue two right here which is of course half of a set for this endgame objective for getting two points and they're going to put it right into the bottom middle of their board is now our turn to grab and there are two good Blues available and of course we could pick a different color dice but blue is much more attractive to us and right from the
get-go this five looks great because it's worth five points at the end of the game but the problem is that we don't actually have any legal place to put it on our board at the moment because right here would be Blues next to each other right here we would have fives next to each other and the same thing goes for these locations up here and of course we can't put that there because it's yellow so unfortunately we cannot actually uh place this die down although if we really wanted to we could activate this tool up here now let's go ahead and take a look and see the details of this it's says it is a uh grossing pliers and it says that after you draft you can increase or decrease the value of the drafted die by one and the way you activate these is by taking favor tokens and putting them down onto the cards the first time either of these tools is taken it just costs one favorite token and every subsequent pull costs two of these tokens but each token is also worth one point at the end of the game so I think at the moment it does not make sense to sacrifice a point just to be able to flip this over to something else and put it as a diagonal when we could grab this one which is half of a pair to get two points at the end of the game and we can put it down right here where it's going to be diagonally adjacent to this four so at least that is a two-point turn and then half of two points over here blue now gets to pick two dice they're going to start with this yellow one and they're going to put it right here oops I knocked this die over right here and for their other pick they're going to grab this purple four and they'll slide it down over here it's our turn again and I think that we do actually want to activate one of these tools now you can use these either before or after you grab these dice depending on the actual power of the specific tool and for us I think we want
to go first instead of doing this one I've already shown I think let's go ahead and activate this one over here it's called a egom brush and it says that we can move any one die in our window and we can ignore the color restriction that is on our window pattern of course we do have to obey all of the regular placement restrictions as I mentioned before the first time one of these tools is activated it only costs one favorite token so we can put this over here and then we can grab this blue five which we placed at the very beginning of the game and put it over on top of this purple spot which leaves us open to grab this blue five over here which is also great because it's five points at the end of the game and we can put it down into that previous location and we have the bonus of having diagonal Blues of course this costs us one point by losing the favorite token but we gained two points by having this diagonal set and we might even be able to make it longer so I think this was a good idea also it's nice to activate these before our opponents do because it's cheaper right now lastly the red player grabs the red two they're going to put it right down here and with that the round is over we can take this purple five and put it up at the top of the round track and I think this is actually a pretty good time to explain our third and final tool option this one right here is called a lens cutter and it says that after you draft you can actually swap the die you just drafted with one of the dice on the round track so that means that these dice over here are not actually technically completely out of the game we may pull one or two of them back to actually fit them into our board as we continue playing the game the red player has handed us back the die bag we're going to pull out seven dice we got a whole bunch of red right here and we will roll them we get
first pick and I think despite having all these red dice there's lots of Pips on them let's go ahead and take this red five and we'll put it over into our top Corner the blue player not unsurprisingly is grabbing this red five and they're going to stick it in the middle of their top column red now gets to grab two of them they're going to start with this purple two right over here and then they're going to grab this purple five and they'll put it right in the middle of all the rest of these blue gets grab dice again and they're going to get one of these red threes and they're going to put it right over here they have a nice big diagonal thing going on right here and lastly it comes back to us and I figure let's go ahead and grab this green four and well we could put over here in this four spot but let's go ahead and stick it right there so then we have a little bit of a diagonal starting with that we've ended the round the dice bag gets passed to the blue player and they're going to roll seven dice blue gets first pick and they're going to take one of these green ones and put it right into this Green Spot Red's going to continue their zigzag of yellows by putting the five right here and now we get to grab two of these and there's just no way we can pass up a blue six we'll put it right over here so we have a really nice diagonal happening and we may as well take this yellow three and put it into this yellow spot just because well we have to put a yellow there at some point this is a reasonable opportunity we already have a couple one value dice so we're actually looking for two value dice so there's no strong reason to grab either of these red likes the look of this red one and they're going to put it in their top left corner cor and lastly the blue clayer grabs yet another red Dy and they put it down into the corner that finishes off round five we can put
this green one up to the top red now takes the dice bag and they're going to roll all these they're going to grab this yellow five right here and finish off the zigzag it's now time for us to grab one of these and I think we're very incentivized to grab this purple too that's because we already have two ones out on our board and we have zero twos at this point also this purple two fits really nicely into the spot that must be a two anyway so I think we should go ahead and do this it completes one of our potential at the moment two possible sets we'll be more interested in these one value dice once we get at least one more two blue gets to grab two they are going to grab this red four put it right over there and then this purple four down into the corner and now it comes back to us and it looks like we have to take a one value die and I see no reason not to take this purple one and stick it right over there it's got to be a one anyway and it fits pretty nicely for the moment lastly the red player doesn't really have a choice here they have to take a green one and they're going to put it down into this green shaded spot right there that's going to finish out the six round of the game it's our turn to grab the d bag and roll a bunch of dice the first thing we notice is there is a blue two and I kept saying that we wanted to have another two so we can make a pair but another thing to notice is that we have a blue in all five of our columns now and we would really like to not have any duplicates within a column because then we'd be losing Five Points the blue player has lots of red dice already but they already have a couple columns where that is not going to be the case although they could spend some of their favorite tokens to move some dice around before the game ends it
does seem to me that this red three works out pretty well for us though we could put it right over here you can see this must be a three anyway and it gives us a little diagonal that we're already working towards so I think that's going to be a pretty good pick for us Blue's going to grab this two over here and they're going to place it right there red gets to grab two and they're going to take this green four and then this purple five right here and you may have noticed that we're not using these tools too much just yet in fact only one has been activated so far and in general these happen much more in the late game when it becomes much harder for us to actually take the dice that are currently rolled and fit them in within our uh patterns because we've just become much more restricted blue decides to grab this green four and they'll slide it in right there completing their bottom row and we've got to take a red five or a red one and I think we should take the five because we can plug it right down here we'll get a longer diagonal bonus and we can't actually put the one there because he'd be clashing with that other one ones do seem nice in general but I think adding to a diagonal is probably the better thing for us to do right now and with that we can take this guy put it up here and that ends the seventh round and we can move into eight blue now grabs the bag and they pull out wow a lot of yellow Dice and they roll them blue decides to grab this yellow one and put it into this yellow shaded spot on their window Red's going to grab this blue blue four and put it on this blue shaded spot right here and that leaves us with a mess of yellows and a single blue to play with uh of course a blue six looks great but once again by
placing this down somewhere on our board we're going to be sacrificing five points for potentially not having any duplicate uh dice colors so I think we should probably start and grab this yellow six right here and we could put it there on our board and you know what let's take the other yellow six and we can slide it right over here we had a couple different options we can make work there's not a huge strategic advantage to putting it here but it does fit things relatively well of course we'd love to have more Reds to make diagonals but we would actually be able to put a red here so I think all in all we're pretty happy with that red grabs the blue six and they put it in the bottom right hand side of their board and finally blue will grab this yellow three and slide in right over here as you can see there are not many spots left over and this ends the eighth round we have two more to go but it's going to become much harder to actually find valid dice to stick in and I'm sure we're going to be hitting some of these tools soon to make decent plays for ourselves red now grabs this dice bag which is getting significantly lighter as we pull all these out and they roll a lot of sixes they decided to grab this purple two and they put it in their middle row we're pretty bummed about that we were really hoping to be able to grab this die and punk it down right over here and make a little diagonal but that's not going to happen so this goes right there in the middle but one of these purple sixes is almost as good the two would have been good because it paired up with one of our ones for two points but we can slide this over here anyway and we still at least get our diagonal and we've locked in another row that has no duplicate colors the blue player gets to grab two dice they'll start by taking this four and sliding it over there and for the second die
they're going to take this green four but before they place it down they're going to take one of their favorite tokens and they're going to put it over here onto the grossing pliers this allows them to increase or decrease the value of the die they just drafted so they'll take this four turn it into a three and they're going to put it down right over here looking at these three options we don't actually have a legal move for any of them uh mostly because they're all sixes and we look at our board we see that we can't put a six here we can't put a six here and we can't put a six here because this needs to be a four so I think what we should do is spend one of our favors and again these are one point at the end of the game so we're losing a point by doing this but let's use the last of the uh tools that has not been used just yet and let's take this purple six and we can swap it out with this purple four that is on the round tracker and we can easily put this purple four down into this slot here that works out really well for us cuz it means that for our last two grabs of the game they are they don't have any specific restrictions on them and we got another little diagonal going and then red obviously takes one of these yellow sixes and they don't decide to use any tools they're just going to put it down right over here with that round number nine is done and the dice bag comes back to us for the last round of the game we'll roll all these Dice and now we get to choose one let's go ahead and grab this red two this is going to work out pretty well for us because we can slide it in right here it's going to pair up with one of the ones that we have to gain us two points at the end of the game and we there are still two purples out within this dipol and hopefully one of them will be available to us uh with our last
pick so we can slide it in right to this last spot on our board the blue players last two spots are a six and a two and they've had to do a little bit of thinking and they've decided to grab this three then they're going to spend two of their favors because once again after one of these tools is taken every future use cost two favors they'll put it down on here they're going to decrease this three down to a two they'll put it in right over here which works pretty nicely because they now made a diagonal of two on their window for Red's First grab they're going to take one of these green ones and slide it into the bottom left corner and with their other grab they'll take this other green one and they are going to spend two of their favorite tokens they're going to put it down onto the lens cutter up here so they can swap it with the red three and put that down onto their board so they've completed their board and now comes back to the blue player and they actually don't have any plays whatsoever because when you look at their board they have one of each of the four out of the five colors surrounding this six which means this must be blue and since it's printed on the board needing a six they would need a blue six and there are no blue sixes over here and no blue sixes amongst the dice on the round tracker so that means that they're just going to pass and they will have one empty slot in their window for the end of the game and finally it comes to us for the last die grab of the game and I know I went on and on earlier in this round saying that I was hoping a purple would survive but I was forgetting that we already have a purple in this column and we get five points if we don't have any duplicates in that column so this is actually a pretty poor play for us I think what we should
instead do is well we can take this one right here but while we're doing this let's grab our last two favor tokens and we are going to put these down onto the lens cutter uh so you don't have to increase as soon as some one person puts down it's always two for the rest of the game and we can swap this with one of the green ones we we're certainly hoping to grab the green one that the red player decided to take instead and we can slide this in over here it does not give us any diagonal bonuses but it does mean that we were able to get all five of our columns to have no duplicates at all and with that the final round of the game is over we have more than one die available and that happened because the blue player wasn't able to grab so both of these actually go up onto that one slot on the round tracker and at this point we can shift into endgame scoring we no longer care about any of these tools and we no longer care about the round tracking so we can dump all of the dice flip this over and now we have a handy dandy scoreboard to total up all the points we were able to make throughout the game let's go ahead and begin with these public objectives so the first one is diagonal scoring again it's one point per die that is diagonally adjacent to another D of its color so looking over at our area we see that we have one two for these two purples 3 four for the greens 5 six for the blues 7 8 n for these Reds 10 11 12 for these blues and 13 14 for these purples so we can take our purple scoring chip and put it down on 14 next up we have the blue player and they have one two for these purples 3 four 5 6 seven eight for these Reds 9 10 for the greens and 11 12 13 for the
yellows and now we have the red player they have one two for the greens 3 four five six for Purple 7 8 9 10 11 for yellow then 12 13 14 for blue so between the three of us we all got very similar scores for that public objective and next up we each get two points for each pair of one and two we have in our entire window we were only able to do this two times because we have four ones but only two twos so that's going to be four points for us bringing us up to 18 the blue player was able to balance us out really well with three ones and three twos so that's going to be six points for them bringing them from 13 up to 19 and it looks like red was able to do the same with 3 ones and 3 tws so they go from 14 up to 20 the third and final public objective was not having any dup colors within a column we were able to do all five of those so that's 5 Time 5 or 25 points for us and that brings us all the way up to 43 blue is only able to do this three times because of these two duplicate Reds in these rows so that's going to be 15 points which brings them up to 34 and the red player was able to do this four times with just the duplicate yellows in this one column so that's going to be 20 points bringing them up to 40 it's now time for us to score our private objectives we'll go ahead and start with blue when we add up all the Pips on the blue dice we get 21 more points which brings us up to 64 so we can flip our disc over to the 50 side and now we get to see if the blue player was indeed going for Reds and yes they were when all of these red dice are added together they gain 27 points which
is going to bring them up to 61 and only three points behind us and lastly we can take a look and see what the red player had they were going for yellows wow when you add all of these up they got 32 points from this private objective so that's going to bring them all the way up to 72 points next up we all score one point for each favorite token we have left over we obviously have none the blue player has two so that's going to bring them up to 63 and the red player has one left over so that brings up up to 73 lastly each player is going to lose one point for every open space in their windows but the blue player was the only one to have any they just have one so that brings them down to 62 and with that we are done with all of the scoring our final scores are 62 for blue 64 for us and the red player has won by a decent margin with 73 points and that completes a full game of Sagrada well I hope you enjoyed this playthrough my main goal here was to try and show the variety of things that are going through a player's mind while they're trying to figure out not only which die to grab from the pool but also where to put that die down into their stained glass window that they are forming they have to think not only about the uh short-term ramifications of putting this down there are going to be many restrictions and only so many spots you can actually put this die down into the window but also what the ramifications of that decision are in the future because uh just because you have a legal placement right now with this D does not mean it's something that you should do because maybe you now have an illegal spot next to it you know you have a restriction you can only put a three pip down here and you put a regular three right here now that's either going to be an empty space at the end of the game or you're going to have
to spend points uh in the form of those favor tokens in order to use the tools which can kind of rejigger things around on your stained glass window and obviously you cannot uh plan entirely for the future and it's uh interesting that you do have those tools out there as an option to mess around with your previous uh decisions or perhaps the previous mistakes but either way you have all these different things that you're thinking about uh each turn and uh even though it just comes down to grabbing one die from the middle and putting it down into this stained glass window that you're making so I think that wraps up pretty much all of my thoughts on this specific playthrough as always I'd like to thank everyone who's been supporting this Channel Through patreon including all of these producer level pledges if you too would like to directly support the channel you could do so at patreon.com Jong games and I'd really appreciate it also if you'd like to see more full game playthroughs like this one as well as in-depth board game reviews and Vlogs please subscribe to the channel thanks for watching