Luthier Preview! | Craft musical instruments for patrons through worker placement & hidden bidding!
Games in This Video
1 game is featured in this video — it unlocks as you watch.
Transcript
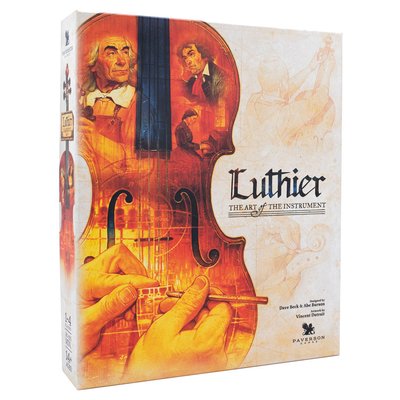
hey friends it is Jenna what is up and welcome back to the board game garden and welcome to a preview of this game right here this is luier the art of the instrument it is published by paperson game who is sponsoring today's video so a huge thank you to them and it is designed by Dave Beck as well as Abe Bon and this is going to be a game coming to kickstarters so when this video is going live or when you guys are seeing this video The Campaign is already started so I will have a link down in the description box to the campaign if you guys are interested in checking it out we're going to be going over exactly how uh luier plays I'm not going to go into an in-depth how to play this is just a preview so I'm going to be explaining the general game play so you guys can get a feel if it's something that you are interested in backing um and then I'm also going to be going over all the components which I will mention right now that this is a prototype so everything is subject to change but it is a very nice prototype and the Art Is by Vincent D tray so you know that it is absolutely beautiful and I'm going to say it right now I really enjoy the theme of this one and I'm excited to show you guys this one here today on the Bor game Garden so without further Ado if you guys want to see exactly how with your plays so you can get a better feel if it's something that you want to add to your collection then just keep on watching give this video a big thumbs up if you enjoy Also hit the Subscribe button down below if You' yet to do so we'd love to have you here in the garden and without further Ado let's get into this preview of luier The Art of the
instrument shall we all right so in luier I'm going to give you guys a quick aim of the game and then we'll get into all of the components that I have here in front of me there is a lot of components in this game so you guys might not be able to see everything um but I will try to show you guys everything here um but basically in luia you are a family um instrument making family um and each person is going to get a different family there are a bunch of different families that you can choose from here we have the Walter family which if you know my dog's name is Walter so I had to choose this one but this is the Walter family and each of the families on the back is going to show you some sort of thing that the family is going to start with um a special ability or starting thing and then it's also going to give you all of your starting components so you have your resources your money so on and so forth which we'll get into but each player will have a family that they're going to be representing and as this instrument making family you are trying to please these different patrons give them things that they want you're trying to um put on performances you're trying to um give them instruments or create or build them instruments that they would like repair instruments different things like that and you're going to be doing this in a kind of blind bidding worker placement which I think is really unique and very cool so um each player is going to have their own individual player board that is going to have two worker placement spots and then there are five different worker placement spots in the middle um different things like the
balcony you also have the guild the repair the perform and the salon so each of these different spots are going to give you different things to help you on this process of uh building these instruments um giving all of these patrons their requirements in order to gain victory points and then the player with the most victory points at the end of the game is going to be the winner um there's also a little bit of area majority here in the center with the different chairs of the orchestra you are trying to um get majority of each of these chairs in order to own a bunch of different chairs in the orchestra um in order to gain more victory points so you have that there which like I said is a little bit of area majority um but yeah that's a little bit of an overview of the game there's also a market at the bottom there that you can buy and sell Goods a few other things you can buy and sell as well um but yes that is a little bit of an overview of the game I will take this out right now to show you guys all the components this is the best thing I've seen in a game it is so much fun we got a little uh conductor wand I think so in the game we have the main board in the center here this is a kind of long thin board um that is all of the different work rep placement spots that you're going to be going to with your chips um so like I said in the intro or in the aim of the game it is broken up into five different spots as well as the um Orchestra in the centers so at the
top here you have the balcony um over here you have the guild you have repair you have the perform and then the salon those are going to be the different spots that you're going to be going to and what you're going to be focusing on in the game there's also some tracks that are related to the repair the perform and the balcony which we'll get into that as well there is the uh like tracker up here the game is going to be played over six rounds and you are going to be gaining more chips um in the OR at the end of the second round and at the end of the fourth round you're going to be gaining uh your two and your four chip you're going to eventually have chips one through five but to start off the game you have 1 three and five those are the different like skill levels of the chips um the chips are kind of represent presenting your workers in your instrument kind of repair shop building shop uh Workshop I guess so the one is you know the lowest maybe like the intern you have the uh three which is like in the middle and then you have the five which is kind of representing yourself as like the head of your Workshop so the strongest chip there um there's also going to be three kind of um special ability chips that you can eventually throughout the game once you get to a certain spot on these three tracks some like better chips that you can replace your other chips with that will have a special ability so when you place that chip it will then have a special ability regarding um a card that you draft that's everything for the main board I also mentioned the market at the
bottom here not sure you guys can see the full Market but each person is going to have a little horse and buggy and once you take the market action which you can only take one market action per round you're going to move your little horse buggy across to the other side to represent that you have taken your Market action and here you're going to be able to buy and sell as many Cube resource cubes as you would like which the resource cubes are white brown and gold the white resource cubes are going to be animal um kind of product I don't know what that is that they use in uh these sort of instruments but you know cow cow hide I believe is used in like drums and uh like horse hair in like string instruments stuff like that I believe um so that is the white cubes you also have wood which a lot of instruments are made out of wood then you also have the gold cubes and those are going to be a different amount of money each round there's going to be a new market card that flips over so that is there and then there's a few other things which I will get into that you can buy or do at the market um so that is that and that is everything for the main board so moving on to the personal player boards I'm not going to wave around this thing the whole video but each person has a player board and this represents your Workshop where you're going to be uh roughing your instruments and then finishing your instruments and then giving them to a patreon um to give them one of their many requirements um so you have three spots here that are
going to be where you're going to be placing your different uh patrons you're going to have kind of a timer because your patrons are only going to have so much patience for you so you have this little timer here that is going to be moving at the start of each round um whenever you actually add one of their requirements it goes back to the beginning so as long as you are giving them one of their requirements each round you're going to have quite a lot of time in order to finish off but if you're not able to give them a requirement that timer is going to be ticking down so that is the three spots you're also going to get some reward whenever you place a patron in one of these three spots they're going to give you some different rewards you have the spot here for your family like I mentioned you also have some unlockable spots that are going to give you different abilities you have a spot to hold all of your resources your cubes you only have spot for nine of those so uh you want to get your resources very wisely you have your two worker placement spots here one for your roughing bench I believe and one for your finishing bench and that's going to represent the two sides of your boards so your roughing bench instruments or the ones that you are building are going to be on the left and then you're going to be able to pay a bunch of different resources in order to bring it on over to your finishing bench you then going to have to pay a few more resources and then that is going to finish off your instrument and then you're going to gain victory points as well as you're going to be able to place a chip onto the orchestra which we'll get into um and
then this will be put underneath one of the patrons that need that requirement or that specific instrument um so that is your player board here once you've finished one of your patrons they going to be able to be tucked under the top here and all of your patrons are going to give you some sort of ongoing ability or thing that's going to happen when you do some specific thing stuff like that some will even give you Income At the beginning of each round things like that so that is your personal player board um you also have some goal cards which having goals and objectives in games is like one of my favorite things so you do have some goal cards that you choose at the beginning of the game that you're going to be working towards player is going to have their chips like I said and moving around each player is going to have some repair markers which are going to be placed into the orchestra each player is going to have some perform markers or tokens that are also going to be played into the orchestra which we'll get into and then like I mentioned when you finish off one of the instruments you're going to have an instrument token here that is again going to be placed into the orchestra um with the coordinating instrument type players are going to start with varying amounts of money there is a solo mode so you do have a solo Mode card here with various different types of cards for an AI for a solo mode which I haven't played the solo mode yet but I do want to learn it and play it on TTS I have
played this both on TTS as well as in person now and uh yeah that's all I'll say you also have these kind of Orchestra setup cards for a two-player and I do believe a solo um mode as well you're going to have to set up the orchestra with some AIS I do believe um you also have the additional Market cards here you're only going to be taking uh six of those per game CU you're only going to need one per round you also have all of the different objective cards that people are going to be able to get um and then you also have some inspiration which I will talk about inspiration you're going to be gaining inspiration throughout the game and you can spend those in different ways you have the money um each player is going to have these apprentices um so they are going to be chips that you can add into bets to give you one more betting power like I said you have the buggy there we have this guy here which this is really helpful when it comes to the order of doing each of the actions if that makes sense so depending on the number that you place into one of the uh work placement Spots You're going to put them in and sending order then whoever has played the highest will go first which we'll get into that more in a second we also have some Royal patrons which you can get um in various ways you have the different cards that will be connected to the upgraded chips with special abilities we have the resources we have
dice for the perform action which we'll get into and then lastly because this game is pretty large I didn't have enough room on the table to in include these but these are going to be public objectives you're going to randomly choose four of these public objectives and they're actually going to be going on top of the board here so there's going to be one here one here one here and one here and these are going to be public objectives that you can complete in different ways um and you're going to be able to gain victory points based off of how many of that specific objective you can get yes you have those and they will be at the top of the board here um but I do believe that is pretty much everything for the overview of all the components as well as a little bit of an aim of the game so without further Ado oh I will also mention there is a scoring track here which I just have off to the side here um but yes without further Ado let's get into exactly how luier the art of the instrument is played like I said I'm not going to go into all of the nitty-gritty but I am going to go over an overview just to give you guys a good look at how it plays so you can decide if you like this game and want to get it so let's get into that how to play so to start off the game each round is going to be played in a few different phases there is a start of the round where players are going to gain some like start round bonuses so some patrons once you've completed them will give you some start of round bonuses um also you are going
to have to advance your cube of each of your patrons and that's going to give you a little bit of a gift so each Patron at the bottom of the card is going to have a gift track so they are going to give you a gift for each time you um put their Cube forward but like I said each of them are on a timeline so they're eventually going to run out a time and if you are unable to complete a Patron's requests before the end of that timeline they are going to get you I believe three negative3 victory points at the end of the game so that's not really great um so you do want to try to finish off these patrons as soon as possible but you are going to get a gift um at the the beginning of each round that you do not uh complete them so with these two here I moved both their cubes up and both of them gave me uh a wood Cube so I added those into my little inventory there and the last thing is that whenever you gain instruments they're always going to go into your hand not directly onto your roughing bench so at the beginning of the round in that start phase you are going to if you have any instruments in your hand you can take one of those and add it to your roughing bench so once everyone is finished with that start of round phase you're going to move in to the planning phase so let's get into exactly how that works so with the planning phase like I said each player is going to start with three of these chips at the beginning of the game a one a three and a five and then at the end of the second round you're going to gain your two as well and then you're also going to gain your
four at the end of the fourth round so you're going to get up to five chips to place in the planning round so what you're going to do with these is in player order so starting with the first player you're going to choose chips to place down at one of these seven different um worker placement spots so like I said you have two in your workshop and then you also have five out on the board so I could decide to place my five let's just say I really want to get an instrument so I might place my five face down secretly onto the guild worker placement spot moving to the next player they might decide let's say the yellow player really wanted an instrument as well they might decide to place their three here so on the guild as well so then once everyone has placed all of their chips which let's just place them out here in some spots so I've placed all of the players chips out so after everyone has placed all of their available chips that would be the end of the planning round and then you would move into the resolution phase so then moving into the resolution phase again in turn order which I will say turn order is determined by this here and the balcony is where you would go to change the turn order but in the current turn order you will then go into the resolution phase so the first player would decide what worker placement spot they wanted to resolve first and this doesn't actually necessarily need to be a spot that they are at but most of the
time you do want to resolve the places that you're at in order to get these different uh actions done that you wanted to so as the green player I might decide I want to resolve the guild first so all of the tokens that were placed there would get flipped over and depending on the um number or the strength of that chip you would then place it which this is where this comes in handy you would actually place the chips in descending order starting with the player that played the highest chip so I as the green player played a five the other two players actually both played a three but when it comes to ties it's whoever placed their chip first so the yellow three was placed first and then the red three was placed after but this is actually a really good time to mention the apprentices so if you ever gain an apprentice in any way you can decide to use this along with a chip in order to make that chip one strength higher so if the red player actually decided to use one of their Apprentice chips their three would actually be put into a or made into a four so they would actually move up one spot and they would go second um with this action The Guild action so let's just pretend that that was the case so as the green player I would go first I would be able to draft one of these instrument cards so at the guild this is where you're going to be gaining the instruments there are two free spots and then there are two spots
here this actually goes for most of the spots here there's always going to be some free spots and then there's also going to be some spots you do have to pay money in order to gain so these two spots here are going to require you to spend a mixture of both money and inspiration if you have it so if you do remember with the overview I mentioned inspiration you gain these in different ways and these can be substitute for um buying these cards or gaining these cards so this spot here you wouldd have to spend a mixture of um money and inspiration four of those so you could spend four money you could spend four inspiration you could spend one money three inspiration two and two anything like that and then this spot here you'd have to spend eight of those mixtures of two when it comes to the instruments like I mentioned with the start of round this is always going to come into your hand and at the start of the next round you're going to be able to place it into your roughing bench or onto your roughing bench and this is going to be on this side here how much you have to pay in resources in order to move it from your roughing bench over to the finishing bench so with this one here I would have to pay one wood and one gold in order to do that and then I'd move it over to the finishing bench and then in order to finish it I would have to pay one wood and one gold again in order to give that to one of my patrons if you don't actually when you finish an instrument if you don't have the patron or a patron that wants this it actually just gets discarded but you're still able to gain the victory points and also
place out one of your instruments and when I'm talking about doing the roughing bench and finishing bench things that actually is connected to the two work replacement spots on your board so I'll get more into that after um but that is the gaining of the instruments at the guild um next up is the repair area here this is how you're going to get um or repair different instruments so um kind of a little bit more about the requirements of the patrons so each Patron is always going to need one instrument of a particular type and then they are going to need need or possibly need another one to two things that's going to either be a specific type of instrument repair or they're going to need a um performance of the type of music that they are or like so or I guess create um so in the top right hand corner of each Patron is going to be a type of music there are three different types of music represented by the colors the green the blue and the red so the performance that they perform is obviously going to be the type that they um do or perform so for this Patron here in particular they are going to need one string instrument and then they're also going to need either a string instrument repair or the green um performance so those are the different things that they need so when I'm talking about repairs um if you have a patron that needs a specific repair you're going to use this
repair or gain this repair by going to the repair shop and then you're going to have to spend a particular amount of resources so this one here is one animal and two wood you would then gain some victory points and then you will also take one token a repair token and you're going to be placing that into the orchestra here onto one of the chairs so with this one I would have to place on the bottom row that is the string instrument repair and I can choose whichever one from the bottom row that I want I would then take it and place it here and if I am the first one to go there and place any of the tokens I gain the reward there so if I place it here I would gain two inspiration I would then be able to place this um onto one of my patrons if that is something that they need if none of my patrons need it again I would have to uh discard it so that is that that is everything for the repair moving over to the salon let's do the salon first and then we will do performance next but the salon is where you're going to gain more patrons this is pretty simple um again you have two free spots and then two spots that you would have to pay um you're going to be looking at obviously what the patreon is requiring um and also you might be looking at their icons the music they um create their ongoing ability once you have completed them cuz that's going to be very useful as well um and also like
how many victory points they're going to get you stuff like that so you might get this one here you would place it on one of the three spots in your workshop and then you would gain whatever um reward is there so for this one here I would gain an apprentice and then moving on to the perform section this actually has a little bit of a luck element to it which I think is a fun surprise to the game but basically um some patrons like I just mentioned need performances most of them do want a performance um most of the time it's either a performance or a a repair that you can do um but if you do want to complete a performance you are just going to draft one of these again two free and two that you have to pay for and this is going to have a little chart of the uh number of music notes that you have to roll so this year I would gain five money if I rolled one to eight music notes um 9 to 12 music notes I would gain two money I would be able to place one of my performance tokens onto the coordinating spot that matches the performance music type so like I said either the red blue or the green um this one here in particular is the green so I'd be able to place it in one of these six spots here and if I was again the first person to place one of these I would be able to get the reward of that spot and then also for that 9 to 12 spot you would also additionally gain one Victory point and if you were able to roll um 13 plus music notes you'd be
able to gain two money place out a performance token and gain three victory points now you're probably wondering how exactly you roll these music notes so um basically it's going to be always how many um kind of strength the chip is that you use there so for example if I decided to use my five chip at the performance I would start with a level five I would then roll these two die which I will add you start by Rolling the two white ones but as you move up this purple track you will eventually be able to replace these uh white ones with the black ones which have more um like music notes and better chances of rolling higher so you would roll the two white Dy and for this example I only got two music notes so that would be my five chip plus these two music notes so I would have seven and then additionally this is another way for you to use your inspiration so I would then be able to spend inspiration to make it higher so each inspiration would be one music note so I could if if I really wanted to get to that 9 to 12 in order to place one of my performance tokens I would then maybe want to spend two inspiration tokens to get to that nine and then I would be able to get my money get my victory Point as well as place out one of my performance markers and then lastly for the different work replacement spots on the main board you have the balcony which like I mentioned this is the main spot that you go in order to change the turn ORD so blue actually went here and they were the only person here they
placed there three so that would go here and then at the beginning or end of this round the turn order would change blue would actually move from last all the way to the beginning everyone else would be moved down and blue would be first for that next round but then additionally for the balcony whenever you go here you are going to change the turn order and you're going to be able to do one of three things one being that you can take one of these little um trophies these are going to be blocking off three spots on your board that you can unlock um one being a spot that gives you an income of one Cube the beginning of each round which is really nice or one resource at the beginning of each round and it also unlocks three additional spots in your inventory so now instead of only being able to hold nine uh resources you can hold up to 12 which is really nice um you also have here that you can unlock the purple die which this is actually just going to be a die once you have unlocked whenever you take a performance action you can roll this along with your music note Dice and you will just be able to gain some additional things like two wood cubes three animal cubes one gold Cube six money an apprentice two victory points different things like that um so it's a good way to just get additional things um and then the last thing that you can unlock is gaining one of the royal patrons so these are going to be some patrons that um honestly aren't too difficult to complete this one just needs one instrument
but if you complete them their ongoing ability is that you get two victory points at the beginning of each round which is a really nice thing to have so that is the little vase things you're going to take those off one of those three upgrades off of your board and this is going to be how you place onto those different objectives that I was mentioning so there's always going to be four different objectives and once you've completed one of those objectives you might want to go to the balcony in order to score victory points for those so that's one thing you can do at the balcony the other thing is gain six coins um and then the other thing is gaining two of your apprentices so that is what you would do at the balcony and then lastly I've pretty much already gone over this but you have the two worker placement spots on your main board one being your roughing bench and one being your finishing bench the roughing bench you would be able to um if you placed a chip here you would flip it over you would spend your resources on the roughing bench side you would then move it over to your finishing bench and if you also had a token on your finishing bench you could flip that over you would spend the uh resources on the finishing bench side and then you'd be able to finish this you would get your victory points you'd be able to take your instrument token here and for the instruments you actually have to place it on the corresponding instrument in the orchestra so this one here is the baroke guitar and this is where is the broke guitar that's a good question it is at the
bottom it is being covered up by this repair so I would place that out there and I will get into exactly what the area majority thing is here um in a second but you would just place out your instrument on to that spot and the instrument um tokens are always going to take priority over other tokens so I would also gain here the reward there which I'll get into in the next section of this video but once You' finished this like I said you place out that token you gain the victory points and you're going to tuck this underneath one of your patrons that uh requires it and then you would actually be able to move down that Patron uh to the start of their little Cube track there um but I do believe that is everything for all of the different worker placement spots the few things that I do want to mention here is if you ever place a token onto any of these work rep placement spots and it is four or higher each of these worker placement spots are going to give you kind of a bonus um at the guild you're going to be able to place the instrument instead of placing it into your hand you're going to be able to place it right onto your roughing bench you're also going to be able to gain a resource of your choice at the repair shop if you use a four plus you get to move up this purple track here which is just unlocks various ongoing abilities as well as your special upgrade for your tokens additionally it's the same thing with the performance over here if you play a 4 plus you're going to be able to
go up on this track gaining you different things like I said you are going to eventually replace the white dice with the black dice um here if you use four plus you're going to be able to move your Cube all the way back to the beginning and then you can pick any one of the rewards um or gifts on that particular Patron's little track there um to gain so that is that and then lastly if you play 4 plus here at the balcony you're going to be able to go up on this track here which again gives you different things it's also going to gain you another uh worker upgrade I will additionally mention throughout the resolution phase you can take your one market turn at any time so if you are needing some particular resources you can take your Market action before you decide to resolve one of the worker placement spots um you're just going to take your horse and buggy move it across buy and sell as many things as you would like you also can spend four coins to gain one of your apprentices you can use your inspiration as money then Additionally you can also spend 15 coins which is quite a bit in order to move up one of these two tracks here um so that is everything for the market action once all of the worker placement spots have been resolved and every player has taken one market action that would be the end of the resolution phase and then you would go into a little bit of a cleanup where you would refresh some of the cards the horse and buggy would be moved back different things like that and then you would move into the next round all right so I can already tell that this
video is going to be pretty long but I do want to give you guys a good feel of how the game plays and all of the different decisions that you'll be making throughout the game but I do quickly want to touch on the orchestra and the seats in the orchestra so this is where a little bit of AA majority comes in and this is actually going to be where you're going to get a lot of your endgame victory points because basically whatever seats you control at the end of the game is going to get you victory points based off of how many seats so there is a chart in the rule book where it's how many seats you have is going to get you a certain amount of victory points so when it comes to the AA majority um the repair markers as well as the performance markers are going to give you kind of one power in that spot so if you place one of your performance or repair tokens there you're going to gain the reward there if you are the first person but if someone comes along and and places their marker here unfortunately if someone else is there already if they have one token there already you're not going to be able to gain the reward there but once you have overtaken another player so for example here the green player has one the yellow player now has two that means that the yellow player has taken control of that seat they do then gain the reward there and they have control of that seat in the orchestra now when it comes to the these um instrument tokens these are always going to just finish that area majority and this is going to
Trump any other tokens that are there so if like I said with this player we did have the broke guitar we would then be able to place our instrument token here and even though the yellow player has two of their tokens and they have control if I place my instrument token there that ends the area majority and this player the green player would then have control of that seat at the end of the game and like I said at the end of the game whatever seats you have control of even if you just had one token on there if no other player had come and placed more of their tokens on that spot you do control that spot and you would gain victory points based off of how many seats you've controlled in the orchestra all right friends so that is going to be everything for this preview of luier The Art of the instrument hopefully you guys enjoyed hopefully it's not too long I will try to make it as quick into the point as possible just so you guys can get a good feel if it's a game that you would enjoy or not um but yeah hopefully you guys enjoyed if you did please give this video a big thumbs up also hit that subscribe button down below if you've yet to do so we'd love to have you here in the garden comment down below if luier is one that you were interested in and that you are possibly going to back um over on crowdfunding huge thank you again to pavers and games for sponsoring today's video I appreciate it so so much love you guys also so so much uh thank thank you so much for hanging out uh and yeah remember you are somebody who's Reed to smile and I will see you in the next board game video bye friends