Bits, Please! Ep 4: Beds Are Burning
Games in This Video
1 game is featured in this video — it unlocks as you watch.
Transcript
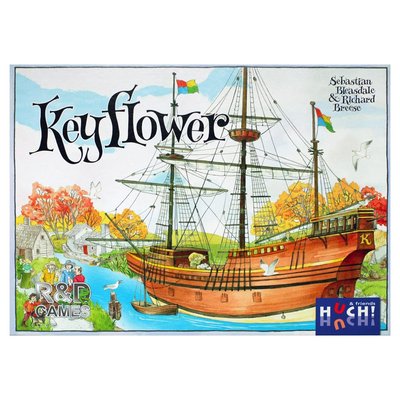
hi it's ryan from nights around a table and you're about to see me plummet to the very depths of despair as i desperately tried a 3d printed insert for key flower right now on bits please this one's going to be a bit of a ride hopefully you've been following the series and you saw my last episode of bits please with the lost ruins of arnac insert an absolutely fantastic production that i printed i actually bought a printer to print it i was really happy with it when i was finished but for a lot of you that might have been a bit i mean i'm a bit much sometimes i understand that might have been kind of like all right go effort boy but i'm really kind of like i don't really want to put that much time or effort into the stuff that i do in this one life that god has given me so i'm gonna i'm gonna reign it back in i'm gonna keep it a little bit more subdued or so i thought uh with this one all i'm gonna do with this one we're just gonna print an insert because when i asked you to tell me in the comments of previous videos what you would do if you were in possession of a 3d printer whether fdm or sla and we saw the difference in previous episodes what would you do with it and a lot of you just said well i would just take all my games that needed inserts and i would simply print inserts for them so that's what i thought i would do with this episode take a game that desperately needs an insert key flower and make the insert for it but first let's define the problem why does key flower need an insert
let me show you here is the game with its top off right off the top you've got some instruction manuals and some of these flat player screens i've got a couple of instructions for promos under here and then this is it there is no insert to speak of and he caught my recent find the fun video on key flower that's one of the things i griped about in a major way it would be one thing if the game was easy to set up and tear down but this game ain't that game there's no board in the game it's all just tiles and the tiles go out and they kind of create the board you bid on the tiles and you put them in your own little farms fine all of the tiles are marked with an icon indicating which season they're from so you see i've got like the winter bag and i've got the the that's a homes bag hold on i got a spring bag here right so they have it's hard to see because it's green on green so there's the tile and there's the spring icon in the top left of the tile but maddeningly when you turn the tile over and they do get flipped during game play there is no corresponding symbol so on one side it says spring and the other side it doesn't say spring and you need to know but from both sides that this thing says spring not only that but you you have to you have to split the tiles into seasons you have to put them out according to how many players you have and how many tiles is it per player per season well the number changes depending on the season and depending on the number of players so you have to go and you got to get the rule book out and you got to find the page in the rulebook i think it's page
yes it's page two so you gotta open it up and look at this little chart and that was a pain in the butt so just to try to make this thing a little bit easier to set up i did this i got the old brother p touch label maker out and i put labels on the winter bag this is the first bag you have to deal with and i i wrote okay so for two players you need two boats for five players you need five boats six boats for six players and you four turn tiles and three players you need seven seasonal tiles but eight if you're doing a four you know and so on it's just like oh my gosh i put that all on the bag to make it easier and then i have a cat named pippin who likes to chew plastic bags so he very helpfully put a couple of holes in this bag beyond that you've got not only the seasonal tiles but you've got ones that represent the homes of the players you got ones that are for boats you've got tiles that are for player order and these ones are really frustrating sorry no it's not these ones it's the boats that are really frustrating because the boats occupy multiple seasons so there's the spring icon but this boat comes out in fall this one comes out in spring and summer it's a headache it's probably one of the worst games in my collection to set up like look at this you've got a whole separate bag for green keeples because they got to be split up and then you've got this big draw bag and all the meeples are coming out of it because it tipped upside down in here and then you've got this bag full of cardboard tiles that can tip upside down and then i have you know there are two expansions for the game one's called the
farmers and ones called the merchants those are the two bigger expansions so you've got extra baggies have these things and these are supposed to be stacked in piles of three piles and and these things which are supposed to come out in a certain ordered array and all these resources are three different kinds they've got to be separated you have three different kinds of livestock that have to be separated and then you've got tiles in certain seasons for the expansion games as well it is it's the it's the worst it's the it's the flippin worst i hate it and i think it is contributed to me not playing this game as often as i think i would like to because i quite enjoy this game you watched my find the fun of video the verdict of the scales of funstis was in and the game is fun the game is fun setup and teardown are tortuous so we need an insert for it what are options well we can design our own inserts or we can go looking for one and if we go looking for one we're keeping our fingers crossed that we find somebody who's designed one that fits not just the base game but all the expansions and then the holy grail is that the sp the insert does everything in the same box all expansions wouldn't that be fantastic well okay off we go to thingiverse which you've seen from past episodes is a website where people design things in 3d and they're offered for free you can download them and try to print them out so this is the first one that caught my eye and it would not normally have if i hadn't done that lost ruins of arnac video where the designer just had the the cover of the game as the first image but as soon as you dive in you go to the second image
oh my gosh this guy has like a 3d exploded view of how all the different compartments fit into this insert that's fantastic and as i clicked through i noticed everything fit in the same box and i really i really wondered what the colors were all about because it's just a beautiful looking colorful insert well look what the designer hybrid tracer has done is used different colors to indicate not only which pieces come from which expansions if anything you see that's brown is from the merchant's expansion and anything that you see that's pink is from the farmer's expansion but he presumably he i'm just taking a wild guess has also made it so that the seasonal boxes that hold the tiles are color coded so that you can see at a glance which box is for spring which one's for summer which one's for fall and which one's for winter just left that one white or used pla to print that in white it's gorgeous it fits all three expansions in the same box it's colorful it's beautiful looks amazing i desperately want to print this insert but i want it to look as good as it does in the picture which means i want my components to be different colors too the problem though is that pla the plastic that you run through these 3d printers isn't the cheapest substance in the world so let's count up all the different colors that hybrid tracer has used in this insert understanding that a decent roll of pla costs about 42 canuck bucks so we've got light blue that's just the base game color we've got green for spring yellow for summer orange for fall white for winter which we can get away with if we do the rest in white although
he's done the rest of the thing in gray the pieces that are supposed to stay in the box and not move he's used pink for the farmer's expansion brown for the merchant's expansion and he has a separate color for this piece that houses the green meeples and then the special purple meeple for the end of the game i don't quite understand why because i think that could easily be done in the same light blue color that he has the other base game components in so even if we keep conservative and we use the winter white for the stationary pieces instead of having white and gray pieces and we use the same color of blue for those other two compartments we're still looking at six different colors of pla so six rolls of 42 bucks that's 252 canuck bucks to print this insert for key flower and i say nuts to that i'm not spending that kind of money i'm not spending you know triple quadruple what i paid to actually buy the game so it's possible and i can't really tell from the pictures the designer hybrid tracer spray painted these pieces instead of printing them out in their own pla color rules so if that's the case let's look up what a can of spray paint costs so if i shop here at home depot.ca i can see that a can of rust-oleum paint like automotive spray paint costs 8.48 canuck bucks multiply that by the six colors i need and that's 50 bucks in 88 cents still quite expensive if you don't have any of that spray paint kicking around plus the cost of a roll of white pla and that's 42 bucks hopefully you can get it all done in one roll my sweet summer child now it's going to be pretty much 100 bucks without tax
to print this entire insert that i'll admit is a spicy meatball plus you gotta factor in the cost of the 3d printer that you've purchased and then all the time because this stuff doesn't just shoot out of there like a paper printer so it's a commitment for sure and you could probably get away with paying less if you were going to go with one of these guys who makes a wood insert or foam core insert for sure but does anybody make a wood or foam core insert for key flower i'm not too sure i haven't looked into it and would the wood or foam core insert look frankly as nice as this beautiful plastic and spray-painted insert i don't know i have my doubts about that so in the spirit of showing you what's possible just before the third lockdown in ontario hit my wife cheryl woke me up out of bed she said ah we gotta go buy craft supplies they're shutting down all non-essential services you know my delirium i said no crafts crafts are essential going on go back to bed she said no they're not she dragged me out of bed and we we raced out to home depot and i bought all of the spray paints that i would need for this project and for a few future bits please projects for you to enjoy so armed i returned home and set about printing the key flower insert if you're digging this story so far remember to click three very important buttons one says thumb one says subscribe and the other is little bell it'll tell you when i've gotten new stuff so i do one of these episodes of bits please every single month you click those buttons you're gonna get notified when new ones come up i've also got how to play videos and find the fun videos all kinds of board game content to keep you and your loved ones entertained and if you think i'm doing something important or valuable here and
making your life a little bit better with this stuff throw me a buck or two or more on patreon i'm going to start designing custom bits for board games according to popular demand and i hope to make those available on the patreon campaign so if you're getting into the ground floor you'll be able to see that content roll in as perks in the near future so back to this when you get 3d files from a place like thingiverse and you want to run them through a 3d printer you can't it's not just like a paper printer where you say go and it cranks it out you know even with paper printers you might have to adjust the resolution or the cropping the framing or whatever it's a little bit more involved with a 3d printer you have to use a piece of software called a slicer many are free some are not but what the slicer does is it takes the 3d model and according to the parameters you set it carbs it up into layers that the stylus can then extrude plastic into and you've seen it work how it builds up those layers this is the slicing software i use it's a free piece of software called cura and one of the first things i do when i want to print a 3d insert from thingiverse is i open up each piece and make sure that it's going to fit on the bed and each printer that you buy has a different build volume so as long as you tell kira which printer you're using it'll show this grid showing the build volume of that printer and check this out these two pieces this piece that holds all of the different trays and i think the shields and this piece that holds a couple of pieces alongside those are the gray bits that remain stationary in the box those are way too big to fit on my printer bed so i was going to have to cut these down i thought the solution
was just slice them using 3d software and print them as separate components the 3d software i decided to use is called blender it's a free piece of 3d software and i'm at a bit of an advantage here because i went to school for 3d animation and design so blender's tough but it's not the worst thing in the world for me to try to fumble my way around in it i'm going to show you quickly the process that i went through to get these pieces cut up into separate boxes with the caveat that there may be a much easier way to do this if there is i don't know what it is if you know please leave a comment below and maybe you can save me some time on a project in the future but here's how i did it all right so here i've imported the box into blender and i select it and i hit tab and that takes me into edit mesh mode now you can see there's a whole bunch of extraneous faces in here that i don't really want so the first thing i like to do is to go and choose this option mesh clean up limited dissolve and that takes away some of the unnecessary triangles so it's a lot cleaner to work with then i use the k key to choose the knife tool and that lets me just go around and click on these edges and draw sort of like a cut line it's a really sloppy cut line but that doesn't matter because i'm going to clean it up in just a second so i rotate the box while i'm doing this and i click and i hopefully stick the landing here and i hit space and there's the whole cut line now none of those vertices are aligned properly so you can select one and tell the 3d cursor to well here's me lining it up perfectly now we tell the 3d cursor to go where that vertex is
and then if i rotate the model and select all the other sloppy vertices along the cut line like so oh i notice here that these two are not welded so i actually have auto merge turned on so that when i hold down control and i drop a vertex on top of another vertex they merge so i'm going to select all the vertices on the outside on that cut line
and then i'm going to align all those vertices i'm sorry i'm going to scale them along the x-axis and they all line up because i've got my 3d cursor chosen as the thing that they're lining up to so look pretty good now i'm going to select that whole section of the box that i want to be its own thing select all the vertices and i'm actually going to all d and duplicate or sorry shifty and duplicate it and then i delete these ones and i'll show you why in just a second so that those shared vertices are in both objects now this is still the same object so what i have to do is select all these vertices and hit the p key and that makes it its own thing so now see i've got two different things the last problem that you might notice is that there's a face missing on the edge of each of them so i have to select all the edges here and then hit f to make a face and then over on this one selected hit tab select all the edges here and hit f and make a face and now when we go back out look at that they're beautiful and so the last step is just to select each one and export it as its own stl file that i can bring into my slicer there are roughly i haven't counted but i think it's a bazillion different sliders and dials and numbers that you can possibly tweak adjusting all these settings in the slicer software to get exactly what you want out of the printer and since i'm pretty new i barely understand any of them but one that i wanted to talk to you about is the infill setting this is a pretty basic one the thought is that if you print a piece out of your 3d printer and you make it completely solid with
plastic you're potentially going to waste a whole lot of plastic doing that like i mentioned the pla ain't cheap so one of the settings is infill and what it does is it hollows out your model and instead of making it solid the stylus draws sort of a lattice work of plastic inside the model and with all that empty space inside it makes the model a little bit lighter and uses a whole lot less material and it's fine but one of the things that i notice and it's probably because i don't know how to adjust the other settings properly but i can kind of see the lattice work in through the walls and i don't like that i don't think it looks very good at all i also find that again it might be a wall thickness setting that i'm not adjusting properly but sometimes it'll take a wall and if the wall thickness is say one millimeter and the wall i'm printing is 1.2 millimeters it'll think whoa well that's a solid shape and i should do infill inside it and then you get this it's trying to print latticework inside the wall and it results in like a really crummy kind of swiss cheesy wall where you can see a lot of gaps and lines and maybe some infill pattern i don't like it so i experimented with printing these boxes for the keyflower insert with zero infill so completely solid i did it accidentally at first the piece came off the printer and i think this is one of the first ones i ever printed and i was struck with i was like whoops i i forgot to put infill on but i was struck with how beautifully uh dense and solid this piece felt and i thought oh that's i mean it's sinful and it's it's costly but it feels so
good and then i kind of went ahead and printed a bunch of the other boxes in the insert with zero percent infill and nice and solid i didn't think it was such a big deal with these seasonal boxes because look all that's going on here is you've got four thin walls and the only solid part is maybe little triangles down here where there's a little bit of a ramp and angle for those key flower you know hexagonal tiles to slot into so i thought i was safe to go and print the rest of these was with zero percent infill now one of the problems i got while i was printing which you can see really clearly in this picture is that at the corners of the bed the bed is the the mat that sits on the on like a big metal platform they started curling up so the first bunch of layers would print perfectly and beautifully and flat but as it started printing the walls of the pieces i would notice that corner it was always the front right corner would just kind of start lifting and raising and i was like why is it doing this well that's another setting that you can adjust in your slicer software you've got a few different options one of them is skirt which just kind of prints an outline around the thing that it's going to run off and that's that gives you sort of a sense of the dimensions of it which is good for you but for the printer it also gives the printer sort of a trial run of just extruding some plastic and trying to get it to stick to your bed before it goes and prints the whole thing but i printed all of these pieces with skirts and the problem with skirts like i get that corner lift that's one huge problem and another problem is that
it was just it was squishing out the pla so darn thin that you can see it in this picture right here it was i couldn't get my fingernail under it to peel it off it was almost like it was painting the plastic onto the bed the solution is to not print with a skirt but to print with one of these things it's called a raft so the printer lays down like a bed of plastic because pla adheres very well to itself this is the very last box i printed in the entire project so we're jumping ahead a little bit here i knew that printing wraps was a good solution to fixing that corner peel i didn't want to do because it added extra time and extra material but i was being really stubborn after i started printing with wraps i had much better results and what's that fancy looking bed you ask well i'll get into that in just a second now feeling pretty cocky and confident after printing out all those seasonal boxes the tile holders i thought ah that's a pretty important box the big one that holds all the trays that have all the components in it so i'm going to try printing that one next and that's where my problems began see one of the things you have to do with these 3d printers is you have to level the bed there are screws underneath at least in my model that you have to twist one way or the other to raise and lower the bed so that it's a certain distance from the nozzle and what's that distance supposed to be about like a fraction of a millimeter and it has to be evenly a fraction of a millimeter and the same fraction of that millimeter on all four corners you level one corner at a time and you do it by sliding a piece of paper between your bed and the
nozzle and keep on twisting and adjusting those dials until you can pull the paper and there's resistance but if you try to push it it crumples or crinkles it's very annoying it sounds like it should be an exact science but it's not it feels like like a dark art like i'm performing witchcraft whenever i do it and i haven't nailed how to do it properly so here's what happened the very first time i tried to print that big box my 3d printer shut the bed it would go all right for a few passes in the first layer and then part of it would start bubbling up and then there's this hood that covers the fan that helps cool the part after it lays the plastic down and if the plastic is raised ever so slightly just again a fraction of a millimeter above where it's supposed to be that hood that fan hood catches on it you hear this snapping from the other room where i'm printing ah what's going on and i've had a really few really severe cases where the plastic is bubbled up and warped and rippled so badly that as the stylus was moving by that lumpy part it snapped the hood completely off like screws and everything so i'm on a couple of 3d printing forums and i would ask what's going on to a fault they would always say oh it's leveling it's leveling you just got to get your leveling proper and then you'll be able to do it stuff will print no problem and remember there's a million different dials to tweak so it's it's not just leveling there's just there's just all sorts of parameters and i don't work very well with situations where i've got a million dials to twist so i didn't know what to do what i ended up doing since this plastic wasn't adhering properly wasn't sticking to the
bed i decreased the distance between the bed and the nozzle now the bed that ships with the printer i have the inner cubic mega zero the bed itself is sort of rubber padding and then you have this sort of rubbery flexible magnetic plate that goes on top of that and it attaches and when you're ready to take your part off you pull off that plate and the idea is you flex and twist it and peel that piece off and it's supposed to come off no problem if it doesn't maybe you can scrape it with a little putty knife or something and get it off while i was printing an insert for a future episode of bits please using black pla i tried gingerly carefully as the part was sticking pretty tightly and i tried to peel it off and rip a strip of the magnetic bed off with it i thought oh my god and the printer was like a week past warranty and it's i've already dug a whole divot in in my magnetic bed oh man what am i going to do i really worried that any future models i was going to try to print on this bed would would mess up because i mean that divot in there is at least a millimeter thick maybe a fraction of a millimeter but that matters with 3d printers so i wrote to any cubic i said look i've you know i've had it just a week past warranty now and i wrecked the bed can you help me out and they responded my ticket and they said yeah okay we'll we'll send you a new bed the other thing i kind of want you to notice with this one is i've got some black really thin pla at the top of it if i sort of shine the light on it the right way you can kind of see black shapes from when i was printing out another insert for a different game
and that plastic i can't get off that's like glued there and there's no way people say oh you just clean your bed with some isopropyl alcohol or whatever there is no amount of isopropyl alcohol that will get that plastic off this bed so i don't know what people are talking about so here i am waiting for another bed and i'm going mad because i'm trying to make these videos for you to enjoy and i don't have a printer bed to print on so i hit the forums and they said oh don't mess around with those magnetic beds what are you doing those are junk and everybody knows it so what you got to do is you got to get yourself got to get yourself a glass bed that's what all the pros are doing they're using glass beds so i hit amazon and i bought a glass bed then i had to re-level the printer and i got it so that the paper would pull but it wouldn't push and so i thought i had done it all correctly and i adjusted the temperature according to the manufacturer spec who made the pla and off i went trying to print another one of these boxes for this insert and then this happened oh my god if you compare it to the magnetic bed it's about like the same area same size same length it just stuck too hard to the bed and it pulled that treated coating on the glass bed like clean off and the whole thing about these glass beds was i i was told that the coating was such that when it started cooling down would release your print and and you could just go bloop and pop your print white out right off and it would be no problem not the case so i get kind of uh annoyed when i'm on online forums and
people recommend things and they super don't work out so i hit the forms again and said hey look bozos i went with the glass bed that you all recommended and it ripped a strip right off it and they're like glass bed oh my god who uses glass beds anymore no no why mess around with that you got to get yourself a pei bed i forget what pei stands for but it's like a spring steel flexible it's a metal bed that has a depending on the bed you get it's got a metal sort of almost sandpapery kind of texture to it and so they're saying oh you get one you get a pi but don't mess around with a glass whoever told you to get glass so i processed a return through amazon on the glass bed that the pla had ripped a chunk out of and the replacement magnetic bed from any cubic was on its way to my house so i just kind of like hung out a couple days still trying i used the reverse side of the glass bed because people were saying the side that isn't treated is actually better for printing on and i had a couple of successes on there but it was still sticking pretty hard to that glass bed it's pretty hard to get off and then finally this replacement magnetic bed from any cubic arrived i thought okay i will keep working on the any cubic magnetic bed meanwhile i'll order a metal pei bed and hopefully that'll arrive soon so off i went and i tried to print another box on the replacement magnetic bed i think the second or third thing that i printed on it again was stuck fast i used a putty knife i used a craft knife very
very carefully i tried twisting it i tried flexing the magnetic bed i couldn't get this thing off so i had forums again and websites and they said oh you can you can run it under hot water because that'll create a temperature differential and that new work and another thing said oh you can put it in the freezer and then it'll freeze the plastic and then you heat up the magnetic bed underneath it and then that temperature differential will make it release it and it just wasn't going and i thought oh my god there's no way i'm going to get this thing off so i started kind of like using i think i used it like a chisel to try to pop it off and i just wasn't getting between the magnetic bed and the pla it was like it was glued to the magnetic bed finally i just threw up my hands and i realized there was no gentle way that this piece was coming off my replacement magnetic bed and i just took a kitchen knife and i started hacking and slashing away like it was in an 80s horror movie and finally with one terrible swipe of my machete i sliced through the magnetic bed and i felt awful for it but the more i kept cutting and i peeled it away the more i realized i didn't stand a chance because this is what happened here is the piece where i pulled off that chunk of plastic it ripped it was like hannibal lecter tearing that guy's face off like there's no way no possible method that i could have used to get that off without severely damaging that bed and here i was with a second sorry this is the third bed now my body count had reached three i had
ruined a third bed and production ground to a halt but i knew i still needed to make this video for you the pei bed was on its way to my house on a slow boat from china and i was getting pretty impatient so i hit amazon again and i ordered this one this pei bed which had the advantage of being double-sided one of the sides had that rough texture on it and the other side had a smooth texture both sides pla and that's an advantage that i didn't get from the bed that i ordered from this wham-bam company over in china both the sides of that pla bed were going to be rough so i really like the idea that i would have now the option and if i screwed up the pla bed that arrived with both sides which is a pretty highly likely possibility at this point then i would have the other pla bed as a backup and if i wrecked that one too i'd go jump off a bridge i don't even know so when the pla bed arrived i went and i you know pulled off the busted old magnetic bed and i threw down the pla bed and i re-leveled it and i was really excited i thought this time for sure i'm going to print that big box and it's going to work and i printed that big box and it didn't work this is how the box turned out you can tell that in the first i mean this would have been like 10 hours of the print the bottom had that slanty problem where the whole thing was leaning to the side it's not until it got to this part that i thought oh i think i'll go straight now and it did the rest of the box completely straight so i thought okay maybe i can stick this in here and this will work so these are two of the pieces
that are supposed to go in the big box so you stick this in here and it goes down fine until it hits the angley part and then it's a little bit of a dicey fit i don't even want to put it in here in there because i don't want to get it stuck uh irretrievably and then i'll put this in here it's the same thing it hits that sort of slanty part and there's no way that i can get in it's got to be a box so that was a complete bust and i figured out why it did that it's because the magnetic the ferrous padding underneath the magnetic bed that ships with the printer i think is a little bit weaker it's strong enough to hold on to that magnetic bed it's not strong enough to hold on to the pla bed the pla bed comes with its own 3m ferrous spongy pad and so i hadn't used that so when it got to a certain part of the print it shifted that stupid little hood protecting the fan just nicked kind of a too high part of the print and the whole bed got dragged over and i gave it another whirl and sort of a similar thing happened so you can kind of see it happening here look down here you can see where the stylus went outside the bounds of the rectangle that it was trying to print and that's because the bed had shifted and i thought oh ryan you dummy what you were supposed to do was use the fairest pad that came with the p with the pei bed and stick it on so i did that i ripped the old one off and i put the new strong presumably stronger ferrous bed uh that's supposed to magnetize the spring steel pad and with that all in place i once again tried printing the gigantic
box for the insert and look friends we finally did it i'm just noticing as i take the box in hand that it's got a little bit of a here i'll show you it's got a little bit of a split on the corner there that you know with all the problems i've experienced here that's no problem i'll just zap that with some crazy glue throw a book on it it'll be fine it'll be fine because this box doesn't actually have to leave the bigger box at all it just sits in there and holds other things so check this out and i'm going to i've got all all the other boxes in there and i'm going to slide this puppy home oh beautiful it fits gorgeously now you'll notice that none of the turned up corners on these tile holders matter a width like they can just sit in there i can take them out there there's one of the turned up corners right there it doesn't matter it doesn't affect anything so i'm super happy so the remaining two boxes that go in this corner in this corner i already printed one of them that was the the the one that ripped off the huge chunk in my bed and the other one was just this uh narrow box and it was supposed to hold the shields the shields by the way are these things your meeples in the game are supposed to be secret so they provide you these shields and you fold them in like this there's little slots here a little slot here and a little slot here so you just sort of fold it here but that's going to come apart at the seams right so they give you little paper chimney pieces as locks to drop into a slot there just
to hold that that piece open so that the side flap doesn't come apart then you got your little shield you can keep your meatballs absolutely secret while you're playing which is pretty important to the game so the designer says in the notes that uh yeah these shields don't quite fit in that box in the corner so so i cut mine down to fit in the box and it's no big in fact i like them shorter and i was just like are you absolutely out of your mind i'm not cutting any of my board game components to fit into a custom insert box that's nuts that's madness i'm happy i mean i'm happy just to let these sit with all the other flat stuff on top you know the the rule books that's that's fine why would i want to i wouldn't want to cut them but then it got me thinking like now i'm going to have this big hole in the corner of my insert in the corner of my box is there something better i can do with that now think versus the kind of place where people can remix other people's creations everything is up there is offered for free and you can just take something and modify it and and throw it back up there give credit to the original designer and saying look i made it yeah i made it just a little bit better so in that spirit i thought i could make this insert just a little bit better how am i going to do that well check out this remix by designer paprika dash so paprika dash notes that you can get a bunch of different promo tiles for key flower and i own i think i own all of them one's called key celeste and one's called key melikin and then there's a there's a sorcerer tile and these tiles are either one or two
tiles as little promo expansion things or sometimes they come with a little meeple so the change the innovation that paprika dash made was to modify the box that holds the green meeples and to sort of widen that smaller compartment so that it can hold the the meeples that come with key celeste and with key melikin and then he presumably that's a he because you know board games plus statistics thought oh okay instead of making such rigid holders for the tiles like maybe you get these promo towels and now suddenly you can't fit everything in these boxes because it's a pretty tight fit so he thought i'm going to make one big long box and treat it more like a card game where you can have dividers movable dividers along the box and then stick your tiles in however you want which is i mean that's a neat idea i wasn't a huge fan of his implementation i didn't think it looked nearly as nice as the painted boxes for the different seasons and the last thing i'll note is that neither of these two designers not hybrid tracer and not paprika dash came up with the way to store these things these little shield chimneys to keep the shields locked there's no great place to put them and you kind of need a great place to put them especially because they're so small and thin they're easy to lose i think i don't have all what is it 12 that came with the game which is kind of a bummer so i've already lost a couple so i really want a way to keep these little things safe inside my insert so i thought i could kill multiple birds with one stone and use that corner piece to design an area that could hold
any number of future promo tiles plus any number of meeples that might come with those future promo tiles future and current plus a little caddy to hold all the little chimney pieces so i don't have to stick them in a baggie or risk losing them inside the box somewhere so off i went to blender and it was nice because i could borrow elements from the existing design already so i knew how big to make it because i had that big empty box that was supposed to hold your insanely scissored down player screens and i had this sort of scoopy bowl shape that i was able to steal from the compartments that hold your meeples and other wooden resources and i had the shape that's the perfect fit for holding all the hexagonal tiles from all the little season boxes the only thing i really had to design was the little caddy to keep the chimneys in place so that's what i came up with but instead of spending the x multiple hours to print this entire thing out and then to find out that i've made a mistake this was the piece that i was worried about most the little caddy for the chimneys because i knew the other stuff would work i'd seen it work already in the existing insert so what i did was i just sort of carved that one little piece out and printed it on its own you know just as a test and here it is looks like that and i just wanted to see if i could fit the chimneys inside you can see from this little test run it's a little i mean it's pretty snug it's about the exact width of one of the chimney pieces so that's the first sort of change i wanted to make and it's an easy one i just wanted to widen that little caddy up i left a finger hole in here so the idea is these chimneys
are sort of like sitting in this caddy and then you can just scoop them out with your finger like this but notice i got a big fat guy finger so this little opening here is kind of like too big for my big stupid fat finger to fit in so i'm already going to be widening this so obviously i need to widen this a little bit more to be able to get my finger in and then just as far as the depth of the thing goes i took all of the chimney pieces together and keep in mind i'm missing one or two and look the thickness is almost like as thick or thicker than what i've got there so obviously i need to increase the dimensions that way too so i'm really glad that i did the test run and i tried to find out you know whether i had the dimensions on this thing correct or not so the next step was to take this and print it in the larger piece but i still wasn't keen on using all of my pla to print that piece you know a high quality no infill solid piece like i've done everything else in the insert so this was the result you can kind of tell maybe maybe even if i put it on the close-up cam that it's a little bit crusty crunchy because i had you know i had infill turned on so you can see at the bottom of this basin you can see some of the infill in there maybe because the wall thickness isn't right or somebody online told me that it's a combing setting so many settings to tweak but this is how it's looking so far and what i didn't piece together in my test because i only did it you know flat on the bed like this is that this piece the caddy for the chimneys because it's suspended in midair fdm printers don't handle that very well so there is nothing to support it so
that's why the walls kind of didn't all print it looks kind of crusty and chunky it's because it needs support going all the way look at there it's a nice fit for my finger now right i adjusted that beautifully but it needs supports going all the way down to the bottom that you can just kind of like snap off later so that there's a foundation or platform for it to to print that part on top of so again i made the right choice there to just do sort of like a rough one of these chimneys sticking to my finger just to do like a rough cut test of of what i designed and here is what i'm calling the final piece so i did do supports in here it was a little dicey going at first i was worried that it wasn't going to be able to print this little platform but it did it printed it beautifully and so now i can take my promo slash expansion tiles and stick them in this they're loose fit of course because i've deliberately left room for however many other promo slash expansion expansion tiles they want to come out with i have no idea uh i i have a feeling that they're pretty much pretty much done with these but it seems like every year or every couple years they come out with a new one so like i guess as long as they keep selling they keep making them so that fits beautifully and then there's this big well on the side blah blah blah to put a couple of those expansion meeples in there for the different tiles and then the caddy look at that how beautiful is that you got a nice little holder for those little chimneys and it's beautiful so then with that in place the last piece i had to print
was just a redo of that one that ripped off the chunk of my bed and after i was finally able to get the big box printed properly i felt pretty confident that i'll be able to get that one done too okay so this is how we're looking with all the pieces printed let's call this like a like a dry run right all the tiles are in there and the box is the custom box that i made everything is fitting abso just everything fits absolutely beautifully in the insert my props to the designer it's quite amazing except the one thing that i i don't quite dig i mean i think these are ready for painting i don't know because i haven't experimented with the paints i don't know what it requires like do i need to sand this stuff do i need to prime this stuff on the subject of sanding i think the answer is yes because check this out when i try to bring this piece of the insert out it grinds a little bit against the edges it's not such a great noise and then this one is even worse and that's just because the edge of the of the plastic you get lininess you get roughness see right there it's all those lines and they kind of act like grooves and they just provide a little bit of impedance so that's just the teensiest pain just to get that stuff in and out and if you'll recall i believe this piece is supposed to be blue so i will be spray painting a little bit but i think i just want to sand down the
edges before i do that and then the seasonal tile holders up here they're pretty good they make kind of like a zipper noise they're pretty good but i still think i can smooth them down just a little bit just like with spray paint i have no experience whatsoever with sanding all i recall of sanding this is why i didn't want to get an fdm printer to begin with because sanding in my brain takes absolutely forever that's kind of all we did in shop class we made one little project with some with some cut plexiglas and then we spent the next eight weeks sanding it and it was just like the most tedious awful thing in the world my hands were tired anyway i don't like the idea of sanding but hopefully it won't be too bad with this stuff and then with painting i don't quite know what to do i have a couple of products i have rust-oleum like an automotive filler primer and what that's supposed to do is it's supposed to prime the surface and use additional material to fill in any gaps and then you sand that down it's supposed to provide a smoother surface of course i could also try my thin corax white citadel primer that you've seen me using in past videos that won't do anything about the grooves on the sides of the boxes all that will really do i think is prime the surface for painting or i could just zap the surface with paint and see if the paint adheres well enough on its own without using any primer that's a possibility so what i'm going
to do is i'm going to take the piece that ripped off the chunk of my bed because that thing's useless and i'm going to try all three of those methods using techniques i learned from the mistakes i made in previous videos there goes sticky tack on the bottom of the thing stick it to a piece of wood so you can turn it around there's the filler primer there's the clorox there's the orange zap zab zap so here's that box and the results of my experiments this was the side that i put two coats of the automotive filler primer on and it filled it in quite nicely i was pretty impressed with the job that i did i scuffed that down a bit with some i think 150 grit sandpaper maybe it was a bit rougher than that and yeah it's nice it's smoother this is the side that had the citadel primer on it and i mean it did nothing it made it so maybe the paint could adhere but it didn't fill in any cracks or make that smoothness any better and that's with zero sanding and this is the side where i just didn't prime didn't sand nothing i just threw the spray paint on it and that adhered really well that's only one coat so you can see maybe it needs another coat down there but i think that looks pretty darn good so i think all i need to do is smooth down the sides of the boxes so that they slide in and out of the insert a little bit better and then just zap them with a few coats of the paint and bob's your uncle all right i think you know how the rest of this goes quick little soaky doke and scrubby dub water that apparently helps the paint adhere to the plastic dried off a little optional pat down just like at the airport and here we go spray paint time ugly side up there's blue there's the orange
and we're doing the green my spray paint technique still sucks at least i'm holding the cans a little bit further away from the pieces than i did in the earlier videos then after the bottom coats are all done wait about i think eight hours and i did the second coat really it's supposed to be a 24 hour drive but i'm impatient here we go top of everything it's hard to get inside those boxes lots of little corners and then here the paint was kind of like dripping i thought i could fix it maybe to correct the pooling by using a paper towel seconds after i turned the camera off i knocked the thing off its pedestal and it fell in a big pile of sawdust so don't don't do that just leave well enough alone there's a last coat of yellow and the pink this is how you stop sucking at something you just suck at it a whole lot until you don't that piece is really tough i think i'm going to have to do another coat after the video is done and these are the final ones with brown here we go the big reveal this is everything inside the box you can see we've got a little bit of box of maybe a quarter of an inch and no that's not because i didn't cut my shields down with scissors and lay them on top those aren't even a quarter of an inch thick so if you don't mind box lift we're fine it's not a perfect fit i'm not burned about it box farto meter four my goodness come on box and it does smell like spray paint my spray paint box by the way looks like a unicorn threw up in it here it is all the shields on top the instructions and i think this is adding a little bit of thickness these promo things anyway yeah look at it oh my gosh it's so pretty it's so pretty and it
looks exactly like the picture you guys oh my gosh i'll leave that in there but you can see i sanded down the edges stuff comes out there's stuff for the insert sorry the expansion the merchants bang look at that compared to last time and then tiny bit of rubbing but that is the action the action on that is impeccable i don't know if that's the right terminology but look oh look we did it we did it i i did it you watched but you watched a lot that was a inappropriately long video i hope you skipped ahead to this part anyway using the chapters feature i am going to take the the boxes that i split up and i'm going to put them on thingiverse for you to download in case that you have a small printer build volume like i do and you want to print this thing and i will also make this custom box that fits the chimneys and your promos a bit more nicely available the one nitpick that i'll make is about this box right here for the farmers the designer doesn't have the measurements quite accurate so it fits all of the the tiles but they don't fit in spring summer winter fall turn order boat properly that it's like one tile off so they're not arranged in the right order i think i'm going to redesign that for you and i'll have that up in the same remix on thingiverse i would like to know from you whether you thought this was all worth it or a gigantic waste of time
and money both yours and mine let me know down in the comments if you would print something like this if you're interested in seeing more inserts being printed in this series uh that's what the comments are for and i can't wait to hear from you thank you so much for watching this episode and i'll catch you in the next episode of bits please please did you just watch that whole thing oh hey to 100 this video click the badge to subscribe and then click the bell to get notifications when i've got new stuff you