TEMBO: Survival on the Savanna - How To Play
Games in This Video
1 game is featured in this video — it unlocks as you watch.
Transcript
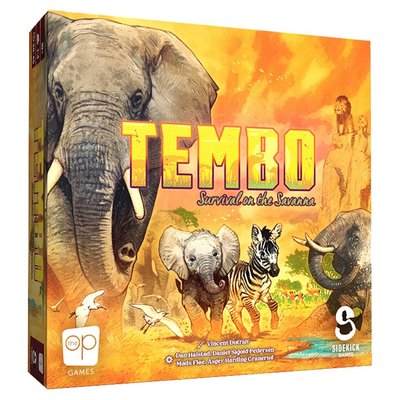
Hi and welcome to watch it played. My name is Rodney Smith and in this video we're going to learn the one to four player game Tempo Survival on the Savannah designed by Dan Halad Mass Flu Asgar Harding Granaroo and Daniel Skull Peterson and published by the OP in partnership with Sidekick Games who helped sponsor this video. The savannah is beautiful, but it can also be dangerous, especially for elephants making their way to its various destinations as they work to find food, protect the herd, and avoid attacks from lions on the prowl. Here, you'll have to work together if you want to survive and make your way to safety. So, join me at the table, and let's learn how to play. To set up, look for these journey tiles, which are numbered from 1 to 12 in their bottom right hand corners. The colors represent different difficulty levels with green being the easiest and red being the hardest. You can randomly choose a tile from the difficulty you want to play. But for your first game, they suggest using tile number one, which we'll use in this video. If you want an even easier, shorter game, you'll find this great journey tile, and you can use either of its sides instead.
These large square pieces are known as savannah boards. mix them face down and rotate them randomly as well. You'll then put them face up in random positions and orientations matching the layout shown for them on your journey tile. So in this case, they might end up like this. And if we were to play using this journey tile again in a future game, the layout would be the same, but the position and orientation of the different Savannah tiles might be different. The journey tile will also indicate the placement of this starting and destination board. So we add those to their matching spots as well here and here in this case. Now check the journey tile for the icons that represent this matriarch piece as well as the icons that relate to this lion and lioness.
The matriarch begins on the space for it here on the starting board. also put this energy token on the space showing your number of players of what is known as the energy track. The journey tile also shows the lioness and lion in these areas of the savannah boards. So we place them there with them lying down. Also on or near this destination board arrange these landmark standees. Then by the start board set each of these four trees upright. Every player now collects a player board and matching elephant pieces in their chosen color, returning the rest to the box. In this video, we'll assume we have two players using gray and purple. If you have three or four players, each person returns any two elephants back to the box, but with two players, you keep all of them. Then, no matter your player count, put any three of your elephants onto your player board. Although these might have different art, they are all treated the same during the game. Now find the five decks of cards and separate them based on their backs, giving each of them a good shuffle. Place the stack with three lines here onto the table. Then put the deck with two lines on top of them with the deck labeled as ones on top of those. This will create your draw deck, which you should keep within reach of the players. The cards with this back make up what are known as the support
deck. And you'll now add zero to five of them on top of your draw deck. The more you add, the easier you'll make the game. And for your first game, they recommend adding all five, but we'll add just two. You then place an equal number of these support tokens near the start board. So two in this case, returning all leftover support tiles and cards back to the box. The tiles with this back are known as events, which are used in the advanced mode of play, and we'll include these so I can show you how they work, but you can play without these as well. Shuffle the tiles and then reveal two of them to the right. If an event has this immediate effect icon, you resolve it once at the moment it's revealed. This is the icon for gaining energy. So, we'd go up by one energy on the track. When you lose or spend energy, move the token in this direction. And when you gain energy, you move in this direction. If an event shows this persistent icon, it means that its effect will modify the rules of the game for as long as it is face up on the table. And we'll learn the effect of this event later. Now, take the starting deck, which has this back, and deal each player three cards. You can examine your own cards, but keep them a secret from the other players and return any undeelt cards unseen back to the box. The game also comes with this reference that you can leave out for use when learning to play. At this point, the players may decide as a group if they want to spend
two energy in order to pick any single Savannah board and rotate it as they see fit. Now, why you might want to do this will make more sense once we know more of the rules, but just be aware you have this option. We won't use it in this case, but either way, you now randomly pick someone to be the start player. And that's the setup. In Tempo's Survival on the Savannah, you and the other players will be guiding your elephants across the savannah, discovering paths you can take as you attempt to reach your destination. You begin at the start board and need to arrive at this destination, but you must visit each of the game's six landmark destinations, which you'll find preprinted on the Savannah tiles. As you chart your course, you'll want to avoid lions who will attack your herd. If you can successfully visit each of the landmarks and bring your herd to the destination tile, you win. However, you immediately lose if the energy token reaches this final space of its track, or if any player loses all of their elephant pieces, or if both lions are in the same area as the matriarch, or if a player needs to draw a card from this deck, but it's empty. We'll see how all of that can happen as we go. So, let's jump right in. The game is played over a series of turns, starting with the first player and then going clockwise around and around the table. And on your turn,
you choose one action to perform. So, first, let's learn the action known as building the savannah. With this, you play a savannah card from your hand onto any open space of any savannah board. There are different types of cards you might have in your hand, but savannah cards look like this. They have a sandy background and some combination of circles. When playing a Savannah card, you pick any open area of any Savannah board and play it there. Each Savannah board is divided into four areas. One with a landmark preprinted on it and three others that show an icon in the middle. The card you place can go into any area that does not show a landmark and does not already have a card in it.
So between these two boards, this Savannah card could be placed here, here, here, here, or here. Also, when placing a Savannah card, pay attention to the arrow showing in its top corner here. If it's pointing up like this, it means that the card must be placed so that the arrow is pointing directly away from you. So, a player sat on this side of the table would have to play the card so that it's facing in this direction. If they were sat over on this side of the table, they'd instead have to face it this way. It's okay if more than one person is sitting on the same side of the table. All of those players simply add their cards facing the same way. If the card you are using for the build the Savannah action shows this rounded arrow instead, then you can rotate it in any way you like when adding it to the Savannah board. During this video, I'm going to place all of the cards so they're facing in this direction. That will just make it easier for you to see and recognize the icons as we learn about them later. But again, if I was seated on this side of the table, then I'd be placing this card in this direction. After placing a card, you then gain the benefits of the symbol you just covered up. There are a few different ones, but this means that all players gain two rested elephants.
Elephants on your player board are considered rested and any on the table are tired. So to gain two rested elephants, you just move them from the table onto your board. If you had fewer tired elephants than the amount the effect would let you rest, you just rest as many as you can. When covering an area with this icon, you pick any other player and they get to rest four of their elephants. As a player covering these icons, you'd gain five rested elephants and another player of your choice would lose two rested elephants. When a player would lose rested elephants, they move them from their player board back to the table. Also, when picking a player to lose two rested elephants, you could pick someone who had fewer and then they would only lose what they could. So, if they only had one, they would just lose one. If they had no rested elephants when you chose them, then they would lose nothing. The effects of this group of icons, which you might cover with a Savannah card, will make more sense once we know more of the rules. So, we'll come back and explain it a little later. So, again, when performing the build the Savannah action, you can place a Savannah card onto any empty area. It does not need to be adjacent to other cards. But with that understood, another type of action you could instead take on your turn is called placing elephants. And just so you know, for the rest of this video, I'm going to be placing and moving
pieces around on the table like you might see later in the game just to help create the examples I want to show you. For the place elephants action, play any one Savannah card from your hand, but ignore everything except its footprint icons here. You must now place rested elephants from your player board so that they fill the exact number of empty spaces in the savannah as the number of footprint icons and in that exact pattern. You must also respect the arrow shown here. So this means based on where you're seated at the table, the orientation of the placed elephants must match the orientation of the footprint pattern. If the pattern instead has this curved arrow beside it, you may rotate the pattern in any orientation you like.
We saw earlier that Savannah boards are made up of four different areas. An area that has a preprinted landmark or a Savannah card will also have a certain number of spaces represented by circles of different colors. Elephants are placed within circles and any parts of an area with no circles do not count as spaces. So elephants cannot go there. Some spaces will show an image inside of them. But these do not stop you from placing elephants there. Let's assume for a moment that we played this card in order to place elephants. That means this is the pattern here that we'll be using to place those elephants. Remember these elephants have to be rested. And right now we have three of them. And this pattern requires two. The very first elephant of a pattern that you're placing must be added to a space adjacent to another elephant anywhere on the board or adjacent to this matriarch piece. Being adjacent does include diagonally. So our first elephant might go here and then our next elephant would need to go here. This assumes that we're seated on this side of the table and we're respecting the orientation of the card as indicated by this arrow. Now, this also means we could not have started this pattern by placing the first elephant here because although it is adjacent to the matriarch, the next elephant in the pattern would need to go here and there's no space here obviously. So again, how we did it
before was correct. Let's assume we were now resolving this pattern. When placing elephants, it's okay if your pattern starts in one area and then crosses over into another. So, for example, this would be valid. Now, let's assume it was later and we were resolving this same pattern again using a different Savannah card, but now we wanted to start here. Pay attention to spaces that have this icon. They represent rough terrain, and you must fill it with two rested elephants instead. So when filling this pattern in, if we started here and then wanted to continue up in this direction within this first space, we'd have to put two elephants. The next space would just require one as usual. And then we have more rough terrain here. So we'd have to place two elephants again. Keep in mind, if you do not have enough rested elephants to place as many as are required by the spaces you need to fill, then you cannot play that savannah card to perform this place elephants action.
You cannot create part of the pattern. You have to be able to place the entire footprint pattern or you cannot place any of it. Sometimes a footprint pattern will show the rough terrain symbol crossed out like we see here. This means you must place elephants in the pattern shown as usual, but if any of those spaces are rough terrain, you ignore their usual effect and only add one rested elephant in each of them. So, if we were using this pattern to put elephants here and here, you would only add one elephant to each space, even inside this rough terrain. And remember, as always, the first elephant you place in a pattern must be adjacent to the matriarch and or another elephant in play, but that can include diagonally.
You'll also notice you do not have to be adjacent to your own elephants. Being adjacent to any elephant counts. Now, I had mentioned when placing elephants, you cannot partially complete the pattern of footprints shown on the card you played. You must add all of them. But there is another option. You can play any card, ignore the pattern, and instead just fill in a single space. So, I could play this card with my place elephants action and just use it to place a single elephant here. Now, if the space I choose is rough terrain, like it is in this case, then I would have to place two rested elephants there as usual. On the other hand, if the card I played to just fill in a single space showed these symbols, I then gain the benefit of only having to place a single elephant if the single space I choose to fill in is rough terrain. Speaking of filling spaces, some of them will contain images that provide various benefits. After placing all of your elephants during an action, you resolve any special spaces in any order. Empty spaces do nothing when filled and rough terrain we already learned about.
[snorts] Some spaces are attached and will show a matching pair of trees. As soon as both spaces are filled with elephants, whether by the same person or two different players, you then find the matching colored tree standey and lay it on its side, red in this case. You then gain the related amount of energy it shows. Each tree, except for green, will give you one energy, while a green tree will give you two energy. When gaining energy, you move your token the related number of spaces in this direction. You cannot advance past this final space. So, ignore any energy you would gain if your token is already here. Also, if you complete a tree pair when its related stande is already on its side, then you do not gain any energy in that case. The other type of space you might fill are water spaces. When adding a piece here, you gain three rested elephants, but you may not use those elephants during the turn that you gain them. This also gives us a chance to explain this event effect. It means that when putting an elephant on a water space, instead of gaining three rested elephants, you gain five. If this event was in play, you'd instead gain zero elephants when you fill a water space. Now, it is possible that both of these events could be in play at the same time. And if you ever have two persistent effects that contradict each other, only the leftmost
one is considered active. So filling a water space in this case would provide you with zero rested elephants. With that understood, we've now covered how you resolve a Savannah card when using it to place elephants. And when the action is finished, you put the card you used into a shared discard pile. Before moving on, we now know enough of the rules to be able to go back and fully explain a rule from earlier. When building the savannah, if you add a card so it covers a space with this symbol, you first gain three rested elephants and then you fill a single space following the usual rules. But if it happens to be in rough terrain, you only have to use one rested elephant. If you had no rested elephants to place, then you would just ignore that part of the effect. All right, we've now learned two of the possible actions you can take on your turn. either play a card to build the savannah or play a card to place elephants. But there is one other option. You may instead play a matriarch. To do this, you must have one of these matriarch cards in your hand.
And if so, you can play it as the action for your turn. You then follow the steps on the player reference card here, which we'll go through together. First, you pick up the matriarch piece and place her adjacent to any elephant already in the savannah. Or you may simply move her to any space adjacent to her current position, even if there are no other elephants adjacent to her after. When placing the matriarch, she ignores the effects of rough terrain, so you can put her into one of those spaces alone. But unless otherwise stated, the matriarch piece counts as a normal elephant for all other gameplay purposes. For example, putting her here fills in the other space of this tree pair and would provide the related benefit. Or we might add her to a water space and then we would gain three rested elephants.
Either way, after moving the matriarch, all players take back their elephants from the board and put them in their tired elephants area. Next, the players lose to energy and then finally all of the tree standees are put upright again. Now, whether you built the savannah on your turn or placed elephants or played a matriarch card, at the end of your turn, you draw cards from the deck until you're holding a total of three again. And remember, if you would ever need to draw cards and you cannot because the deck has run out, the players all lose. That said, anytime after you draw a card, stop and check to see what you're holding. This is important because if you have two matriarchs in your hand at the same time, you must stop and immediately play and resolve them. This is known as resolving a double matriarch and you follow the exact same steps as when you play a single matriarch. And even though it's a double, you still perform each step only once. However, when you get to the part here where you normally lose two energy, you instead lose five. And remember, if you ever reach this final space of the energy track, the players all lose. So this means when you have a single matriarch in your hand, you might want to play it as your action. If you don't and play something else, then you risk ending up with two matriarchs after drawing cards at the end of your turn, and that will force you to resolve them and lose extra
energy. After resolving a double matriarch, you also draw cards until you're holding a total of three again. And if this would cause you to be holding another double matriarch, you would immediately resolve it. If you flip over the player reference, you'll see how many matriarchs are in each part of the deck. As an example, there are four in the top section, which are the cards with this back. I should also point out if you're playing with the optional events, whether you just resolved a single matriarch or were forced to resolve a double after you immediately gain a new event. To do this, first return the rightmost event to the box. Then slide the remaining event over and reveal a new tile from the stack into the now empty space. If it has an immediate effect, resolve it once right away. Otherwise, it will have a persistent effect that will last as long as it remains in play. We're not going to go through all of the events in this video, but this page of the rule book explains how each of them works, so you can refer here if you have any questions while playing. All right.
Along with Savannah and Matriarch cards, the deck also contains lions. A lion card looks like this. And as soon as you draw one, you must stop and immediately resolve it from your hand. This will cause both lion pieces on the board to act. Each will move and then chase elephants, but you fully move and chase elephants with the lioness first before you move and chase elephants with the lion. When one of these pieces acts, it first moves. If it's lying down, then all it does for its move is stand up. Lions don't go into spaces and never block them. Instead, they're considered to be in the entire area their piece is in. So in this case, our lioness is in this area. If it was over here instead, it's considered to be in this entire area. If the piece had already been standing at the start of its activation, then it instead might leave its area. So let's pretend that's the case and this lioness is already standing upright when it would activate. It will now advance one area towards the closest area with elephants following the shortest path but never moving diagonally. So in an example like this, the closest area with elephants is here. Now remember the matriarch is considered an elephant. So if it was let's say here, now this area would be closest. The closest path to this area is going in this direction. So the lioness would move one area closer to here. Let's reset this and pretend
that our closest group of elephants was in this area. If you have a situation where there's more than one equally short path a lion could take to the nearest elephant, refer to this compass found on your start board. This will show a different value for each of the four possible directions a lion piece can take when moving. So if it has more than one option it could choose to move to the closest group of elephants, it will move in the direction that has the lowest value. In our example, the lioness could either go left or down to get closer to these elephants. And down has the lower value of three compared to going left, which has a value of four. So the lioness would go down. If a lion begins its move already in an area with elephants, it will not move and it just stays put. So again, when a lion piece activates, its entire move will be to stand up if it was lying down.
Otherwise, if it was already up, it will follow the shortest path to the nearest elephant. Or if it started in an area with elephants, it will stay put. Either way, no matter what happened when a lion resolved that step of its activation, if it is standing in an area with any player elephants, those elephants are removed from the game and returned to the box. So if our lion was here, each of these elephants along with this one would go back to the box. If the matriarch is in the area, it is not removed. But as an added penalty, each player removes one of their rested elephants on their player board from the game, returning it to the box. If a player does not have any rested elephants to remove in that case, they lose a tired elephant instead. And if they had no tired elephants, they wouldn't lose anything. If a lion piece caused any elephants to be removed from the game, even just from being in the same space as the matriarch, that lion then lays down. If the lion caused no elephants to be removed, then it would stay upright. And remember, the lioness completes her full activation, potentially moving and attacking elephants, and only then do you check the lion and complete its full activation. I should also point out when building in the savannah or placing elephants, lions do not interfere with that. Just pick them up and put them in an empty area of a new savannah card, if
they were in that area and ensure that they're not blocking any of the spaces so you can still put elephants where you want to go. So, now that we've seen some of the dangers of the savannah, let's take a moment and see one of the ways you can gain an advantage while playing. During setup, you put a number of support tokens in play based on the number of support cards you added to the deck. Before taking any action on their turn, a player may spend as many support tokens as they like. For each, you resolve any one of its four listed benefits. Either gain one energy or gain two rested elephants or rotate the next card you use, even if you would normally not be allowed to. or place one rested elephant following the normal rules. And if it's going into a rough terrain space, you only need to fill it with one elephant. Each time you use a support token, afterwards, return it to the box.
All right. Now, let's learn a very important element of the game. Landmarks. To win, you must visit every landmark preprinted on the Savannah boards, and each has a certain number of purple outlined spaces. When all the purple spaces of a landmark are filled with elephants at the same time, which could include the matriarch, stop and put the related landmark stande near that area. This indicates that you have visited that landmark. If and when elephant pieces are removed from those spaces later, the landmark still counts as being visited. Once all of the landmarks have been visited, you are then allowed to place elephants on this final destination board following the normal placement rules. Until then, these spaces are considered locked and cannot be used. But once unlocked, any of these can be filled. You'll notice there are two purple spaces here. And as soon as those are filled, the game ends and the players immediately win. As a reminder, the players immediately lose if the energy token reaches the final space of its track, or if any player would need to draw a card at the end of their turn, but there are none left, or if both lions are ever in the same area as the matriarch, or if any player has no elephants left. This would mean having none that are rested, none that are tired, and none anywhere on the savannah. I should point out as this
game is completely cooperative, you can talk openly with the other players about what you want to do on your turns and how you can help out. And while you are allowed to say anything about your cards, you may never show them. This ensures that no player at the table has so much information that they might be tempted to tell the other players what they must do on their turns. Players should work together, but each should be free to make the final decisions about what they want to do on their own terms. Also, if you're looking for an extra challenge, remember that during setup, you can randomly pick from the easy, harder, or most challenging Savannah arrangements, and you can modify how many support cards and tokens you use. There is also a campaign mode where you will attempt three games, one after the other, beginning from green and making your way up to red. and your performance in one game will dictate your resources going into the next one. Win all three games and you've completed the campaign.
You'll also find rules for solo play if you want to tackle the game all on your own. But the campaign and solo rules I'll leave for you to discover on your own. Otherwise, that's everything you need to know to play Tempo Survival on the Savannah. If you have any questions about anything you saw here, feel free to put them in the comments below and I'll gladly answer them as soon as I get a chance.
You'll also find forums for discussion, pictures, other videos, and lots more over on the games page at Boardamegeeek, and I'll put a link to that in the description below. And if you found this video helpful, please consider giving it a like, subscribing, and clicking that little bell icon so you get notification anytime we post a new video. And if you'd like to support us directly, you can join our Patreon team, which I'll have linked below. But until next time, thanks for watching.