Parks (2nd Edition) - How To Play
Games in This Video
1 game is featured in this video — it unlocks as you watch.
Transcript
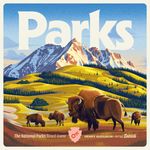
Hi and welcome to Watch It Played. My name is Rodney Smith and in this video we're going to learn the one to five player game Parks Second Edition designed by Henry Audubon and published by Keymaster who helped sponsor this video. The US National Parks are full of wildlife and nature's beauty each having unique qualities and wonders to explore and you aim to make your hikes the best experiences possible. So, fill your canteen, put on your hiking boots and join me at the table as we learn how to play. To set up, put the game board in the center of the play area along with the included resource trays. These will each contain mountain, sun, water, forest, wildlife and photo tokens. The tokens with these backs are the canteens which you'll shuffle face down by the board revealing three to put into these spaces. Set this shutterbug badge nearby and also put this photo bonus tile here flipped to the side showing your number of players.
We'll set up a two-player game in this video so we use this side. These are the spring, summer and fall season bonus tiles which you organize and separately shuffle into stacks drawing one of each to add face up to the matching spots on the board here returning the rest to the box. Now shuffle the park stack which has this back and place it here dealing three cards from it face up into these spaces. The cards with this back make up the gear deck which you also shuffle and put into the space for them here on the board dealing three of them face up. The tokens with this back are known as the trail site tiles which you shuffle adding a random one face up onto each of these spaces for them, leaving the one labeled as parks empty.
Each space that these sit on top of, including the one labeled as parks, are known as trail sites. Starting at the second trail site and going to the right, you'll alternate adding a sun and water token to each trail site, so that it looks like this when you're done. Now, roll this trail die and using this table found in the rulebook and here on screen, find the trail site with the related token above it and put this shutterbug token beneath it. After, put this trail die at the trail site with this token above it and the side the die is on does not matter. Now, each person collects a board and two hikers in their chosen color. Keep the board in front of yourself, but move your hikers to this trailhead space of the board here. Then, have each person draw a canteen token from the stacks and put it face up into the top left space of this canteen area of their board. Also, have each person collect one of these campfire tokens. If you have four or five players, leave it face up. Otherwise, flip it face down.
Now, shuffle the double-sided passion cards, which look like this, and deal one to each person. They'll keep theirs in the passion area of their board with the side face up showing just one white box. There's an optional camping mode, which you can choose to play with and we will, so I can teach you how it works. To set it up, shuffle these double-sided tiles, randomizing their sides, and then stack three of them onto this space of the board, returning the leftover one back to the box. Then, add one of these tent tokens to each of the spaces marked with one of these icons. So, it looks like this when you're done. Now, whether you're using the optional camping mode or not, give the person who last visited a national park this first hiker token, or you can just choose someone randomly.
And that's the setup. In Parks Second Edition, you and the other players will be hiking throughout the various seasons as you explore different trails, visit parks, take photos, and encounter a variety of wildlife, at a safe distance, of course. Through these hikes, you'll receive points representing your enjoyment, and the player with the most points at the end of the game wins. The game is played over three seasons, also known as three rounds, and each round is broken into turns, starting with the first hiker, and then going clockwise around and around the table. During these turns, the hiker pieces will travel along what is known as the trail, which begins here at the trail head, and then goes from left to right through each of these boxed spaces, known as trail sites, until it reaches the final trail end space. When it's your turn, move either of your hikers from wherever they currently are as far towards the trail end as you like, stopping in any space that does not currently have a hiker, yours or another player's. You'll then resolve the benefits provided by the space you move to. And why you might want to go to certain sites will make more sense once we know more of the rules, but be aware, you cannot go to a site if you're not able to at least partially resolve the trail site tile there. And we'll learn how these are resolved shortly. After you've moved a hiker and resolved its space, the next person in clockwise order picks one of their hikers to move
to a space along the trail that doesn't currently contain a hiker, and resolves its space, and then the next player goes, and so on. Just remember, you can only move one of your hikers on each of your turns. So, as the blue player, on my next turn, I could advance this hiker again, or advance this one instead. Now, I had mentioned you cannot move to a space with another hiker. But, there is an exception. If your campfire token is face up, then you are allowed to advance to a space with another hiker, yours or another player's. And then you flip it face down, and it will stay face down for the rest of that round, meaning you will not be able to enter another hiker's space again that season. And remember, in a two-player game, this token begins face down. We'll see how it can be flipped face up a little later. Eventually, one of your hikers will reach the trail end, and it will stay there for the rest of the season. And that means on future turns, you'll have to advance your other hiker instead. And remember, when moving, you can only advance towards the trail end. You can never move backwards.
Once both of your hikers are at the trail end, your turns will be skipped, while the other players continue taking turns with their remaining hikers until the season ends. So, with the general rules for moving understood, let's see what happens when you enter each of the different types of trail sites. First, if your hiker arrives at a trail site with a sun or water token in it, you collect it and add it to an empty space of the backpack area of your board, which is divided into 12 spaces. Each can hold one token, and these are known as resources, which represent either sun, water, mountain, forest, or wildlife. Wildlife resources come in different shapes, but they're all treated the same way. You can collect more than 12 resources during your turn, but if you have more than 12 at the end of your turn, decide which ones you want to keep and then discard back down to 12. We'll see how resources are used a little later. For now, it's enough to know that the first person to land on a space with a sun or water resource token collects it and it is not replaced afterwards.
Each trail site will have a trail site action at the top, which you also resolve after advancing to it. In this case, the player here gains one forest resource from the supply. Again, as with all resources, they go into an empty space of your backpack. Entering this site with this tile gains you one mountain resource from the supply. Well, entering the trail site with this action gives you two sun tokens from the supply. Entering this site with this trail action will give you two water tokens. Water is unique because you can either place it in your backpack or into any one of these three empty water spaces of your canteen. But why you would want to add water here will make more sense once we know more of the rules, so we'll talk about this later.
If you enter a trail site with this action, the symbol here means any one resource and this symbol represents the wildlife resource. So this is saying you must now trade in any one resource from your backpack to take a wildlife resource from the supply. Right now, I don't have any resources in my backpack, but remember, when we first entered this space, if there's a water or sun resource there, you collect it. So now I would have to trade in this water resource and then I would gain a wildlife resource. As we know, wildlife are another type of resource, but they're special because you can use a wildlife token in place of any other resource you might need to spend during the game. I should mention, the resources are limited, so if a type has run out in the supply when you would normally gain it, then you gain nothing.
And remember, you can only move to a trail site if you can at least partially resolve its related trail site tile. So, you could go to this site where you'd collect two water if there was only one water left in the supply. You would gain just that one and ignore the other. But, if there was no water in the supply, then you could not go here. If the trail site you move to has this shutterbug piece on it, in addition to the other benefits the space might provide, you now take this shutterbug badge from wherever it is. At the beginning of the game, it will be beside the board. But if it's with another player, then you take it from them. Either way, you put it by your backpack for use later. When resolving this trail site action, you either return any one resource you have to the supply and take a photo, or spend nothing and gain a canteen token, which these symbols represent. If you choose to take a photo, collect any one of these square photo tokens from the supply and put it in this area above your board. Each photo will be worth one point at the end of the game, which this symbol represents.
When you take a photo, if you have this shutterbug badge, you may choose to spend one more resource to gain one more photo. But you can only do this at most one time on each turn where you took the photo action. Also, if the supply of photos is ever running low, a player who has at least five of them should trade five in and collect one of these album tokens, which has the same value as five separate photos. Going back to this trail site action, instead of paying a resource to take a photo, you can use this action at no cost to resolve this canteen symbol. Do this by either taking any one face-up canteen token from the board or a face-down one from the supply. If you take one from the board, immediately replace it with one from the stacks. Either way, you now add the token you collected to an empty circle space of your canteen area. Nothing happens after adding a token here, but let's pretend it was later in the game and my canteen looked like this. Anytime you gain a water resource, instead of adding it to your backpack, you can instead add it to any one empty water space of your canteen, and then after, you can choose to gain the benefits showing on any canteen tokens to the left and or right of it. In this case, I would gain two suns and could then spend one resource to gain a photo token. And you can resolve these canteen tokens in
either order. If you add a water to a row with just one token, you only gain the benefit of that single token. If you were later to add a canteen token to a row that already has water in it, you do not gain its benefit, though you will be able to gain its benefit in the next season, as we'll see. All right, moving on. If you're resolving this trail site action, you'll now purchase gear. To do this, spend the sun cost showing in the top right-hand corner of any one of the face-up gear cards, and then collect it, or spend two sun and take the top card from the gear deck without looking at it first. If you took a face-up gear, slide any remaining gear to the right to fill in the gap, and then draw a new replacement from the deck to fill in the empty space. Gear you collect is added to this area below your board, and there's no limit to how much gear you can collect over the course of the game. Each gear will have an effect you can resolve at its bottom when it would apply. Any gear you have is immediately ready to use and remains active while hiking and between sessions. But, you can only use the benefit of each gear you have once per turn. For example, when gear has the word at within its effect, it means you get the benefit on the left when you're at the trail location shown on the right. So, when this player's hiker moves to a trail site with this matching action, they would be able to resolve
this effect which allows them to spend anyone resource they have in order to collect a photo token. If the effect says when, that means you gain the benefit on the left anytime something causes you to do the action on the right. If you have more than one gear, you can use any number of them during your turn in any order if they would apply. In this case, if we had the rain gear as well as the wide-angle lens, then after resolving this take a photo action from this gear because we had arrived at this site, then we would also gain two water resources from this gear because we had just performed the take a photo action from using this gear's effect. I'll also show you this gear effect which means that you flip your campfire token face up when your hiker arrives at the related trail site. We're not going to go through all the different types of gear because how they work is printed on them. But, just know resolving a gear's effect is optional.
All right. Now, let's take a look at another trail action. This one means that you roll this trail die and gain the benefit printed on it. So, here we'd take a wildlife token. Here we'd gain a canteen token and so on. And that brings us to the last trail action which is printed directly on the board and is always located at this trail site. This gives you two options. You either reserve a park or visit it. To visit a park, spend the resources showing in this white bannered area on any one of the cards in this face-up display by returning them from your backpack to the supply and then collect it. So, here I would need to spend one mountain and three water resources and a wildlife token and then I'd be able to take this park and put it to the right of my board in this visited parks area. This would be worth the points showing here at the end of the game. And you can visit as many parks as you want during your turn as long as you can pay the resource costs of each one. So, if we had two more mountains and one sun in our backpack, which we do here, then we could pay them to also visit this park as well. If a park you visit has this instant action symbol, then once, as soon as you collect it, you gain the benefit on its right. So, in this case, we'd now collect a wildlife resource token. And resources you gain this way might help you immediately visit another
park. Once you are finished visiting parks with the parks action, draw new ones to fill in any empty spaces. That said, instead of visiting parks, you can reserve a park with this action. To do that, pick any one face-up park or draw the top one from the deck. If you take a face-up card, replace it with one from the deck. Either way, add the collected park to your reserved parks area. You can only reserve a single park with each parks action, but you can have any number of them in this area during the game. In the future, if you're resolving a parks action along with visiting ones in the face-up display on the board, you You also visit parks in your reserved area by paying their related resources and then moving it to this visited park side of your board, gaining its instant benefit if any. Also, be aware there is no penalty for reserving parks that you do not visit later. They just will not be worth any points at the end of the game. In this way, reserving a park ensures another player will not visit and remove it from the board while you're trying to save the resources necessary to visit it yourself.
Now, before we move on, there are some extra rules if you're using the camping mode. This mode added tent markers and campsite tiles to the board. If your hiker enters a space with a tent, you have two options. Either visit the trail site as normal, gaining its usual benefits as we've discussed so far, or instead, take the tent from that spot and put it onto any one of these four spaces of the campsite tile there that does not already have a tent, and then resolve all the symbols in that space. Just know, if you choose to perform a campsite action, you do not resolve any of the other actions or benefits on the space your hiker moved to. You do not even collect a sun or water resource token that might be sitting there. All right, whether using the camping mode or not, we now need to learn about passion cards. Each player will have one of these that lists an objective at the bottom. For example, this objective wants me to visit two different parks, which each have at least one sun in their cost. As soon as you complete your passion's objective, which in this case would happen as soon as you have two parks like this in your visited area, you'd flip your passion over and pick one of the two possible effects on it.
An effect that shows this symbol to the left is known as a gear effect, which is resolved just like any other gear effect. Or you can instead choose the end game bonus effect which has this symbol. This will give you a unique way to earn additional points at the end of the game. After deciding which effect you want, slide your fulfilled passion under your board so the benefit you chose is still visible. Like many benefits that you can gain during your turn, it's possible that the effect of a passion card you just completed might also help you with another action you're performing in that same turn. We're not going to go through the effects on all the passion cards as how they work is shown on them, but this area of the rulebook describes them in detail if you have any questions while playing. With that, it's time to talk about this final trails end space. Eventually, you'll advance a hiker here either by choice or because it's the only space left for your hiker to go to. And just so it's clear, when you advance your hiker, you really can go to any available space and that means you could move a hiker right from the start of the trail directly to the trails' end, skipping every other space. Now, I wouldn't recommend doing that, but you can do it. When a hiker comes here, pick any one of these three rows to assign it to. If you're the first person to add a hiker to that row, put it in the small box here. You then gain related benefit as well as the
effect on its left. So, going here would get me a wildlife token and I could spend any resource, including the wildlife I just gained, to take a photo. Any other person who comes to the trail end later and puts their hiker on this row, adds it to this section and they only resolve this photo effect, but not the bonus. And there's no limit to how many hikers can be moved to and resolve these actions. All the symbols here will be familiar except for this one. The first person to put a hiker on this row goes here and then takes the first player token from whoever has it. If they already have it, then they keep it. And those are how all of the trail spaces are resolved. And after taking your turn to move a single hiker and resolve the related space, the next person in clockwise order takes their turn. And turns will continue like this until there's only one player who does not have hikers on the trail's end space. On their turn, they must move each of their hikers to the trail end space resolving the trail end actions those hikers are assigned to. So, as an example, if this player moved their last hiker here, now on this player's turn, they must move their hikers to the trail end. Maybe putting the first one here to gain the bonus and this action and then putting this one here to gain this action. With all the hikers at the end of the trail, the current season is over
and it's time to resolve the end of the season. First, we resolve the end of season bonus for our current season. The first season or round of the game is spring and this is the end of spring bonus tile which will want you to check to see who has the most of something. In this case, the most water resources. Whoever has that gains the benefit below. Here, they get a canteen token. If multiple players are tied for having the most, then they all gain the benefit. All the bonuses will make sense from the rules we know, but I'll just clarify that this spring bonus which checks for the most water only counts water in your backpack, not water that's also in your canteen. Either way, once you've resolved the end of season bonus, flip it face down. When you get to the end of the second round, which is summer, you'll check to see who has the most of what it lists. In this case, the person with the most instant effects on visited parks. They will then roll the trail dice twice, gaining the benefits of both rolls. At the end of the third round or fall, the person with the most of what it asks for will gain bonus points to add to their final score. When you finish resolving the scoring bonuses for your related season, each person now updates their board. First, return all the water tokens from your canteen to the supply. This means in the next season, you'll now be able to activate your canteen tokens here by refilling these spaces. Then, relight your
campfire if it's face down by flipping it face up. After, return all of the hikers to the trailhead. Then, collect all of the trail site tokens. And once you have them all gathered together, give them a good mix, and then place them in a random order back into the spaces for them on the trail, so it looks something like this when you're done. Then, move the trail die so it's under its related action tile. Any sites that do not have their water or sun tokens on them from the original setup, gain them from the supply. And you'll find an icon reminding you of which types of resources go into each of the trail site spaces here beneath them. Now, roll the trail die and put the shutter bug under the related trail site. Then, return the rightmost face up gear card to the box, sliding the leftovers to the right and drawing a new one from the deck to fill in the empty space. If you're using the camping mode, you now return all of the tents to their original trail sites, and return the topmost campsite tile to the box. Then it's time to begin the next season, starting with the person who's holding the first player token.
Once you reach the end of the third season, it's time for final scoring. Here you first check to see who had the most of the required resources on the fall bonus tile and award them the points showing there. If players tied for having the most, they all gain those points. Now add the points showing on all the parks you visited and any in your reserve are worth nothing. Each person now earns one point for each of their photos and five points for each photo album they traded for photos in for. Then the person who took the most photos scores the extra three points showing on this photo bonus tile. If you have three or four players, the tile would be on this side and instead the person who took the most photos earns four points and the person with the second most earns two.
Players who are tied for first or second all get the related points at those positions. If you completed your passion objective and chose the end game bonus on it, you earn those points now. Then finally, the person with the first hiker token gains one point. Now the player with the most points wins. In the case of a tie, the tied player who visited the most parks wins and if there's still a tie, the tied players share the victory. The game also comes with components and rules for a Ranger Teddy hiker you can include in two-player games to add an additional challenge. And there are also components and rules for a solo mode as well. But those rules I'll leave for you to discover on your own. Otherwise, that's everything you need to know to play Parks second edition. If you have any questions about anything you saw here, feel free to put them in the comments below and I'll gladly answer them as soon as I get a chance. You'll also find forums for discussion, pictures, other videos, and lots more over on the games page at BoardGameGeek, and I'll put a link to that in the description below. And if you found this video helpful, please consider giving it a like, subscribing, and clicking that little bell icon so you get notification anytime I post a new video. And if you'd like to support the channel directly, you can join the Patreon team, which I'll have linked below. But, until next time, thanks for watching.