Thunder Road: Vendetta - How To Play
Games in This Video
1 game is featured in this video — it unlocks as you watch.
Transcript
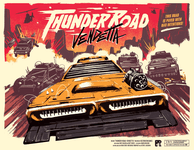
hi and welcome to watch it played my name is Rodney Smith and in this video we're going to learn the two to four player game Thunder Road Vendetta designed by Brett Myers and Dave Chalker and published by restoration games who helped sponsor this video this reimagining of the 1986 classic retains the same Relentless road racing at Breakneck speeds with danger around every swerve but also adds in some new twists to all the car smashing and Chopper fire so join me at the table and let's learn how to play to set up go through these various double-sided Road tiles and pay particular attention to the chapter headings here at the top look for chapter one and notice that every tile has an A and A B side use either side of this chapter and place it on the table to become your rear Road tile then Shuffle the remaining tiles randomizing which sides are face up to create the road tile stack you'll now draw and set the top tile in front of the rear one this becomes the Middle Road then draw one more to be the lead tile these make up the first stretch of highway that the players will be racing on set the remaining tiles and this Finish Line nearby for use later all all the tokens with this back are known as the hazards which you'll Shuffle face down and then without looking at their other sides you'll add one face down to each of the spaces on the highway marked with this matching red Hazard symbol The Only Exception is the starting rear tile
only add tokens to the symbols showing your number of players we'll assume that we have three players in this video so we'll leave these two player only spaces empty it'll look something like this when you're done and then you keep the leftover Hazard tokens in a pile nearby Now find the damage tokens which have this back and shuffle them into a face down pile nearby and with them put the FX Dice and car wrecks each player now picks a color and collects the matching command tile and three dashboards labeled as small medium and large you can place these in order from small to large to the right of your command tile you also collect the three matching colored cars Chopper and four movement days each car is related to one of your three dashboards based on their size this one for your small car one for your medium vehicle and this one for your largest racer every player now sets their cars to the left of the rear Road tile in what is known as the starting area players now roll their movement Dice and the person with the lowest total becomes the first player if there had been a tie for the lowest value all players re-roll until there's no lowest total tie once the first player has been decided they collect this gray Road die they now roll and set it by the highway where it can easily be seen the dice the players role to determine the first player should not be changed because their values will be used at the start of the game as we'll see and that's the setup in Thunder Road
Vendetta you'll use your dice to propel your vehicles down the track trying to avoid hazards Choppers and a variety of dangers that said if you can create some danger for your opponents perhaps by slamming into them or leaving them spun out in the dust well that's just part of the game be the first player to send any one of your cars across the finish line or be the last player with cars still in the race and you win the game is played over a series of rounds and each is broken into turns but before players take any turns at the start of a round they each roll their four dice and the first player rolls the road die now this is skipped for the very first round of the game because we already did that as part of the setup to determine who would be the first player turns are now taken starting with the first player and going clockwise around and around the table and on your turn you'll resolve four steps in order beginning with the assigned step here you pick any one of your unassigned movement Dice and add it to the center of any of your car dashboards that don't have a die anywhere on it yet the value on the die will determine how many spaces that car moves in a later step we'll learn a few other ways that dice can be assigned to dashboards but those will make more sense once we've learned more of the rules so we'll wait and come back and explain that later now after assigning a single die to a car dashboard you move to the activate a command step of your turn and this will also make a bit more sense once we know more of the rules so we'll come back to
this later as well and instead go right to the third step of a player's turn moving here you move the car you assigned to die to in the first step of your turn spending its value as movement points so in this case we'd be able to move our medium car four spaces the first move any car makes is to enter any space of the rear tile's back Edge after that each move it makes must be into one of the three spaces of the car's front Arc so here here or here in this case and each space shows a type of terrain which costs an amount of movement points to enter for example gray spaces are known as road while these lighter spaces are off-road and both cost one point of your dies move value to enter so with four points at the start of the game I might go one two three four some spaces might show these Hazard symbols printed on them but if they don't contain a hazard token they have no extra effect on your car during the move step you must move the full amount of your car's assigned die unless something stops you now to learn about the rest of the terrain I'm just going to put cars in various spaces of the board to create the situations that we need to learn about for example dark brown spaces like this are known as mud and cost two of your movement points to enter so a move from here to here would cost one two three four points however if you have only one point of movement left during this step you can still use it to enter a muddy space so if I was here and I had three points of movement I could go one
two three now spaces like this with a double yellow border around it are impassable and a car that enters an impassable space is eliminated and I'll explain what happens to an eliminated car a little later if you're curious yes you can choose to drive into an impassable space on on purpose and eliminate your own car if you want and when you're playing you may actually find reasons to do this as turns continue in the game more and more cars will enter the board and you can choose to drive into a space with another vehicle even one of your own if you do this you lose any movement points you might have had remaining and then you stack your car on top of the one that was already there you then immediately resolve what is known as a slam and you do this by Rolling both this slam and Direction die after if one of the vehicles is larger than the other the player with the larger vehicle May re-roll both dice a single time but if they choose to do this they must re-roll both dice a player could even do this if they controlled both cars in a slam but either way you now resolve the final result start with the red slam die this shows a solid white symbol to indicate either the bottom or the top car that car is then moved in the direction of the Direction die the solid yellow symbol on this die represents the car's current position so rotate this die so that it matches the same direction as the spaces on the board the yellow
outline space is the one the car on the red die now moves into so in this case the bottom car moves into this space whereas a result like this would have pushed it straight ahead it's also possible that a slam would cause a car to go into a space with another car and then another slam would have to be resolved there and you'd keep resolving slams until each space has only one road vehicle in it now although a slammed car loses any remaining movement points it might have had you still resolve any effects of the space a car is slammed into speaking of which let's go back to learning about the various types of spaces you might drive or be slammed into during your move step if you enter a space with one of these Hazard tokens immediately turn it face up and resolve it these will have various effects so let's go through each one treat this as a regular Road space costing one point of movement so if you have move points left keep driving if you reveal a mud space it costs two points of your movement as normal and again you keep driving if you have points left over after on this tile we find an oil slick and after entering this Hazard immediately roll the Direction die and resolve it moving your car into the indicated space a move you're forced to make from an oil slick does not cost any movement points so if you have any left over keep driving that said if an oil slick was to send you into an impassable space your car is eliminated I should mention if an oil slick or any result of
the Direction die would force your car off the road it's also eliminated you can also be slammed off the road and yes if you're curious you can choose to drive or slam your own car off the road and eliminate it on purpose us all three of the hazards we've seen so far stay on the road after they're revealed to potentially affect other vehicles however these next two are discarded after they're resolved if you reveal this Hazard it means there was a car wreck on the road so add one of these pieces to the space and place your car on top of it you then resolve a slam as we learned about earlier and racks are considered small vehicles for the purposes of determining slam re-rolls if the hazard reveals a mine your car loses any remaining movement point it has and takes a damage anytime your car takes damage reveal one of these tokens and resolve its effect for example here you move one space in the direction shown and after a damage effect is resolved you place the token Face Down Under that car's dashboard with a single damage the car still functions as normal however if a car takes a second damage it becomes inoperable and you flip its dashboard face down you also turn the car backwards on the road as a visual reminder of this and while inoperable a car can't take additional damage and can't be assigned any movement dice during the first step of a turn but it
can be affected by FX dice for example if it's slammed as we saw earlier when you take damage you draw the top token from the stack flip it over and resolve its effect skid we learned about earlier Dent has no printed effect but you still assign it to your car as damage then there's also shrapnel dazed and blast off these last two use this stunt die and I'm going to leave these effects for you to discover when you're playing if you draw one of these just refer to the back of the rule book where it explains how they work the important thing to keep in mind is that as soon as you have any two damage tokens assigned to your car it becomes inoperable because an inoperable car can't be assigned movement dice it's basically useless but it's not considered eliminated because as we'll see later in an operable car can be repaired allowing it to drive again however when a car is eliminated it can't be repaired and instead you immediately remove its model and dashboard from the game if it had a die you keep the die but it can't be used again this round so just keep it separate from any other unused dice you still have and any damaged tokens it might have had are now shuffled back into the damage token pile okay with that we've covered all the unique symbols you might find on Hazard tokens and as mentioned most will stay on the board except for mines and racks which get discarded after they've been resolved once a hazard token has been removed from its space the hazard symbol here has no effect on the cars that enter it in the future these Choppers
are not road vehicles so they don't enter the board the way cars do and we'll see how they enter the game soon but just know a car can move through a chopper space without penalty however if your car is in a chopper space at the end of a turn yours or another player your car is eliminated even if the chopper is also yours with that we've covered the core rules of movement so now let's discuss this road die which was rolled at the start of the round on each player's turn if their car starts to move step on a road space which you'll remember are these gray ones and then only moves on Gray Road spaces then after they can choose to continue moving using the value of the road die this extra movement doesn't have to be on road spaces and you don't have to use this die if you don't want to but if you do you must move its full amount I should mention you can also use the road die when a car enters the race from off the board as long as the first space it enters is a road and the rest of its move that turn is only on other Road spaces also notice the oil slick Hazard has a gray background so it counts as a road space for being able to use the road die on your turn as long as it doesn't Force you onto a non-road space first so with that we've covered the assign and move step of your turn so I just want to go back to the assign step to explain something I skipped over earlier at the beginning of the game everyone's cars start off the board but with each turn taken new cars enter the
race and as we saw cars can take damage become inoperable or be eliminated when a car is inoperable its dashboard is flipped face down and dice can no longer be assigned to it when eliminated the car and dashboard are removed from the game in both cases you have fewer cars to assign dice to and remember during the assigned step of your turn you have to assign a die to a dashboard that doesn't have one already but in this case that's not possible only in a situation like this can you assign a die to one of your dashboards that already has one but it must go onto this Coast space of a car that moved previously this round later if you're forced to Coast again which we would be in this case the 2 that's here act as a reminder that at most each car can have two coasting dice assigned to it after assigning a coast die to a car during your move step you move that car exactly one space ignoring the value on the die itself if you coasted you may not use the road die and keep in mind you cannot assign a die to coasting if you have an operable car with no dice assigned to it yet okay there's one other assigned step rule we can now go over once per round and that's very important it's once per round not turn in addition to assigning a die to occur you may also add an unused die to one of the four command spaces found on the corners of your command board however you can't do this if your movement die was assigned for
coasting this turn immediately following the assigned step of your turn is the command step now earlier we skipped right from your assigned step to your move step because the command step is only resolved on the turn you added a die to your command board so now let's learn how that command step works during this step resolve the command die you assigned that turn if the die was assigned here on a previous turn it's ignored now to add a die to this Nitro corner it must have a value from one to three and then you add the value showing here to the move die your car received which could result in a total movement higher than six and as usual you must move the full amount only a six can be assigned to the repair command and then during the command step you Shuffle one of the damage tokens from any of your cars that have damage back into the damage token draw pile now if the car had been inoperable this makes it operable again and then may be moved on a later turn this round if you still have dice remaining that you could assign to it only a three four or five can be placed on this drift command which allows you to ignore the first time you enter a space with another road vehicle that turn don't slam it just keep moving any car you pass through after that is slammed as normal now that said if the very first car you encounter is on the last space of your move then you have to slam the final command is
the air strike and any die value can be placed here to resolve this add your chopper to any empty space of the board which is any without a road vehicle Chopper Hazard token or impassable terrain after the chopper is placed it may then shoot a road vehicle even your own in any space in its front Arc here here or here if you have more than one target you pick just one and also note a chopper can't Target another chopper with a valid Target picked you shoot by Rolling this shooting die and if its letters match the size of the targeted vehicle M for medium s for small and L for large then the vehicle is hit and takes a damage by a drawing and resolving a dam damage token you then add that damaged token to the vehicle's dashboard as usual the smaller the car the fewer sides that hit it but this side counts as a hit for any car the chopper can also shoot one of these wrecks this counts as a small vehicle and is removed from the board as soon as it takes one damage just know although a chopper can enter the board during the very first round any that do won't shoot nothing shoots until after the first round of the game so you may want to wait and bring them out later also note Choppers can't shoot cars in their own space but instead as we learned at the end of any player's turn even in the first round all cars in the same space as a chopper are eliminated okay we now
know the first three steps of a player's turn first they assign a die to occur and may assign another die to a command once per round then they resolve their command if any and the third step is moving the car they assigned a die too the final step is the shoot phase here the car you moved this turn May shoot its guns but like Choppers nothing can shoot during the first round of the game so for these examples we'll assume it's the second round just like a chopper a car can shoot a single road vehicle in its front Arc it can even Target one of its own cars but it can't shoot a chopper it can Target a wreck though treating it as a small car a car even resolves its shoot step whether it resolved to slam that turn or only coasted that said in an operable car can't shoot otherwise a car shot is resolved just like a chopper shot you roll the shooting die and land a hit if the target matches the size shown on the result Choppers don't shoot during this step of the turn Choppers only shoot during the command step of a turn where they were brought onto the board and those are the four steps of a turn assign a die resolve a command if necessary move and then shoot at the end of your turn if you had assigned a die to the center of a car's dashboard slide it to this end turn space as we learned this car cannot be assigned a movement die later but may be able to Coast if the previously explained conditions
allow at the end of every turn also check every Chopper on the board and any car or a wreck in a Chopper's space is immediately eliminated then the next player in clockwise order takes their turn and turns will continue like this until each player has taken three turns that ends the round and then the road die is passed clockwise making that person the start player for the next round the next round starts with every player collecting all four of their movement Dice from wherever they are and rolling them and also you make sure that the road die is rolled for the next round as well with that we now know many of the rules but I'm guessing some of you are wondering about a particular situation we haven't discussed yet what happens when a car moves off the end of the road as soon as a car moves off the front of the lead Road tile first eliminate all cars still on the rear tile they fell too far behind and were left in the dust you can also remove any wrecks there now place all Hazard tokens on that rear tile in a face up discard pile any choppers on the rear tile are now returned to their owners and then the rear tile is flipped over and added to the bottom of the road draw pile you then draw the top Road and add it to the front of the two roads that remain so we're going to slide all this all the way back putting the car onto the space that it would have moved into these are now the new rear middle and Lead tiles you now add a random face down hazard
from the supply to each of the hazard spaces on the new lead tile and if you ever run out of Hazards to draw just Shuffle the discarded ones into a new draw pile now the player who caused the lead tile to be placed spends any movement points they had left turns continue as normal but in a two-player game you need to keep track of how many tiles have been used so far because as soon as a fifth tile has entered play it becomes the final tile of the game and then you add this double-sided Finish Line tile to the end and which side you use doesn't matter as soon as any one car enters the Finish Line tile from any space of the final tile that player is declared the winner you don't have to get all of your cars to the Finish Line just one the game also ends if there's only one player still left in the race a player is out of the race if all of their cars are eliminated and or inoperable when this happens their Chopper is removed from play their inoperable cars are left on the road and for the rest of the game they stop taking turns if this is a two-player game since there's only one player left then that remaining player wins but if you have more than two players as we do here then after a player is eliminated the race still continues for the remaining players but now you add this Finish Line panel to the end of the lead Road making it the final tile so unlike a two-player game this is only added in a game with three
or more players once one of the players is eliminated again any player who gets one of their cars onto the Finish Line first wins or if a player is the only one left with an operable car they win this video covered everything that comes in the retail version of the game but if you bought the game through Kickstarter and have that addition or picked up some of the expansion content from the publisher or a retailer those extra rules I'll leave for you to discover on your own but otherwise that's everything you need to know to play Thunder Road Vendetta if you have any questions at all about anything you saw here feel free to put them in the comments below and I'll gladly answer them as soon as I get a chance you'll also find forums for discussion pictures other videos and lots more over on the games page at Board Game Geek and I'll put a link to that in the description below and if you found this video helpful please consider giving it a like subscribing and clicking that little bell icon so you get notification anytime we post a new video and if you'd like to support us directly you can join our patreon team which I'll have linked below but until next time thanks for watching