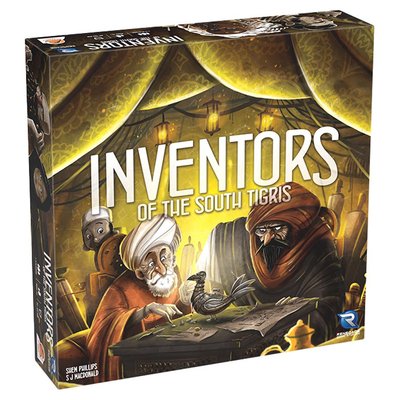
Inventors of the South Tigris - Official How to Play Board Game
Games in This Video
1 game is featured in this video — it unlocks as you watch.
Transcript
in the height of abset calford around 850 ad Bagdad is the home of innovators everyone's competing to invent build and publish in inventors of the South tigers and today we'll be teaching you how to play inventors of the South Tigers G designed by Shan Phillips and SJ McDonald and published by Garfield games and hello everyone it's Stella and Taran here from mle University all right let's get to the classroom in inventors of the South Tigers players are competing in inventors and entrepreneurs working collaboratively to create the best widgets and doodads for the caliphate while at the same time working against each other to score the most points players will manage dice workers pay to use and improve the skills of their Crafts People strengthen their workshops sail Down The Tigress in search of opportunities and more to be the greatest inventor in the land after three or four rounds depending on your mode of play Whoever has amassed the most victory points will be the winner for the main teach I'm going to be taking you through the four round version of the game for three or four players I'll explain the differences for the other modes at the end of the video firstly I'll take you through the components and how they'll look at the end of setup this is the main board and it's broken into five main sections these are the guilds where players Gather in fluence and fight for
majorities these are the worker placement spaces players will be using workers from their supply to take actions in these locations this is the tenting area and players will be taking actions up there with their tents this is the royalties track where the best inventors and Publishers will gain income and this is the river players will sail their ships along the river for various bonuses and effects throughout the game game below the lower left of the main board is space for the devices and this is what you'll be inventing and promoting through the game ultimately a device is going to be made up of a device board and a device card and there's decks of each and any devices which are in play will be placed in one of three columns the left column the middle column or the right column the left column always holds four boards the mid column holds at most four boards and the right column can hold any number the devices will ultimately move from the left column across towards the right the more steps of inventing have occurred but we'll see the particulars of that later on to begin the game you'll be seeding some but not all of these tiles with cards and with these neutral colored tokens you'll see throughout the game that all other versions of those tokens will be in a player color each player now takes a player
board and all of their colored and player board pieces as well as a setup card which describes their slightly unique setup it will depict four guilds for which you take that much influence and add them to those guilds on the main board it depicts the starting positions of your 11 dice here it would be these four dice in the exhausted section these six dice in the ready section and this one die in its matching space of your study it depicts your starting Workshop tile find that matching tile among the ones with the gray back and add it to the leftmost slot of one of your three Workshop rows finally it depicts your starting Tower and crafts people make sure you have one copy of each of the five Tower tiles and flip them over so their lower numbers are showing and they're stacked in ascending order take a set of six craft people and place them on the level and side shown here you would take your yellow scribe and place it on level four with this green arrow indicating its face up here you take your Carpenter placed on level two and fli face down due to the absence of that green arrow repeat for all six Crafts People line up your tents in this area being sure to use the overlay tile which matches your Play account these two tiles cover two of
your four camel spaces and you put the one with the Plus on the left and the flip on the right then to begin the game keep only two of your three workers putting the other in the general supply for now choose a first player who takes the first player token then in accordance with this card give each player silver and device cards drawn from the deck according to their position in in player order you're now ready to play inventors of the South Tigers is played in four rounds and each round is played in three phases first is the start of round indicated by this icon in which players gain royalties and income this is skipped in round one second is player turns starting from the first player and going clockwise around the table each player will take it in turns to take one main action as well as any number of free actions there are four different types of main action players could take one or two dice to a camel space to resolve a camel action they may take one or two dice to a workshop to resolve that Workshop they may take a worker and place it onto either an empty single occupancy worker placement space or onto one of these larger worker placement spaces regardless of its current occupancy to resolve that space's action or they may take the leftmost tent from their player board and place it onto an empty bottom row tenting space to take
its action your tenting action will be your last turn which follows these rules for the round even if you still have diur workers remaining in your supply now when play passes to you instead of those options you'll take one of the four mostly smaller actions listed here at the end of the turn in which the last player has placed their tent the player turns phase is over and you'll proceed with the end of round steps after four rounds have been played Count Up final scores which are represented by these yellow flags there is no in-game scoring all scores are totaled at the end before looking at each phase in detail we're going to have a look at all of the different resources and how you gain pay and manage them because it's this management which is a key part of how you do well in the game the first and simplest resource is silver there is a general supply of silver when you gain it simply take it and add it to your personal Supply and when you spend it simply return it to the General Supply Second is your hand of device cards and any effect like this allows you to draw device cards from the deck into your hand you may hold at most eight cards and must discard down immediately if you ever a draw above cards may be used in three different ways this icon indicates that a card simply needs to be discarded as part of the cost of an action here I would
discard any two cards from my hand discarding them face up second a card may be discarded from your hand on your turn to resolve its immediate effect which is this section highlighted in the bottom right of the image the third way to use a card is to use it in in an invention which is where all of its remaining icons come into play but more on that later third is influence each player begins with a limited pool of personal colored influence and any icon which shows that star represents placing one of these influence onto the appropriate component this could be to place an influence on the matching colored Guild or to Mark a research space or to Mark a device device should you ever need to place an influence but your supply is empty you can always take one of your influence from a guild but not from either other location some actions require you to spend influence from a guild and that's indicated by The Guild icon split in half this for example would cost two charcoal influence this would cost one of each influence to pay influence remove it from The Guild and return it to your personal Supply your fourth resource is Dice and as we've seen you'll be placing dice on camels or workshops to take the majority of your main actions dice are managed on
the left hand side of your player board and there are seven different segments of that board where they can be these are called exhausted ready determined and inspired and in the study which is also broken into three tiers only those dice in these three boxes ready determined or inspired are considered available they're the only ones which may be placed or spent on your turn furthermore the higher the die is on this track the more valuable it is when placed a d that's in the ready space may be placed only on its current number a d which has come from the determined box may be increased by one when it is placed a die which comes from the inspired box can be increased by up to five which effectively lets you turn any D into a six you do physically adjust the die when making this placement so you can't use this to increase a number Beyond six the process of improving the position of a die is called brightening and it's represented by this icon whenever you gain this icon you may brighten one die by one step this lets you do one of many different things you can change a die from ready to determined or from determined to inspired if you brighten a colored die from determined to inspired you gain one influence in the guild matching that die you can brighten a d within your
study take the die and move it up to the matching colored space the next level up as long as it's empty and then gain whatever benefit you covered your other options are that you can move a die from exhausted up to ready or to the left from any study space into its corresponding area now you will notice that for both of those examples I roll the die and this is a general rule anytime a d enters the available Zone it must be immediately rolled once you've done that roll it remains on that value within this area until it's either manipulated or placed it also means that when there's a D in one of the four unavailable sectors it does not matter what face is showing you can almost think of them as being blank cubes until they enter the available area colored dice are more valuable than white ones and you'll often come across an icon like this which lets you gain a colored die into your study represented by the book take your chosen die and then place it onto its matching colored space in the bottom section of the study when you do this you must resolve the effect you cover which is to discard one white dye you'll almost always choose to do this from the exhausted section but must choose from elsewhere or even choose a colored die if there aren't any there available in this way gaining a die to your study doesn't increase your count of di it simply changes one into a
color of your choice if you gain a die to your study but the matching slot is full then move it to your exhausted section instead but you must still discard another dive yeah the only times you will actually increase your count of dice will be if you get an effect like this where you gain a dice to a location other than your study here for example it's gaining a white D to your ready section because it's going straight into an available Zone you must roll it for the most part dice are going to be circulating around your board across the game with anything you place on action spaces coming back exhausted at the end of a round the last type of resource is your craft Crafts People and there are six Crafts People tokens in your Tower when you need to spend a certain crafts person there icons will be shown in the cost of the action you're taking this would require you to spend a blacksmith a weaver and a Chandler when the cost shows a sixc colored disc with no other icons on it that means any crafts person may be spent to spin a craft person it must be active meaning it's face up you can see its icon on the token these two craft people are inactive they're face down then pay the craft person the amount of silver showing in the brown bar on its current Tower tile so for this Chandler it will be one silver flip it to inactive and Advance
it to the next step of the tower if at any point the bottom level of your Tower is empty then you'll Advance your Tower resolve this effect effect in the Black Box the zeroc cross person box then if it shows this white flip Arrow flip the tile over and move it to the top of your Tower sliding all other pieces down later in the game if that tile shows an X you'll discard it entirely and Slide the rest down craft people get more expensive the further you go up the tower but they're also worth more points at the end of the game so a double-edged sword there are some other key icons you'll come across when managing your Crafts People this green flip arrow means to flip a craft person back from inactive to active so with this effect you would reactivate your Chandler and with this effect you could reactivate a cross person of your choice this icon the cross person with the up Arrow simply allows you to advance one craft person whether active or inactive up to the next level without paying or activating and so those are all the resources you'll be managing through the game there are a couple of free actions which will allow you to Interchange between these resources from here you may discard two cards from your hand either to brighten a die or to reactivate a crafts
person and when taking an action requiring you to spend silver you may deactivate a crafts person that is flip them over without paying but without advancing to reduce the silver cost by one and you may do this any number of times that you can afford so now let's take a look at how to take actions first we'll look at camel actions each of these spaces in your camel area allows you to take one camel action you begin the game with two spaces and with effects we'll learn about later this could increase to as many as four to take a camel action Place one or two dice in into an empty camel space even if a space has one die in it it's considered full you couldn't use this one for another camel action this round you can take any one of the four camel actions with dice of any color although color dice will give you a bonus for certain actions in most cases the sum of Pips on the dice you place is going to have to meet a minimum threshold for the action you're taking there are four camel actions all of which relate to the creation of the devices in the game and these are invent build test and publish there's a lot of different information on the device boards as you create them but these icons will tell you exactly which parts to interact with as you take each action the first action is invent and
this is the first step of creation very specifically you'll be inventing on a device board in the left hand column which does not yet have a device card on it firstly to invent on this board you must have placed dice which meet at least the PIP threshold shown in this top right bar of the board then using device cards from your hand pay the discard cost also shown in the top right bar of the board then take any other device card from your hand and play it into this right hand slot of the device board you'll evaluate these three influence markers for any color match you made between the card you placed and what's printed on the board gain one influence in that Guild here it's two orange influence then Place one of your invention tiles over this bottom left bar of the board those are these six markers in your color on the bottom right of your player board choose any one of them it doesn't matter which and then place it down here gaining the bonus you cover which is always to advance one step on the royalties track if you cross one of these blue immediate reward steps gain it now also if you cleared off the second tile in a given column gain the immediate reward that you've just
revealed and every two adjacent tiles horizontally you remove will score you three endgame points your new invented device remains in the left column of the board alongside the empty device tiles which are yet to be invented you can think of this as the device's blueprint it is yet to be built you just have the design on paper finally invention is favored by orange Dice and for each orange die you place for the action you may draw one device card into your hand this can be before during or after the extra actions and can be used as part of the cost or even as as the device you invent the second camel action is build and here you'll choose an invented device from the left column and bring it to life the dice you place to take the action must at least meet the PIP threshold now showing in the top right corner of the device now pay the craft people also showing in the top right next the immediate reward showing in the bottom left corner of the tile is gained first by the player who is taking the build action and then by the player who invented this device in other words who owns this tile if the same player is both inventor and builder then the reward is gained only once then this tile is flipped over and moved to the top
right there's no immediate effect but this serves as the cost for a future action next Mark the build slot of this device with your influence move the newly built device from the First Column to the second column and replenish the First Column to four device tiles note there can't be more than four tiles in the second column and if it's already full then you cannot take this action building is favored by charcoal Dice and so for each charcoal die you place as part of this action you get the bonus of refreshing one crafts person again before during or after the action although it's shown fourth on your board the third action I'm going to talk about is publishing you can publish a device once it's been built meaning that any device in the second column is available you must have placed dice which at least meet the PIP threshold shown in the top right bar of the card for publishing this is always eight pay one silver to the inventor of the device that is whoever owns this tile here red would pay blue one silver for the neutral tiles placed in setup pay to the supply and for your own inventions pay nothing also spend the craft people which is always a scribe and one of any crafts person gain the immediate bonus printed in the bottom left of the tile once again this is always a
royalty Mark the publishing slot of the tile with your influence this could have the same or different players influence finally move the published device over to the published section of the board any number of published devices may be kept here publishing favors blue Dice and for each blue Dy plac you may bright in one die the whole purpose of doing these is to gain victory points and as shown on these bars here there'll be points for both the builders and Publishers of all of these devices and do take note of of this brown bar at the bottom of each of the device cards this represents an end of game scoring objective which you'll be trying to meet in order to get the best points the last of the camel actions is testing a device may be tested at any point after it has been built meaning anything in the second column or in the published area devices can even be published without having undergone proper testing to take the testing action you won't be placing Dice from your supply instead you gain one white Dy and place it onto the camel space then take one of your available colored Dice and place it into an empty matching test slot of the device you're testing in this way you've given up an available colored die but gained back a white D which will come back
exhausted each subsequent test die placed on the same device board must be equal or higher to all those that preceded it as such this die could not be placed but this one could if you covered an influence icon you now gain that influence and then either way you move your ship exactly the number of spaces along the river as shown on the slot you chose along the river path there'll be four types of space research tile draw decks spaces with research tiles already in them empty spaces and spaces with workshops when moving you'll count only spaces with workshops or with the draw deck what I just showed you was moving three spaces if you land on another player stack your ship on top the player on the bottom of the stack is considered AE when you land on a space with one or more Workshop tiles take the top one add it to the leftmost open space in one of your Workshop rows and gain the benefit covered if any if you add the tile to anything other than the overall leftmost empty space then you must pay one silver for each column ahead of the leftmost empty space you placed if your movement takes you into or past a draw X space then you must stop there even if you have extra movement and you resolve this effect printed at the top of the tile the first time a player reaches one
of these slots flip all of the workshop tiles in the next segment of the track face up if you gain any ship movement once you've reached the end of the track you simply don't move and claim the bonus on the final space again the second way to take an action is to place one or two dice into an empty workshop and resolve all of the workshop tiles within it which are triggered by those dice much like the camels each of these is considered full as soon as it has either one or two dice in it all of the tiles within a workshop have a minimum requirement to take the effect and for all for which you qualify you may take them in any order a white symbol requires the Pips to add up to at least that amount the colored symbol requires the Pips to add up to at least that amount and there to be at least one of that colored die so for this placement these three workshops could be triggered Even This plus four orange the orange itself may be only three but there are at least four p and at least one orange a workshop with good combinations can be very powerful and it's sometimes possible to activate a workshop multiple times in the same round this occurs when you trigger this effect Workshop to exhaust it and it means you take all the dice from a single workshop and move them to your exhausted area freeing it up for another placement next we'll talk about research
that's represented by this icon and and one of the main ways to take this action is with the worker placement spaces of the guilds here for example it would cost me two blue influence and I could either resolve these icons or one step of research you may either research a new tile from a draw deck or a previously placed tile to research a new tile you must go to the leftmost empty space along the river take the top three tiles from the draw deck to the left of that empty space look through them and choose the one you wish to research return the other two to the bottom of the deck in any order then place your influence on the higher scoring slot of that space for pre-existing technology simply place your influence on the lower scoring space each research can be done only twice and it must be by different players you may freely research a space equal to or behind your ship but if if you research a space ahead of your ship you must pay one silver for each space on the track which it is ahead this counts all individual spaces not just the number of spaces of movement it would take to get there you're reminded of this extra cost by this icon in the bottom right corner of the board there are three types of research tile the first ones you find will give you some sort of ongoing benefit the second ones will give you a benefit
which is specific to placing your tent and the third ones will be a once off immediate bonus that covers all of the major actions and now we'll go through some of the minor actions and other effects that you'll find on icons in the game this icon is a combination between the royalty icon and the start of round icon and it means to immediately gain the start of round income effect of the current position of your royalty marker this worker placement space lets you move your ship one space and gain a silver by itself the square with three colors represents a workshop tile but this icon allows you to take any one Workshop tile which is in your current position or to the left on the River track this effect the white Dy with a plus one allows you to manipulate one of your available dice take a Dy of any color and increase its value by one slightly distinct from this is an effect like this Here If You activated this Workshop it would allow you to treat the sum of dice in this Workshop as six higher than it already is even without manipulating the dice in a similar way this technology effect gives you a plus two on Camel actions meaning when you place dice you can treat the sum as if it were too higher in your camel section this effect lets you swap a die and you're not just limited to your
available dice here for example I could swap this white four with a blue four which would give me enough to trigger this effect in the same action this also counts as gaining a blue Dy so if I had an effect which triggered off gaining a blue dye I would get that as well this action allows you to reactivate all of your craft people at once and this action lets you activate the camel which has the matching icon thereby giving you one extra camel action for this round only when dice are cleared at the end of the round this will be flipped back over to its inactive side the last type of action is a tent action take your leftmost tent place it into an empty one of these five tent spaces and then resolve the following effects in any order these are the effects printed on the tile next to your tent all tent activation technologies that you've researched a bonus of reactivating one craft person and brightening one die for each worker or camel space you haven't used this round and the effect you uncovered with your tent these are going to move the game along this icon clears off this space giving you an extra camel for the rest of the game and later on it will give people access to their third workers exactly when these happens depends on your Play account once you've placed your and you
may no longer take camel actions or worker placement actions this round every time it's your turn you have one of these four options available to you these are you can activate a workshop using available dice exactly as you did before you can brighten a die you can reactivate a craft person or you can spend a craft person to clear the dice off a workshop after the last player has finished the turn on which they've tented the round is over and you'll proceed to end of round round whoever tent is left most on this round's track becomes first player for the next round from top to bottom players brighten all of their dice finishing with the study dice which they may either brighten up or left then all dice on camels or workshops become exhausted unless you've activated an end of round effect which modifies this if you flipped your highend camel then flip it back over and retrieve your workers from the main board players now move their tents up to the leftmost open space of that section of the board if you cover an influence then gain that influence tense in these sections at the end of the game will be worth two influence on their matching guilds for the purposes of endgame scoring only if you tented in the fourth section then you gain the envoy this black worker joins you for the next round
giving you one extra worker placement action you'll return it before this phase is resolved next round if you tented in the final section then you get to flip your highed camel over from the start of the next round meaning you get that extra camel space without having to spend a worker to get it you'll now proceed to the next round and the start of round phase here you'll gain your incomes and royalties from two main places both colored green you'll look at the royalties track and gain the income printed underneath it and you'll gain this benefit printed on the left of your current lowest tower level and this will increase as you go up your Tower in the three or four player game only the third and fourth players in turn order which is clockwise from whoever has this token will also draw one card at the end of the final round you'll skip all steps of the end of round phase except for raising 10 T up to the top level for the left three slots this will give you this influence bonus on the guilds for the last two slots there's no benefit for these tents now count up your final scores for each of the three guilds determine who has the most influence gaining the higher number of points for the winner and second highest for second place ties are broken by whoever is leading on the ship track so in this case blue has five influence including these tents red has three and yellow has
one meaning blue would get four points and red would get one but if red had another T here they would both now have five influence and red would win the tiebreaker you'll score points based on the position of your royalties marker score the points next to each influence you've placed on a research space for each craft person who's reached at least level five whether active or inactive score the points on the current level score the points printed on any Workshop tiles you've built for any of your invention tiles which are gone score any of these three point banners which are completely uncovered in this case it's six points for each unpublished device that you built that is you have your influence on it gain one point for each testing die on the device here red gains two points yellow would gain nothing for each published device both the Builder and the publisher get points according to here if the device had a different Builder and publisher then the Builder gets three points and the publisher gets one point per test die if the Builder and publisher are the same player then that player gets one point plus one for each test die so here red would get two then all influence markers on either a built or published device will score according to the endgame scoring objective at the bottom of the device card if you at least meet the green
requirement then you gain two points and if you at least meet the blue requirement you gain Four Points here for example if red had four charcoal influence red would gain two points for this influence well here if red had four sets of non-matching influence then red would gain four points for the build influence and four points for the publish influence a total of eight finally cash in any leftover silver and device cards at a rate of 4 to one the player with the highest score wins and if tied furthest down the river breaks the tie when playing with two players you'll use a simple dummy player to create some more competition on the board you'll also start the game with only one pre-build device at the start of each round flip one dummy card this will will show you where to place influence for the dummy player and how many spaces to move its ship along the river this does not collect or reveal Workshop tiles then the bottom of the card will show three worker placement spaces on the left take the token which matches the influence shown and place it next to that space this increases the influence cost to take that action for this round for the other two block out the specific space which has that cost this will force players to take the more expensive options the first player to tent in each
round then also immediately gets to place the dummy players tent into one of the other spaces blocking it out for their opponent at the end of the round only the players tents are raised the dummy players one is returned to the supply meaning that these end of game Guild bonuses cannot be gained you will count the dummy players influence when determining first and second for Guild majorities finally as a simpler or quicker variant and this is very much recommended for your first game you may choose to play the three round variant flip over your setup card and take your first tent placing it on the top space this immediately grants you an extra card and silver in setup and the bonus uncovered by your tent so here you would get your third camel immediately this card has three objectives on on it which you must meet one after the other in order to gain these extra bonuses the first bonus comes when you've invented twice built twice published twice or gained one of these research tiles upon achieving this move your tent down and gain the reward the second benefit comes upon achieving each of these actions once or gaining one of these research tiles and the reward is to clear an invention tile off your board gain its immediate reward and discarded finally upon doing one of these actions three times or gaining an immediate research tile gain the last
reward otherwise play three rounds and then resolve final scoring as normal and that's how to play in vendors of the South tigers do check out the project page for the game we'll put a link to that in the description below and thanks so much for watching your like and comments are much appreciated subscribe to see what's coming and have a great day see you next time