TDG: Iwo Jima: Hell on Earth
Games in This Video
1 game is featured in this video — it unlocks as you watch.
Transcript
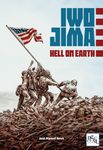
Hello ladies and gentlemen and welcome to the discriminating gamer. You know the other day I was very frustrated with my wife. I asked her why she was pushing my buttons all day. She said she was looking for mute. Ladies and gentlemen, today we're going to go ahead and take a look at Euima Hell on Earth from Nea War Games.
Heat. Heat.
Ewima: Hell on Earth from Neville War Games is a solitary game in which the player takes on the roles of the United States Marine Corps as it attempts to subdue the island of Euima in 1945. Now, the game board is a map of Euima. You have the landing beaches. You have various terrain and and and other features on the board. You also kind of have places that you are trying to take as the Americans from the Japanese. Now, this is of course hex encounter games. And each of your hex's, they contain essentially your combat rating for that specific kind of hex as well as kind of a support rating because you have various kind of supporting units that are attached to these uh units that are coming on the board. Now, as I recall, your marines and army units are regiments. I believe you're going up against Japanese battalions here. Now, the Japanese battalions are all face down. They're all placed face down in their starting locations, so you don't quite know which units are there. As you advance further, you're going to have opportunities to discover what they are.
Sometimes pleasantly, sometimes unpleasantly. Ah, it's all unpleasant. It's war. But, uh, sometimes you'll be surprised and sometimes not. But essentially, uh, you're going to be looking, as I say, at the ratings for your combat and support units on your counters. Now, the first thing you're going to do every round is determine the weather. You're going to roll a dieice. On a one to two, it's bad weather. On a 3 to six, it's going to be good weather. Now, this is important because if it's bad weather, your movement is going to be inhibited. There may be some other um consequences of that as well. Now, next, you're going to determine bombardment points. You get nine bombardment points. You may be able to get more if you take in certain features like airfields. And essentially what you do then is you can look at enemy units and roll and try to take them out. You can try to bombard them. Uh for every hit you're going to flip it over. Um and then you know you hit it again you can you can remove it.
So you're trying to take out these various units Japanese units on the board. Next the Japanese will try to bombard you. Now there's kind of a formula. They're going to target units. I think if they're closest to Surabbachi they'll target you. Essentially, you're going to uh rotate uh step from, you know, your full strength, your next level strength. Then you'll flip the uh counter over and you'll do the same thing. So, ultimately, you can take three hits before you're eliminated with your your counters. Once you get to that second step and you flip it, uh you're going to kind of have reduced abilities. During the movement step, you will be able potentially to rally and then you, as I say, you're going to be able to move your units. you're going to be able to move them a number of spaces. Again, depending on weather, depending on terrain, uh that will dictate essentially how far your units can move. There is zone of control. You if you move into a zone of control, you know, you're you can't move from one zone of control to another zone of control. You'd have to back out of one first. So, there's of course basic movement restrictions there as well.
Now, if you are next to a Japanese unit that is flag is face down, you don't know what it is, you can attempt to do a reconnaissance in force. So essentially uh you can roll a dice for the unit you're going after and you get a plus one DRM for every uh unit one of your units that is also adjacent to that force you roll the die depending on what the table says you can go ahead and flip over that unit now that is revealed to you. Now it's possible too if the die roll goes the wrong way you yourself will take a hit. Now, critically, once you do that movement, you're going to place a marker on it to show that it's been activated. But critically, it will show that your main unit has activated, but your support has not yet been activated. So, you can still use that unit to support other units later on. So, if you're doing an assault, which is the other kind of attack here, if you do an assault, you choose one unit if with its combat power to go in. It can also use its support. You can also use support from up to three other units.
And you if you haven't activated those units yet, you can place a marker on them to show that their support is used, but their main combat function has not been used. But you're going to go ahead use those together to create your DRM and roll on the table and to see if you are able to inflict hits on that Japanese unit. Now, if that Japanese unit that you are assaulting is still hidden, you have to draw from a bag kind of a response marker. And this is going to show all sorts of things that they may do. They may do a bonsai attack on you. Um, there may be other crazy things that happen there. They may have their own support capabilities increasing their numbers. So, you're going to go ahead figure that what that is, resolve that, and then move to the assault. You're going to calculate the combat ratio, and you may get, as I say, bonuses for if you've got armor assault or flamethrowers or artillery. You're going to go ahead compare kind of the combat ratios between your combat strength and the enemy's combat strength strength and then roll on the table and the die results in the table will tell you exactly what happens. Do you take hits? Does the enemy take hits? Multiple hits? Who knows? The Japanese will then have opportunity to do raids.
Essentially, they can attack any American unit that is within two hexes of the Japanese unit. Again, there's some modifiers there, but you're going to roll the dieice to see if you take any hits from these Japanese raids. Next up, you're going to go to the second movement phase of the round. And again, you can move just like in the first phase, you're going to go to the second assault phase where again, you can do recons or straight assaults to try to take out those Japanese forces. Next, you have the command phase. Again, you can rally here, but here, if you do it, you can actually get a plus one DRM to rally a a unit. And then, you're going to roll a dieice to give you command points. And there's different things that you can spend command points on. You can spend a command point for reinforcements. Essentially, you can move any unit up one step, but just one step with these command points. You can also deploy one unit that is in your reserve to the beaches, bringing more units onto the game board. Now, you can also spend one or two command points to draw command markers. These are special advantages that will help you in battle in certain situations. You can bring them out, but you can only have ever have a total of three that are on the board that you can draw from. and you may draw these kind of intelligence failure markers that just take up space and you just wasted a command point. You can also spend for a command point uh for the ability to remove one of those intelligence failure markers to free up more spaces. Now, if you have some units on the board that are retreating or routing, which means they they can't they're disorganized, they can't fight, you can spend a CP to remove one of those markers as well. They actually have the organization phase. You can go ahead, you can move the turn marker ahead one space. Um, some units are
going to be put on the on the turn spaces there if they're removed from the board. You have options about if you want to kind of rotate them up or move them to the reserve board so they can immediately come into play if you want at that time. On certain spaces, you may add more tokens to the Japanese bag or the American combat marker bag. Uh, so you go ahead and you finish that and then you proceed to the beginning of the next turn. So over the course of the game, you're figuring out the weather. You are doing bombardments. You are moving. You are attacking. You are suffering enemy recon, enemy harassment. You are again moving again and fighting again. And then you're doing some of this basic uh housekeeping at the end of the game. And what you're trying to do is capture as much of the island as you can and destroy as many units as you can. Uh all of these factors, like for instance, you destroy two combat Japanese combat units, that equals one victory point. you take certain objective uh spaces on the board that equals uh uh you know victory points and depending on the victory points that you earn by the end of the game you will determine how great your victory is in Eoima Hell on Earth. We'll get back to the review in just a moment.
I want to take a minute to ask you to check out my other channel that is Cody Carlson PhD where we talk about history books on history military history. I even post some of my uh lectures for my classes on there. Please check that out. Please subscribe to that channel. And now back to the review. All right, ladies and gentlemen. Ewima Hell on Earth. There's a there's there's more going on here. I'm just kind of touching the basic points of the game. This is this is a game I saw on BG and I thought it looked very interesting. I reached out to to to Nea and asked them if I could get a copy of this to take a look at on the channel and uh they did. They sent this out and I was really excited because, you know, this is Euima is of course one of those battles that is just, you know, one of the iconic battles from World War II. And I thought the system sounded really interesting.
And I really like here how you've got this each unit has its own kind of combat rating, but it also has kind of this this attached support rating that you can use for its attacks or for other units. And so I really like that. And I like how you're placing these markers when they're done to indicate, well, okay, I've used this unit for a combat mission, but it's support unit I haven't used, so somebody else can still use that. I thought that was really cool. I really like that aspect of the game there. Sometimes it was a little hard to keep track of. I mean, not that there's anything I think wrong with the game, just with me, I was kind of, oh, okay, yeah, yeah, I did that. And I put, oh, yeah, I put the marker there. I put the mark, you know. So, just stuff like that for me was a little tricky, but I don't think that's any fault of the game. Um I but I really like that system. Um the game presents a great tactical problem, you know, and how do you want to effectively use your resources? I'll tell you, you know, when you're when you've got that bombardment and you're taking out some of those Japanese forces, that's like ah so good. And then they turn around and they bombard you and that hurts. That is really scary.
But you know, this idea of you can do the recon or the full assault works very well again with that with that combat support mechanism there. I thought the the Japanese when they're coming out at you, their recon and force and their [clears throat] harassment. That hurts. I really like too how you can buy the the the combat markers in the game and and they give you special advantages that you can use. I think that was really really cool. They're they're really fun and it really hurts you when you go get one of those like intelligence failure markers. That that really sucks. I think too one of the things that's really cool is, you know, if you attack those Japanese markers that haven't been revealed, you're going to get a nasty surprise. You may not know what that surprise is going to be, but it's going to be nasty. Like when you have those bonsai charges. I remember the first time I got a bonsai charge, I was scared to death. Oh crap. Oh crap. I rolled really good, however, and the Japanese took losses and I didn't. So that was pretty cool. But still, they can be very deadly, very dangerous. And um I don't know. I like games that that give you those kinds of surprises. The game felt I felt like I had a lot of agency in this game and yet it still felt the history of the battle really came through and I thought it just did a a phenomenal phenomenal job here of of capturing both the history and really fun and engaging gameplay. This is a really fun and and unique system. Like I say, I've never played anything with with this. I I don't know, maybe other people have, but I've never played anything where you had support units that were actually part of the counter and then you could you could use it for one and the other. I just thought that was really cool. So again, really
enjoyed Euima Hell and Earth. Really a fun solitary World War II game. And I'm going to go ahead on the Cody scale. I'm going to give this an 8 out of 10. Uh great fun. Thank you once again for joining us today on The Discriminating Gamer. As always, we'd ask you to please leave a comment for us here on YouTube, on Board Gamegeeek, on Facebook, on X. We'd love to hear back from you. We'd love to hear what your opinions are. And please, if you do like what you see here, check out my other channel. that is Cody Carlson PhD where we talk about history, military history, books on history, fun things like that. I even post some of my lectures up there. It would mean the world to me if you would subscribe to that channel as well. And if you do really like what you see here on the discriminating gamer, I would humbly ask you to click on the super thanks button and leave a tip. You know, there ain't no cure for the summertime blues or herpes.
on my feet again. AND I DON'T KNOW WHERE I'M GOING. And I don't know where I've been. Please somebody ground. It's a LONG TIME AND I'LL BE DYING. Once a year I wind up in the
My only vulnerability is that I care too much. And knives and bullets and cheesecake. I do love a good cheesecake.