Fate of the Fellowship Solo Play
Games in This Video
1 game is featured in this video — it unlocks as you watch.
Transcript
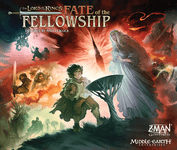
Ooh, that looks tasty. Welcome folks. The Hungry Gamer is back with another playthrough video. And today we're doing a playthrough of Fate of the Fellowship designed by Matt Lecock from Zman Games. And usually when I do playthroughs, this is something that is sponsored by the publisher. In this case, it is not. In fact, the publisher has let me hold on to this game for about a week and a half or two weeks or so, and then I actually have to send it back to them. But from the pictures I posted, there's been a lot of interest in this game. So, I decided to post a playthrough video as well. Now, with that said, couple bits of information. I am doing the official solo variant. And so, what that means is, and you can't see my four character cards that I have offcreen, but I have four different characters. And you'll notice Froto and Sam are over here because what happens, and this is different than the normal game, is you go with your four characters and whoever is first in line gets their four actions. Froto and Sam gets one. The next character you have gets four actions. Froto and Sam get one. And so on all the way through. However, on the other side, you get to share your cards and you get to share your tokens. Now, you'll see the four cards I started with kind of right Whoops. right here. And I'm going to try to kind of keep them stacked there. So, if you take a look, you can see what I have at any given time because this fills up most of the screen. Now, talking about the quests that I have, I have the omnipresent
destroy the ring quest, which is get to Mount Doom with Froto and Sam, spend five rings and don't die. Then I have the other starting quest of Sauron. Your staff is broken where you have to basically get here and take over Eisenard. And my initial draw setup added more troops there. So that's going to be quite hard, but that's what I have. And then I have two ones that I've never done before. And that's what these coins are here for. These coins are not from this game. They're actually coins from Red Dragon N and I put them there just because when I am doing playthroughs and recording them, I'm talking and explaining and often I miss details. So I've simply put those there to remind me of what I need to do. So first we have free Theodin's mine here in Eurus. And what I have to do, as you can see, is as an action, a character in Idris spends two hearts and one ring while at least one other character is present. If I do that, I get the troops back into the supply and a little bit of hope. And the other one is a Galadriel specific quest because I'm using Galadriel and I've never used her before. And that is we have to turn Dol Gadore into a haven and get three elven troops there. However, since Galadual has to be there, I can spend two rings in Valor or three Valor to do so. And that brings me to what characters am I playing? So, I'm using two characters I've played before, or I guess three technically because we have Mary and
Pippen. I decided to use them because they get a lot of the fellowship tokens or the friendship tokens, which makes it very easy to do the muster and I like that. And also, they can pull ring race away. I've also my third character is Legalis who I've used before. He gets a lot of stealth tokens which is very valuable for Sam and Froto moving. And his shot ability is quite useful for kind of softening areas up. And then the two I've never played with before. My second character is Galadriel as I've already mentioned. And she's going to be able to use those stealth tokens to draw the unused event cards which are right here. And the event cards are these pretty darn good cards like this that always do something good for you. And then as an action, she can kind of stack the the fellowship deck and then she can allow me to reroll dice in battle. And then Arwin is the other character I've never played with. And so she can muster in the green areas for free, which is always really good. when she prepares. If a character is in the region named on the card, I can also move a troop from my location to that location. That feels very situational, but nonetheless kind of cool. And then her give council once per turn when I use fellowship at a haven, which can't happen in a solo game. So in the solo game, once per turn when I prepare, the card I discard does not need to match her region. And that is awesome. That is an amazing ability. Now, I tried very
hard to figure out a way to get the Sauron's tower, dice tower, somehow in the shot so I could use it, and I just could not find a way to do it. So, instead, I'll be using an itty bitty baby little dice tray here. All right, so we'll get started. Just so you know, this over here, that is the extra event cards. So, what I will say is I played this game six or seven times now and I've won exactly once. So, expect me to lose, especially with some quests here I've never done before. But, we are going to give it the old college try. So, first I have Mary and Pippen. And so, first thing I'm going to do is use one of their actions to get a fellowship token. Oh, and I'm going to swing Tom Bombadil to the front here just so I can keep reading it and make sure I know what's going on. He can gain a hope. I'm tempted to spend that and just get the hope bonus right away. Actually, I am going to do that. So, I often hold on to Tom Bombadil, which can either give me a hope or let me reroll dice. And I always regret it. So, I'm going to go ahead and just spin that right away and gain that hope. Then, for my second action, this is tough. Like, I because I want to move, but I don't have any stealth, but I feel like I need to risk it. So, this may be, as I said, a very fast game. I'm going to start. I'm going to go ahead and do my second action. I'm going to move and I'm going to bring Froto and Sam with me cuz I want to just
kind of get them where they need to go. I'm going to move to here and that's going to result in a roll of two because there's two ring wraiths and that's going to be a loss of two hope. I'm just going to eat it. Then I will move once more, which puts me down to one action remaining. And again, I'm going to roll two dice. I'm going to risk it. And two more. I could spend I'm going to go ahead and spend a ring and at least roll one of these and maybe be okay. I was not okay. So, that was all around terrible. This might be a super fast game. Oh crap, that was bad. And I have one action remaining. I wanted to move. So, my plan was I wanted to just kind of move all the way here, but now I can't do that. So, I'm gonna have to leave Froto and Sam. I'm just gonna pop over here and be done with it. Now, Froto and Sam, unfortunately, I've lost so much hope. I feel like I'm stuck here. So, I'm not going to do anything with them. This is a This is a terrible start. This would be a very fast play through at this rate. All right, we draw our first card.
And you can't see it, but that's going to activate the red. So we're going to go from Dole Gulier to Arabore following the blue line. So these troops follow the blue line to here. And then we look and there are no more no more troops. That's all that they do. And the next one we draw is also going to be the red. And that's going to be near Harad to Helm's Deep. And so they move and they're following the orange line. So we go here and there's no more troops in the way. So that's the end of that. Oh gosh. Oh, and I did not draw my two cards at the end of my turn. Okay. So I want to save that stealth for Froto and Sam to move. And I know Galadriel needs to get some troops to do her quest. So I'm going to do a prepare and spend a Dale card.
for that to add single troop here. Then I'm going to use the one from Mary and Pippen to get another one here. Then I'm going to spend her third action and move here. Whoops, that is legalis. What am I doing? There we go. Those two guys come here. And I will spend a if only I had a ring. If I hadn't wasted that ring, I'm gonna move over to here. Wait a minute. Wait, wait, wait. No, I need three there and a haven. Yep. So, ah, terrible choices already. I'm going to spend her final action, use her mirror, which lets me draw four cards and put them back in any order I want at the top of the deck. So, I definitely want that's tough. So, I know I want another sword, but I need that when I get back to Galadriel. Stealth is really good. So, I'm going to put them back in this order. Then I draw Nope, I don't draw two yet because first is Froto and Sam and they're going to move. And I'm going to use the stealth this time, not ruin everything, and move them to here. Then that's the end of the turn. I draw my two. Another stealth. And now I have what I need to take there when I get back to it. Then
we draw our two cards. And this is going to be the top from Ner to Arabore along the blue line. So they move to here. They move to here. And these guys move to there. Okay, not bad. Now I'm on Legalolis and very clearly I'm going to use this first action to get a new token. I'm in Merkwood, so I'll do a prepare action for this one here, which will give me another token here. And I can look at the top card of the shadow deck, which I know is gonna deal with this Ner line and the purple.
So, that's okay. Um, I don't have any friendship, so I can't recruit, but I do think I will move to here and I will spend one stealth. Uh, I'll spend the card to remove one of these guys. Then Froto and Sam are going to move and there's no ring race and no troops so I don't have to spend anything. I draw my two and so I know first I have Ner to Helm's Deep and it's going to be the movement along the purple line. Oh, that's not Ner. That's why I was confused. So these guys go to here.
These guys go to here and here. Here, here. No more. And then the second one is also the top, which is rune to the woodland realm, which is just going to be that. Okay. Okay. Okay. Okay. Okay. Right now, I'm just kind of I'm just really kicking myself that I blew this here. Really kicking myself. So now we have Arwin and we have some elves. She's in the Misty Mountains, but I can do a prepare. So I'm going to do a prepare with the Mordor card because I can do that once per round where I use one that is not in the same place. So that gives me that. Then I'm going to do two musters. Actually, I'm going to make it three musters and hopefully I'll draw hopefully I'll draw some more. Nope. I'm going to do No, I I'm going to do two musters. I'm going to spend my stealth token and move all these troops across to here. Hopefully that's not going to bite me in the butt. Then Froto and Sam are going to move to there. I'll draw my two cards.
Got a ring in the Dale and another stealth. So that worked out okay. Our first card is again the top Eisenard to Helm's Deep. So that's actually kind of good cuz now I'll be able to bring Arwin eventually up there and maybe take that. But of course Helm's Deep is in a lot of danger. So, if I lose Helms Deep, I'll lose three hope, which will mean I'm done. So, I might want to consider right now. Yeah. Nope. I don't want to consider. I'm going to I'm going to spend for Froto and Sam. They're not going to move. I want them move. I'm going to spend one of these here for muster action and put a single troop there. Oh, there's two troops there cuz one did start there. I knocked one away. So they have a little bit of protection but not a lot. Then the second card is again the top when we're moving from rune to minus tithth which would be here. Nothing nothing nothing. So that actually worked out. Nothing happened. So far our draws have been really really good.
Okay. So now we're back to Mary and Pippen. So very clearly my first action must be get one of these tokens. Now what I need to do is I need to find a way to get some troops to Eisenard so I can take it. So I think what I'm going to do is go two three stop here. Oh, I can't get any troops there till some of them get killed.
H. Ah, that's a bummer because I don't have any more troops until I get this quest done over here, which I'm I'm getting there. Okay, so what I'm going to do, actually, I'm going to do a fourth action and move here. So, I can get here and try to do this one because all I got to do I got to get two characters there. But with Froto and Sam there, I can do that. Then as my next action, I'll move Froto and Sam to Eras. I'm going to leave those troops there. And I think if the cards are good to me, by the time I get back to Mary and Pippen, I'll be able to do this. Oh, wait. They moved. I can bring Mary and Pippen with them. Duh. So, as soon as the cards are good to me, Froto and Sam can complete this. Okay. All right. I'm feeling good about this.
Oh, and then Froto and Sam. They're in Rohan. I can't do any of that. I think I'm going to have them do nothing because I think I'm going to wait until I get the cards I need cuz I in theory I could pull all I need is one heart card and I could do this next turn. So, I'm not going to do anything. Pull my two cards. So, I have a Dale Stealth and Elron's Foresight. So, Elron's Foresight. The current player reveals four cards on the top of the player deck. They may optionally add one of them to their hand. Return the unselected in any order. And I think I'm going to use this right now in case I can pull a friendship card. I think it's what I need to do. So, I said I needed to pull one. I actually pulled two. So, I'm going to take the Mordor card right now. And I'm gonna have this Gonder card, then the stealth, then the skies darken. All right, so that that was a good round. And now next I have Galadriel. So I'll be able to take over this and get us moving. So our first card is going to be the bottom action near Harod is going to get the troop. And we move the eye over to Rohan. So, I have to hope I don't pull another one with a bottom black. I did not. So, we're moving from Moria to Arabore, following the blue. So, only
these guys. Oh, wait, wait, wait. We have Oh, shoot. Are those troops there already? Yes, those troops. Huh? Ah, cuz I brought all these troops there. So, these two run away from me and show up here. And they will attack right there. But I can use Legal's ability, and I'm going to do that. I'm going to use one of his stealths right here to remove one of these, which means I will roll one die against my one troop. And there's no Naz Ghoul there, so nothing happens. So, that was solid. Okay, I don't know if you guys can hear, but I'm so y'all, this game is so stressful, but man, I really really like it. Gosh, I like this game. So, anyhow, we're on to Galadriel.
And so, I I think I can do both. I'll start with Galadriel. I'm going to do her quest first because I have three elves there. And I will spend one, two swords plus one token. And I will turn this into a haven, which will give me two hope. And I actually gain one additional hope. So now I'm not in super danger here. So now I've done that. Now Galadriel can do her nonsense. So I think what I want to do is I'm a little worried about this here. So I'm going to spin my second action to move back here. My third action to attack. I'm going to roll three dice. And because Galadriel's here, I can roll one of these if I want to. Wow, that's terrible. So let's roll one of these. So we each lose one. And then for my fourth action, I'm going to do the same thing, but I can only roll two dice because I only got two troops there. And again, I can do a roll. So, they lose two and I lose one.
But I eliminated them from everything. So, that's good. Gosh, I'm all stressy here. Now, I have Froto and Sam. And at this quest here, I have two hearts and a ring like so, which will allow me to complete this quest here. So, I get these troops into the supply, which is huge. Then I get to add two of these troops right to the board, like so, and gain one more hope. So, oh my gosh, I've gone from like this being a disaster to like really doing well. Now, my next goal is I got to get Arwin up here to Eisenard and take that.
And now I just got to start banking rings and get Froto and Sam over to Mount Doom. Oh, I'm going to say this and regret it. I might have a chance here. We get a Gondor and another stealth, which is good cuz now I'm going to start stealthing. All right, first card. It's going to be the bottom one in rune. And unfortunately, the eye is where Froto is already, but there are no ring wraiths, no troops, so there's nothing to actually roll. Second card is also bottom. Another to Ner. Sorry, another one to Ner. And two Naz Goul move closer to Frodo. So that one will move and that one will move. So now I got to get his butt out of there, which is okay because now we have Legololis. First thing I want to do, get one of these. Second thing, do I want to do an attack there and cost? Nope, I don't want to do that. So I'm actually going to spend a card and just get rid of this guy so I don't have to worry about potentially losing a haven. That's one action. Oh, it's not an action. Not an action. So, I'm going to go one. Actually, no. I'm going to go one back to there. Two, spend the fellowship here to get a troop. Then three, bring him
here. And four, come over here and join Arwin so she can take those troops with her. Then for Frodo and Sam, I don't need the troops. So I'm going to just move them. Oh, that coin I can move. I'm just going to move them to here. And then I may pause here and minus Tth for a bit. Yeah. Okay. Now I know a sky is darken's coming. That's going to be bad. I'll go over it. So there's my sky darken. I'll go over that in one second. and an area door. First thing, the shadow grows by one, which means I move the number of shadow cards I draw up by one. But for now, it's still on two cards. Then if the eyes in Froto's region, which is not, bad things happen. Otherwise, it moves to Froto's region. So, it's just going to Whoops. It's going to move to right here.
Then three troops show up in Darwinian, which is dangerous because that means we got a pretty nasty army over there that I guess Legololis is going to have to get his butt over there and deal with. And then then I take all of these cards, I shuffle them, put them back on top. But in there, we have these two special cards, which I'm going to kind of spread out a little bit. And it means all the places that have been activating already are gonna activate again. So this is kind of one of the one of the more interesting things in the game I think. So I did that. Now let's draw the cards. So first we have the bottom. Oh, this is bad. Bad bad bad. And then we roll a C. Oh no, it's not bad because it's here. There's no ring rates and no troops. So that actually worked out. So I'm hoping actually for another one of those. We get a troop in Moria. And again, roll a search, but there is no search to be rolled. All right. Now we're on to Arwin. So I need to get Arwin's butt to Eisenard and take it. Now I don't have the swords, but So let's get her there, though.
So if I go take all these troops, go one, two, whoops, two, three, three. And before I leave Laurian, I'm actually going to do a free muster right there and just get one troop. I'm going to leave it there cuz I can't take Eisenard till I have more swords anyway. Actually, I'm going to stay here after that muster and I'm going to just go ahead and use her solo mode, get a ring token because that's going to get me closer to letting Froto and Sam win. Then Froto and Sam don't have the ability to do what I want them to do. I don't like them being where the eye is.
So, I'm just going to move them there. No ring rates, so they're okay. Draw my two cards. Har wreath and Gondor. So, I got some rings, which I can get especially if I get someone mean Terrath. Okay. Okay. Okay. Not terrible. Not terrible. We draw our first card which is a top Dolador to Arabore. There is nobody here but following this line. Nothing. And then to the woodland. So I got to deal with that.
That is on its way. Oh my gosh, I'm so stressed out. So, Miam Pippen, first things first, get one of these. I wonder if I shouldn't take a bunch of these troops with me and try to deal with Helms Deep. I think I should. So, was one to get the token, two, three, and my fourth action, I will do an attack with three dice. All right. So, they lose one, I lose one, then we each lose one. I'm willing to suffer that. That's not remotely the worst. Infoto and Sam. Let's see. So, I really I guess I want them to come down to here and move through there. So, what I'm going to do is I'm going to spin this card here to move them so I don't have to roll a search. And that is the turn. Draw my two. Uh, there's a sword.
So, one more sword. That's what I'm talking about. Give me one more sw Oh, well, I got eagles. So, eagles will let me move a lot. And so, I'll probably hold Well, let's see. So, Hootin, Galadriel's next. It doesn't say I can't take troops. So, if I move Galadriel, she can take a troop. Her turn is next, but I still missing one sword. So, that's not helpful. But I could move Pippen and Mary and have them take their troops to potentially take that later.
So I'm going to immediately play this. Oh, and I forgot there was a fight. So the eye was supposed to move to there. And maybe this is wrong. And Brie Woodward will tell me I did this wrong if it is. But it doesn't say they can't take their troops. So, they're going to take all their troops and defend that. Oh, but the problem is, are they going to Helms Deep? Crappity crap. Oh, sugar. Nope. I'm going to hold off on that. I'm going actually send them all to Helms Deep with that card. I don't I don't have to use it right now, but I'm going to. I'm going send the helms deep just in case they move because I don't want to lose that hope. Oh, dang it. All right.
So, first we have a bottom action one to near Harod. If Mordor is empty, deploy one from the largest group at a time. If the eye is in mortar, recall three instead. So, this is actually good. So, three of these guys are going to make their way over to the eye. And that's great. That's going to make this a lot safer. And the second action is moving Ner towards Arabore. So here we're following the blue line. It goes here, here, here, here, here, here, here, here. Oh boy. All right. Legal is going to have to deal with that nonsense very soon. Oh shoot. It's Mary and Pippen's turn. So moving them was dumb. Yeah. So I'm going to do a little bit of a retcon because I wasn't paying attention. I'm going to leave everybody here. The first thing I'm going to do is I'm going to do a capture and capture Eisenard. My second action I'm going to get another one of these tokens. And for doing that, we get a ring token. And we can continue on. My third action, I'm going to take all of them to here. And then my fourth action, I'm
going to go ahead and move over to there just in case they come after me. Froto and Sam, unfortunately, can't get through there. I don't think I don't have an Ailion card. So, they're just going to stay there and wait because I need to get another stealth though. I could use the Eagles. I think I'm going to do this. I'm going to use the Eagles. Move Froto and Sam directly here. Then I have to move the eye here and roll a search. There's one Nazold there, which means I have to roll one dice. That is not that bad, which Oh, well that's in this case that's actually bad. I have to recall one two Mordor. So, I'll just pull one of these back. So, when it comes to my turn again, I need to do a fight to get the eye out of there because now if I can get one more, actually, if I can get one more ring this turn, I can win. Oh my gosh. Watch me just get a shadows dark. It's going to be terrible. A ring. Oh my gosh, y'all. I can do it.
Maybe. Let's see what happens. First we have a top which is Ner to Arabore. Oh boy. Oh crap. So this is bad. Boom. That gets conquered because all these guys move there. I didn't deal with it. Which means I lose three hope. That just made winning much harder. Oh, wait wait wait wait wait wait wait wait wait. I not Ner. That's not Ner. Ner is
here. Oh, yeah. So, it's still there. A shoot. That That's only one card. Uhoh. Add one shadow troop to every stronghold in Mordor. The Drums of War. Well, that's that's not terrible. So, now we're on Galadriel. Is there anything she can do to help? Oh, did I did I get my hope here when I took this? Cuz if I did, I'd be
here. Shoot. I'm not sure. All right, I'm going I'm going to risk it. I'm going to do it. This is it right here. Win or lose. Two tokens, three cards, one, two, three, four, five, six dice. I can reroll two because I have Sam with me and I can spend these two friendships. Oh, I'm going zoom in for
this. All right. What? Oh god, that's bad. 1 2 3 four. So four I can't do. So I will roll these two. That's nothing. I have to suffer these three. All right. I need this or this on both of these dice. No. Oh. Do I have anything I can do? There's nothing I can do. Oh, dang it. Dang. I lost. Oh, that was close. Unless, of course, I didn't give myself my hope. If I did not give myself my hope for this, then actually I would be here and then it's a glorious victory.
But either way, there you have it, folks. That is a solo play with a couple of the non-standard characters, a couple of the non-standard quests. I'm sweating, y'all. That was so close. Ah, and I lost. Anyhow, there you have it, folks. That is a playthrough. You'll find a link in the description to my review of the game. I like it. It's really, really hard. I may have won this. I may have lost if I forgot to give myself hope for this. I won. I don't think I did. So, I lost, but it was really close. I probably could have held off a couple turns and then maybe gotten some more friendship there. Let me just check. No, I didn't have any friendship coming up next round. Yeah, so I would have had a skies darkened. So that that was the play. I beat the right play and the dice just didn't do it for me. But anyhow, I hope that's helpful to you in deciding if you're interested in this game. As always, if you found this video useful, please like, subscribe, share, maybe become a channel member. As always, thank you so much for watching.
Have a wonderful, wonderful day.