Tokaido: Automa (Solo) Playthrough
Games in This Video
1 game is featured in this video — it unlocks as you watch.
Transcript
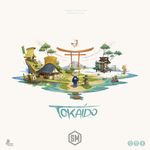
Hi everyone, I'm Tom and today I'm going to be playing Tokaido, which is a game of travelers in Japan in the days of old traveling on the Takaido to Edo and trying to have the best time along the way. It's one of the classic, you know, best gateway games. Fantastic for introducing anyone to board games or just having a nice chill but still competitive time. It was one of our very early games thanks to tabletop. Remember tabletop? It's one of the things that got us started. Anyway, uh before I get started, I recommend you turn on the subtitles to the Cllingon channel. If I make any mistakes, they'll be corrected there. Thanks, Steve. If you'd like to support the channel, there are ways to do that in the description. Thank you. And thanks very much to Stonem for sponsoring this video. And hello, if you're watching this on the Stonem channel, I'm Tom. I make playthroughs. The channel's called Slicker Drips. Don't worry about why. There's board games in that. So Stonem is now the publisher of Tokaido. And one of the things that has been included in all editions. You can buy this separately, but if you buy the Stonem version, it comes with a solo mode or an autoim mode, which is what Stonem calls their solo modes. So, if you want to practice or you just don't have anyone to play with right now, you can go and play against the Ottoman. There are two Ottomans in your game. So, you are simulating a three-player game. There's very simple rules to control them. I'll explain the Ottomans and the rules for the game just as we are playing. So, here is the Takco Road and all of the dots along it are locations that we could potentially visit along the way.
If we have a zoom in, we take turns until we all reach the end of the road. But we don't, you know, just go in clockwise order or something as you usually would in the game. Whoever is furthest behind on the road goes next. So, in a random shuffle at the start, I as the purple player have started out at the end. So, I have my choice of place to visit. I can jump as far forward as I like, but I have to stop at the next inn and wait until everybody has gotten to the inn. Now, I think I'm just going to do some baby steps over here. And I'm going to stop off at this first location. The black location here is a shop. Now, some of the places have got multiple dots on there. So, the first player to come would go on the road. The next player to come would go on the other space, and then nobody can go to that space. Again, that's only for when you're playing at four and five players.
So, anything under, we're simulating a three-player game here. We can't use those extra dots. So, while I'm still here, nobody can come to this shop. But if they're desperate for a shop, they can still go to that one right away. What do we do when we come to a shop? There's a handy reference card that explains all of these bits. Uh, but you draw three souvenir cards, and we can jump down to my player area here. So, there are four different types of souvenirs we can buy. We can buy food and drinks, clothing. Uh this is art, and there is also small objects which I haven't drawn here. We can buy as many of these as we like. And we are trying to get sets of different things. I started off the game with seven money because I chose this as my traveler, Kingo. Here you get a special ability as well. When I buy meals, they will be one cheaper. There is also handily on the back a little text description of the rules of your traveler. You can look them up in the rule book as well. We've got my little parcel in here to show that it's me, the purple player, who has this traveler. And I started off with seven money because of it. Now, I want to have some money available. I don't think I want to spend six out of seven of it right now. I'm going to buy two things. So, you can see they cost two each. Let's have some jubacco and dahuku. So, I pay my four coins. And then the first one goes into a brand new set. I don't have any sets right now.
So, the first card in a set is worth a point. So, I get one point. And the Ottomans should actually start on a point each for the coins that they got at setup. The second one is from the food and drink category. That's a different category. So, it's the second thing. I score three more points for it, putting me on four. So, next time I buy things, if I was to buy another art card, it would start a new set and be worth one point. If I was to buy anything that isn't these two things, it would add to this set and be worth five points. And then, if I can get the fourth different thing, seven points on top. So altogether you can get 16 points for completing each of your sets and that's my turn. I was last in turn order. So I placed my traveler did the action of the location and we go to the next player along who is the gray. There is an Ottoma deck that is going to determine where they want to go. So we draw a card for the start of the game and it gives us a range for the auto. It might have some other things on it too, but right now Autumn is going to go to a space one ahead. And it's got space for many columns of cards corresponding to all the different things that we can get.
And it has a priority list based on how many of that thing it already has. So it's got zero of everything apart from coins. It starts with one coin. So that means its priority would be a farm. Can it get to a farm by moving one space? So it gets to skip any spaces that are fully occupied. No, it can't get to a farm. It has got to go here because there's just no choice at range one. So gray's going here, which is the temple. Now, the Ottoman never has to spend coins. They have these coins in the display, but that is just for point scoring when they go to farms. When they visit the temple, this is different to what I need to do. Uh they take two coins from the supply, put it in their space, and score two points for having donated two coins. At the end of the game, there are points available for whoever has donated the most, second most, third most to the temple. If you haven't donated anything, you don't get any points. So, Gray now has two donated to the temple. If I were to come to the temple, I would have to choose to donate one, two, or three of the coins from my player area, and then I get a point per coin donated, and at the end, we can compete for that total.
So, that's it for gray. That goes in the discard pile. Green is now last on the road. So, we draw again. And they've actually got one range, too. So, they're just going to go to the next space along, but we're kind of explaining the places in order, aren't we? So, pink here is an encounter space. Draw an encounter card and apply its effect. So, if we were to come to this space, we would draw this card. And on the other side of the encounter card, uh, you can gain coins and get them as offerings, gain other types of cards, gain souvenirs, gain some money, gain some points. The Ottomans do not care what these cards say unless they're going to the temple, of which case we've seen what they do, or they're going to an inn, and we'll see that in a bit. They do something special at the end. every other type of card. If they haven't got one yet, they make a new column for it and put it face down and they score points equal to how many they now have in that column. So, they got one encounter card will get one point. That's it. It's as simple as that. Now, I'm left on the road. And again, I don't want to jump too far forward. Now, some of the next spaces coming up are panorama spaces.
You come over here and start to build a panorama of this type of well panorama and you only score one point at the start, but the more times you come to the same place in the future, you'll get more and more points. The panoramas have three, four, and five different cards to them. And the first player to complete each of the panoramas is competing for uh an achievement which worth three points. There are also achievements at the end of the game for the player who has the most hot spring cards, who paid the most for their meals, who has the most souvenir cards. All of the autumns count as two for this at the end. And finally, whoever has the most encounter cards. So, there are two different panoramas available here. I could go to the hotring and draw a hotring card.
Those cards are all worth two or three points, but we've seen there is a majority at the end. Three points for whoever has the most. Now, I'd like to go to the farm and get three coins, but I think I'm going to hang back a little bit. I'm going to work on this panorama. I'm going to hang right back. The first space available. So, I have come here to look at the patties. I take the first card available, which is worth one point. If I come here again, I fish through until I get to a two-point card. And I can put this in my player area. Look at the lovely panorama we are looking at. I'm going to run out of space very soon, aren't I? It's worth one point. So, we score that. That's the end of my turn. Gray is last. So, we draw a card. Their range is now two. So, in the next two spaces, can they go to a farm, which is all they care about right now? No, they can't. Now, a little bit special for their priority. Inns and temples are always the lowest priority for them unless there's a special symbol on the cards. As it is, they can't get to either of those with two movements.
Uh, so look, do they care about hot springs or looking at the mountains? No. They are equally indifferent about those. So if they are tied for a choice, they'll go to the one that takes the fewest steps so they can see more things. So they're going to go to a hotring and we know that they don't care what's on the card. They just place it in a new column cuz this is their first hot springs card and score one point for it. If a player were getting a hot springs card, they would draw it. It's worth two or three points, but they will get more if they keep getting Hot Springs cards. Green is now last, so we draw an autumn card. Their range is one. So, we know they're just going to the next space in front. They take their first mounting card. Ignore the points that are on it because their columns all work the same. It's the first thing in a column. So, in this case, they're getting the one point that's on the card, but in the future, they don't care about actually making a panorama.
They're just stacking things up. Okay, so this actually leaves me with the farm that I think I wanted to go to anyway. So, I'm going to go there. When a player goes to a farm, they get three coins, and that's it. No points, but hopefully more buying power in the future. Although that shop might very well be occupied when it becomes my turn again. So, gray is next. They have three range. So, here's what we're choosing. The shop, the temple, or the encounter space. Do they have any of those things? Well, we know temple is the lowest priority unless the card says otherwise. So, that's out of contention. Shop or encounter, they don't care about either of those things. So they go to the one that takes the fewest steps, the shop. And again, we don't care what it is. They just take it. They don't pay for it. It's a new column which is worth one point for them. Discard next.
Green card. Okay. So this has a special symbol. Their range is two, but if it's within range, they want to go to an inn the most. You see the inn has got that symbol of a meal there. So if they were a bit closer to the in, they would definitely go to it no matter how many items they've got right now. And there is another symbol in the deck for temple being the highest priority. So green has two range. We know that unless told otherwise temples are the lowest priority. So they're going to go to this encounter space leaving a gap there. And they do already have an encounter card. So this is number two. And they get two points. We're all tied up on five points there. I am last again. And if I'm willing to go to the temple here, I could get a turn before green. I think I will. I'm going to sneak in here so I can donate one, two, or three coins. I'm going to go for the big three.
So, that is a fair bit of my buying power, but the shop's blocked off. The other one isn't for ages. I'm going to donate three coins and get three points for doing it. And so, at the moment, I'm in the lead and I might get these 10 points at the end of the game. Gray is last now. So, draw their autumn card. Their range is two. So, do they have either of these panoramas, the sea or the mountains? No, both even. So, they go to the C for the first time, make a new column, and get one point for it being the first thing in that column. I'm last again, so I get to go before green. And let's see. I could go to the mountains and start that panorama, or I could go to the hot springs and get two or three points. I like the idea of going to the mountains. I'm going to go there. So, we start our first look at the mountains there. Building up a lovely picture. and get one point. Green is next up. So the player orders shifting. Now we're jumping ahead a bit.
So temples would be top priority. So in their two spaces in is the lowest unless we're told otherwise. So they will go to the hotring. Take the card. It's a new one for them. So they get one point for it. And then gray doesn't have much of a choice really because oh in's a top priority for them. So they're going to go to the first available spot on the inn. And normally the first player there would draw meal cards and choose from them. When we're playing the solo game, we wait until everyone is at the end. So they're not going to get another turn until everybody's at the end. But as it is, we're quite close. I've got no choice. There are no spaces available for me. And then we're drawing for green. Yeah, they've got to go to the end. So now we're at the end. We shuffle the automa deck to form a new one. And then we draw meal cards equal to the number of players plus one. And then in turn order, we're going to buy them. So, gray arrived here first. So, looking at the meal cards, they will buy the cheapest meal. Now, if I had been the first player, I've got free choice of these. They're all worth six points. You don't have to buy one, but you can't eat the same meal twice in the whole game.
So, if you've gone for the cheapest next time, if you want one, you're going to have to go for more expensive one or hope that you draw that. Maybe they're all going to be dango. For the meals, they'll take the cheapest type. And you don't have to put these in a column. I'm just going to put it uh just underneath so we've got space. They get six points. They don't have to pay. Comes over to me next. So I would I like Tempura for two or Fugu or Donbury for three. Now remember my special ability is that I can buy meals for one less. So one cost meals are free for me. I've only got three money. So I think I'm going to buy the tempora for only one with my discount. So that's going to get me six points as well, putting me on 15. And finally, green will just buy one of the other available ones. Get six points.
The one we didn't take goes on the bottom. And we continue the game. Green is last, so draw a card. Their range is one, so we don't have to worry about what they want to do. They are going to look at this panorama, which they haven't looked at before. So, they're going to get one point. I'm next. So, let's think. I've only got two money, so I'm And I'm in the lead on the temple. So, I think I'm going to go to the farm and try and build this money up again. One, two, three. Okay. So, then gray is next. Draw a card for them. Their range is three. So, we aren't told anything. So, the temple is just out of the question. Do they care about patties or mountains? No, they haven't got either of those things. So, they'll go to the nearest thing, you know, in their priority. So skipping over the temple, they'll go to the first paddy, take that card and get one point. And then green is behind again. So their decision, their range is two, one, two.
We aren't told that temples are the best. So they'll definitely go over to the mountain, which is a shame. I'd like to build up my mountain licking, but they have already started it. So they'll take a card and get two points cuz it's their second one. And so for me, we can have an encounter card. We haven't had one yet. I'm not thinking temple. We could go for mountain again, but it's a bit in front. The priority for the Ottoman is going to get quite high for this mountain now. But do I want to skip ahead four spaces to be the first person to pick that? I think I am just going to go for the encounter. I'm kind of mixing up and getting everything. And my reward is get a Patty Panorama card. That's actually great cuz I've I've got the first one. So, I can go and get the second one here. Oh, look at my lovely picture forming. I get two points for that. So, that's worked out quite well. The encounter card itself isn't worth, you know, points or anything apart from for the achievement for the person who took the most of them. So, I'll just leave that off to the side for now. In the back is gray.
So, let's draw a card. Ian is the highest priority, but their range is only two. So, out of those two, one is a temple. So, they'll skip that and go to the hotring. They have been to a hotring once before, so that's going to be worth two for the number of cards they've got in there. Green is now last. So two range again. It isn't telling us temples are worth going to. So it's going to go to the mountains. Blocking off my mountains. The third one. One, two, three. So jumping in front. Now I with my mountain winnings. There is there is no cost essentially for me going to this temple. I still get another turn. I think I'm just going to spend one at the temple and grab one points and keep you push my lead a little bit. I've got four now. And then I don't want to start a new panorama. I don't think I'm going to jump to the shop. So, let's draw three cards and see what we want to buy. We've got Kashi is clothing, Shiki is art, Saki is food.
So, so with only four money to my name, I think I'm just going to buy the new type for two. Discard these. That card is worth five points to me. Two, three, four, five. So, I'm on 23. And then it is Gray Autuma's turn. Their range is only one, so they're going to be going to the Panorama. It's their second card of that type. So, getting two points. Green is now last, and they could be going to the inn here. Two range temple is best. So, they will go to the farm. Whenever they go to the farm, they get one coin, but it goes in this stack. And just like them getting multiple cards, there are now two coins in that stack. So, two points. It's gray again. But we know that they have to go to the end. Then I have to go to the end. Then green has to go to the end. So, we shuffle the cards up and then we can look at the meals. And gray is going to get first pick. Again, I can afford all of the meals. I think I would like to pay nothing, but I imagine gray is going to take that choice away from me. So, four more meals and let's see what Gray wants. They want the cheapest. So, if there's a tie, it's the first drawn, so they actually do take a different one, but it doesn't really matter to them. I haven't had one that costs one. So, I think I'm going to buy the dango because that's free for me. So, we need to give ourselves six points. Six. And I get six. They're basically always going to get a meal. They'll buy the earliest two cost. The autos are always going to get six points. I need to have the money available to get those six points and keep up. So now green was the last to
make it to the inn. So they take the next turn. The next two spaces, do they care about patties? Not at all. Shops, they've got no items. So they'll take the shortest path and get their first patty card. Then it's me. So shop, I've got two money. I might get the last thing that I need from here, I think. Yeah, we're going to go shop. So draw three cards. Are we going to just buy nothing though if we don't get the type that I need? There's the type. So yeah, we'll spend the last two coins available to get which is going to be worth seven points. And I can't afford any of the others. So that'll put me on 36. And then gray is next. Their range is two. Temples are best. So it's either encounters or farms. They've got zero encounters and two coins. So they will choose farm. Get a third coin and three points. Green is next.
So their range is two ins are best but the in is miles away. So encounters they've got two mountains they've got three. So they will choose mountains. So I don't think we're going to get much more of that uh panorama. So that's their fourth one. 1 2 3 four. So it's up to me. You know maybe I need to block mountains off to maybe I should do a big jump to stop them earning all these points. So it's me next. It's free for me to have this encounter card. So why not? It is gain three coins. Lovely. Cuz I am skinned. And so now we've got the option hot spring with two or three points. And at the moment, the person with the most only has two of these Hotring cards. Could maybe compete for that. Ocean not very good at that. Whereas the Paddyy, I could complete this. It would be worth three points for the third card and I would get the achievement for doing it first. The thing holding me back from that is nobody else is close to doing that.
There's only one more opportunity though near the end to do it. Yeah, I'm going to jump ahead. We'll go for Paddyy. So, I've already got one and two. We get the number three card. Complete our lovely panorama. Look at that. So, that's going to be one, two, three points. And then the first player to complete the Patty Panorama, three sections, gains this achievement and scores three points. One, two, three. We've got a bit of a lead going. Gray just goes to the next space along. It's a hot spring cord. And that's their third for one, two, three. Green has a range of three. So, let's see. They've got rank one for this. They don't want the temple. They've got rank one for the farm. So, they'll go for the nearest thing. They'll take a C panorama card, and it's worth two points to them. Gray is next cuz I did a bit of a jump, didn't I? Range one is just the next space along which is the temple. They get two coins from the supply. Put it in their space and get two points and they are now equaling me. So, we've got four each. Maybe stack them up like this so you can see from a bird's eye view.
We've got four coins each at the temple right now. I probably want to go to one again. Green is next. So, their range is two. Farm or encounter. They've got one coin and two encounter cards. So, they will go to the encounter space and get a third for three points. Okay. I think I would like to go to the farm and get three coins. I don't want gray to go there. They really want to go there. And if I get lucky and the shops available, we might be able to buy a couple of things, get another set going maybe. I don't know. Gray is next anyway. So, their range is two. They want to go to a temple, but neither of these are temple. Let's see. For gray, they've got two ocean and one item. So, they will actually go to the ocean, which I quite like. Although, this is their third out of five for the ocean. One, two, three points cuz it's their third one. Do I want to go to the shop or jump to the inn? If I don't go to the end, I'll be last on the road and get first pick, but I'll get last pick of meal. But I've got a lot of money. I'm going to go to the shop. Draw three cards. So, how much have I got? Two, four, six. Oh, there's something that only costs one.
So, I could buy these for five. and just cross. Oh, they're the same type though. Yeah, I think we'll just buy these two then. I don't want to double up on type, especially since it costs two. So, we'll pay three money for some clothes and some food. So, the first one gets me one point. The second one gets me three points. So, one 1 2 3 4. Green is next, but let's not bother drawing the cards for them. Then gray goes, then I go, cuz we all have to stop at the end and these get shuffled anyway. So, I'm getting last pick of the mill, but I've got three money, so I don't really care unless they happen to leave me the two things I've already bought. That would be bad. But I've got a bit of a lead going as well. So, Green's actually getting the first pick here. One, two, three, four cards.
So, their choice is Sushimi, Misoshidu, Unagi, and Dango. You must have Unagi. Okay. So, they will take the cheapest thing. They don't care what it is. So, green takes that. Gray takes this. And my choice is is two three cost things. So I'm going to pay two for it because of my one discount. And then we all get six points. Well, we'd get it when we were buying the meal card, but you know what I mean, don't you? So I've got first pick. We can go to the hot springs, but I've got none of that. We could go to the temple. I do have a money cuz at the shop I've got to be lucky and hope that one cost items come out. I could just go to the encounter space. I've already got two. I could keep up with the lead for encounter cards and deny green. Yeah, I'd like to be ahead on that temple, but I think I've done decently anyway. I'm going to jump to encounter. Let's see what it is.
It is gain a C panorama card. That's not very helpful for me. So, oh, actually, in them taking all of the ones cuz they don't care about the number. They haven't left a one for me. So, uh, let's undo that. I get a one. Look, I've started a brand new panorama. It's only worth 1.2, though. Oh well. Went for an encounter card. That's the risk you take. Gray's next. Their range is two and temples have top priority. So, unfortunately for me, Gray are going to put their sixth coin on here. Two for the donation. They're now in the lead for the temple. I wouldn't I would have been blocking it off, I suppose, if I was there, but I could only have donated one. Then Green's next. Their range is only one, so they're going to be going to the Hotring.
It's their second hotring cord, so I get two points. They're last again. So, their range is two. Shop, they've got no items. C, they've already got two, so they'll get a third C panorama. One, two, three. Oh, actually move them to the C space as well. Gray is last. So, two spaces with ins as the priority. Shops, they've got one. Coins, they've got three. So, they're going to jump to the farm. They get one more coin. It's now their fourth. So, they get 1 2 3 four points. Okay. Unfortunately for me, the shop has been left available. I don't really want that. So, the hotring, I'm not really going to get majority on that, though. Encounters I can take majority for. And hopefully, it's going to be better this time. Draw a souvenir card and add it to your collection. This I mean there's there's two other sets.
There's two other items and it is something different. So, that's worth five points to me. One, two, three, four, five. Generally, the encounter cards been pretty kind. The one that got me a new visttor I hadn't started. Not so helpful, but in general that's been a lot of points. Green next. So with two range, do they want to go to the hot springs? They've got two. Or the mountain. They've got four. Oh, they should have the achievement card for mountain. Uh that would have been a subtitle at some point. Uh they will choose mountain though because unlike me, they can go past the limit of the cards. 1 2 3 4 5. They get five more points. Ouch. Gray is now last. So in three range, what do they want to do? They've got three hot springs, one patty, 3C. So that means they're going to go to the hot springs first. It's their fourth one, so get four points.
Oh, they're catching right up. And then it's gray again. Three range temple is the highest priority. There are no temples anymore. So three range, patty is one, C is three, shop is one. They're going to go to the C and get their fourth C. It doesn't complete it. You need five to complete it. But it is their fourth one for one, two, three, four points. Now it's me. So the Patty I can't go to. I've already completed it. The shop I've only got one money for. And if I spend it, I mean, for it to really pay off, I have got to draw a one cost piece of art and then hope that there is a one cost meal left for me at the end cuz I'm likely going to be the last person going to the end. So, I think it makes the most sense for me to jump ahead and get first choice at the end. So, I will get a meal and I can pay for a two cost to try and keep my uh paid the most up. Okay, so green is next. Range three, in is the lowest priority. So patty is one. Shop is nothing. So they'll go to the patty.
Second one for two points. Green is still last. Temple highest priority, so not the inn. They'll go to the shop and get their first item for one point. Then gray is next, but everyone's got to go to the inn. Now there are no more spaces available. So we come to the final inn. We don't need to shuffle that anymore because this is the end. So, my choice of meal. Let's zoom in so we can see the types I've already had. So, sober. Yeah, I want to I want to pay for what I can. So, it doesn't really matter to me, does it? Because gray is going to go next and take the cheapest one. So, I wonder cuz paid the most is an achievement. I I think green might end up paying the same as me. So, I can pay one for the tofu, which is a new meal. And then gray is next in line and we'll take the cheapest one and they will just take the first drawn of the two costs. We all get six points. It's close. This is probably going to be on achievements. So, first up, the traveler who had the most hot spring cards, that is going to be gray.
They get the bather achievement for three points. One, two, three. Next up, who is the gourmet? The traveler who has the highest sum of coins on their meal cards? Gray has four. So that's not going to do it. Green has 3,568. I have 3568. If there's a tie, we are both the gourmet. 1 2 3 1 2 3. So we both get those points. I'm going to have to card that. Collector, the traveler with the most souvenir cards. Theirs count as two, but they only went there once anyway, so it's definitely me. It's my main thing was shopping, wasn't it? One, two, three. And finally, the chatter box. The traveler who has the most encounter cards. One, two, three, four versus three versus none. That's me for another three points. The only achievement left is completing the C panorama, which nobody did because you need to get five spaces for that. So, the final scores are 73- 66 to 64. So, I had the most pleasant time at Takaido.
Now, if you're thinking, "Oh, you came all these points ahead. the autumn is going to be too easy. There are difficulty levels. This with no changes to it is difficulty level four. We can make the game harder. At difficulty level five, you take these difficulty cards and for each automa you shuffle them up and at level five draw one of them. The Ottoa act as if they went to that space. So they'd get their first C panorama card at the very start of the game and then you'd shuffle them up again and draw for the other. They'd start off with a card, giving them different priorities and, you know, a potential to get those stacks bigger. They've already earned a point at the start of the game for that thing. If they get the chance to, they'll go to that space more and build up bigger stacks worth more points. At level six, you draw three each. At level seven, you draw five each. You still all start at the very beginning of the game. And there are other variants that you can use that are that are compatible with the solo mode as well. But yeah, at higher difficulty levels, they're going to be starting with a lot of stuff each.
The solo mode is also compatible with promos with expansions from original Tokco as well. I've just got the base game here. There are a couple of changes like a variant in one of the expansions can't be used. The Felicia promo can't be used but all the others can be used fine. Wonder if that was a Felicia day tabletop promo. Maybe. Yeah, Takaido is a lovely easy to get to grips with. Just nice relaxing time building up sets, building up these lovely panoramas. tricky to see how far ahead to jump because you're potentially just giving other players free turns if they end up too far back. And the auto mode is a fantastic inclusion because why wouldn't you want solo modes in games? If you're like, I never play solo, well that's fine. It doesn't affect you. But if someone wants to give it a go, it is here. It is so easy to learn. That's kind of a hallmark of autoimm solo modes of every Stonewire game. They are really easy to get to grips with. you know, perhaps like a little bit more complicated if the game itself is more complicated, but they are generally just governed by a deck of cards that you're drawing from to tell you what to do on their turns. And despite them being simple to operate, they are very competitive as well and very customizable. So, if you find that you're just really good at Taido and you're winning all the time, you can keep stepping it up until that's not the case anymore. So, there we go. That's it from me. I hope you enjoyed this and it gave you a good idea of what Tokaido is like in general, of what the solo mode is like in this new edition. Remember, if you're already an owner of Tokaido or you're thinking of getting a secondhand copy of a non Stonem edition, Stonemire are selling the solo pack as well as a separate thing. So, even if you are
fully geared up into Kaido, you can just get a little thing adding that solo mode into. It's just great all around, isn't it? If you'd like to see more from me, you can subscribe. If you'd like to support me, there are ways to do that in the description. Thank you so much for watching, everyone, and I'll see you for the next game. Bye.