Inventors of the South Tigris Preview! | Invent, build, test, and publish your ingenious devices.
Games in This Video
1 game is featured in this video — it unlocks as you watch.
Transcript
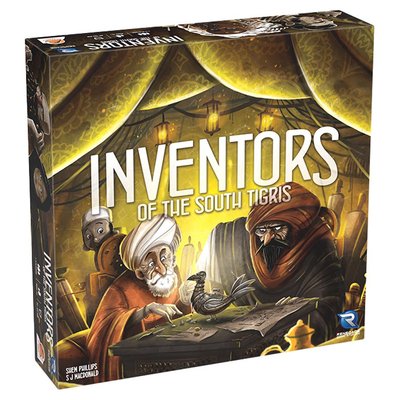
e nah n hey friends it is Jenna what is up and welcome back to the board game garden and welcome to a preview of this game right here this is inventors of the South tigis which this is the third in the South tiger series from Garfield games who is sponsoring today's videoos so huge thank you to them it's designed by shm Phillips as well as SJ McDonald it's a game for one to four players so yes for those solo lovers out there there is a solo mode which is awesome
and I will will be actually streaming the solo mode at some point during The Campaign which I will add here that the campaign is when this video goes up live so definitely go and check it out I will have the link in the description box to the crowdfunding campaign for inventors of the cell Tigress um but it does play in about 90 to 120 minutes and is ages 13 plus so like I mentioned this is the third in the trilogy of Wayfair of the South Tigress Scholars of the South tigress and now inventors of the South Tigress so you guys if you've seen the channel before you know that I am a huge fan of wayf fars of the sou Tigers it was actually my number one game of 2022 and then schols of the SE Tigers was my number two for 2023 so inventors of the SE Tigress is definitely one that I have high hopes for and am anticipating so I'm very happy to be covering it on the channel today but anyways if you guys want to see more about inventures of the S Tigress exactly how it plays all the components in front of me which I will say that this is a prototype um it's a very far long very nice prototype so um things are subject to change but it is pretty close to final production um so if you guys want to see that then just keep on watching give this video a big thumbs up if you enjoy Also hit the Subscribe button down below if you yet to do so we'd love to have you here in the garden and without further Ado let's get into this preview of inventors of the sub pigis all right to start off the video very much like all of my other previews I'm going to be going into a little bit of an aim of the game as well as taking a look at all the components
and kind of just um this is a pretty big game so I wanted to just kind of do some overview of some of the like General things that you will see in the game um that are really useful to keep in mind um when going into the how to play so uh yes in inventors of the C Tigress you are going to be competing as inventors and you are trying to be the best inventor by the end of the game um you obviously are going to want to get the most victory points so whoever at the end of the game has the most victory points is going to be the best inventor um but you're going to be doing this in different ways by using Dice and also your Workshop so with those dice you're going to be able to perform actions like inventing as well as building so you're going to be inventing the items then building them then publishing them you can also test those inventions as well and with the whole you know inventing building publishing you can actually do those or each of the inventions are going to be able to be done by multiple people so one person might invent it another person might build it very much like in Scholars where you could bring a scroll over to one of the guilds and then someone else could actually translate it it's very much the same in inventors where it's kind of like a communal thing so anybody can do anything to any of the uh inventions over the rounds you're going to be doing all of those things and then at the end Whoever has the most victory points will be the winner I will also quickly add that there can be two different ways of playing you can either decide to play the full game which is four rounds or you can decide to do a shorter game
which is three rounds and they do mention that if you're playing with four players it's recommended that you do play the three round the shorter one um just to make sure the game doesn't go on for too too long so uh yeah that is everything for the aim of the game um but let's go quickly into all of the components so we're going to start with the board in the center here there are a bunch of things on the board here the main thing is going to be uh the river here where you are going to be sailing your boat down the river you're going to be gaining Workshop tiles and you're also going to be researching as well there are the three guilds up here which I will explain there are the tent spots at the top um which if you are going to pass at the end of the round you are going to be placing out your tent gaining some sort of reward there so those are the tent spaces you also have the royalties track here which is the green track so that's everything for the main board I just quickly went over what everything is there but obviously I'll go into what all of them mean when we get into the overview of how to play um there's also at the bottom here like I already pointed out the invention board so you're going to have four in the column here and then you also have some that are uh already built that are ready to be published moving on to the additional components kind of around the main board we have all of the dice here as well as the coins which I do have the like metal deluxified South Tigress coins which you can get but the base game does come with like the punched uh versions of the coins we have the four different colored dice so we have the main color die which is just uh the white and then you also have the three
additional which is blue yellow and gray those are going to get you different things throughout the game depending on which actions you use them with um so that is that on this side here we have the invention boards which like I mentioned once one of these on the far left is built you will then um put another one out so there's always going to be four in this farle column here um you also have the device cards which players are always going to have some device cards in their hand um in order to obviously invent or you can discard them for rewards for free action which I'll get into you also have the dummy cards over there which a dummy player is going to be used in a 1 to two player game they are just going to be covering up some of the worker placement spots they're also going to be adding some influence to the guilds to kind of compete with you there then they are going to be moving their ships but that is purely only for like tie Breakers um and then over here you do have the solo mode cards as well as the first player token and then we get in to the player board so the player board is quite big and there's lots of stuff going on um but basically on the far left here this is where we're going to go over some of like the general things that you're going to see in the game um and that is the brightening of dice so basically you have kind of levels of dice so at the bottom here you do have your exhausted dice so you're not allowed to use those until you have brightened them to the next level or to multiple levels higher um but you have the exhausted you also have the ready dice so those are just going to be dice that you can use for
worker placement spots but you can decide to brighten those dice higher um to either the determined or inspired level and these are going to allow you to add to the PIP um or pip value of the dice so when the dice are in the ready spot that is just going to be that they are the number that they are you can use them from that spot um but you don't get any additional pip numbers but if you do brighten them up to the determined spots that's the blue spot the water that is going to allow you to add one strength or one pip to that die and once I decide to actually use that D um to do an action from the determined spot is going to add one um strength to that die so that diee would be turned from a one to a two and then if you decide to brighten a die all the way up to inspired that is the highest and you actually get to add five so it's pretty much that each die that you put up into Inspire is always going to be a six um so this one if I used it from The Inspired spot um um that one is going to be a six um and so on and so forth they'll always just be six it's not going to be able to go higher than a six so yes that's generally how the brightening dice work you're going to get a brightening die action throughout the game in different ways um and then also you have your study so this is a different way that you're going to be able to kind of hold your dice and brighten them as well so when you're adding dice into the study you're going to be adding the colored dice so like I mentioned you have your white but then you also have your colored dice so there's going to be different ways that you are able to um
gain colored dice mainly through the guild um by placing workers but once you place one of the color dye there's going to be a specific spot there are three different sections that you can add you're going to add it to the lowest of that colored spot you are then with the lowest spot here that is going to make you actually get rid of a diey and most of the time this is that you are just basically replacing one of your white dye which most of the time you want to get rid of your white um with a colored D so you would add this blue here you would get rid of one of your white in the game you're always going to have the same amount of dice you're always just going to be replacing one Dy with another dye unless you get to this spot and this spot on the ship track those allow you to add two more but you're always going to have that basic amount that you start with you're just going to be replacing the ones that you already have but yes when you are going to be brightening a Dy you can actually decide if you have a Dy in your study you can brighten that one you would then put that color die up to the next of that colored space you would gain some sort of reward there and then if you decided to brighten it again you could go all the way up to the top um and gain the reward there but at any time you can actually decide when you brighten you don't have to bring it up you can actually bring it from your study over to that um spot or that level on the brightening or in the brightening area so if I brightened it up to this spot here I could then on my next brighten action brighten it over and have it uh ready to be placed out um from the determin spot so that is generally how
the study and the brightening of dice work the next thing that I wanted to go over is the Tower and your crafts people so you're going to be wanting to use your Crafts People in Order to invent and build and publish you're always going to need to be using your Crafts People you're going to have six different crafts people they're all named something different but there are six different colors and you're going to be using them they are going to be basically hiring them you're going to is spending money and then moving them up one level in the tower and then flipping them over to their um unactive side so that's generally how those are used as you use a specific craft person more and more they're going to be moving up uh that Tower and they're going to get more and more expensive cuz obviously they are becoming more experienced in their craft so they are um charging more to be uh used or to um use their services I guess so as you move those up um once you actually have your bottom space of your Tower empty what is going to happen is you are going to gain some sort of onetime reward you're going to take the bottom tile of your Tower you're going to flip it over and then you're actually going to put it at the top and push all of the others down so this for one thing is going to continuously make those crafts people become more and more expensive but also it's going to allow you to kind of upgrade your income cuz at the beginning of each round aside from the first round you're going to have income which is going to be compiled of your royalties track so wherever you are in that as well as your Tower income so um it actually gets
better as you go up the tower more and more um so that's generally how those work and then obviously when a crafts person is inactive you're going to have to find a way to reactivate that crafts person in order to use it again which there are various ways to do that in the game um but that is the tower there and then you also have your workshops so this is going to be connected to your your ship so as you move your ship you're going to be able to collect these different Workshop tiles and then you're going to be placing them into your Workshop so you have three different Workshop um kind of rows that you can build upon and uh on your turn instead of doing a camel action which I'll get into you can actually do a workshop action where you place your dice into one of your three rows of your workshop and then you're able to activate all of the applicable Workshop tiles that you have in your Workshop so that's how that works kind of building those different rows and getting more rewards um as you build them you also have your tents here which I'll get into but each round you're going to be placing out a tent at the end of the round once you pass you also have your camel actions which this is going to be one of the main things that you're going to be doing you're going to be placing out dice using one of your camels in order to do one of the four main actions which is invent build test and publish all about these inventions down here um and then at the bottom you do have your invention tiles here which you're going to be placing out when you decide to invent um but that's everything for the player board and just the general concepts of the brightening of dice your study as well
as your Tower your Crafts People your Workshop um and your tents different things like that um also I will mention in the three round game you will have this card here to kind of um mimic you already going through one of the rounds you do actually have to in a three- round game at the beginning of the game everyone's going to get one of these cards and you're going to place your furthest left tent onto this card and then it's basically once you have achieved some sort of goal you're going to move your tent down and gain some sort of reward so when you place it um at the beginning of the game you're going to gain one device card and a coin and then as you do different things you're going to move it down and gain more and more rewards each player does have all of their influence that they're going to be placing out onto both the inventions as well as the guilds they also have their three workers that they can use use in the work replacement spots and then you also have some uh cards there to help you out so yes I believe that is everything for the components and just a general overview of some of the general concepts in the game but let's quickly get into hopefully quickly this is a pretty chunky game so I'm going to kind of try to go through how this game generally plays so you guys can get a good feel of it but not make this video like an hour long video so let's get into how exactly inventors of the SE tiger R plays so getting right into the overview like I said at the beginning of the game you're going to decide if you're playing a three round game or a four round game if you do decide to do the shorter three round game each player is going to place
out their tent they're going to get those additional things and once that is finished you're going to get into income unless it is the first round you are not going to do income but in the second and third and possibly fourth round you're going to do income at the starting of a round and once everyone has gotten their income you're going to go into the main actions which there are four main actions that you can do do one is going to be placing one to two dice on a camel action which I'll get into that is where you're going to be able to do a lot of the big main actions like the invent and build and publish and test of the different um inventions here um you can also decide to put one to two dice onto a workshop action so you're going to be able to activate a row in your Workshop you also going to be able to place out a worker which I will mention you do start with two workers but once you've placed out um I believe the second tent here or the first if you're playing a shorter game you're going to be able to gain that third worker um that's another action you can perform on your turn is placing him at a worker and doing one of the worker placement spot actions or the last thing is going to be once you cannot do any other actions you're going to be placing out a tent and deciding to pass so I will quickly um kind of go over that so when a player can no longer do anything they're going to take their leftmost tent and they're going to place it on one of the five pass actions so there are five different tiles out there's going to be variable ones depending on the game but you're going to decide which one you want to go to and whoever actually goes on the left
most is going to be the first player for the next round so players might actually decide to go to one of the further left ones to try to be the first um on the next round they actually might decide to go on the furthest left to make sure that they are the first player on the next uh round but there are various different things that those tiles will get you um I will also mention as well that the furthest left three are going to be adding at the end of the game some influence to these guilds so if you do place in those they're going to kind of be connected to one of the three guilds um but the far to right ones uh do not have connection to those but they do have some additional things so this one here that has this black worker is actually going to give you the envoy or Envoy um which is an additional worker that you can use on the next round um so you could place there you would get this additional worker to use on the next round which is nice and then you would also gain whatever the reward is on that tile the past tile and then the far far right one here is that you actually get to hire your camel so there is right here you can actually H hire an additional camel so then you can actually perform four camel actions instead of three on your turn on the next round and then you will have to flip it back over at the end of that round so it's kind of of just like a one time you get to kind of rent that camel or hire that Camel for that uh next round and then you have to flip it back over for the following round unless you actually go to that space again um but yes that is kind of the passing once
every player has passed you would then go into a like round cleanup and then you'd go into the next round each of these tents would actually be pushed up to the corresponding little area here to open up the spots for the next round um and the first people to get to these three spots here would gain um some influence inuence and then whoever has tents in these three spots like I mentioned will have an additional two influence to that corresponding uh Guild so that's pretty cool um but also I will mention this is a very cool mechanism in this game where if you decide to pass first um and there's still players playing their turn you actually whenever it comes back to you get to do something on that term so you're passing and like passing on your main actions but the longer that other players are playing their turns until they pass the more kind of bonuses you get so if you decide to pass and it comes back around to your turn you're going to get to choose some sort of thing here so you're going to be able to do a workshop action or brighten your dice um or flip over one of your Crafts People um or do different things like that so that is the tent action um moving on to all of the other main actions so like I mentioned mention the one big main action is going to be taking a camel action this is going to allow you to do one of the four different main actions so there's going to be invent there's going to be build there's going to be test and there's going to be publish so let's get into
exactly what those four are going to allow you to do so getting into the first camel action which is going to be invent this is going to be the first thing that you're going to do in kind of the process to getting to fully publishing one of the uh inventions but I will add that there is this handy dandy card here that each player gets that actually explains exactly what you're going to do for each of the actions so you have exactly what you're going to do for invent build and publish and then the testing action is pretty simple and that is actually connected to the ship action up here on the main board but getting into invent so you are going to be looking at the far left column here which like I said this would be in the column but for board restrictions or uh table restrictions I have it there but you're going to look at one of these device boards and it's going to be one of the empty ones if it already has a card and some tiles and stuff on it that's already ready to be built and has already been invented there's going to be at the beginning of the game a few that are already um or one that's already built and then two that are already ready to be uh published but you're going to if you want to invent you're going to look at one of these device boards you're going to look at the top right hand corner and that's going to be one you're going to have to discard two of your device cards from your hand so you're kind of going to have to uh get rid of the thoughts of some inventions to kind of focus on one invention I think that's like the Thematic parts of it there but you're going to have to discard two device cards from your hand and then also the two dice that you use you can actually use one or two die um to do this action
but those dice are going to have to add up to whatever is in that top corner here so in this situation here it has to be two plus so I could use a two die to perform this action I could use a six I could use anything above two I would then be able to take one of the device cards from my hand so players will start with some I would place this into this section here after making sure I discarded those two cards and then made sure my dice added up to that number I would place this here I would then get influence based off of any matches that I got so on the board you're going to have half guild signs and then on the card you're going to have half and then if any of them actually match up and are the same color you would gain that um different Guild influence you would then look in the bottom left hand corner when inventing it's always going to do the same thing which is going up once on the royalties track and then lastly you're going to place one of your invention tiles so you have six here and as you take these tiles off you're going to gain both victory points as well as different like rewards when you take things off so if I took off these two in this column here I would gain uh two flips or two activates of Crafts People if you actually take off two beside each other that's going to gain you victory points at the end of the game so depending on what invention tiles you take off you can get endgame victory points as well as um like onetime abilities but you would then take your invention tile here and you place it in
the bottom leftand corner of the device board and one fun thing that I found with this game is that the device board as well as the device card is going to have a word and then may actually make up what the invention is that you're inventing um so in this situation I have uh a resonating Lantern which is my invention but here we have like a wind powerered basket a mechanical Basin as well as a miniature Beacon but yes that is what you're going to be doing when you invent the next main camel action is going to be build so you're going to be looking at one of the leftmost column devices or inventions that have already been invented so we have two here the one that I just invented was the resonating Lantern um but you're going to look again in the top leftand corner and that is going to be how much you have to pay so again you're going to have to look at how much your dice has to equal up to the Pips that you have to use again with this card that I placed it's going to be a two plus so whatever dice I use I have to use that which I forgot something this is very important if on these various actions you use a specific colored d so in the invent action if you use an orange it actually allows you right away to pick up a new device card and that can actually allow you obviously you're going to have to discard two uh device cards like I mentioned but also you could decide you could pick up that device card and actually decide to invent that one in that very turn so if you do decide to use an orange Dy on an invent action
that gets you that bonus of picking up a device if you do use a gray Dy on this build action it actually allows you to flip over a crafts person right away so this actually goes into uh the things that you have to pay so in this situation I will have to pay my Tyler my Weaver as well as my um candle person uh the orange one all of those are available but for example if my Weaver was actually flipped over and I used a gray dy I could actually flip over one of my Crafts People and that would then allow me to pay for that device card to build it so in this situation they are all ready to go I would flip them all over to inactive and then move them up to the next in my tower that would actually empty my bottom tile that would flip over I'd gain a reward and I would place it at the top which let me just do that now so I can keep on track of things and also a quick reminder when you do use your Crafts People you do also have to pay whatever level they are on so in that situation I would have had to pay one per crafts person so I would have had to pay three coins for those I would then be able to perform the invent action so I would look at the tile that was was placed there if the person that invented it was a different player than the player that was building it both players would actually get this invent action so this invent action here is brightening to dice so for example if I was the blue player and the person that invented it was the yellow player we would both be able to brighten two dice but if it was just me I was the yellow player and I also invented it I would just get to brighten two dice on my own
and then once we were finished with the invention tile you would take it you'd flip it over and place it in the top right hand corner you would take the entire device board and actually move it over to the build these would move up a new device board would be placed out in the furthest left and then whoever decided to build that would then take their influence and place it on the build spot so then you know exactly who built it you knew exactly who invented it and then that would be the end of the build action I will skip over quickly the camel action of testing we'll do that one last but the third and final thing when it comes to getting this uh invention fully invented and published is the publish action so what you're going to do is you're going to be looking at one of the already built inventions here you're going to look in the top right hand corner again that is going to have your base amount of dice Pips that you're going to need so in this situation the one that I just built um is going to need eight plus so I believe that all of them are always going to need eight or more uh Pips in order to do that publish action you are then going to pay one coin to whoever invented it so if you were the inventor you just wouldn't get any coin you would just not have to pay a coin um but if it was another player that invented it You' have to pay them one coin you would then have to flip over your scribe I believe it is and move them up you would also have to pay your scribe so in this situation I would have to pay two coins
in order to hire my scribe and then I would also have to hire one additional uh crafts person so doesn't have to be a specific one but I would have to uh do that which in the situation that I have here all of them are inactive so I actually wouldn't be able to perform this action um but I would have to flip over one to an active pay them move them up the tower once so that is going to be the payment for this I would then move my entire device board to the next column which is publish I will add that my personal player board is in the way this would actually be moved over a little bit but it would then be fully published again you would Place one of your influence whoever decided to publish that would Place their influence here and additionally you would get again one space up on the royalties track and gain whatever rewards you got there all right so in this situation here this device is completely published so you don't need to perform anything else with this device aside from testing so this is the last of the four different camel actions and you can only test on devices that have either been built or published you can canot um do tests on ones that have only been invented um so you're going to look at one of those in the top leftand corner and each of the device boards is going to have one of each of the different colored dice so you have the blue the yellow and the gray and on your turn if you decide to take the test action you would take one of your dice um of that specific color and you're going to place it on that matching spot on the device
board so um some of them are going to allow you to gain influence so in this situation if I place this yellow D on this spot here I would gain one influence into the yellow Guild and then I would be able to take a certain amount of ship movements so this is going to be with the ship track on the main board so in this situation this is going to allow me to take two ship movements I'd be able to move my ship one two and that is going to allow me to take a tile so these are the workshop tiles I'd be able to take that coordinating tile here and I would be able to place it in into one of my three rows so the first spot in every single one of your workshops is going to be free but any other column they decide to place it in so if I placed it here you'd have to pay one coin per um column that you went so for example if I placed it in the first spot it would be free if I plac it in the second spot it'd be one coin third spot two coins fourth spot three coins so on and so forth so I would place my tile into my workshop I would have to pay any coins that I would pay based off of where I placed it and also some of these spots are going to get you rewards based off of where you placed it so whatever icons you do uh cover up you're going to do whatever that is and then that would be the test action so those are the four main camel actions there like I mentioned another thing that you can decide to do on your turn is Place one to two dice on your workshops so like I said you have three different workshops you can place two dice into a workshop and then you are going to be able to activate all of the workshop tiles in
that row there is one like basic thing that is already printed on the board that you get to do and you would activate all of your other tiles if you had no tiles you would just do what's on the board and that would be it um but there's always going to be some sort of requirement for the tiles so some of the tiles is just going to be you need a certain number um of your dice place there some of them you're going to need at least one of a certain colored dice so if I placed in this Center Spot here I would need four plus so I might decide to place my one four my one white for here I'd be able to do whatever is on the board here so that's either going to be to move up one crafts person or I can place a um influence onto one of the guilds and then I would be able to do this tile but in this situation I would not because this needs specifically an orange so this four here would have to be an orange so let's say I did decide to use an orange place the orange for there I'd be able to do what's on the board I would be able to activate what is on my tile there as well I'll be able to perform all of the different things on the tiles based off of the numbers and the colors and then that would be my workshop action moving on to the next thing that you can do on your turn that is placing one of your workers which I mentioned at the beginning or earlier on in video that you do start with two workers um once you have taken one of your tents off you do gain your other worker and your workers always uh come back to you so you're always going to
have those three workers two at the beginning three later in the game but you can place one of your workers onto a worker placement spot on the board so there are various smaller worker placement spots that are going to allow you to perform different things there's also going to be two that are open um so the ones that are closed the smaller spots are going to be only one person can go there and that is it um but there's also the two larger ones here um that any amount of people can place their workers there um but they are going to get you various things uh brightening dice flipping over Crafts People different things like that so for all of these smaller worker placement spots they're going to require you to spend uh influence and then also there's going to be three that are going to be connected to the three different guilds they are going to require you to spend influence from that Guild and then they're going to allow you to do an action that is just below that Guild so these three spots here I could place my worker here I would have to spend two of my influence from that specific Guild and then I would be able to choose one of two things I could either research or I could gain one yellow D to my study and gain three device cards so I pick up three device cards I would take a yellow dye and then I would place that yellow dye on the lowest most yellow spot in my study that would then make me discard one of my white dye and that would be my action basically replacing one of my white dice with uh a color dice which is going to be stronger cuz like I said based off of the color that you use for actions you're going to be able to get
bonuses and then obviously some of your Workshop tiles are going to require different colors as well so it's always good to have the certain color dice instead of the white um but also alternatively like I said I could take a research action so let's quickly get into research research is going to have to do with the ship track here and based off of where your ship is you're going to be able to research on an empty spot so it has to have an empty spot and you're going to not have to pay if the empty spot is below where you're shipping is but if I wanted to research on a spot that was further than my ship I would have to pay one coin per spot uh that is ahead of my ship so if my ship was here and I wanted to research two spots ahead I would have to pay two coins in order to do that and when that happens you're going to based off of what section you're in so the ship kind of track is going to be uh in three different sections so the first section the research tiles are all going to be kind of ongoing abilities that are going to um be in play if you have one of your influence tokens there um the second spot is going to be things that are going to happen when you place out a tent and the third section here is going to be really strong onetime abilities that you're going to gain when you do uh research one of those tiles so what'll happen is I if I'm going to research on a spot where my ship is I don't have to pay any coins I would pick up three from
the research kind of stack here and I'll be able to choose one of them so like I said this section here is going to be ongoing abilities so I could choose this one which is whenever I gain a yellow dy I can flip over a crafts person and gain a coin uh whenever I perform a camel action so quite a bit I think this one does mean that the dice are going to be plus two um and then this one here is whenever I go up the royalties track I can brighten a die so these are just going to be ongoing abilities so I could decide let's do when I go up the royalties track I would be able to brighten a die I would then take the two tiles that I decided not to keep I would place them at the bottom of the research tile uh stack there and then I would take one of my influence I would place that on the influence spot there that would gain me some end uh game victory points there but then also I will have that ongoing ability for the rest of the game now I will mention that there are two spots for influence on each of the research spots so another player could actually research and instead of picking up their own tiles and choosing one they could actually decide to research on that spot and place their influence token there as well that would gain them endgame victory points and it would also gain them the ability of that research tile as well so those are all of the actions they can perform on your turn I already went through the tent actions so once every player has decided to pass Place their tent out you would then go into a
round end kind of of cleanup phase which again is right on this card here so you're going to look at whoever is the leftmost tent they are then going to get the first player marker you're going to brighten all of your unused dice so any dice that you decided not to use on your last round would then go up so all five of these would go up to the determined and all the ones that were in exhausted would then go up into ready you would then exhaust all of your used dice so you take all of your dice off of your your uh various spots your Workshop your camel actions you'd place them into your exhausted section if you did hire the camel that would then get flipped back over you would retrieve any of your used workers and then every player would move their tent Up So based off of the action that they placed it in they would move it up to that corresponding area the three first spots on the three leftmost uh actions are going to gain that person an influence and like I mentioned these three leftmost spots here all t that are there at the end of the game are going to get that player to more influence uh when scoring for the guilds so once all of the end of the round upkeep was finished you would then move in to the next round You' go into the income as well as all the actions but if you were on either the end of the third round or the end of the fourth round depending on which one you decided to do you would then move into endgame scoring so the nice thing again is that they do have a card here that goes through all of the endgame scoring also I will mention that Garfield games has an amazing like
scoring app that I use for all of my other garel games and this is going to be on there as well so you could go with that as well which makes it a lot easier um but it does have endgame scoring here there's also an endgame score pad that comes in the game as well but the first thing that you'd go through would be the majorities for the guilds so whoever had the most majority in each of the guilds would gain some victory points and whoever has the second most also gains victory points as well you then go into the royalty track which is this uh green track here like I've mentioned um the further you are the more victory points you're going to get you would score for any of the research tiles that you had your influence on so for this example here I would gain three victory points you'd count up how many uh victory points you got for any research tiles that you were on As you move up the tower and as you move up your Crafts People there's also going to be some endgame scoring on some of these um as you flip them over so depending on how many crafts people were on a specific tile you would gain victory points for each of those any Workshop tiles that you had at the end of the game that had victory points for example this one here has two victory points you would count up all of the endgame victory points on your Workshop tiles like I mentioned as you remove your invention tiles if you do unlock or remove two that are like right beside each other you do gain some endgame victory points there as well then you would move into all of the built and published devices so you're not going to be looking at any that were invented it's only going to be ones that were first off built as well as
published so first you would look at any that were built whoever built that device would gain one Victory Point per die that was on the testing spots so if a device was tested three times with all three of the colored dice you would then gain three victory points if you were the Builder and then moving into the published devices so you are going to have a builder as well as a publisher if they are different the Builder is going to get three victory points and then the publisher is going to again get one Victory Point per uh test die on that device and then if that invention was built and published by the same person they would gain one Victory point plus one Victory Point per uh test die and then you are also going to be looking at the devices for their endgame scoring so at the bottom of each of the device cards there's going to be some sort of endgame scoring they are all going to be different and basically what it's going to be is you're going to see a green number and a blue number so that is going to be the green number is going to get you two victory points if you achieved that and then the blue number is going to get you four victory points if you achieved that so in this situation here it's going to be a set of research tile as well as flipped craft person so if you had three sets of those two things you would gain two victory points and if you had five sets so if you had five research tiles as well as five um active Crafts People you would gain those four victory points these are going to be various things things so this one here is um spots on the
royalties track so if you were up six spots you'd gain two victory points if you were up 10 spots you would gain uh four victory points this one here is the ongoing ability um research tiles so if you had uh influence on two of those ongoing ability research tiles you'd gain two if you had uh influence on four of them you would gain four victory points um so on and so forth so depending on what device card you place onto that device board you're going to gain either two victory points or four victory points based off of those particular requirements and then lastly for endgame scoring any leftover coins as well as device cards You' count up those and for every four of those you would gain one Victory Point once all of that final scoring was finished you would tally up your victory points whoever had the most victory points would be the winner if there is a tie whoever is further on the ship track would uh break that tie so that is I believe everything for inventors of the sales tigis all right friends so that is going to be everything for this preview hopefully this video is not too long again I'm assuming it's going to be a pretty long one because I believe this is the crunchiest of the South Tigers series or is said to be the crunchiest um I would say that in decision space this is definitely going to be the crunchiest for sure um but yeah hopefully you guys enjoyed hopefully me going over this and you guys getting to see a little bit of how the game plays this will allow you to better determine if this is something that you want to back um again I will have the link in
the description box to the crowdfunding campaign if you guys are interested um definitely go and check it out huge thank you again to garel games for sponsoring today's video it is an honor covering your game because you guys know if you've watched the channel before I'm a huge fan of garel games um so yeah hopefully you guys enjoyed if you did please give this video a big thumbs up also hit that subscribe button down below if you've yet to do so we'd love to have you here in the garden comment down below if this one is one that you're going to be backing I'd love to chat about that down there I love you guys so so much remember you are somebody's reason to smile and I will see you in the next board game video bye friends