Sensuikan Solitaire Campaign | Episode 0 | November 1941 | WW2 Japanese Submarine Game
Transcript
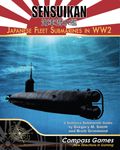
Hi everybody, I'm Zilla Blitz and welcome to the first episode in our mini series with Sensuikan. This is a Japanese submarine simulation game from Compass Games and designed by Gregory Smith. Let's jump right in and get started. So, we've got Sensuikan spread out all in front of us as we get ready for our first mission. Now, a couple of things. If you are familiar with the game The Hunters or Silent Victory or Raiders of the Deep, Sensuikan falls very much into that category. The Hunters, for example, and Silent Victory are also designed by Gregory Smith, the designer of this game. And the basic idea is that they allow you to take control of a submarine in World War II. Now, the nuances here with Sensuikan, of course, is that you're a Japanese submarine commander. So, the missions that you're going to be going on are very much in line with what a Japanese submarine commander would have encountered in World War II. And there are additional features that are particular to Japanese submarines. For example, submarines. You could be equipped with one of those. The submarine-equipped aircraft, and that's what we're going to have on our submarine here. And then lastly, towards the latter parts of the war, you can have Kaiten sui- suicide torpedoes.
Which, uh, if you last that long, you get a chance to experience those as well. So, a number of unique aspects of Japanese Japanese submarines that are incorporated into the game. Now, this gameplay is basically you go on a particular mission that you take anywhere from 5 to 20 minutes or so to play. If you survive, you go on another mission, and the goal is to make it all the way through the entire length of the war. What I'm going to commit to in this one is a three-mini mission mini campaign. So, in this mission in this episode, we're going to set up our submarine and go through all of the preparatory stuff. And then after this, we'll go to mission one, episode one, which will be our first actual mission. So, with that in mind, let's jump in a little bit here and get started. We will need some volunteers. If you're interested in being the executive officer, I'm going to be the captain, but if you're interested in being the executive officer, the engineer, the navigator, the medic, or our airplane pilot, put your name down in the comments below.
First come, first served, and you don't have to know anything about the game. All that I ask is that you follow along with the episodes and add some flavor comments to those videos as they come out. So, we've got a checklist of things to do. Let's jump right in and get started. The first thing we have to do is to pick our submarine. Sensuikan comes with a literal flotilla of submarines you can pick from, some of which were available later in the war, many of which were available right around December 1941. With that in mind, I've chosen one of the 17 that are available here, this type B class, which was available in December 1941, and I think it gives some interesting aspects of submarine warfare that we'll be able to see, and it was also one that had 26 of these produced, which was one of the larger numbers of submarines actually produced by the Japanese of this type B class. Let's take a look at the type of sub we've got, and let's get it ready and outfitted here for our first mission.
So, first up in the top left, we have our current base. Now, all Japanese submarines start the war here at Yokosuka, which was where we will start, and we'll take a look at the operations map. Map, we can get repositioned at some point during the war. And we'll put our at port marker for where our submarine will be. We'll be following along through these transit and on station boxes, moving the submarine along here to be tracking the progress of our patrol. Also up here, we'll note that this type B class, available December 1941, patrols are 2 months in length, so we've got a good amount of supplies that we can be taking to be out at sea for quite a while. Now, the other thing we can get ready here are our damage tracks. We can see along the middle here, we've got our flooding track, and this will start our flooding marker here will start right all the way over on the left. Our whole damage marker will also be put in place here, meaning we've got no damage. Now, during the course of patrols we could have flooding occur, and if we get all the way down here, we've got to jettison our ballast and get up to the surface. And if we have enough whole damage to reach all the way to the right side, we would be sunk. It does give us some statistics here. We have a crew of 101, 14,000 nautical mile nautical mile range and a displacement of 2,500, a little bit over 2,500 tons.
Now, down here we've got our crew status. We'll be putting those in. We do want to start out with our crew quality here, which is trained, and we could be improving or we could regress if we have a number of failed missions in a row. The quality of our crew could actually go backwards. Now, one thing I'd like to mention as we're dropping the counters down on here, since U-boat can comes with about a counter sheet and a half, and I'm using these cube for me counter trays to store the counters for this game. And the nice thing about these is they're not the bucket-based counter trays, so you can see every single counter that's available in the game. So, here we have US targets. These are some of the special missions, a lot of the crew statistics and special abilities that we've got. You can get some of the markers that will be using for different parts of it. And this all of these fit into two of these trays. Here all the different types of torpedoes that you can get, the Kaiten suicide torpedoes, some more of the special missions that could be available. And then, rather ominous, the large collection here of damage markers. It's not a good sign, as well as crew injuries down here, and then a few more random miscellaneous markers. There is a link down below to this particular tray set on the cube for me site, and if you are interested in picking that up or any of their trays, you get a discount on the order through that link. And that is a an affiliate link. They are a channel sponsor, so using that link to place an order does help out the channel, and thank you to everybody who who does that. So, with that in mind, quick detour as we wanted to I wanted to show this because I feel like these really speed up gameplay.
You're never hunting in a bucket of counter in a bucket of uh counters to try to find the one you want. You can see everything. Super handy for both setup and takedown of the game. Slight detour addressed, let's continue outfitting our submarine here. One of the reasons I wanted to pick this type B class is you'll notice up in the top it has at Yokosuka has status. It has the E14Y1 aircraft. So, that's uh pretty cool. So, I'm excited to be able to see if we have some aircraft missions. And there are a number of mats and special rules that apply for those little aircraft missions that could be either bombing types or recon types. So, that's kind of fun. Up here we got some space for random markers, random events. And now it's time to us for us to load out the torpedoes. So, at the beginning of the war uh Japan had a a number of types of torpedoes available. And for these type B classes, their initial loadout all the way pretty much through the first six, seven months of the war or so are a combination of type 95 oxygen torpedoes, which are a little bit better than these older type six steam torpedoes. So, by the rules in the game, we get have to start with six of these older torpedoes for quite a while. I think the first six or seven months of the war. They're not substantially worse. I think the only thing they do is less damage. And so, we have to start with a dozen of these, and we're going to try to load as many of these up into the the uh the basically the holding supply here, the reserve torpedo area. And we're going to put the
rest up into the forward tubes. Now, we do get to this particular sub, the type B class, can hold 17 torpedoes. So, we have to take 12 of these type six. We can put the others, the type 95s, which are much better, the oxygen torpedoes. We're going to load those up here in the top, and we have five of those, and these will do a little bit better damage, which means we have to take one of our type sixes and put them up in here. Now, another feature of this type B submarine here, you'll notice is that these are our forward torpedo tubes. This submarine has no aft torpedo tubes, which is unfortunate because that can allow you to have a little bit more maneuverability and flexibility in how you attack enemy ships. But, we'll make do. I do like the fact that we have six tubes available for firing at once.
That's a pretty wide range of shots we can take at targets, so that's a good thing. And we have a do a large number of reloads, although for a while, assuming we survive, they won't be the better type. Now, the next thing we have to do is we go down here to this deck gun. We have a 140 mm deck gun on here, and it says ammo five. So, I'm going to put in basically five shots here for our deck gun ammo. And you'll notice I'm covering up these Kaiten suicide torpedo marker spaces, and I believe this is So, it says, "In December of 1944, Kaiten may be installed with a second 25 mm twin anti-aircraft gun." So, when that happens, we remove our deck gun and our aircraft. So, we basically would have to replace the deck gun and aircraft with these Kaiten suicide torpedoes, and those allow some special missions to occur. But, it's We are very far away from December 1944. This is pre-war right now, so assuming we're somewhere in November of 1941 as we load up our submarine here. Lastly, down here, you'll notice that this is we we saw that ominous amount of damage tokens. These are all the different statuses of our systems here, radio, hangar crane, diesel engine, electric motors. These are the the that can be damaged in combat. Not that we'll be seeing any damage, of course, but these are things that potentially could be damaged if we get depth charged or have other misfortunes during our missions. And with that, we have completely outfitted
our Type B class submarine. Now, one of the things I'd like to do is I would like to give our submarine a Japanese name, but I don't I wonder one of the questions I have did Japanese submarines get named after fish like US submarines or did they just not get named at all? I confess I don't know. I'm I might try to look it up, but if somebody knows, I'd be curious if you could post it down in the comments. Cuz I was thinking like Kurozame, like black shark or something like that would be pretty cool. But I'm open to suggestions here, but I think even if historically Japanese submarines weren't named after fish, I still want to name our submarine after a fish. So, we're just going to do it. So, it's okay. But, with all that being said now, yes, our Type B class submarine is all set to go, and we're going to number it the I-15. Japanese submarines apparently started with the letter I, and then number 15 was one of the historical numbers. So, we're going to be the I-15, and then we'll give it a nickname as well. The next thing we need to fill out is our submarine patrol log. This is the sheet of paper where we're going to track all of our patrols, the targets we've hit, the tonnage we've sunk, the things that happened. For the moment, all we have to do is to fill out this top part. We've got our boat type in here. We've got a captain. I'll put our ship name up here at the very top. We're all set to go for our first mission with our patrol log. I do also want to take a quick look here though at the operations map. So, basically, our operations could span anywhere from the Indian Ocean in a very rare mission to Europe down here at the bottom, too, with all the way over to the west coast of the US, as well as a lot of the as the more traditional, as you would expect, Pacific theater uh
patrol zones. Iwo Jima is later, Aleutian Islands, Midway, Pearl Harbor is over here, Dutch East Indies, uh Philippines, New Guinea, Guadalcanal. So, a lot of historic places that we could end up having patrols in. The next thing for us to do is to prepare our captain and crew for combat. First up though, this is our captain's chart here with all of the different uh metals and badges and skills that could be earned over the course of a campaign. The first thing we're going to do is we are going to give the starting rank here, which is a lieutenant commander. That's our starting rank for our captain. And now we can shift over here to submarine school. There's going to be a number of parts to this. The first is our captain is going to do torpedo training. The executive officer is going to do deck gun training. The engineer is going to do judgment training. And then we do get some spare time activities that's going to give us another special activity. And lastly, because we do have an aircraft, we're going to send our pilot to the Costamare Naval Air School to pick up a couple of skills for our pilot. We will not do the submarine school training cuz our submarine is not equipped with a submarine. Let's start with our captain's torpedo training. So, the first thing we're going to do, we're out in our training submarine here and we're going to do some torpedo drills. This could give us the torpedo gunnery skill, which means we'd be able to reroll a miss when we're firing torpedoes once per patrol. So, this would be a very valuable skill to get. To do this, we
are going to roll on the chart B1, the torpedo deck gun to hit. And it is rolling at long range. We need to have to get two hits on three rolls. Now, we're going to hit here on a two to six and then the seven to 12 we miss. So, the odds here are pretty good that we're not going to succeed at this. Nevertheless, our crew is ready. We're floating around the harbors of around near Tokyo and near eastern Japan. We got our torpedoes up. We're looking at the dummy target and we fire our first torpedo. We get an eight, which misses. So, this is looking a little bit dire here. We need to fire our second torpedo. We need two consecutive hits on a two to six to get it. We get a 10. So, we we're not starting out this career the the the good omens here. And then our last one is a seven. We go over three. So, Captain Gogeta here at Lieutenant Commander Gogeta has totally failed his submarine command course, which means no extra skills for our captain for me as we start out our career. Now, let's go to our executive officer. This time we're going to do the same thing. It's the the torpedo and deck gun chart are the same charts in the game.
We're going to practice with our deck gun firing. We need to hit at long range. If two of these are hit hits, we get the deck gun expert skill on chart K1. This would mean deck gun two hit rolls are at minus one. This would be very valuable as it's a skill that is always in effect. Now, it's the same thing, long range. We need a two to six to hit. Let's see if our executive officer, whoever they may be, again a reminder, we're looking for volunteers. So, we are up. Fire one. Yes, the omens are good here. We hit. Very good gunnery. We just need one Well, not just. We need one hit in our last two rolls. Firing two. Oh, look at that. Whoever our executive also officer is, you are awesome. Can we get three consecutive hits in a row? 12.
Oh my gosh, we hit like the one of our own ships there with that one. We'll just pretend that last shot didn't happen. But, this is good. This means our executive officer gets the deck gun expert skill. Deck gun expert skill goes right down here in the bottom left. That gives us minus one in our deck gunnery. Oh, that's very very good. Okay. Now, we go to a fun one here, which is the engineer judgment training. Let's talk about that one. And to do that, we need to take our sub on some deep water maneuvers. So this is a special drill using our type B class sub to prevent implosion and it's up to our engineer to do this. The rules for this training say set the whole damage at three. So we're going to move our whole damage over to three spots and we have to successfully exceed test depth three times in a row and each time we're going to increment by one. And how exceeding test depth how exceeding the the dest the test depth works is that we're going to roll two dice. We have to be less than this number, the number of hits here, so less than the damage, so less than three. And if we are less than three, we do not implode. We're going to do three tests each time increasing by one. If we fail any of these three, we do not get the skill, but if we do get this, we get a skill called keen judgment, which allows us to not take whole damage the first time we exceed test depth on each patrol.
Uh now and basically every time you attempt to exceed test depth, you take an instant damage. You're putting this the submarine under stress. But it's at three. We're going to make our first roll. The only way we would fail this is if we get a two. We get a five. Excellent. We have succeeded in passing the first test test. Our whole damage goes up to four. Now we need a four or greater to survive this one. Oh, that's such a bummer. So simulated death, our type B class would have imploded on this as we rolled a three. So our engineer has failed us. I thought that's the easiest one of all the tests, but no. So no skills for our engineer. However, our executive officer does have deck gun training, which is good. Now the last thing that we do here is our spare time activities. This is going to give us a choice. There's it's an automatic success. We just pick one of these three. We could do martial arts training, we We do extra study time, or we could do a go say, which is meditation. This would give us a good good luck charm, which we can use as a one-time expenditure to reroll anything that goes bad, or yeah, assume it would be going to reroll the bad stuff. An extra submarine study time gives us a potential to get a submarine upgrade earlier, and minus two to our first promotion attempt, but we're going to pass on those two because I feel like this one is without a doubt the best spare time activity training to come out of, which is martial arts training. This is going to give us this shibumi marker, and this allows us to on each patrol, it can be used once patrol,
to automatically mace make a die or dice roll check. This means, for example, we could automatically succeed at eluding detection, or we could have a torpedo hit, or we could be guaranteed that a torpedo is not a dud. Lots of things that this can be used for, and because it's a multi-use one, you can use it on every patrol one time. This feels to me to be the strongest of all the spare time activity skills to come out with. So, let's get the shibumi trait on our captain. All righty, so shibumi goes up here under our captain trait right there, and that's a good one to get. And now, we have successfully completed our sub badge, so we get this little submarine training school medal. We've got our first medal. Even though we didn't really succeed at our torpedo firing. We did come out with our deck gun expert though, so that's valuable. The last training that we go through isn't for our submarine crew, but it's for our air crew, and we get to basically choose two of these options: weapons expert, flawless maintenance, air combat maneuvering, or aerial navigation.
Uh I'm I'm going to take the weapons expert for one. I I I don't really know which ones of these would be better. I I think this would take a little while the aircraft module to understand it, but this allows us to blow stuff up better, and I like that idea. Flawless maintenance, I feel like aircraft on submarines are probably something that's going to break a lot. So, this allows us to reroll any result from the mishap malfunction chart once per mission. Place the aircraft maintenance marker on chart K1 ready for use. We're going to pick these two. It's possible these other ones are better. If you have thoughts or if you played the game and you know, I'd be interested to hear what you think. But, for lack of knowing what we're doing, we're just going to pick these two. So, we are going to transfer the weapons expert over to our air crew skills, which is right over here. And then the aircraft maintenance over here.
Now, some submarines apparently had more than one aircraft. I I don't see that on ours, so I think we just have one air crew. So, we just ignore these over here. And with that though, I believe our crew and our captain are all set for their first mission. Yes, indeed. I think we've covered everything that we wanted to go through. I'll be back in about a week with episode one, our first patrol. And as I mentioned in the introduction segment, I'm going to commit to doing three patrols unless we sink in the first one or the second one. And then at the end of the third patrol, I'm going to see how much interest there is in people watching this series and seeing if people want to keep it continued and see how my how much interest I have in continuing going longer. One of the things is there's a lot of games to look at and play and cover on the channel, so I'm not sure if I'll be able to go longer that, but I'm definitely committing to three patrols unless we have extremely bad luck and sink on one of our first two. A reminder, we need volunteers. So, if you'd like to volunteer to be part of the crew or the air crew, please drop a comment down below. First come, first serve. And once again, you don't need to know how the game plays. All I ask is that you ask drop interesting comments and watch the upcoming episodes to be part of the crew in spirit.
With that in mind, I'll put a link right here when the next episode is ready. Thanks for watching everybody. See you soon.