The Hungry Gamer Reviews Azul Duel
Games in This Video
1 game is featured in this video — it unlocks as you watch.
Transcript
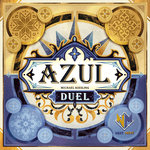
Ooh, that looks tasty. Welcome folks. The Hungry Gamer is back with another game review. And today we're talking about Azul Duel, published by Next Move Games, designed by Michael Keling, and distributed by Asthma, who sent me this copy for review. Now, what this game is is this is a two-player version of the classic Azul. And as you can imagine, it is a two-player only game. And you are working on drafting these tiles to kind of fill up your tiled roof in the church in Portugal or whatever the heck it is. And you're going to play through five rounds. At the end of five rounds, whoever has the most points will win the game. And as I mentioned, you're going to be doing that through tile drafting and tile placement. Now, if you are not interested in how this game is played, I'm going to jump to my final thoughts.
Then, you want to go to the time stamp on the screen right now. For those of us still here, let's talk about how this game is played. First off, you'll see there's two boards facing each other like so. I'm going to go and just remove the yellow one so we can zoom in a little bit here. All right. Now, we can pretty much see everything here. So, what's going to happen is on your turn, you will either draft a set of tiles from one of the factories out here. You'll use one of these chips here to collect one of these dome plates, which you'll take and then place wherever you would like onto your board. You can also draw from the top of the pile. And you can even spend your points to draw more and then pick the one that you would like to keep. And I'll talk a little bit more about those in just a moment. Over the core of the game is going to come with your drafting. So, what you will do is you will select one color from one of the different factories and take them.
So, we'll just say I choose to take the browns from this one right here. I'll put those there for just a moment because after you draft, then what you're going to do is you're going to take all the remaining ones here in kind of the sun area and stack them in whatever order you would like and place them on top of that other chip. We'll come to those in a moment. Then you take all the ones that you did draft and you place them somewhere on your board here. Now, if I were to try to place them here at the top, one of my tiles would go over here to my broken tile track, which will be worth negative points at the end of the round. But we'll just say I put them right there. And the next player will go and we'll just say that they took these and they stacked like so. Then it comes back to me and I decide this time I want to just take this one and I'll put that right there. And then the next player goes so on and so on.
However, what's important is on the big tile here, once that is drafted, let's just say later I took those, then all of the others go up into the moon like that. Now, the way that the moon works is as follows. One of the other things that you're able to do is instead of drafting from the factories there or getting yourself a dome plate like that, you can take all the same color from the top of all the stacks. So, if I were to take red, I would take both of those. The factories look like this. I might take the brown right here and then go and place it somewhere, but I'm going to move it off to the side. And then that would reveal this flipped over chip, which then can flip like that. That unlocks the next thing that you can do on your turn is you can take a face up chip. You take it like so, and you place it on the round one, two, three, four, five on one of the two spaces. And you can each and each player can only take two per round. And I'll talk about what those do in just a moment. Then we have over here, you'll see that the ones over here, you have your choice of whichever one that you want. So if I were to take this one here, again, I'd put it wherever I want. And since I was took and since I was the first one to take one from there, I would also get the first player marker, which will let me go first next turn. But it comes with a penalty. And I'll talk about that in just a moment. Now, let's do a quick little fast forward and move these on off here. And we'll just say that I finished up like this right here. Then you come over here and you start
checking all of your different rows and see if they're full. So, this one here is completely full. So, then I would take this and I would move it over and place it on a dome plate that matches the color and pattern. If I did not have that, say I was like this, there's nowhere, then it would go over here into my broken tiles. But, as I set this up, I did have this right here. So I can place that right there. Then you gain one point for the tile being placed and then another point for each one adjacent either horizontally or vertically. So in that case just the one. Then I go down. This one's also full. So I can move that over. This is a joker space. So I can put anything I want. So I get one point for that and one point for the one next to it. And you notice this one stays right here for now. Then I come down to this row and it's full. So, I take this, I'll move it all the way over and place it right there again for one point.
Though, I'll point out had it been right here, I would actually get one, two, three points. So, we'll just say that's what I did. Now, here, this one is not full, so I would leave it alone and skip down. But I have my chips here. I can spin two chips that have halves of the same color. So there's half a red and the other half of the red to fill in one there, which would allow me to pick this up and place it again for one point. Then I would take these and they would flip over like so. The other thing that I could do is if later on if I have three that are not a matching color, I can spend three to fill in a spot. Then I come down here. It's not a full row, so nothing happens. At the end of the round, you'll notice I have the first player marker, so I would lose two points. Then after both players have scored, we would reset the board by placing these back out. And then we would simply refill.
There's only two other things that I want to point out. One is each game you'll have three different in-game scoring conditions, though you do have the option to play with the fourth out there as well. And all the tiles are double-sided. But in this case, at the end of the game, I'd score seven points for each completed column I have with the tiles right here. So, in other words, if I finish the game like so, that would be worth seven points. Then the same thing here, except for rows. And this one here, you get it for a complete diagonal. Now, I already explained the choker tiles right here and how those work as they're just simply wilds. However, there's also these special tiles right here. And the way those work is if you ever fill the third spot on them, then you for free get one of these special tiles, which you get to place. Now, that tile will allow you to score and accounts for your adjacency. But then you also look all the way over here and you gain points based on the row it's in. In this case, this tile would score five points. And you're going to play through through five different rounds. At the end of the game, you'll add your in-game scoring.
And whoever has the most points is going to win. And I do apologize. I almost neglected to tell you what happens to these tiles right here. What's going to happen to those is once you have placed the one next to it, all the others will be discarded from your board and they go into this tower right here. Then if at any point you're refilling the factories here and your bag is empty, you simply take your tower and refill the bag. And so that's how this game works. So what do I like about this game? The first thing is it takes all of the gameplay of Azul and also those really cool little tiles. The tiles are great. And it puts it into a two-player game and it gives it enough of a twist to make it different and interesting and worth having the one over the other. And so I I I really do like that. I think the way that the drafting works, how you're getting all of one color, but especially as you get towards the late game or at least late rounds, a lot of times you wind up with a really hard choice because you're going to get stuck with some broken tiles. It's going to lose you a few points. And so maybe you don't go down that route. Maybe you wait another round to take the brown ones that you need, which is going to fill up the bottom row, but give you a broken tie. Maybe you wait one round to do that. And I think that's very very clever the way
just the pure drafting works. But along with that, the way that you're stacking the tiles on top of the chips and you get to choose the order that they're stacked there. That I think is really cool because that makes you pay a little attention to what they have on their board. And it's very easy to see what the other player has. It's a quick glance and you can see everything. Very, very simple, very easy. And I really like the way that that works. I also like the way that the dome plates work, how you're putting them out there and you are trying to predict what you might be getting later on, especially when you add in the in-game scoring conditions, which you kind of start chasing early on, sometimes to your detriment, but you kind of start chasing these things early on. And so getting those dome plays, deciding if one of the ones out there is one that you want or you just want to kind of wait till the other player picks one and it get refills or maybe you're going to spend a few points and kind of have a choice. All that I think is very very clever and I do really like the way that it tells you on the back of the tiles. Is it a special tile or is it a joker tile? Really really good. I like that. So it at least kind of gives you that thing to think about like I don't like these. Well, this one definitely has a joker tile so I'll definitely be able to use one of those this turn. Like the way that works. I also like the way the special tiles one fill up spaces for you. Let you fill up more spaces because you're putting out three and you get four, but also the way you get points for it at the end of the game or immediately I should say when you put them down. Like that. I like the way the scoring works, the kind of adjacent scoring, making those lines uh horizontal or vertical. I think that works really well because again, it's
giving you something to kind of chase after. It's giving you something to work towards and picking what colors you're going to place where. And I really think that works well. And then last thing is I like the way that the chips work and the big factory work. The chips just in the sense that one, it's another thing flipping over. It's sometimes let you kind of delay what you're trying to do because maybe you don't want to take first player or something like that, but also I like the way that it lets you just kind of speed up filling of your board a little bit as you're getting those chips because in theory you might be getting one extra tile every round with your two chips that you're getting. And so I like the way that that works. I like it's very simple. It's not hard to figure out. And I also like that you can always spend three for three of anything to get one. That works well too. And mentioning that large factory tile, I like how when you do that, they are just kind of all out there for people to pick. But with that choice of anything, you get the first player and that the first player is worth negative points, but then of course you get to go first.
So I I like the way all that works, which brings me to my quibbles for the game. And the first one is, now this may just be me, but I found it is really, really hard to get rid of the first player marker when you have it. In all the games that we played, one time, one time was a player able to get rid of it. And I don't know, maybe it maths out and it was just weird for us because we didn't play it that many times. It's pretty simple game. So maybe it's just weird coincidence, but that's frustrating to me because when I was playing it meant I wound up losing 10 points or eight points, four turns. And in the first game that we actually played, that was the difference. I lost because of that. And I was desperately trying to get rid of it and I couldn't.
And yeah, and that's just a bummer. Again, it might just be some weirdness that happened when we played. The next thing I'll say is even though the tiles, those baked light tiles are so nice and they're so cool, because those are so cool, the player boards feel a little bit flimsy. It's just kind of folded paper and that kind of has that little raise a little bit in the middle. Doesn't affect gameplay, but when you compare it to the really cool tiles that you have, they feel a little bit me. And then the tower that you're dropping the tiles in, which is great. It makes it very easy to pour it right back into the bag. You have to dismantle it every single time you put it back in the box. And that's annoying because you actually have to fold the this part that hooks in. You actually have to fold it inside the box and then collapse it cuz otherwise it doesn't fit in the box. And I don't know, it's annoying. It's just a weird production choice. Like I I don't know, make the thing a little bit smaller.
Like they could have done that. It would have been fine. So I don't know. It's just a weird little choice there. And the last thing I'll say is all of the endgame scoring conditions are not created equal. Now, everyone's dealing with them and fighting for them, but some of them just aren't nearly as fun. And some of them just feel like traps. Like the there's one where you're trying to get a all four or all five colors in your completed row. And we spent all this time chasing it. Got it like once or twice and spent all this effort for four points. Meanwhile, if I had just done a row, I would have gotten a whole bunch more points. And so, I get it. Everyone's dealing with them, but some of them to me are clearly more fun than others. And it's not so much because some are more challenging than others. For example, one of them is getting the corners done. There's more point three points I think for the top two corners and eight points for the bottom two corners. And that makes sense because they're harder, easier to get, but that's way more interesting to me. Or the diagonals, like some of them just to me are way more interesting. That might just be a me thing, but something to consider. But there you have it, folks.
That is Azul Duel. It's very pleasant. It's It's more than pleasant. This is a good duel game. We actually really enjoyed it. I don't I'm not going to say that it is one of our favorite two-player head-to-head games, but it is fun. And I do think that if you like that kind of drafting, you like the pattern kind of creation, and you like a ZUL, if you really like Azul, then you're really going to like this, I think. But there you have it, folks. That is Azul Duel. As always, if I made any mistakes in the rules overview, please let me know in the comments with the time stamp so I can get that in the click on subtitles. If you found this video useful, please like, subscribe, share, maybe become a channel member. As always, thank you so much for watching. Have a wonderful, wonderful day.