Kingdom Legacy: Feudal Kingdom Playthrough & Review - Build Your Kingdom....Alone
Games in This Video
2 games are featured in this video — they unlock as you watch.

Transcript
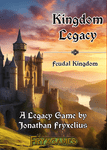
Hey, I'm Alex Mack from Board Game Co. And today I'm going to be playing and reviewing Kingdom Legacy. And if you're like, "That games in shrink, you're reviewing it right now." Well, I've already played through Kingdom Legacy, but I'm going to open up a fresh deck over here and dive into it. It is a legacy game after all. I'm going to play through some amount of time. I honestly don't know. Uh, and then I'll go ahead and review it because I've already played this. Like I said already, I have nothing to expansions yet. Expansions will save for another time, but for right now, I'm diving into this. I might still need a knife from me lessoning because I don't know if the cards are cards are still in shrink. So, let's talk a little bit what Kingdom Legacy is. If you want to avoid any spoilers, I'm going to time stamp this into three areas. Basic overview, then playing the game, which is the spoiler part, and then the review. The review should hopefully be spoiler-free, but we shall see. Um, no, it's going to be spoilerfree. I don't know why I said that. Anyways, Kingdom Legacy, let's talk overview first. This is a legacy game. It's a legacy game where you're going to destroy and alter components as you go through them. Now, you're going to start with a deck of cards. It is a solo legacy game. Although I will say it is also fun to grab two of these or more if you want and then just play with somebody else. Each of you doing your own little solo game at the same time.
That's also fun. I do recommend that that that's a fun way to do things. We have our sticker sheets which we can ignore over here. We have our rules which we will try not to ignore. I will say and this is a minor tangent to the review part over here. Minor spoilers to the review. There are areas in which I felt the rules are not necessarily as clear as I would like and there are areas where I made judgment calls while playing. If you see any mistakes as I go through a sorry got candy talking while doing that if you see any mistakes while I go through this over here right now uh feel free to call them out. They either something that I missed and I know the rule or alternatively it's one of those things where uh things were not as clear as I would like. Now the basic idea is we have this is where we're going to time stamp to um to playing the game. So, we have a deck. Welcome to Game Legacy. Make sure to read the rules before opening this pack of cards or scan the QR code below to watch a tutorial. I'll also say I'm going to add a time stamp because there's the pregame stuff, which is all like pre-spoiler stuff, and then there's the okay, now you're making changes. So, I'll break up the gameplay into those two sections.
The orientation of the cards is important. Best of luck to building your kingdom. Never rotate or flip cards. Okay, let's grab our first batch of cards over here, which specifically is going to be cards 1 through 10. We're going to start with cards 1 through 10. We're going to put the deck off to the side. We can put in the top corner for right now, but we might need the space later. We shall see. Uh, and then we're going to go ahead and shuffle this deck. Although we have to actually keep the orientation. I almost turned it over out of instinct. We have to keep the orientation. We shuffle the deck. And then what we're going to do is we're going to go through rounds of adding two cards to our deck. Specifically, let's go ahead and just play because it'll make a lot more sense. So, except I just dropped cards respecting the fact that I missed the orientation. This needs to go over here. This needs to go over here. 1 2 3 4 5 6 7 8 9 10. So, got 10 cards. All right. First thing you're going to do is you're going to play the top four cards of your deck. These are the top four cards we have. We have a wild grass, a wild grass, a trader who we can spend a coin to gain a wood. Okay, that's not bad. We can spend three coins to trade them to flip them. That's not bad either. So, basically the way the game works is cards provide resources.
You can see over here coin, coin, and coin are provided by these cards and then cards have costs in order to adjust them to an upgraded level. So, in this case, I'm going to pay three coins. One, two, three. And then I'm going to pay the cost of three coins to flip this to its next side. And then we're going to discard the cards. That's a basic turn. We're going to put that into our little discard pile off to the side and draw four more cards. Now, you could add cards two at a time. In fact, in this specific situation, I'm incentivized to do so to a certain degree because right now, you start with a basic deck of 10 cards. And so right now, if I go ahead and resolve these four cards, then I'm only going to have two cards left. And the chance of me being able to do anything with those two cards is slim to none. So I'm going to look over here. We have this one. Chop down. I can either chop down a forest to gain three wood, which makes sense. It might be worth doing so cuz then I can upgrade my farmlands to um to food barns.
That's not bad. But then these are not going to be as useful. And the problem is you can only make one upgrade per turn. So I can't. Although this, by the way, this is supposed to be on that side. That's what's going on there. That's a mistake. That's when I when I dropped the cards from earlier because that's the starting orientation. So right now, because of the fact that I don't have any wood, I don't have any stone to upgrade these. The wood would not be helpful. I am going to go ahead and draw two more cards. So I'm just going to take them. Doesn't matter where they go over here. And now that we have those more cards, we can spend two coins to upgrade something else. Now, getting a stone could be helpful, or alternatively, I can just get more coins. I think I'm going to pay two wild grasses to upgrade this to the other side, which will give me a rocky area.
That's basically a round. When you're done with that, the next thing you do is you grab two more cards from the top of the deck and you add them to your pool of cards and then you shuffle them all all together. And then you have more new cards entering the system. And this is basically it. you keep going. There's a lot more to it. And I'm going to keep going right now because it's not in the spoiler territory. It's not yet in the hard decisions. Everything right now is still resetable. And the game does give you a reset period where you can go ahead and um reset. Oh, I forgot to say this beginning. This is going to be like a solo Sunday video, which is a new series I'm kind of doing on the channel, I think. Maybe. We'll see if it lasts, but it's not even going to be every Sunday. But I just want to find more time to play some solo games. And uh in this case, I haven't reviewed Kingdom Legacy, and I want to dive back in. So, this is what we're doing. So, one, two, three, four. So, we do potentially want to upgrade this to the other side. The other side is going to be spend that to gain any of those. I think there's a lot of flexibility.
And right now, we can't otherwise we can spend a coin to get a Yeah, I think right now we're going to draw two more cards. So, we're going to draw two more cards. Add them to those sides over here. which does mean we can now spend a wood, a wood, a coin, a coin, and we can flip the rocky area paying that cost to its reverse side. So now we have a quarry in play the next time we go through our deck. We're going to take the next four cards. Now, because we already did a draw four, we're kind of incentivized. I draw two. We're incentivized to do that again because again, the chance of getting anything else is minimal to none. So I am going to go ahead and draw two. Again, the chance of being able to do anything with two cards in your hand is very rare. Not never, but very rare. So in this case, and this is example where I would not have been able to.
So I could upgrade this from the jungle to the huge trees. That's one option. Paying one, two, three coins. I could upgrade these two, but obviously more coins is better. And I could I can't upgrade this. Yep. So we're going to pay three coins and we're going to upgrade the jungle to uh that over there. All right. that's going through the deck over there, which means now we get to add a new card to our deck. And this time around, the top two cards are going to be a uh bandit over here and a field worker. The bandit is not ideal. We'll walk you through what happens when that comes into play. The field worker, because of the top bar, means I can choose one of these two sides. So, I can either choose the servant who's going to give me one of those three resources, or I can choose a field worker, choose a land in play, gain its production as resources. I think this has better long-term potential. This is better short-term flexibility. I'm going to have to go with the better long-term potential.
That might be the wrong move because long-term potential is great, but the faster you can get your engine running, the more you can turn that short-term flexibility into more things. But we'll see. I believe, if I recall correctly, we go to cards like 20. Let me actually just double check over here to show you how long we're going over here through this before we dive to Yeah, it's a 20 22. We go to card 22 before we hit the stopping point and the reset. I may or may not continue past this for the sake of this demo over here. We We'll see. Four cards. One, two, three, four. So, right now, I don't have enough to do any of these things. I don't have two coins to upgrade one of these. I don't And you could just discard the cards without doing anything, but I don't want to. So, I'm going to pay that and that. Oh, now the band that came out. Now, in the bad that comes out, what we have to do is we have to cover any one card with a um a land production, which means I could put this here and then chop this down to upgrade to the bridge, which I think I'm going to do. So, I'm going to go ahead and take this action. I'm going to gain that and then rotate it down to that side. So, it's going to have to be upgraded later. So, I fel the forest and I use those three wood in order to um upgrade this to this side. Now, in this case, I can spend a sword to defeat him and gain any two resources or with a mer with a missionary, but none of those things are things that I have right now.
So, that's not relevant. One, two, three, four. Now, again, I do have another four card hand if I want. So, I need to think through how I want to handle this. But right now, I can't I can't do anything anyway. right now cuz two coins is not enough. I need three coins to upgrade there. None of these. I can spend a coin to get two wood, but that doesn't help me. So, we're going to place out two more cards. I got a quarry. Quarry is helpful cuz a quarry can be used to upgrade the forest, which is not bad. I don't think I can do anything else other than upgrading of quarry, wild grass, or distant mountain. But I think getting the forest and the quarry at the same time means I should definitely upgrade that. And now we have a sacred well in play. for when we cycle through again. And then lastly, we have these two, which um as expected, don't do anything for me. So, we cycle them through. We grab the top two new cards over here. We have another bandit, and we have a Distant Mountains. You are allowed to look at the cards you are adding to your deck. We're going to shuffle up and continue through this.
One, two, three, four. So, we can choose a land in play, gain its production as resources. We can tier this up to discover a shrine. So, I can discover the shrine. That's an effect I can do right now. I can discover the shrine, ripping this card up. The problem is that's going to make it very hard to um what I think I'm going to do is I'm going to use these two coins to upgrade my wild grass to this. Uh, and again, you can only do one upgrade per turn. And then I'm going to tar up and discover the shrine. Uh, it means I'm going to tier this card up. And I won't actually tear it up, but I'm going to look at cards 82 to 83. Again, this is all in the pre-tutorial stuff, so I'm still not going to mark it as spoiler yet, but you look at cards 82 to 83, and you pick one to add to your deck over here. So, we got those two shrines over here. I can pick one. Uh, they're identical. They're identical over here.
So, I'm going to grab 83 because why not? And then we're going to put that into our discard pile. And this card, you don't actually tear it up until you're ready to move on, but you put it into your um your your your pile. You have it for next time. We draw four more cards. One, two, three, and four. So, right now, we could spend these two to upgrade this, which again is not the worst. I do I do tend We do have this one over here. This has two two stone, and this needs three stone and a wood. I think we're better off spending the two coins and upgrading this to the stone. Going to go one, two, three, four. Now, the good news is these two come into play, but they can't actually block anything because there's nothing that has any coin production. And so, because both of them came out at the same time, it's actually in my best interest to just pass and not upgrade anything. So, they're going to they're going to kind of burn a turn for me, but they didn't block me as bad as they could have if they had come out at separate times at the wrong situation. Uh, now I could upgrade my bizaar, which seems like the right move because I have three over here. I think upgrading the bizarre is the right move. Gives me that flexibility for later. Okay. And that's going to be our set. Pretty straightforward set. We're adding two cards to our deck. We're adding our hill and our east cliffs. Okay. That's going to be added to the next batch. Again, we're almost almost done with the uh initial tutorial phase. But all you're doing, by the way, you can't really lose this game, which I guess we'll talk more about in a review, but you can't really lose the game. It's just a question of how well you score. But you're going to be going through a sequence of 70 cards.
Anything above 70 has to be unlocked, as you saw me do with that uh Sacred Well. Uh, but you're trying to just go through those 70, which means the turns get longer and longer because you start with 10 cards, which is only five turns. By the time you get to 20 cards, you up to 10 turns. Or is that math right? No, 10 cards is two and a half turns. 20 cards is four turns, I guess. Five turns. Five turns. 40 cards is 10 turns. 60 cards is divide by four, 12 turns. That that that math's wrong. 60 divid 4 15 turns. But it escalates every single time you do it, adding up. So, you get a lot of turns out of it. But you got to work your way up there. Okay. Although again, technically you're moving cards as well. Uh then we have over here. So this right now we can spend that to gain that. It's not going to help us unfortunately. So we could just spend two of these to simply Yeah, we could just spend two of these.
The problem is here. Here's what I know because you know the top card of your deck. So the top card of my deck has this which if I get a stone and I have a stone from here, I can possibly upgrade this. But it really depends on what's underneath this card. And I don't know that. So I can go for a very safe, you know, upgrade of my wild grass or or I can just play two of these and hope for the best. I think I'm just going to play two of these and hope I I'm not sure. I'm not sure. I'm not going to I'm going to go for safe upgrade. I'm going to play two of these or two of these, whichever one it is, and upgrade my wild grass. Boom. There we go. That gives me some flexibility. Then this one. Okay. I'm glad I didn't because there's a bandit. Great. So, the band is going to block production, but again, there's currently no production for him to block. But in this case, what do I want to do? I can spend a coin to gain two wood, which won't help me.
I can spend a coin to upgrade the Feld Force, which won't help me because the the first card I play will be covered by the bandit. Or I could just consider this a burn turn, which does seem to be the best option, even though I hate it. I hate it. We're gonna go ahead and do a burn turn. Okay, gonna play out more cards. Now we have a bandit who's going to block that production. So there's going to be our four cards over here. Uh and in this case, this is this is annoying. We can choose a land and play gain its production as resources. These are both good cards. I think I am going to play out. I'm going to play out over here. Two more cards. This is a mistake over here. None of these give me the options to to flex it. So I'm going to add two more cards. This is the first time you're seeing me add even more right now. So I'm going to start creating another row because I have four cards in my hand, I think. Yeah. Okay. And I could keep going, but I don't want to. But it might be worthwhile.
And this card over here is end of turn. Discard to make another card stay in play, which again is none of these are ideal. I can discard a friendly card to gain two money, but the problem is nothing here is super expensive. The issue is I have rocks that won't go anywhere. So, I think I'm just going to play these last two cards. see what my options are. Okay, that one wants three stone and a wood. Can I get a wood from anywhere? I can't. I can get the three stone. I can't get the wood. So, I just have a lot of coins. I can use them to upgrade this, which is not bad. The other options are upgrading one of these over here because I have plenty of coins to go around. I can spend a coin to gain more stone, which does not help me at all. I think I'm just going to upgrade my shrine. We're going to pay three coins to upgrade my shrine. That's what we're going to do. I don't love that one. That one did not um work out in my favor. That's where the um the field worker uh bought me double resources. So like extra stone, but not flexibility, which would have been nice from the uh servant or whatnot. We have the forest now being added as well as a swamp. Okay, I believe we have two more cards to go before we cycle into the um stop stopping point. Not necessarily my stopping point, just the theoretical stopping point.
Okay, let's go ahead and uh continue playing four guards. One, two, three, and four. So, the bandit's going to block this unfortunately. Blocks the card of production. We know our top card is going to be a coin, which is helpfulish, but we don't know what else there is. Upgrading that requires three stone. I think we'll just take the hit. We'll take the hit. We're going to actually Is it worth taking the hit? There's no There's no incentive. I don't know why I'm taking the hit like this because the bandit taking the hit makes sense when the bandit's not covered. The bandit is covered, so I'm just going to draw two more cards. I don't know why why I'm thinking that. Uh, we have a stone production, which could be used over here. We have a stone production that could be used over here. We don't have anything else. End of turn, discard to make up to two other cards stay in play. That's even more useful. So, let's go ahead and place these down like so.
We're going to put these out. Now, two stone and three money is enough to upgrade this. And I have a stone, a stone, and two money. The problem is if I play the next card, which is a bandit, then that's a problem, I could also gain more stone, but I don't have any. Oh, more stone might be helpful. Now, in this case, we should be able to use the rocky area alone because the rocky area gives us a stone. We can spend a coin from another card to gain two stone and then use those to do the east cliffs. So, I think we'll do that. I think we'll spend which ones do we want to spend is the question. So, I'm going to spend the headquarters as my coin. So, I'm going to discard that. That's going to generate the rocky area. Then I'm going to it's going to generate two stone. Then I'm going to discard the rocky area for the third stone. That's going to let me upgrade the east cliffs, which immediately ends the turn. Uh but this card, end of turn, discard to make up to two of the cards stay in play. So I'm going to keep the swamp and the wild grass in play. Okay, which means now we unfortunately have a bandit coming out to immediately deal with those. So the bandit's going to jump onto any one of those cards, uh blocking it. And then we have these other cards, but we don't have enough to do anything.
Unfortunately, we don't have enough to do anything. So, I'm going to I'm going to draw two more cards. Spend a coin to gain any of those. So, I could make the swamp into accessible swamp, which does feel like the right move cuz I can spend a coin. So, I could spend a coin to generate a wood. Then I could spend another coin. I could discard a friendly card to generate coins, too. Oh, one second. Maybe not. So, if I discard a friendly card, this generates a coin. Coin, coin, coin. So, here, discard a friendly coin to gain two coins. So, we're going to discard the swamp to gain two coins. Then three, four, and five. That's going to allow us to upgrade the market, which gives us a lot of flexibility. Whole lot more flexibility. And then the rest of the cards are going to go away. And we continue with our next batch of cards. One, two, three, four.
We have the hill and the forest, the wild grass over here, the huge trees. So, this requires three to upgrade, two coins to upgrade, spend a coin to gain two. None of those are helpful. So, we're going to draw the next two cards, which are also the last two cards, by the way. So, our last two cards over here, we have our query, which wants two stone. This actually makes sense to upgrade right now. So, here we go. Two wood, two coins, upgrade the query. We didn't even need um you know, her the field worker. She's been useless so far. which has been fairly useless as far as things go. Then we are adding a swamp and a lake to our board over here. And then we're going to um go through this. Almost almost done.
One, two, one, two, three, four. So this is excellent. This gives us a sword and it stays in play. Okay, it stays in play until used. Basically, you can't just keep it forever, but until used. But that means that when the bandits come out, we can use this to defeat the bandits. We have the sanctuary. Stays in play. Discard this. Make up two other stay in play. Which means at this point, I think we should just draw more cards. No reason not to at this point. So, we're going to draw two more cards. We have our bandit. We can use a bandit to destroy him. Spend a coin to defeat him and gain any two resources. Uh, can be killed, gain any two resources. That's very helpful because if we gain any two resources, what can we do with that? We can spend a coin to gain two stone.
So, here's what we can do. Oh, we can't. Okay. Okay. So, we spend a coin on this to gain two stone. That gives us three stone already, which I think is overkill for what we need, but it's still worthwhile. So, a coin, two stone, plus this is three stone. Then, we use a sword to kill the bandit. That gives us the wood. And we use the wood to flip this from the headquarters into the town hall. And the bandit is destroyed. So it's going to go to our out of play pile. And because we used the castle, it's now gone. So I have to wait till the next round to kill the next bandit. Over here we got pretty straightforward. We could use any two of these to upgrade one of those, which if again feels like a bit of a waste of this, but it might still be the right move because you only otherwise get one. I think upgrading these are always helpful. This one needs three coins, which I can do one, two, and three, and upgrade the planes to a farmland. Just give us extra coin production, which is great.
Over here, we have a bridge and a plains, a swamp, which we really need to deal with that swamp at some point. Uh, we could improve this right now. If we want, we could bring back the felled forest or we can try to recover it. We do have this coming out next, which is not that we could discard a friendly card. Okay, we could discard a friendly card to gain two. So, let's do that. Discard a friendly card to gain two. Then use that one from here. And we're going to upgrade the planes to a farmland. So, we have another farmland over there. Beautiful. We're getting our economy up. Then over here, we have to block the uh wild grass with the bandit over here. And then we have this one. I think we're going to be taking two more cards out. So, let's slide these up over here.
And next card. card. And we only have two more cards in my hand, so I'm almost incentivized to We could discover a mine, which is fun. But we have to destroy this card to discover the mine. So you you could do either one, by the way. So when you whenever you have an ability, you have to choose. Sorry. If an ability makes you destroy or discard a card, then you can't get the resources. Otherwise, you can because you have to discard the card to use the resources. So we're going to go ahead and play these out as well and see our full options. So, at this point, because I want to discover a mine, we're going to hold out this for a second and see if we can do anything else. So, we already could improve the swamp, which I think is good enough for me. Could we do anything else? We can't get stone. We can get a stone over here if we wanted to, but then we wouldn't be able to do that. I think once again, she's not being that useful.
So, we're going to spend these two to improve the swamp to slightly better land because currently our swamp and he's still still not healthy right We still need to convert it even further. Uh but then we're going to destroy this card to discover a mine. Taking cards 84 to 85. Well, one of those two. It is. And that is basically that's basically that. That's going to be our our cards over here. We got our 84 into our cycle. And then we get to stop. Now you got the hang of the game. You may reset to start again if you'd like to give your best shot. If you continue, we'll discover cards. Four cards. Cards 24 27. Look at them now. then decide if you want to restart or continue. This is the legacy part of things. So, here's what we're going to do. I'm going to keep playing for another few cards. I don't know exactly how how long to go because the whole game can take a decent chunk of time. Uh I'm going to play for another few rounds at the very least.
So, what I'm going to do is going to tag this as the spoiler part because we're moving past the reset. So, right now, that was the intro and let's continue playing. Stop. So, we got for fertile soil over here. This land seems Let's see other side. Cards 25, 26, and 27 are permanent cards. Okay. They can never shuffle into your deck. They cannot be discarded. That's going to be the army. Army, the treasury, and the export. Basically, the short version of this is the army wants us to spend swords to slowly move up boxes, which means I have to get a pen. The treasury over here wants to spend coins to slowly move up boxes. And the export lets us spend barrels to slowly um earn various bonuses over here. So, as we get barrels, we're going to mark off various bonuses. Those go off to the side. We'll deal with them later. Cars 28 over here. Uh 24. This land seems to go anything add sticker one as a production to a land. So, we have a sticker over here.
Uh, we have fertile soil and efficiency. Just one of those. Uh, choose one building and boost its production. Add a production sticker to make it produce one more resource already produces. That's going to be a building. So, we already have Do you have any maxed out buildings? I don't imagine I do cuz like I always want to do this on maxed out stuff, but right now, let's find a maxed out land. So, we have our farmlands over here. Let's add a sticker to production to any land because the problem is you're upgrading lands, which means I kind of really want to put this on things that are maxed out. So, we have a sticker over here. We are now adding one more coin. Our farmland has now produced three coins which is awesome. The problem is our buildings. Do we have any maxed out buildings? I don't believe we do. In fact, we don't have a lot of buildings to begin with. We have a wall. Oh, the wall is maxed out. The wall is maxed out. Choose one building. Boost production. Add a resource to make it produce one reser produces. Restores are number one to six. Let's do that. We can do the the that that thingy. So, we're going to regenerate two swords every time from this wall that stays in play, which feels feels pretty good overall.
Let's put a sword out along the um tag. Doesn't look the prettiest, but functionally it does the job. Uh parchment cards like this are destroyed after use. We toss it into our destroyed pile. And then our stickers go to the side. And lastly, we have cards 28, I believe. Or maybe not. 28's next time. Ding treasury. You'll not be able to complete any stacks. No. Okay. 23. 24 to 27. Okay. So, we're good to go. Let's continue playing, which I will probably need to grab a pen at some point. Now, it's very important if you ripple shuffle to maintain the orientation because it does matter. Also, if you're sliding into stickers, that's a problem, too. Overand shuffle might be your friend in this case. Sleeves are possible, too, but you're rotating and adjusting cards all the time. Okay, let's put this off to the side. Let's grab our deck and let's continue playing through a few more rounds. We have Hill, Feld Forest, Bridge, and Farmlands. Uh, none of these are easy to convert based on the current setup. They all require other stuff. So, we're going to slide them up and continue another two cards.
We have a distant mountain, which only needs two coins. We have this can spend. So, we could use that to upgrade the bridge, which I think makes sense. It's a little overkill on everything else. So, we're going to spend a coin to then generate two and then do that over there, which means we can upgrade our bridge. And we now have a bridge upgraded, which will slowly help us find adventurers. Then we have these four, the huge trees, the farmlands, which alone can take care of the huge trees, and then the wall. Now, given this situation, I think this is an easy choice. Uh, spend the farmlands to upgrade the huge trees to the other side over here. That gives us a bunch of stone coming in, a bunch of wood coming in, and then we have our wall in play for whenever that other mercenary comes into play. We have one, two, three, and let's go four over here.
Play one land from the discard pile. That could be very useful. The question is what is it we're trying to do? Because playing a card for the scar pile, we can just use that ability. We also have a sword over here. H we also have a sword which is interesting. The sword might be worth considering. Okay, we're going to figure things out one at a time. So, we have right now we have any particular lands that would help us strongly. We can get the stone, but we don't have coins then. None of these are going to help us strongly. So, right now, play a land for the discard pile. Okay, here's what we're going to do. We're going to spend the coin to mark the sword to mark off this over here. One complete discover. This card is worth
spend the swords below to improve your H. Never mind. I forgot that this action over here is an end your turn action, which I don't want to do. I might be forced to just because the alternative is not great anyway. play land for your discard pile. Um, I think I'm going to simply I'm going to end my turn. I'm going to end my turn. I'm going to do this over here. Uh, because I could discard this, make cards stay in play anyway. So, I'm going to spend the sword, but then I can play a card from my discard pile. So, I should do that first. Okay. So, let's play let's play a wood. We're going to grab this over here. Gather some wood over there. Then, we're going to So, we're doing that effect. Play a landing discard pile. Then, we're spending the sword to mark off the first box in army. I'll grab a pen in a second. And then at the end of the turn, we're discarding this to make two cards stay into play. Um, and that's where I could make a few choices.
I think I'm kind of inclined to keep this in play. No, I have to spend it. Now, I have to spend this to mark the box. Never mind. I have to spend that to mark the box. So, I'm going to spend that to mark the box. That can't stay in play. So, I'm going to keep these two in play. All right. Great. That's good enough turn. That means our entire top row over here is cards that are staying in play, at least for this round. Although, this stays in play forever until necessary. All right, let's draw four more cards over here. Uh, we have swamp lake. We have our bandit, so we can take him out over here. And we have festival. So, our bandit, we're going to spend our wall to take out the bandit, which is going to generate two resources, which is amazing. Uh, now the question is what we want to do over here because we can either generate two wood, which feels like choose a land and play, gain its production as resources. So, I could just do that. I could just upgrade this, which is not the worst because I can choose a land, gain it production as resources. That's going to be the two two wood over there. Then when I kill the bandit, I generate two more wood.
And that allows us to upgrade the deep jungle. I think that works. And then we have a building, a top a top of a building. And this stays in play, too, which is amazing. I think we're going to do that. We kill the bandit. The bandit's gone. The wall's gone. These cards are all gone. And we upgraded that. I still need to mark that first box on the army card. And then we draw our last four cards. Only three cards. Our last three cards over here. Can I do anything with them? It does not look like I can. No, I could gain this and then fell it. So, I can fell the forest in order to upgrade the mine, which feels like an easy win. That's just a stronger card. We're going to do that. And that is a round. Okay, we had two more cards. This time around, we have an opportunist and as well as a volcan a volcanic eruption. This one does have to be upgraded. The volcanic eruption is event while it's in play.
Destroy the next land you play. When you do, flip over. Oh, that's not good. That's not good at all. Fun things. fun things. Let's go through this. We're going to play straight to the top of the pile. Uh, while this in play, destroy the next land you play. Now, it's worth mentioning the way you play these cards over here. Okay, so we're going to go ahead play them. While this is in play, destroy the next land you play. So, a felt forest is gone. That is brutal. Then, this flips to its opposing side. Now, it's an Ashlands. Um, and it just flips it right away. But then you flip a card, it immediately discards. So, that's gone already. Then whenever you flip a card of any in any way, they immediately go away. Uh then we're going to draw two more cards because right now we can't do anything with those cards. We have a field worker who can replicate that which is very cool. If I can actually no fieldwork has to be a land, not that. I'm going to draw two more cards. We have our treehouse which is amazing. And then we have our land over here. Now the treehouse can stay in play. But if I get two more wood, the treehouse is not a land or she could replicate it which would be great.
She's been so useless. I made the wrong choice. I could spend these to upgrade those, but I feel that might be overkill considering I can keep these things in play anyway. So, I'm going to draw two more cards. Two more cards. Festival and Opportunist. Festival would allow us to get the one more wood, which means we can upgrade our deep mine, which I think is worth it. I think it's worth it. This one we can just upgrade. But if we upgrade this as our turn, it's a free opportunity to upgrade. But then with then we're done. So, I think we're going to take our festival, our treehouse, and our lake over here. That's going to give us a 1 2 3 4 5. And we're going to upgrade our deep mine, which is awesome cuz it's a ninepoint card. Plus, it starts giving us barrels, which is great. Okay, we're going to draw four more cards.
We have our castle, which is great. We have our town hall. We have our wild grass and our sanctuary. Enter discard to make two other cards stay in play. So, this is interesting because I killed both bandits. These two alone don't help, but spending the army takes up my turn. So, I think what I'm going to do is I'm going to spend this to do the second box on the army card, which takes up my turn. But then at the end of turn, I can discard this to make the other two stay in play, which feels like the right move. So, we got those two and we got one, two, three, and four. Now, this one does let us pull any land, play any land from the discard pile. Let's see what the most helpful land would be. Right now, we have this land, which is pretty strong. That's not a land. That's a building. I got to remember this. Lands versus buildings.
We have no particularly strong lands. Actually, no particularly strong lands. So, that's not going to help us significantly. Right now, get a coin out of it. which coins are not the worst, but I just don't know if coins are super helpful right now either because this would require coins to upgrade. This would require stone, which I can't get from our current cards. I can only get a coin, which I don't think is helpful at all. So, I think the only thing I can realistically do is upgrade one of these cards, unless I bring two more cards into play, which I don't feel the need to. So, I'm going to upgrade our Wild Grass. Okay, that's going to be our turn. Good enough. Not ideal, but good enough. That's going to give us our last four cards over here. We have distant mountain. We have farmlands. We have land over here. So, we could spend these. We could increase this to the other side, which I think makes the most sense cuz the alternative is to do the distant mountains, but I think we want this one because we want the adventurers that we get. Discover a new region 7172, but that's going to be for the future. That's going to be the round, right? Let's go to our stop effects over here. With your kingdom growing and flourishing, many are coming here to pursue their dreams. This round, instead of discovering the next two cards, look at the next four cards of the box. Cards 31, three, four. Choose some that two of them discover and destroy the other two. Oh, I remember this part. I remember this part. This is this is a pain. One, two, three, four.
Okay, so we're going to take this off to the side over here. Uh, this one. We can get rid of that card. We have these two cards. These four cards. Okay, we have an inventor, an engineer, a scientist, and an entrepreneur. I think I want to I know I've done the inventor. I can't remember for sure what I've done. I've done the inventor. All persons, including scientists, have plus one production. That's not bad. Let's go with the scientist and entrepreneur. I think I did the inventor and the engineer. Okay, so we're going to get rid of these cards. They are gone. We have our scientist and we have our entrepreneur. Those are going to go into the cards and we're going to shuffle up. I might do like two more rounds. We're currently up to card 35. So technically we're at the halfway pointish. Once you get to 35 you're at the halfway point. That's just in terms of quantity of cars. Not actually in terms of the gameplay experience because the thing escalates and magnifies.
One, two, three, and four. Okay. So what can we do? We have no discard pile, which is kind of annoying. Um I think that that's a just a bad starting hand. We will use it to just go ahead and spend those two to upgrade that. We have a rocky area in play. Bit more resources. Not the best overall. Although you could, you see, this is the problem. This action over here, I have to start doing it at some point because at first it feels like a waste because spending a coin is so easy. But the longer you go on, the more of a waste it is. You want to work your way up as soon as possible to be able to having those like amazing turns with the lots of coins. But I kind of want to see what we can get out first. All right, this one. Discover a new region. 71 72 73 74. then flip. Okay, so that one would involve flipping that. Let's go to get 72. Let's say I can't remember what I've done in the past. We'll grab I'll do 74. 74 it is. We got a shore. That's going to go into our pile over here. And this is going to flip to its other side, which we'll have to rediscover. And it goes away. But that doesn't actually end our turn because we didn't upgrade a card yet. And that was an action. Actions don't end your turn. So, right now we have the ability to either add more cards or maybe we just bite the bullet and start paying for the treasury because we got to do that at some point.
I think we'll do that. I think we're going to bite the bullet. We're going to mark the first box in the treasury. So, I kind of do the first two box in the armory and the first box in the treasury. I have not done those yet. And we go one, two, three, and four. So, over here, end of turn, discard to make up to two other cards stay in play. That's not the worst. Uh he is going to allow us to start shipping. So we're going to start marking. I have to grab my uh cards over here. Discover school. So I could do this over here to discover the school. Uh we have to do although we have to discover H. We have to discard that card to generate the barrel. I might just want to discover the school and call it. But that would end the turn. But then this would allow us to keep cards in play. So let's do that. So we're going to discover school. That's going to be card 118.
which I assume I have not seen because I don't think I used the entrepreneur in the past. So, we discover school. This gives upgrade a person play for free and then rotate. So, it's going to upgrade people, but now we're going to use our sanctuary to keep these two people in play for the next turn. So, now we're going to draw four more cards, which mean I can still spend that barrel in theory. One, two, three, four. Okay, so now all persons including scientists have plus one production. So I have a lot of monetary production. This stays in play. I'm almost incentivized to flip this. It's not the best action. But this one basically, but then I can't use that. No, I could use that. I can generate the resources anyway cuz he generates. So he generates a resource, he generates a resource. So coin, coin, coin, and barrel. I'm going to spend those three coins to upgrade the planes.
And I'm going to put the barrel onto my exports. decent enough turn. We're going to keep the well in play, which I don't know if it'll help me right now because unless I get more swords, I won't be able to do the next level of swords anyway. So, I don't think it's going to help because I don't recall if there's more swords in the deck. But now we have the ruby mine, which is going to give us another barrel. We have the festival, and we have the wall. Wait, no, one more card because that was just the wall from last turn. Then we have the treehouse, which stays in play as well. It gives us a lot of things, but I think I want to play more cards. So, we're going to play our Ashlands and our lake. And at this point, we're actually not going to play this one right now. We're going to play Ashland in the lake because this is actually a this is one of those few times that a last card is actually helpful. So, we'll deal with that soon.
But now, for the lake over here, we can upgrade the lake to the fishlands, I believe, to the um fisherman's cabin, which isn't the way I want to upgrade it, but I don't have four stone. The alternative is I can I don't think I have enough stone to do what I want. So, I'm going to spend my wood, my two wood, a stone, and a stone. There's a whole lot of spending for just that one thing. And we're going to upgrade the lake to the fisherman's cabin, which I think is still good overall. Uh, and then we still have that barrel over here. So, now we have two barrels that we can mark, which at this point means I really should uh deal with that. And then we have this over here that's going to go away. And then he I can now rotate him to one side or the other. I can either ro him to the laborer or I can rode him to the recruit. The recruit will be helpful for this, but the laborer is helpful for that. The recruit can be upgraded anyway to the pretend noble. H I think I'll go ahead and upgrade him to the recruit for right now. Recruit it is. Okay, that's another pool. And at this point, I really should grab a pen to actually remember. And we have another stop effect coming. So, um, we'll deal with that shortly.
I'll be right back as I grab a pen. Apologies. I know I said I was coming back, but then the camera cut out just as I was filling the stuff out. My SD card was full. So, uh, we filled in the two barrels over here. We filled in the two armies, and we're going to fill in the one over here. We're not going for pretty. We're just going functional. And then we're going to continue with our, uh, next set of cards. And then we'll do we'll see. We'll see. Let's go. Let's Let's just go through this. Maybe we'll do another this round and then one more. Maybe this round and two more. But anyways, let's go ahead and play some cards. We got one, two, three, and four. So, we have our small school. Upgrade a person and play for free. Okay, so upgrading a person and play for free and then flipping that. The small school becoming a uh upgrade a person. Okay, I like this concept because the mercenary is useful. Although, honestly, the mercenary was so close to being able to do it anyway. Uh, this one over here, we can upgrade the mercenary to sir. Spend three to add stickers. Okay, one second.
Over here, spend two to mark one to two of these. And that gives us swords. Do I care about that? Spend two to mark one to two swords. I think we're going to do that. So, we're not going to actually upgrade the person for free, which feels a bit like a waste. But here's what we are going to do, cuz I think we can do this. We can do the army. So, we're going to spend two to mark one or two swords. So, we're going to mark off swords. So, one and two. And then our two swords plus this over here means we're going to have three swords, which means we're going to check off that box, which is great because the higher we can get this, the more points we're going to get. It's going to be a lot of points if we can do all that. But anyways, so we've done that card over here. That means we can't do these. And that is our starting play. Then we have good time to get the pen. Apparently, we have one, two, three, four. We do want to upgrade this, but we don't have the resources to do so. We could spend that to get two over there, but we can't currently do anything. So, we're going to start getting two more cars here. We have one and two. We have our accessible swamp, which we have two coins. We We can do that. That's fine.
In fact, we can even do this one over here. We can upgrade the rocky area. That might be worth it. But this also stays in play if we don't use it. So, that's worth considering. So, what can we do? We have two wood. We have two coins. We have a rock. But we could spend coins to gain a rock. And upgrading this feels like a strong play. So let's do that. Let's upgrade the ruby mines. So we're going to play two more cards because now what we can do is we can spend a coin. We can spend a coin to gain two rocks. That's this one over here. Okay. Then we have a coin, a coin, and two wood. That's enough to upgrade to the diamond mine. Getting the diamond mine in play early is pretty strong. So even though there's some extra resources there, I think it's worth it to get that diamond mine. It means every subsequent round we're going to be getting a bunch of barrels out of it which is pretty strong. We have our festival, our swamp, our wild grass and our law fisherman's cabin over here.
Fisherman cabin needs threewood. This one we could upgrade the swamp right now between these two. Let's just keep it simple. Let's just upgrade the swamp. Swamp is upgraded. There we go. Then we have one, two, three, and four. Uh we have our scientist needs some resources. We have two. We don't have that. We can discover school. We already did that. Uh we don't have enough to do these. We don't have the wood. All persons including this have plus ones. We have plenty of gold production, but nothing else. So, we're going to add two more cards here. Even more gold production. Still not helpful. Really, really not helpful to upgrade them. We just we can't we need we need wood. We need wood right now. We have a stone. We don't have any wood. We're going to put our two more cards over here. Still nothing. We still don't have wood. And everything this one a felled force is the only thing we can upgrade at this point. Honestly, I should have quit early and used the money for At this point, we have three cards left. I'm going to play out. We're going to play more cards. So, we're going to see what we can do. We're going to play two more cards. We're going to play one and two. Okay. So, can we do anything with these? This one needs We still have no wood. We're low on wood production. Maybe I should just upgrade this, which feels like such a waste. But if I upgrade this, what can we do? Play one land from your discard pile for free. Okay, that could help. So, what is the most valuable thing to upgrade? Well, we could also play the um we need lands. I need to remember that. I always remember this part because I have some cool cards. My lands are not that cool. I can get a stone. I don't have any I don't have any I need wood. I need wood. That's what I'm low on. So, let's go ahead. H
Let's see this one. Do I have any wood? Land. We have stone. We have stone. We have lots of coins. We have no wood. But I could upgrade the bridge at the very least, which might be worth doing because wood, stone. This actually just needs stone. So, in fact, I could actually do the following. If this needs stone, I can do the person. So, I can use the field worker on the rocky area. That's going to give me enough to get two stone. And then that plus this and this is going to be all that that I need. So that's going to be that. And then we can take this over here and flip it to its reverse side which means we will lose this but I think we are getting the higher value of it which I think is worth it. End of turn discard to make up the three other cards stay in play which is even stronger. So it's kind of a a little bit of a bummer end turn over there because we had massive amounts of resources for it but I think it's worth it. And the last card we have is a wall which is going to just go you know nothing we can do with it cuz we nothing we can do with it. So, let's go ahead and continue over here. Stop. It's time to set up something, some goals for your kingdom, something to strive for.
Discover five cards this round. One, two, three, four, five. Uh, we 38 to 42. The first three are goal cards. For each card, you need to choose one of the sides now. It cannot be changed later. So, I think what we're going to do is we're going to do this round and then finish it off and then go to the review. So, these are the five cards we have. We have to choose goals. Okay. Strength and numbers is worth two points per person. We have or we have military dominance worth two points per production of swords. I think both are good, but I think I'm going for people right now a little bit. So, we're going to go people. Expanding borders. You want 70 more cards in your kingdom. This card is worth negative two points for each card missing from 70 or worth negative one point per card with exactly zero points excluding permanent cards. Interesting. Let's go with expanding borders. Loyalty worth 35 points if there's no enemy in your kingdom or 25 points if your production of barrels is eight or more.
I can probably guarantee there's no enemy. We'll find out. But no, I don't know if I can. We're going to go with the trader. It's more reliable. Jester stays in play. Discard the top card of your deck. Stays in play. Discard the top card of your deck. Mark one bar box. Discard the top card of your deck. Mark one X. Okay. Okay. Or merchant, mark one to two X's. Oh, this is very helpful. Okay. These are people. These they have goals over here. And then we have people over here. Let me just double check. Discover five cards. The first three are goal cards. So, these two are staying in play. Choose a land in play and gain production resources. Stays in play. End of turn. Discard to make another card stay in play. I think I'm going the storage building for that. And for the jester, discarding the top card of your deck lets you get rid of bad thingies, which is helpful.
That part's helpful, but the the sheer amount of flexibility. I want the merchant because I want I need wood. I need wood. And these goal cards are here. And so, we're going to now shuffle it up. This card is gone. And we're going to do our last round. We're making progress. Making progress slowly. We're up to card 43 over here. But again, it gets longer. Let's play our cards. One, two, three, and four. So, we have our stamp stays in play, which is already good. Although happens to be these already pair up to make the rocky area. The problem is I need wood. I need more wood. Um, choose a land and play gain it production as resources. That's like a ton of a ton of resources. a ton. I could improve this to its other side. I think making the rocky area is good. So, we're going to do the rocky area. So, it's going to simply do that rocky area and done. Okay, that's one. Then we have mercenary. 1 2 3 4. Okay. Uh, this one is going to give us two barrels, which is very helpful. Uh, but what else can we get out of this? We don't need anything to be upgraded right now. This can mark those coins as resources, which is helpful. This can't help. That can't help. We might be able to use our Where' our person go? It's a person. It's not a card in play.
So, we can't upgrade this. We can't upgrade this. We can't upgrade this. We could upgrade this if we had one more coin, but we don't have one more coin. So, I think what we're going to do is we're going to draw two more cards. One and two. Okay. So, we have one more to upgrade a person and play for free. And then that that's not going to help me either. So, I'm going to do two more cards again. One and two. Now, the interesting part here is now we can spend two coins to mark that. That's going to give us this over here. And that's going to be one, two, three, and four. And that means we can now do our fourth level army over here. And that's going to be that ground over there, which again is getting the swords thing is always feels like you're not making good progress, but when you do it, it is well worth it. Oh, and I also had the barrels because I have two barrels over there. There's going to be two more barrels over here. One and two.
Once we get to 10, we could spend some stuff. Getting some stickers. One, two, three, and four. Okay. Discover school, which we've done already. Uh, land over here. We still We need We need wood production. So, we can fel. We can just pay this to make this into that, which gives us I think we really need to we really need to expand these. We really need to expand them. Okay, that is what it is. Not the best turn, but it gets us closer to being able to have wood back in play, which has been our biggest challenge. Stays in play. Discard to make another card stay in play. So, that's helpful there. Uh, these ones don't help us right now because again, we need wood. So, we're going to draw two more cards. Okay. Uh, we have one wood from here. Or we could just upgrade this. Does this upgrade to anything useful? No, it's just more money. Money. Like we're so good on money right now, but like maybe we should start working our way towards money because if this isn't going to help us with that anyway. So I think what we're going to do is we're going to go ahead and do this to get the next batch of money. So we're going to discard this card over here. This card to get two money on this one. Then we're going to discard this to make this stay in play, I think. And then these are going to go away. And then we're going to spend that to do this one over here.
And then we're going to draw out more cars over here. One, two, three, and four. This has to be discarded. And we have this, which is theoretically good, but it's not particularly helpful for the current situation because we have two wood for this is not going to help. We have this thing in play. We're going to draw two more cards, and we only have one card left, so we may as well draw the last card. Um, okay. So, that's what we got. So, what what can we do? We can do accessible swamp, end of turn, discard to make up to three other cards stay in play. That could be theoretically useful. But right now, we could easily upgrade this to be that, which would work our way towards not actually wood. I want wood. I want wood. Add sticker two as production here. That's wood. So, this one can get our way towards production. So, let's go ahead. We're going to do Ashland. We're going to pay these two to do this one.
Um, that's going to flip that to the side, which means as we play this, we're slowly going to be able to add force here, which is really slow, unfortunately, but I don't see a better solution. Okay, that is that is a cycle. Not the most exciting cycle to end it off with, but a cycle nonetheless. And with that, we're going to go ahead and move into my review, but I'm going to uh put the cards here in play to make sure everything is all ready to go for the next time. So, let's talk review. This is Kingdom Legacy. Uh, this is this is like the second time going through it. It is surprisingly fun. All it is is a little engine in which you're just trying to rotate cards around, paying using cards to pay for other cards, balancing when you draw more cards, and then trying to do all of that to get as many points as possible. Uh, there are expansions. I have not dabbled in the expansions yet. Honestly, I don't even know how to integrate them. I need to take a look at the rules. I found them to be a little confusing. Uh, I I I wanted to integrate. I haven't done so yet. I need to just really look up how to do that. But overall, let's go into review. It's a solo legacy game that works well as a solo game and it works well as get a few pairs and play it simultaneously with another friend and see how well you score. There's a registration code, so you can kind of do that with anyone else. You can just kind of punch your registration code and see how well anyone scored. I haven't actually tested that yet, but that's theoretically what you do. Uh, but ultimately I don't find that as nearly as compelling as playing with other person who I know and then be like, "Oh, I score this. You scored that." Uh, but it's fun. It's straightforward. You're going through a cycle. It's kind of addicting. It's great for a late night like kind of, you know, you just want to play a few rounds and and finish it off.
You can go through this. You can just burn through this playing it all at once and just having a several hours of playing through Kingdom Legacy. Or alternatively, you can play it for uh 20 minutes here, 20 minutes there. Just play a few rounds at a time until you get to the end. Uh the unlocks, you've seen a decent amount by now, unless you skip to the end. The unlocks are not gamebreaking, but there are fun things that you have to deal with as far as how to upgrade your process and your your engine. Overall review wise, I'm having fun with this. That's my review of this one. I I scores are tricky because scores sometimes me can mean more things. The fact that I'm playing this through a second time, I'm going to give it a four out of five. I'm going to give it a four out of five cuz I'm playing it through the second time and I can see myself doing it more. I can see myself doing with the expansions. And if they put out a new game with like uh some other theme, let's pick anything. If they put out a feudal Japan version of Kingdom Legacy, I'd play that, too. If they put out space Kingdom Legacy, I'd play that, too. So overall, I'm having fun with it, but it's a four based on what it is. Meaning, it's a legacy game that's meant to be played once, unless you buy it again, and then going through it. If this is a game that I was repeating again and again and again, I don't know if it would get a four because this isn't the kind of game that I wanted to be my regular game made.
It's kind of a little bit too it's too linear as far as what you do. Even even going through it now, it's not significantly different in terms of I make small different choices as far as what I add to my deck in different ways. But overall, the core engine is going to be pretty straightforward and pretty repetitive if this was something you were doing again and again. So, rated as a $15 game that you're meant to play once for several hours and get fun out of, it's a strong four to five. Uh, rated when compared to other games that are meant to last a longer amount of play time, it's not nearly as good. Uh, that's Kingdom Legacy. It's fun. It's charming. Uh, it's got terrible AI artwork. I'm pretty sure it's AI artwork. It's got terrible AI artwork, but the actual engine of the game itself is um more fun than I expected from this. In any case, until next time, I'm Alex Radcliff from Board Gameco. I hope you enjoyed this uh gameplay plus review. And as always, I hope you have a good one.