Did you know you could play Patchwork Solo!? Patchwork 10th Anniversary Solo Playthrough
Games in This Video
1 game is featured in this video — it unlocks as you watch.
Transcript
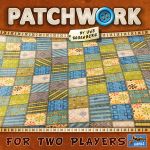
Hello everyone. Welcome back to the board gaming doctor. My name is Phil and today we are playing Patchwork the 10th anniversary edition. Whoops. And this special edition came with its own Ottoa solo mode deck. Now, interestingly enough, with this deck, you have a normal deck where you flip over the card and it tells you what to do. and we'll go over some of the rules as we play, but it also comes with a more tactical deck where it tells you what or how many buttons the uh Ottoa is going to take on the next turn. So you can kind of plan ahead, which actually may very well resemble the two-player game where you do have perfect information as far as not only where the uh opponent can go, but what they might want to do on their turn. And so we're going to play with the normal deck today. You can also adjust the difficulty by placing a tile or a button in this case where if the opponent passes that spot they or lands on that spot, they will get the uh 7 by seven token.
And yeah, in addition to that, there are some other scoring uh criteria to follow based on the difficulty. We're going to go right in the middle. And uh so I've got the rule book here and we are playing against the fellow difficulty. So that's the third out of fifth difficulty. And so yeah, we'll just get into it and I will go first. So looking ahead at the tiles that we have, we get to choose one of the three tiles ahead. Now, it's nice to get some button income early on. And so, I think that's why I'm going to go with this first one right here, the uh two button cost and three time token.
So, let's go ahead and place that right there. Paying our two buttons. And uh so, I have uh three buttons left to spare. So, the opponent already starts with two cards discarded. So, we're going to go ahead and flip over that next card there. So, the top portion of the card tells you how many buttons the opponent is willing to spend. And in this case, 10 buttons. Basically, I don't see well, there are some tiles that would only be available with 10 buttons, but if they can afford it, then they will go ahead and choose based off of these criteria here going from top to bottom. So, the top one says if their three options are pretty much equal, they will go with the button that has the most buttons on it, which is going to be the second tile right here, or the first tile, rather.
So, we're going to place that off screen. They don't need to put it on their own board. And that will be Oh, um, and that will be their turn. I forgot to advance the, uh, time track. So, I went up three spots and the opponent went up two. Okay. So, let's move on to the next turn. And I also forgot to mention here, uh, the bottom right portion of the card tells you the income that the opponent would get on their turn. Here, this zero card, they have zero to spend. And so, they wouldn't be able to afford any of the cards that are list or any of the tiles rather that are listed there. So, they just move their tile ahead accordingly. If they were to trigger that income, they would get uh five buttons or points.
So, so I'm looking at my options right now, and it's I'm I have the option to get at least one tile that has one button on it. And with the income uh apparent, you know, coming up, I would only have a maximum of two buttons that I would gain on my next turn. And I have some pretty expensive tiles coming up here. I've got an eight cost, a four cost, a five. The next one that I would be realistically able to capture would be one of these two tiles and onward. And so I might want to grab the tile that has the one cost and five advancement. I think that's going to be the best. So that way I allow the Ottoa to uh catch up to me in a sense and uh allows me to be able to afford some tiles later on. So I'm going to spend a button and grab this one. it will advance me quite a bit. So, let's see. One, two, three, four, five. That triggers the income. I get two buttons. And the Ottoa wouldn't trigger the income because they haven't crossed the income threshold yet. And so, they probably will now. All right.
So, they have five buttons to spend. I forgot to move that tile forward or the neutral token. So with five buttons to spare, they have the option to take the first or the third tile there. They would prefer uh not advancing on the time track farther than where I'm at if they So that would work for both tiles. The next one over says the tile with the most buttons. Both have the equal amount of buttons. And so the third option here is Ottoa takes the path furthest from the neutral token. So they will go over here and grab this tile.
And so they would advance to grab a button for themselves. I will uh keep it off screen for now just for the sake of room on the table. They will get to go again. They have one button to spend. And it looks like they will uh be able to afford that one only. So, they will go ahead and grab that one as well, which is too bad because that was one that I was thinking of grabbing. and they make it ahead of me just in time for me to make my next choice. So, I have four buttons. I could afford this four right here. That doesn't really do anything to increase my income, though, and neither does the first tile. I could afford uh this next tile. That would net me two more buttons. So, it would increase my income by two and it would put me past the uh income marker again. So, let's go ahead and do that. I think increasing income is going to be beneficial at the start despite the fact that I do get to progress quite a bit. So, one, two, three, four, five. Whoops. One, two, three, four, five, six. And I have four.
So, I spent three and I will get four back. So, I have five buttons now. Okay. The Ottoa has two buttons to spend. They can afford this one and they will move up four. They trigger income. So, they get four buttons. Keep track of that. So that was one, two, three, four. So with the Ottoa being on the spot next to me, they will take another turn. They have four buttons to spend. They can only afford this one. And that makes them move over uh up to six. One, two, three, four, five, six.
That triggers another income event for them. And they get that button. So, now we have a few turns. Let's try to maximize the amount that we can do. Well, I wish I could say that because unfortunately, it's hard to see with the glare, but this one costs seven buttons. This is 10 and this one is seven. So, now it's always optional for me to advance my token even if I can afford. I haven't done it yet, but in this case, I am forced to advance my token all the way up to directly in front of my opponent, and I gain a button for each movement. So, I'm going to go one, two, three, four, five, six, seven. So, I get seven buttons, and I also trigger the income. So, in addition to the seven buttons that I got, I am going to get four buttons. So, I'll replace one of those here. And it is what it is. Okay.
So, now my opponent has three up to three to spend. They cannot afford any of these as well. So, they are going to go ahead and move up in front of me. And as opposed to me, they do not gain gain any extra buttons by doing so. Coming back to me now, I can afford one of these buttons or one of these tiles with the buttons that I have. So, let's try to make the best decision here. Kind of like the idea of not making my opponent have as many options later on and keeping some of those more expensive options open. I could afford the seven tile and the 10.
So I think I think I'm going to go with the seven cost tile first cuz I think that places well pretty pretty well right there. So I pay seven and I advance four. One, two, three, four. That also Oh, that almost gets me the bonus tile here. But I do trigger income. And so now I have six showing. My income is looking okay. And I have some buttons to spare. Okay, let's see what they can afford. Eight. So they can afford this one. This skips over this 10 cost tile here.
Uh, actually I should note they do have this other tile that they can afford as well. So they will prioritize the tile that gives them the most buttons. So they're going to go and take that one and move six. One, two, three, four, five, six. They remove this special tile. They also trigger an income, but that unfortunately for them gets them no buttons and gives us plenty of time to think about our next move. So, one option that I see here on the board is that I could potentially go here, grab this uh two cost tile and place it on the board as and then I would still have an opportunity to grab this tile which I think would fit pretty well right in here. So, let's do that. Let's go ahead and place this two cost two time tile right there on the edge.
So, I spend two and I'm going to advance two. And then let's go ahead and pay six for this tile here and fill in that space perfectly. So, that advances Oh, I So, I paid six. I advance six or five. One, two, three, four, five. I will get to uh place this. Let's go ahead and place that right there. Since I went through that space, I trigger income. I have one, two, three, four, five, six, seven, eight. Not bad. So, I've got a decent income at least going for me.
Okay, my opponent can afford a seven cost. So, they can afford all three of those. They will grab the one that gives them the most bonus points there. So, they advance four spaces. They're on top. And again, they do not get any income, but they do get to go again. Okay, cost of eight. They can afford all the tiles here. Uh they're going to go for the one that's the biggest. So it looks like it's this tile and they get it to advance two. I'm going to go ahead and shuffle the deck. So this includes all the uh cards or the two cards rather that started in the discard pile. They get shuffled back in and we'll see what they get up to very soon.
If I go ahead and grab this one tile, that would place me on top of my opponent. So, that seems like a pretty good bargain. It's just the uh fact of where to place this tile. Uh let's just go ahead and place it right here. I think that's pretty good. So, I'll spend a button, advance up to two, then I get another opportunity to grab another tile. I kind of like this uh two space because or this two time tile right here because the other ones which are really good for income, they do advance you quite a bit. I like this tile because I can fit this one right here and it won't advance me too far ahead.
so that way I can have an opportunity to um continue to buy some extra tiles and not have my opponent take more tiles than is necessary. So, I'm going to go ahead and buy this tile here. I think that goes pretty well right there. That'll trigger income again once again. One, two, three, four, five, six, seven, eight. That's another eight coming back towards me. Fantastic.
Okay, so now my opponent has six to spend. The only tile that they can afford is this one. So they will advance five spaces. Two, three, four, five. They do remove that one tile and they trigger their own income which is once again zero. And it gives us some opportunity to think about our next move. I could definitely afford this tile right here. Um, both costwise as well as timewise. And I could take another tile after that. I can afford this one as well. That one costs seven three. I feel like this is the point in the game where you start to really think about how your board is coming together and things if things are going to fit. Uh let's go ahead and grab this tile because I like the way that it fits right here.
So we'll spend 10 advance three and I get to do another one. I like this one. I like this one for sure. Um I think that'll look pretty well over the top somewhere up there. So, let's go ahead and spend seven.
Let's see if we can make this work. I hope spatially I don't miss the opportunity to grab the uh 7 by7 tile. I don't think it'll matter because my opponent will probably um overtake that spot since that one is coming up pretty soon. So that's it is what it is. Okay, but we're just going to be playing for fun. They have five to spend. They can afford all three of these tiles. So they will try not to pass me, which works with this tile. So they will take that one and go right on top.
Now they have seven. They can afford the next three in order. Uh they're going to take the one with the most buttons as a priority. So they'll take this one and advance three spots. One, two, and three. They do uh take the 7 by seven tile. So I'll place that next to their board. And they do trigger income, which is once again zero for them. Okay, for my next turn, I could advance up to three spots and be safe. I do also actually keep in mind that I can only afford uh two of these three tiles.
And so I might as well go for let's just go for this one here. Um let's see. As you can tell, I'm just kind of kind of just going for it. I don't really have much of a plan in mind as opposed to when I have played this on like board game arena. So, I'm going to advance three. That nets me I got to calculate my income again. So, one, two, three, four, five, six, seven, eight, nine, 10, 11. Very nice. Okay. And I get to go again. You know what? I think I'm going to go for this one that I couldn't afford before.
We'll take this tile as I think it slots in pretty well right there. So, that'll advance me two spots. That gains me this extra tile that I'll just place. And I need to spend three uh buttons for that one. Okay. And for my bonus tile, uh, let's go ahead and slot it. I think the best place is Whoops. potentially going to be right in this corner here. Okay. Zero. They cannot afford any of these.
So, they must advance and they do not trigger any income. Okay, good for me. All right, so here is what I'm thinking. I like this tile. It is cheap and it can fit pretty well into this spot. And my plan is if I do advance just one spot, I could grab another tile, let's see, one of these to be able to uh make sure that I get this bonus tile to fit into that spot that won't match. So, if I go here, I would need to advance one, two, three, four, which I can with this this tile.
So, let's go ahead and do that. So, let's go ahead and grab that tile for two buttons. Advance one. And then let's grab Oh, of course I can't afford it. That was silly. Okay, so let's try to not advance as much. So, that means going for this tile here. So, let's go ahead and spend four. Place that tile right there. Advance two. And I get 1 2 3 4 5 6 7 8 9 10 11 12 buttons.
Very good. Okay. All right. They have four So, they couldn't afford this one. They have this, this, and this to be able to spend. They can afford both of these. Uh, they're going to go for the one that does not advance them past me. So, they're going to go and take this tile. Advancing two. They will get a button with their income and they get to go again. Okay. With only one button to spend, they cannot. That is very fortunate for me. they cannot um take any of those tiles, leaving me the opportunity to go ahead and take a tile and grab one that I would need for that bonus tile there.
The issue is uh finding a spot now. I think I've painted myself into a corner. I think if I had placed this tile over here or in a different location, I might have been able to work something out. I cannot afford any or place any of those tiles. So, I'm just going to go ahead and advance two spaces, gaining me two buttons and that bonus tile to place right there. My opponent will be able to afford this one right here. So, they will advance three spots. No income yet. Um, that still doesn't work for me.
Not playing this very well, am I? So, they will I will go ahead and advance three spots as well. Three more buttons and then let's see what they do. Three. Uh, they can get this one right here. So, they will go ahead advance to the end. They're off the board and they will grab three buttons as part of that income for themselves and I basically get one more turn which is going to be this tile right here. So there we go. And that is the game. I do get one more income and that's going to be another 12 for me.
So, let's go ahead and add up the score. Okay, so finishing my uh I just went ahead and used board game stats to add this up. So, I had 30 buttons left. Uh seven empty spaces, so a final score of 23 for me. Now, the way the Ottoa scores is that they score the 7 by7 tile if they grabbed it. That's seven points. They scored the amount of buttons that they collected as well. And my opponent had 11 buttons throughout the game. And then for each tile that they collected that has a button on it, they would score one point. If you were to play like a step lower, then you would not count that score of tiles with buttons on them. And if you wanted to make it harder, you could score the number of buttons that were on the tiles and or the number of tiles with buttons on it, if that makes sense. And the hardest mode would be to add like all of these tiles, each one of these tiles with buttons on it plus the number of buttons on them as well.
So, but any in any case, they got 28. They still beat me with my score of 23. Uh, so it was, you know, I I played this pretty quick and definitely made some mistakes, but you know, this game is is quite fun, quite quick and surprisingly uh in finy, right? I guess it's uh a lot of interesting decisions and forward planning that is involved with this game. And with this special 10th anniversary edition, you do have an official Ottoa mode, which makes this game very fun at the solo mode. And that's why I wanted to uh play this and record this video cuz I don't think the solo uh game is really out there for people to try. But any in any case, thank you for checking this video out.
Let me know what you think and I will catch you on the next one.