Nova Aetas Renaissance Campaign Playthough Mission 0.0
Games in This Video
1 game is featured in this video — it unlocks as you watch.
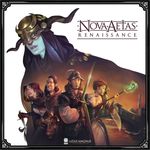
Transcript
greetings I'm baren and welcome to meet me at the table today we're going to dive into a playthrough that I probably going to mispronounce and I apologize ahead of time if I Mis pronounce any these words it says Nova ATS Renaissance I could be completely wrong about this and I apologize this is a one to four player Adventure roleplaying Dungeon Crawl Experience I'm excited to show off this game this game does come with a tutorial we're not going to be playing that we're going to start right in the game with the prologue we're going to start our campaign I'm going to show you everything has to do with the setup that we're going to go through the first mission and then we're going to continue on in other videos I'm been I'm really excited after trying the tutorial of how cool this game is going to be and I'm excited to show you what this game has to offer and if you're excited to see Nova a3s Renaissance which I probably butchered again then I need you to meet me at the table yourself first to begin your campaign the first thing you're going to do is print off the campaign sheet from the back of the rule book or you can go to their website and download it from there and print it this is going to keep track of everything we are going to be doing through the campaign may it be things we have in our inventory uh different items and sorry Regents that we own we also are going to be able to look at different hunts and missions that we have so this is something we need to keep track of it's going to be kind of
our tracker for the campaign on top of that they do have one for all of the characters as well and yes you do play with four characters you can choose to use companions but companions aren't going to be able to level up and experience the game so I do recommend playing with four characters so if you're not interested in playing four characters it could be a tough game for you but I have no problem doing that I really like the experience of being able to rock four different characters that have different abilities that they're going to be performing throughout the game then we also are going to have any skills that we buy during the game and all this is going to be tracked here along with our experience points so that's the first thing you need to do the next thing you need to do is grab four characters there are four base characters and those are the ones we're going to play with there are of course some that came with the stretch goals as well that you can throw in there it's kind of cool one of the characters is actually from Assassin's Creed the video game so you can actually play with that character in this game if you're interested I've set up everything for our first character here Valerio and I'm going to go through all this in detail but the other characters I'll probably explain a little bit faster the first thing we need to do is of course grab our basic version of the character as we go through the game it you shows here it says three Square skills and uh or three squares here it could be a tower Shield or flint lock as you progress through the game you're going to gain skills if you get enough of them you can progress to a more uh advanced class so for example I could choose to be this flint lock which be this side or the other side which would be our Tower Shield which we have these skills and abilities here which are all located here over here on this side you're going to see our different attributes that we're going to use then as you level up you're going to be able to add tokens or cubes to the side of the board that are going
to give you an extra one bonus to those and of course your Advanced skills are going to give you ones as well going through the game then on the bottom here we have their skill list all the skills are located down here with a quick reference guide on how they work which is really cool I like the fact that they do that I don't have to be looking in the book for every single one of these I've got it all right there and as we go through it of course we will be gaining a new skill sheet for whichever advanced class we decide to use the next thing we're going to do is we're going to grab a little Cube here and put it down onto this part of the board those are our heroic points and as we gain them we'll be able to perform our heroic action everybody does have one and the way you gain these heroic points are found down here for example this one says that I I get one every time I gain damage this is kind of a tank character and I can spend three of them and one time to add two to the test of my of this attack and I can roll any number of my dice you must keep the new results so there the the add those are it's a kind of like a superpowered attack as you go forward the game you're going to be gaining these things that you can use so it's kind of cool they have that extra ability that you can use going through it I think that's awesome all right the next thing we need to do is we got our little pilum here this is going to this is kind of like a threat meter so as you gain this this is uh one of the ways that an enemy May attack you is based on the amount of threat you have versus other characters around you or in the area of their able to be able to see you the next thing we have is all of our items over here each one of these I'm going to go through and you'll see a little bit more about them as you play through the game oh another thing I want to mention is if you notice here The
Squire it's got some colors here red two blue a pink and a green so as we level up our Squire we're only able to gain cubes onto those particular things so if you notice I only have one red available here so I can only choose Reckless charge or Hawk strike I wouldn't be able to choose both of these because my Square can only ever learn one of those particular red skills now of course I can use all learn all of these going down here and of course the advanced ones have the same thing it has different skills you can learn but sometimes you may not be able to learn them all we have a leather armor here leather armor does have resistance one so as we get damage we're able to place a damage onto this and that'll be the first time we get damage we'll put one at least on here has resistance one that's not going to be removed until the end of the actual adventure for that mission it's going to stay there it doesn't it's not something that happens persistently and gets to be removed then we have our sword our sword has a set of attack values here and I'll go over a lot of this while we play the game but do know this has three it takes three time to do it it targets an enemy it does have a range of one everything's orthogonal that's why this is like a cross and it doesn't give me any extra bonus dice to the attack and it's going to be a physical attack which means I'll be using my physical stat here to roll dice it's kind of NE to put a red dot for Red Dot you know which one to roll then it does have this ability down here that says tackle and I'll talk about that when it actually takes place but do know that anything found after this symbol here is something that takes place after the dicer rolled anything that is before this would be something that would happen before the dice is rolled we do have a shield here and this
one just says at the start of your activation if there is no Shield tokens on this card place one on it which will be able to prevent one damage coming through so again very tank type character we also have what's called a destiny deck and as you go through the game you're going to be revealing Destiny cards and trying to perform the abilities that are on the destiny cards the first one for him for example says you have always thought that a military career is the best way to get a reputation in Rome and then we have objective here if you finish the mission with at least three damage on your hero sheet during the next rest phase I'm be able to gain I'm supposed to read this from our journal and that would probably progress my destiny deck now we don't start we have the deck available to us we don't start with anything available yet it will be uh these will be revealed as we play through the campaign so that is our first character let's move over to our second character but before I do I do want to tell you what these stats are you just see a bunch of numbers and symbols this is our swiftness this is not only what uh where we're going to act if we're tied with people on the activation wheel we're going to be see looking for a swiftness value and if there just higher than anybody else on that specific wheel will act before them also this is the amount of action time actions you're able to use so like I showed you earlier our sword costs three so it cost three of our time to be able to do that so we'd be moving our car our token around that wheel and I'll show you more about that when we get to it this is going to be our dexterity stat if we ever have to do it test that involves dexterity that's we'll do then we have physique this is our main combat
stat when it comes to using physical attacks so that's the amount of dice or you might have to take a test during the game that's going to have to use that stat then we have our mind and we have our health we have five Health we take more than that we're going to be down and that's usually some of the end game it has to do with how many characters you lose in a uh thing once you go down you potentially can gain injury cards that are no good for example we could have this one it says the uh the dexterity test cost you one additional time to do it's a broken finger and notice the co these little dots here these are the amount of coins it would take to pay to get rid of that injury if we were in our resting phase there are four parts to this game there's the travel phase the setup phase the mission phase and then the rest phase for this particular Mission it does start you off in the mission so there is no travel or setup phase there no travel phase but we will be experiencing the rest of the phases and going forward in this game we'll be able to see some of the other phases as we continue the camp campaign past this one our next character is Rebecca Rebecca is a magic wielding character she does have a dagger an energy Shard and Arcane arrows she has five Health she has four mind and one physique so again very similar to a magic user type character has a lot of intelligence-based attacks two dexterity and five time as well let's go through her things real quick first off she has this dagger that I'll never use by equipping this card you do gain elusive which means characters around me don't get to do uh opportunity attacks if I leave their space if I remember right this and I only get to roll one do only have one physique so I'm not going to
use that very often but I do have this energy Shard which is pretty sweet this one says that I can gain a charge for two time if there are fewer than three Advantage tokens on this card I get to place one there and these Advantage tokens are going to be allowing me to roll extra dice it does say when you spend all you may spend all Advantage tokens on this card on the next mental or uh mind-based attack you perform during your current activation and of course as you see her attack is using that particular statistic there which is going to cost three time one character now this is a range of 1 to six I don't get any extra dice but this is an interesting way of attacking like physical attacks every time you get above a threshold you're going to be doing damage when it comes to the magic attacks it only actually activates if you're able to gain two or more successes at least for this spell other spells in the game that we might acquire may take different amounts of successes in order for them to activate and it does have an extra ability here that if I ever roll this on one of the dice I'll be able to inflict an extra plus one damage it's a really it's really cool I'm excited to show you that out and that's all I have to show you for her we'll move on to our next character I do want to mention that we do not start with any skills at the beginning of the game we have to purchase those that are located right here these are the purchase costs so if we have one experience points we could potentially gain magic step or we could learn decisive or we could learn doe eyes those are different things we could learn and remember we we can only gain the amount of these equal to what we have here so she can gain two of these one of these now she can only gain one of the pink ones cuz it shows only one
in that particular stat now the way she's going to gain some of her heroic points is by every time I perform a test for a spell and obtain the indicated number of successes or more so basically every time she fires off a spell that succeeds she'll be gaining heroic points next we have Vincenzo he is our he's kind of like a medic type character that is going to be able to heal some of our characters but can also fight he does have this right here it's kind of his incense burner that he can hit people with he has a bag here that he can use to heal people for two time I can choose a hero within one and uh including yourself and perform a test for each success the target discards one damage so he's able to heal people and he has this for himself which allows him to spend two time to gain a blessed token which are these tokens right here and I can spend those tokens to make the success threshold be lowered for example if I wanted to do this and I had a bless token I could spend the bless token meaning that when I try to do this act activation it would C I need to roll at least one less in order to make that happen so for example I have three of these I would roll three dice if I use the bless token normally this would need a five plus to activate and the only reason I know that is because there is no actual number for the activation you need to try to succeed at that if you doesn't have one it is always going to be five so using the bless token means I would need a four four in order to succeed so it'd be a better chance of being able to heal some of our players he does have a heroic action which well he does have
heroic action but in order to gain it he's got to get these heroic points in order to do that every time a hero including you discards at least two damage I'm going to be able to gain one of those points moving on to the final character in our group here we have Sophia Sophia is kind of a rogue type character and uh they did already say that there's a a couple you can reprint this there's an error on this particular thing first off it does not with extra things here on its player board and also I able to learn this pink one instead of having two blue ones it should be a red blue pink and two green so that is that is sadly an error on this particular print card so do know that I do in case you're looking going wait you can never learn Take Aim you are able to learn it based on the FAQ she has three abilities here and she's able to gain heroic points by doing at least one damage to an enemy now whenever you do damage an enemy you're going to gain uh threat or this per I think is what it's called I'm probably pronouncing that wrong terribly too uh I'm just probably going to call it a threat tracker that uh so every time you do damage to a person you're going to gain threat now she does have throwing knives that she can use at a range of 1 to four that she's not going to get any extra dice for they do have lethal as a thing that can trigger she has a hood that she can wear that says the value of the uh sight of the enemy is going to be considered lowered by one to minimum of one towards you so when they look to see how if they can actually see you on the battlefield it's going to be one less because of her cloak then she does have a grappling hook as well which gives her the ability to climb one so the there is elevation
in this game and as you play through it you're going to come to different buildings or that you can scale and normally there the only way you can get up them is by using like a ladder or something but she has this grappling hook that's going to be allowing her to move up and down these elevations as long as it's an elevation one she wouldn't be able to do it on an elevation two type thing like a giant Tower or something before I move on to the next step I do want to mention that I'm sure a lot of people are wondering what sleeves I am using for my uh cards I get a lot of questions about that so for these particular cards I am using these Mayday game sleeves they are the uh red ones that are 43 mm x 65 mm now I will say these are super tight they are all the way up to the top and they are just really snug in there if you want at least a little bit of play you might want to go with a different sleeve but these are like right to the edge and as you can see sometimes it does kind of affect the card the way it sits in there but I don't mind I like these sleeves the way they are I like to really have them right up to the edge of all the different parts of the card and also they are in two different thicknesses they either have these 100s which are very thin or else they've got the more thicker version with the coming 50 packs no I am not affiliated with this company I don't get any Kickbacks or anything like that I just get a lot of questions about the kind of sleeves I use so I just want to let you know what those are ahead of time with our characters ready to go and our campaign sheet printed out it's time to start our first Adventure this is going to be the prologue we're going to go to 0.0 as the actual starting Mission so I'm going to open our envelope now I do want to mention the game came with all of these envelopes but they were not pre-filled you had to actually fill them with the cards from the game there's a game similar to this called Assassin's Creed when it came to the way they structure of this campaign system but they
actually came pre-filled these did not you had to do it them yourself so you're going to grab everything out of your envelope and you're going to look at what the cards you have now again you don't actually need to use the envelopes you want to but I thought it was kind of neat to have those in there in the first thing we're going to do is we're going to see some symbols on these cards so the first thing we see is the type of faction that we're going to be fighting against or that's going to be part of this particular story moment the other two down here the first one is going to be that this is going to be taking place inside of a town and the other symbol here is going to show that buildings will be part of this adventure now like I said this is the type of enemies we or characters we may encounter and they're actually from Venice based on this symbol here and this really is just some tips to help you set up so when you go to set up your characters you know kind of a little bit of what is going to be in store for you so for example we know that there's going to be buildings so if we had a choice to take the grappling H or not we probably would because we have that here also knowing that we're in a town might mean that if there's any abilities that affect like trees or any like thing about that we might not have we'll probably have less of those inside of a town now of course we'll see how it all transpires we're going to flip over our top card and see what it shows the first thing it has up here is the components we're going to need we're going to need all these different characters here we need the stradiot the arubus the ladder a tree one house that's a 4X two we'll need tiles 1B and 5B we'll need a lever token and a focus point then we're going to look at the key here where our heroes are going to start our enemy two different enemies are going to start and at this point it does say once we've read all this we're going to reveal number one which is
right here so we're going to take our card flip it over and this is going to show where we need to put everything out on our map our heroes are here these are our two enemies this is our Focus point the green right there and this is where a tree is going to go and of course we have our building with the lever and our ladder there as well it says that we're going to start at 5:00 now that's going to have to do with the time of this game but I believe well I'm guessing that this isn't probably going to be too much of a timed Mission but maybe it might as we go forward we're going to put our heroes on Capricorn and our two enemies are going to be on Aquarius once that done we're going to go to our book and read 0.0 D1 we have our board all set out as instructed by the card I'm super excited for how this looks I think it's absolutely awesome to have these neat buildings now I just said to put a 4X two building out it doesn't have a particular building in itself so I built this one and put out there I think there's other buildings you could have built to put out here and you you can mix and match the different things to make it look kind of cool however you want to make it we do have a tree here and we have that ladder behind it just like we're supposed to we have a lever up on top we have our two enemies with that point of interest that we have to take a look at or deal with at some point and then we have all of our heroes down here I have had a chance to paint all of them up here is Sophia Sophia looks pretty awesome she has this cool looking purple cloak that I was able to paint up I used all these were painted by contrast Paints in case people are wondering Wonder ing how I painted these up we have Valerio he's painted up really awesome looking I really like the way these guys turned out we have Rebecca here now I paint most of these based on what I kind of see in the pictures so I try to get as close as I can to what they normally look like in
the uh as their normal game this last one we have here is vieno he's painted up as well if you're interested in seeing how I painted him up I did do a live painting video of him to show you how I was able to paint this up and you can join me for my live play painting videos I try to do one about every week about Wednesday or Thursday but sometimes it doesn't work out but I did get a chance to do one for him so if you're interested you can check that out in my live tab of the channel then we have our enemies here he is all set to go along with our arcub Buster arcub Buster is all set to go as well we had I had a chance to paint up at least a couple enemies for this game all right they're all down we're all set to go with this let me quickly show you our enemy you know what I am going to show our enemy cards as we go through the game and we start doing attacks and having to deal with them but do know we do have our two enemy cards out and ready to go the game did start off at 5:00 so I have our five right there it is exactly 5:00 and we put our tokens into the Capricorn area and I will put the two enemies into the Aquarius area and the way these are going to activate is as this spins around whenever it comes to a place with a token it's going to activate that token and it's just going to keep on spinning so some people might activate more than other people's which is a kind of cool system I really think this is a neat way to be able to activate people so if you don't do all of your action to turn you might get another turn before Sometimes some of the enemies activate though I do want you to be aware you can never take just one action and stop before an enemy you always have to spend at least enough to be able to get you to the next enemy place even if that means you have to wait and not do anything on your turn
you can't just do two actions and then stop right there so you know that thing will swing in and hit you again so you can do a big action you always have to do at least enough actions to get you to the next enemy that has to activate moving from the cards we're going to go to the campaign book and I will already say I'm to make a lot of mistakes when it comes to pronouncing some of these words so I do deeply apologize it says your finances are running thin in these hard times this is why you chose to Grant Ed Gio of vertebro request a few days ago a crier had waited through the Smoke Filled Austria alak konaka loudly announcing that the prelate was looking for a group of men capable of retrieving information for him according to the crier brief description it seems an easy task some patreons half-hearted comments on the other hand gave rise to the suspicions that the assignment had something to do with the impending unavoidable war with Venice could the church be looking for pawns to manipulate while not becoming directly involved a hefty pay was tipping the scales so you are given orders to travel to spolo where you are to meet a messenger to be escorted to Rome however you have more pressing concerns right now on your way home a group of suspicious individuals stands in your way with a menacing air you've been ambushed in a well planned way a few Escape Routes through the houses are all guarded by brigin you spot your only
possible Escape in a small house that appears to be abandoned with a little luck you may be able to get in and out through the back window so at this point we are now going to reveal card number two so let's check out card number two see what we have found it says that we have the mission so here are going to be a lot of things we need to know about the mission it says Hero's goals a hero enters the house see missions actions so our goal is to get into the house the enemy's goal is to attack the heroes that's going to be the enemy's goal it's going to be attack the heroes then it's going to be heroes defeat condition is if at least three heroes are koed I'm going to read this excerpt out of the book here are mission actions which of course are going to be how we're going to deal with this house it says for one time I can pull the lever only if adjacent to the lever token and I'll read 001 or -116 I guess or I'm going to spend one time to interact with the green square out there to enter the house I'm going to read 0-2 so at this point we are now going to start the mission to begin the game we're going to choose where we're going to activate and who's going to activate as you can see the clock is here so it's going to these are the people in the next spot they're all our heroes every one of these Heroes has five swiftness meaning there is not one that stands out that has more than any other so I can activate since there's a tie anyone in any order I wish to we're going to start by using Sophia so the first thing you do is figure out what actions you want to do with her and put use her wheel so she's going to move to and then she's going to perform an attack which is
going to be using our throwing knives which is going to cost three which is going to be our full five one 2 1 2 3 bringing us to there let's take care of those actions at this point we're going to move to and I want to mention everything in this game is orthogonal which makes it super easy in order to uh decide where and how things are going to act so I'm going to move one two that is my movement now I'm going to use my throwing knives now remember our throwing knives are ranged 1 to four so we have to check 1 2 3 4 he is in range now it's not one two you don't count diagonal even for range and to see if you have line of sight in this game the way it's measured is a little bit different from other Dungeon Crawlers or games of this nature it's not from Center to Center or anything like that you're going to measure from the side of one of your squares to the center of the enemy Square so for example to see if I had line of sight I would measure from this side to the center I do or I could measure from this side to the center I would still have line of sight to this character there's nothing blocking this and the only thing that do block it are enemy characters and potentially something of that nature like a tree is considered an obstacle of blocking and also buildings you obviously cannot shoot through buildings and since there are different elevations the line of sight for elevations is also a little different it's not different too much but you can shoot somebody right at the edge but if they back up now you have a piece of elevation that is in between you and the enemy so you have lost line of sight and they have also lost line of sight to you so I could have attacked the arubus which is up here on top if I
had the range but I don't I can only do four squares so 1 2 3 four we're going to make an attack against that enemy now when it comes to making an attack the first thing we do is check our Weapon It's going to be using her dexterity stat which is three so we're going to grab three dice to be able to roll to see if we hit now notice there's nothing about hitting here what you have to do is actually break or go past the number here in order to see if you're able to succeed any numbers that go above six are going to be doing a damage to this guy any successes above that six are going to help us out now I did get a seven this one's cocked we're going to roll it again I got a three so I only got one so I got one damage through on this guy I also though did get this moon symbol if you notice down here it does say if the thing is successful I will be able to gain lethal on the moon symbol the lethal uh uh rule states if I do at least one damage to the Target I'll be able to do additional I'll be able to do additional damage equal to the results shown on at least any one of these dice so I have done one two damage I hope that made sense now when it comes to enemies you should put these next to the enemies on the board but there's only one of each of the enemies out here so for filming purposes I'm just going to put them on the card he's taken two damage he has three left now since she did damage I am going to tick up my threat meter here also she gets to gain a point here because she was able to do at least one damage to an enemy now if I
get to four of these heroic points I'm able to perform her heroic heroic action if I wish to Let's activate our next character I think we'll activate Valerio and he's is just going to move up four spaces 1 two 3 four on the time track now notice I didn't use all five of his swiftness I only used four and that's totally fine because as long as I go equal to or past at least one enemy token that's great Valerio is going to move 1 two 3 four to right there next we have Rebecca the first thing she's going to do is use her energy Shard for two time and if there are fewer than three Advantage tokens on this card I can place one on there and I will you may spend all the advantage tokens on this card on the next attack using your mind to perform dur uh you perform during the current Activation so we're going to use that to spend two time to gain an advantage token on that so I'll place this onto that card then I'm going to use my attack I'm going to cast our Arcane Arrow it t cost me three times we're going to move our thing one two three she's at the same place as Sophie Sophia sorry and then she's going to be able to cast this it's going to Target one person person with Enemy Within 1 to six range I don't get any extra dice but I do have to have two or more successes in order for this to activate and if it does activate it's going to do two damage and inflict one wound if I'm able to gain any Moon symbols when I do this so making our attack I am going to spend my advantage token giving me an extra dice she gains four for her total
statistic that she has so roll up five dice now what I'm looking for is successes and the successes I need is need to be a five or better in order to be able to break through this guy mental fortitude I guess you could say I did get a seven and a six and a five so I got three of them that doesn't mean I get to do three damage it only means that the spell is successful so I'm able to inflict two damage so I'm going to flip one of these over we've done a total of four damage Dam he has one left since I successfully casted a spell I get to gain a heroic point and I did damage so I get to gain one of these on the threat meter there's only one person left and that is vencio vencio he's going to just move two spaces and that's going to be the end of it activation I lied I'm going to go four we're going to go two more so we're going to go all the way up to there we'll move him up 1 2 3 4 to right there and now that there are no more people in this this is going to tick one space that way and now we've come to one that has two different activation tokens in it we're going to activate these in the order of swiftness our dude that's standing in front of the door he's got a five swiftness where our arubus has only a four swiftness so the five swiftness is going to activate first he only has one hit point but he still alive and he's going to activate when they activate they are going to use absolutely all of their time that they have whether or not they actually use all the time components that they're able to so I'm going to move his token 1 two 3 4 five to right there and then we're going to check our AI chart to see what this guy is going to do there's a neat artificial intelligence here that
we're going to reference in order to figure out how to activate our enemy it starts here it looks daunting but it's not as bad as you think it says here when the sector of the horam contain contains an enemy activation token become the active one all models of that enemy in the battlefield are activated activate one model at a time in the order of most convenient for the enemy we do only have the one out there so the only one enemy is going to activate that is on the heram at swiftness five next we check to see if it has a mission goal does it have a mission goal yes it does it is kill all or attack Heroes at this point I'm going to since I do have one I'm going to check the area control is there at least one hero whose threat is greater than or equal to the mission goals one now there isn't really much when it has to do with the uh for this particular Mission because there could be potentially like protect the box where if unless threat is higher than four it wouldn't move towards an attack heroes or something of that nature so we are going to say that uh is there one greater than or equal to the mission goals one yes there is because the mission goals one is technically zero so at this point we will continue down it says the enemy must choose as their target the hero with the highest threat if tied they chose the one who of the one who is closest if it persists again they'll choose the one with the most damage tokens and if it persists again it will choose a random person so we'll have to check to see the enemy can choose their target based on their highest threat can the enemy attack the Target in the activation the only two people that have threat are Sophia and
Rebecca the other two did not make any attacks or anything to gain threat so can the enemy Target that in order to figure that out we have to check their this statistic right here it is a three that is their control area it's a three we're going have to see if he can see those particular enemies so if we count the squares from where he is 1 2 3 1 2 3 he has no way to reach to see this particular character in the threat area it's only three so this person is not a valid Target and neither is Rebecca Rebecca is also out of the range on top of that don't forget that I've got that hood for Sophia that changes the value of the a the area by one of when considering uh whether or not this person is the target if they can see them so she definitely can't so since they both the only two that have threat can't be targeted they're going to go to the next two people to see if they can Target them so we're going to go to this x it cannot Target them so it's going to go to the enemy goal becomes attack the closest hero so at equal distance the target is the hero with the highest threat if the tie persists the hero with the most damage tokens if the tie persist the player chooses the hero that which hero is the enemy's Target so the closest Target is going to be V Valerio which I can barely say so we're going to then check here the enemy moves the minimum distance necessary to reach the target with one of their attacks check range of the enemy's attack now the range for this particular enemy is one so it's not going to have
to move it is already adjacent is the target within range of the attack the enemy has enough time left to attack yes it does it's going to take three time in order for this person to be able to attack so it's going to make the attack and then it's going to say attack the target the enemy attacks the same Target as many times as possible with the remaining time now he only has five swiftness so he can only perform this attack once and he's going to basically lose two time because he has nowhere he needs to go because he's going to be remain adjacent to the Target that he's actually attacking before we make the attack there is one thing I forgot to do and that was I was supposed to place a Shield token down on this Shield card here it says at the start of your activation if there are no Shield tokens on this card place one on it so I'm going to place that Shield token right there this is going to be able to help him prevent getting damaged let's see if we cannot get hit by this guy so what we're looking at here is we're going to look at this attack characteristic down here it does have we've already established that it is in range and has time to do this so it's going to do four damage and the enemies Auto hit they're going to do four damage it's up to us to dodge so we're always rolling for our characters are never rolling for enemies then it's going to need a five plus in order to dodge these dice the stat we're going to use to see how many dice we're going to roll is going to be our physique because it is a red attack which is going to be a physical attack so we're going to roll four dice that I have for Valerio let's roll them up and see how we do I got a total of one two blocks I was able to block two of the
four damage that was incoming I did not get enough to block all of it so I'm going to take two damage moving over to Valerio we're going to do two damage to this character now normally I would just take two damage tokens but we do have some things going on first we have our resistance one so this is able to take one damage it's able to resist one of the damages coming in now unless there's an ability or a card or an item that can allow you to remove these tokens from the armor the armor now has the only damage it's going to take for the rest of this mission on top of that we do have a shield token we can remove the shield token to prevent damage to our character before moving on I do want to mention that the resistance that this armor has does only work against physical attacks that particular one is not going to work on anything that has to do with for example I could not use it against if he got attacked by this like Arcane Arrow attack also since I was able to block the damage here and this soaked up the resistance I am not going to have to deal with the ability that this card has I'm not going to be gaining this bleed token it would only have affected me if I actually gained damage on my character so for now we are bleed free it's now time for our arubus to attack and our activate and he has a total of four swiftness so he is going to use 1 two 3 four he will automatically use all of his swiftness if he wishes to attack it's going to cost him three time his range is 2 to six and he has a control area of seven so he pretty much can see everything on the board he also has the following
abilities reload to pierce and shooter shooter means means that after an attack is made he's going to try to get as far away from all the enemies as possible still stay within range reload two means it's going to gain a Reload token after the attack and he's going to have to spend two time the reload two in order to remove the token to be able to redo his to be able to fire his weapon again I think it's actually super cool because it's an arubus it only has one bullet so it takes a while to get it back up and running again now Pierce would ignore that resistance one that the armor has if he would be able to hit so let's go activate this guy he's not going to move he's really just going to attack and let's see who it is where we stand right now remember the only two that have threat are Sophia and Rebecca and he can count 1 two 3 four five six seven he cannot see Rebecca right now 1 two 3 4 5 6 7 how many different ways I counted and now hers is reduced by one 1 2 3 4 5 six it can still see Sophia so the shot is going to come from the arcub briser and it's going to attack Sophia looking at the attack it does have range 2 to six and even though he has a thread area seven the he Sophia is within range six the amount of range isn't going to be affected by the hood only this particular stat there it's going to do two damage automatically and need a seven plus in order to break or block this attack so let's roll up our Dice and see what we get I get to use my physics physique stat sorry and I have a three with Sophia let's roll them up and
see if she's able to block any of them she was only able to block one with the eight so she is going to take one damage which is going to pierce after that's done he is going to gain this reload token and he only has one time left CU it took three in order to make the shot so he can't get rid of it this round unlike Valerio she can't block anything with anything she owns so she's going to take one damage with one time remaining and with the shooter keyword he is going to move back one space making it almost impossible now for me to actually attack him we survived the attack by the enemies so it's going to turn the clock down this way till we hit that particular spot here which means we have our two characters here valario and venzio both having a swiftness of five I get to decide who I want to go first I'm going to have him go first he's going to move two and he's going to make an attack one two three moving one two and then making an attack with our sensor he's got this right here it is going to be a range one attack using three time I don't get any extra and I'm going to be using my physique stat and if I attack and I'm able to hit I get stun and I can burn them if I get the moon symbol showing on one of the dice vincenzio is definitely a well-rounded character he's got three in both his mind stat and his physique stat we're going to roll up our three dice see how we do I do need to get at least one six or Plus in order to hit we got two so we have done two damage he's already taken four so he's going to take two more and be super dead
uh and the two doesn't matter matter cuz he's already dead so we have removed this character from the board I am going to gain one of these uh cards now I don't get to see what this is this is going to go into a loot pool that we'll deal with potentially at the end of our adventure but we have removed one enemy from the board and that opens up the way to be able to check out the focus point that is located right in front of the door so since it's going to be uh this person's turn next let's check out that Focus point to do that we'll have to use the activation token now of course we were able to kill this guy so we're going to remove that now if there were more of them on the board this would stay there but there is only the one he's going to use one action to move and then one to check out the focus Point having done damage I am going to tick this up to a one and another you're he's going to gain an extra one because he was able to kill an enemy that also moves that up an additional one another way to get more of this which is not always the best thing ever is if you ever critically hit whenever you do a attack using your physical or physique attack for example this right here if I were ever to do three damage in one hit that's considered a critical hit and I do again gain another uh threat on my threat meter there I do want to mention though that if you're using any type of spells spells no matter how much damage they do will never do what is considered a critical attack unless there's an ability or a card that tells you it does so we'll move here and we'll have our tank check out the door in case there's more guys in it according to our card we
have to spend one time in order to enter the house I'm going to read 00 -2 it is right here it says a sturdy green wooden door this colored by time blocks The house's entry you try turning the knob but the door's locked of course is you try pushing and banging on it but it doesn't seem to budge I get to continue my activation well h no I know what the lever is for there's not much more I want him to do so he's going to stop right here he did activate past the next enemy so I'm totally fine with being able to stop there at this point I'm going to tick this down and we're going to go to the next set of people here and in order of what we're going to activate here is first we look at swiftness our two characters have a five this arubus only has a four the arubus is actually less Swift than we are so we're going to be able to activate first before this person if there was ever a tie say the arubus did have a five swiftness he would activate before any of the heroes go in a tie enemies always activate first at this point I'm going to use Sophia she's going to go five spaces and she's going to activate the the the uh the lever there I want to the the door one two 3 four five we're going to move all the way up like that and I'll show you what we're doing she's going to move one two to right there and she's going to use that grappling hook that we have which gives her the ability to climb one this is considered a onlevel Terrain piece here so it's going to cost me two time in order to climb up that part there if we use the ladder which which is over here it would also cost us two
times it cost you two time in order to move up and down of course unless in a card or ability something lets you do otherwise having done that that's four time we have one left and one is enough to be able to use this lever looking at the uh Mission goal here or the mission card here it says pull the lever only if adjacent to the lever and I'll read 00 D16 an old lever in a niche on the roof attracts your attention you try to pull but the mechanism stubbornly resists you plant your feet on the ground and pull with all your strength suddenly the lever gives way and crashes to the ground with a snap breaking rust and the passage of time must have weakened the metal strange noises and a slight vibration Beneath Your Feet indicate that the mechanism has been activated your gaze is drawn to the front door of the house as You Follow The Sound remove the lever token and reveal card three card three gives us a new Mission here it says the heroes enter the house see Mission actions so our goal stays the same the enemy's goal is also the same attack the heroes then it says here Heroes the defeat condition is the same so our mission action has changed though I can spend one time to enter the house which is a different passage in the book so that must have done something to the door we'll also remove the lever token from the top and I do have to give a shield token to him I forgot to do that when he activated last Rebecca is going to move one and then gain or she's going to move three one two three and then
gain one of her Advantage tokens on her energy Shard that is going to be her activation for the turn she'll move one two three just like that the last person to activate is going to be the arubus or in this section he's going to spend all of his swiftness or all of his time one two three four to right there and the first thing he's going to do is spend two time in order to remove his reload token giving him two time left but in order to fire he needs three so he's not going to do anything else because his goal then is also to stay as far away from all the people characters as he can but still stay in range and from where he is there isn't another spot really that would be more advantageous than the one he's in we'll move our time down a little bit more and we're going to come to venzio he is going to spend one of his activations to check out the spot there now I do have to also spend the rest here so we're going to spend two more just to go there if there are actions I can do once I trigger the uh interaction spot then we'll do that otherwise I'll just have to wait in order to get up to here where the next activation token for the enemy is the door seems to be a jar the lever must have activated a mechanism that unlocked its hinges if there are no enemy models on tile 1B or tile 5B read 0018 if there is an enemy model on one on the tiles read 0017 so we have to go to the bottom one because we still have the arubus are on the map it does say the enemies are too close they don't give you a break and it's impossible to
turn your back on them to enter you must face them continue your activation oh I need to kill the bad guy I'm then going to like I said wait the two to get to this spot here one two because I can't it's really hard to get up there and I'd have to spend basically two full actions to get up on top of that building and I don't think I'm going to need to I'm really thinking Sonia can probably take this guy down hopefully uh at this point we're going to check out these two these two can activate uh before him so he these two I don't think there's anything they can really do he can gain a couple bless tokens it doesn't say I can't gain more than one it says gain a bless token for two times so I'm going to spend four to gain two bless tokens why not and that will move him down one two three four and he is activating before the enemy because the enemy only has a four swiftness he's going to I I guess he's going to wait in order to get through the door until Sophia can take this guy down so one two I'll just wait two I guess this guy will activate next 1 2 3 4 all the way swinging himself to that side with his four time he is now his range or his active control area is seven so he has the ability to pretty much detect everything within seven but he doesn't have line of sight to anybody down here because it does pass through an ed of or a square of elevation I believe if I did this wrong please let me know he's going to move up one and then with his other three he's going to fire remember his goal is to attack the person with the most threat which is
Vincenzo I'm being attacked with a physical attack so I am going to use my physique stat I've got three I need to get a seven plus to not take any damage and I got I got none none of them so I'm going to take two damage from this arcuser who then is going to gain a Reload token we'll place two damage down on his card and then we'll move to the next activation which is going to be I'm going to use Rebecca 1 two three she's going to take a shot with her Arrow or Arcane Arrow our Arcane Arrow does have I can use the advantage token from the energy Shard which I'm going to bringing my mind stat to five so I'm going to roll five dice here I got a total of and I need two fives I think is what it is yes five right here so I got a five here oh I just barely did this so I got two fives which is going to activate the spell the spell will do two damage and I'll be able to inflict an extra damage for each moon symbol and the one has a moon symbol on it so I'm able to activate that as well doing a total of three damage to that guy next activate is going to be Sophia I forgot to turn that Sophia is going to move 1 two three down the dial here meaning I am going to use my knives another thing I might have nope we're we're still good once I get past this and I move to the next one I do have to move to a six on this smaller dial and that's just the amount of time and some missions will have a time element to them this one for right now does not but who knows as this Mission goes on maybe a time element might appear my throwing knives are going to to use decks so I get to roll three dice cuz those are the deck score I have and we're looking to try to get a five or better and we did get we only got one five so I did one damage to this guy
making a total of four oh no it's not it's going to be a lot more this is going to be fantastic oh my gosh holy dice Batman this is amazing okay so I did one damage with my attack but then I did two more because my lethal is going to fire off doing two more damage meaning I have done a total of three damage which is six which is enough to kill him and we are going to be able to gain two of the these rig gents into our loot pile which is awesome all right that guy is done we can actually go into the door now so at this point we'll remove the miniature from the board we've killed all the people if there's anything mistakes I made in that full thing please let me know in the comments below and also make sure after the video has been recorded and edited and put up for viewing there may be errors that people or I catch so please check the pinned comment of this video that will also show any errors that going forward so everybody has a chance to be able to learn from all the things that go on in this game this game does have a lot going on and it's bound to make a few mistakes here and there and I want to make sure everybody understands what those are by checking the pinned comment moving back over to our timer I'm going to tick it over one and we're going to have this guy activate he's going to spend one to go through and activate that door now there are no enemies on the map we get to go to number 18 it says you give the door a gentle push it swings open with a faint Creek revealing a dimly lit room everything inside is caked in dust it appears that no one has lived in this house house for a long time the back window is sealed and the room looks like a dead end however there's something that doesn't sit right with you maybe it's worth a second look so we're going to reveal card four and
place your hero on card four and continue the activation here is card four it is not a bunch of monsters which I was thinking there be dudes in the building but there aren't so I'm going to place my guy on here at this point I still have four activate actions left I can do or four time I should say so I can perform some of these actions in here each of these are going to going to cost me two now if you notice here there's a little spot there that is a place where I can put an active action Cube to show that I have already completed this you can only check this place once and perform what is there one time so at this point I'm going to check out we'll start here at the bed and then we'll go to the Wardrobe I do have enough to check both of these so we're going to spend two and go to 006 everything in the room is covered with a thick layer of dust except for the bed which seems to have been recently made intrigued by it you pull back the cover is releasing a cloud of dust and as you sneeze you notice that the floor is scuffed as if the bed had been moved several times choose one continue re activation or try to move the bed I think we'll try to move the bed especially since it's a physique test and we've got Valerio who's got awesome physique we'll roll our Dice and I'm going to need to get two successes and I can check out one two if I get 0 to one I can check out 08 now I want to mention that when you do roll these if you notice there is not a number here and like I've said before if there is no number that you need to get then the number that you're going to have to get is a five and that's kind of the default for any action so let's roll up our physique and see how it goes I've got
four dice I get to roll we'll see how this goes I need a five and I got two fives and two ones so I got the two that we need to succeed so we'll turn to that passage the bed sways violently scratching at the floor with an obnoxious Screech a trap door opens beneath it revealing stairs Vanishing into the darkness you quickly descend and move through the narrow tunnels dug into the ground exposed roots lash your face while insects and cobwebs get caught in your robes yuck soon you come to a short ladder you climb up and lift the lid at the top revealing the interior of another house replace four with seven all heroes placed on four are now placed on seven all cubes placed on four are placed on the same choice of seven all right then we reveal five we place your hero on five all right we'll do all of this okay this is super cool we don't have anybody over here but we do now see that we have that trap door so it is going to take us two time to go through that trap door which I believe is just going to bring us over to this tile uh he has done that actually he has two left I could check the door the window I think it's probably going to be best to check the debris I have a feeling the door and the window might be the end of our mission here the floor is covered in rubble debris from the Upper Floor collapse you notice something buried beneath As you move a few boards and a couple of large stones to retrieve something useful I get to draw another one of these and at this point I have to
place a cube on that debris and I can continue my activation but I don't have any more actions I can do so that is going to be the end of my turn and since I de place this here this does give you that does mean that I can't keep coming here to get this over and over and over again with his activation over I'm going to remove this we don't need him anymore I forgot to spin this dial but he's going to move oh I didn't he was here so I did one and then one two and one two he's kind of off the board a little bit there that's okay we're going to choose our next person to activate I think I'm going to activate remember that we have that wardrobe that we can check out we'll have to see who we can do that I think we're just going to activate him because he is the closest to the house he's going to do one to activate the door two to activate the Wardrobe and then two to activate the trap door so we'll Place him right here and like I said we'll start with the Wardrobe then will go to the trap door so I have to go to seven and then 15 you open an old closet door which falls off its hinges and shatters on the floor wood worms may have made the wood extremely brittle in the wardrobe you can find worn clothes glasses yellowed by time chipped Earth and wear dishes and the other old junk I can choose one either continue my activation or search through the objects and test my mind now Rebecca has the best mind but his isn't too bad his is a three I'm going to have him go ahead and do it I need two successes and I can read 13 otherwise I have to go to 14 I have the ability to use bless tokens if I want so why not use one this is going to lower the difficulty from a five to a four so I need to roll only some fours on these dice in order to do it and I got two I got a four and a six lucky
thing I Ed that bless token rumaging through of the objects for a while finding nothing you're about to turn away when a strange pig-shaped container catches your eye you pick it up and hear something rattling inside without a second thought you throw it to the ground and retrieve its contents I'm going to be able to gain two more of these cards we're on fire we're like grabbing lots of loot I love it and then I get to place the cube on the Wardrobe either on four or seven and continue my activation we'll place our Cube there and then use 15 which is the trapo that moves us over to there that's the end of his activation I have two more people I don't think either of these are going to be able to get into the house and do anything 1 2 3 4 five and she's going to use 1 2 3 4 5 as well and we'll see what we can do with that Sophia has stand standing on high places it's going to take her one two to get down with her grappling hook three then I can cause 14 to enter the building but I can't do anything more because both the actions in the building cost five uh Rebecca on the other hand can go one two and then three to check out this and then four five to use the trapo so this is where our party stands and I have to admit this is kind of super cool that I've got these awesome cards you get to explore through as well as the actual map and all these other books and cards I really love the fact that there's many different ways that this guy story progresses it's not just always in a book it's also in cards and some of the cards are super cool and I get to do things on them that's the end of all of our characters he's going to move over to Valerio's turn again I think he's just going to bust down he's going to break the window and see if he can go out that way it's going to cost him two point no we're going to go out the door
the door is only going to cost him one and in case there's somebody outside then he can maybe move and attack that guy if there is or this could be the actual end of the mission and I'm just going to go through the door and it'll be done we'll see what happens I'm going to go to 05 you push open the door and a beam of light enters the room nearly blinding you if six is not revealed read number 19 if it is revealed read 21 well we haven't revealed it yet so we're going to go to 19 it says here setup so there is more going on I like the fact that there's more just by reading through the game I think that's awesome so it wasn't just that one Map There's going be more going on here it says take the following from the game box tile 2B two bushes a tree and a house that's 3x3 then I'm also going to grab Focus Point yellow and blue and reveal card six this is the last card in Our Deck here so this is going to replace card three which is where we had our last mission goals and everything so things have changed a little bit first we're going to we'll set all this up but here it says Hero's goal if at least three heroes are in on a square in the red area so it's over in this area that is our goal we're going to read 10 the enemy goal is of course to attack the heroes our defeat condition is the same and Mission actions I can spend one on the yellow area here here to enter the house and I can read 0017 if the group has number nine I can read 20 I don't have number nine before we start the second part of this Mission which I didn't even know was going to happen I there are a few things I forgot to do while we're getting ready for that first off she killed that last person so
she should have gotten two more towards her uh her threat and she also damaged somebody so she should have gotten one more heroic point I totally missed that and with her spell going off dealing damage she also should have gone up one so she is at two at this point I'm not exactly 100% sure I think I might have to used the door again because our story did say that if it wasn't revealed that we're supposed to reveal it and we saw all the things were supposed to put down but it didn't tell me to actually place my character outside so I'm going to use the door again because this time I will have the ability to have already seen what's set up and maybe it'll move me to a different point so having spent another time at this door which I think might be a something that isn't supposed to be the way it's supposed to happen here it does now say that it's revealed so I'm going to go to 21 here it says place your ha on the focus point or if unavailable on an adjacent Square you step out into the courtyard a few buildings away from the abandoned house you entered earlier as your eyes adjust to the light you see some ugly mugs staring at you they have a moment of bewilderment but then one of them recognizes you and shouts for the alarm the brigin stand between you and the only way out continue activation okay it makes a little bit more sense so I opened the door in order to see out there and now I'm actually moving out there with my next turn okay that makes a little bit more sense so here is our board all set up I'm going to take our character off of this and place him down here I do have to apologize I didn't get a chance to paint the minis up what I was doing is I was doing more like batch painting which means that I you kind of
paint one color on every model and since there's six of these guys or five of them I can't remember exactly I normally do a test model which is why this one's fully painted and ready to go I do a test model to see how I like what they look like and then I'll paint all the rest of them so as you can see on these guys I've gotten the skin color done and I started on the white part here but that's as far as I got so I apologize I didn't I didn't really know it was going to happen I thought just do that one Mission but there's guys I had to deal with and I don't have them painted so I do apologize and now we have taken two time off of our character here and we have three time left so I think we'll move one two three no I can't do that I'm going to move one two 3 the reason I cannot go one two three is because whenever you leave Square adjacent to a character that is able to attack you it gets to make a free attack now we don't get to make free attacks as they walk away from us but they get to make free attacks if they walk away if you walk away from them so instead of moving this way I'm going to move down that way all right that is the end of his turn and we're going to move our token 1 two 3 4 and I did have to place our token for our enemies one in front of where he was before he was right here so use that one action to open the door which then triggered all of that stuff putting the token down one space adjacent to him which means he's going to activate but look I get to activate all my other guys first which is super cool so we are going to spin this until we get to the next point which of course like I said is all of our guys now the sad thing is he had these have a swiftness of five so they are going to activate before any of
our guys do because all of us have a swiftness of five now of course this might not have been the smartest plan to move down they're going to try to attack and kill me they're going to use their abilities to move and then attack so this one would move up and attack this one would also move and attack I should be resolving each one of these individually but I'm doing it just for camera purposes we're going to move the guys and then we'll attack with all of them hopefully they do not kill my guy this last person is going to move 1 2 3 4 five to right here he's not going toble to attack because he's run out of time it does take three time in order for these guys to attack but look at how many are surrounding him this could be really bad really fast so I'm going to attack with both of these guys this guy does not get to attack our enemy does hit me four times I need five to block and I get to use my physique then his is four so I get to roll four dice and see how we do I need to get a five plus in order to block some I only blocked two but I do have my shield token which will block another one so I'm going to take one damage upon taking the damage I am going to get one of my heroic points and I'm also going to gain a bleeding token cuz that is what these evil guys do on the bottom of their card they do have bleed so I'm going to take the bleed no good I'm going to take a damage at the end of my activation and then I will be removing the token and that's the end of the first attack we'll roll on our second attack and see how we do we blocked Oh all but one and I don't have any more Shield tokens I only have it for that one attack so I am going to take another point of damage so we'll put another token down now I'm not sure if I gain another bleeding token since
it's a different enemy I don't see why I wouldn't I if I don't please let me know in the comments below so I can make sure to put a note in the description of the video then that entire Squad moves 1 2 3 4 5 so everything gets to activate which is going to be happy days here Sunday Monday Happy Days we're going to use all of our characters now but remember they're all inside the building so let's see if we can get them outside we're going to start with him he is going to use the door for one time which we've already read and we'll Place him right here one two three to there and at this point he is now going to use his bag he's going to use that healing bag right here so I'm going to test my mind it says here for two time choose a hero within one of you you may be the Target and perform a mind test for each success the target discards one damage we totally need to do that to save our friend he only has a mind of three he does have another bless token I think this is a good time to use it to try to save my friend so I'm going to lower the number I need from five down to four we'll roll these up and I did get two and the sly the bless token didn't help me at all but two was enough we needed to in order to heal Val uh Valerio of all of his wounds now he still has the bleeding tokens but at least I got rid of the wounds and because I healed to it says right here every time you make a hero you included discard at least two health or wounds I get to go up one on my heroic tape chart there having performed all his actions he will go down 1 2 3 4 five on the track here I'm
going to use her next she's going to use Five Points as well 1 2 3 4 five down to there she's going to start by opening the door coming outside and moving back one space and then casting her spell at this enemy her Arcane Arrow does need two successes in order to fire off we'll roll this up I got my two successes which are enough to do two damage to that enemy damaging the enemy does tick up my threat to three and I gain another point on my heroic table and I need four and I'm allowed to perform this attack found right down here it costs me 3 1 to five I get plus four to my stat here so it' be rolling eight dice I need two and for each star I get to inflict an extra damage that's going to be really good so hopefully we can blast somebody really soon with that now sadly I don't think she's going to be able to do much 1 2 3 4 5 I'll move her down to there and the first thing she has to do is use the trap door which is two which moves her over to that card then for another two I could at least look out this window if I want or I could move out the door and move two spaces actually I think I'm going to go out the door and move two spaces I have a plan and my plan is to use my grappl hook cuz I can go up one elevation for two I'm going to move all the way up to there so now they can't actually Target her at all because they don't have a way of using ranged attacks he is going to be next he's going to one two three attack the person next to him and the one I'm going to attack is this one and the reason I'm doing that is because otherwise this this person will probably go and attack Rebecca because
she has the most threat in all of this area if he can kill this person he will go to two threat meaning that these will probably attack him otherwise their control zone is going to be enough to go after him instead before I do too much more I have to remember to give myself a shield token and this should actually be at two cuz I have taken one damage individually twice which is pretty good now he's got an ability that fires off at three of these our enemy has taken two damage already from the spell so I'm going to attack with my sword with four I get to roll four dice I don't get any extra in here but that's okay I need to get six pluses in order to hit it looks like I got a couple so I did two damage so I will be able to flip one two I'll be turning this to there so he's done four damage just not enough to destroy him that's too bad but I do get one on my threat which again is not going to be enough I think we have a lot of hurt coming our way and now that that's over I'm going to remove these two tokens and I'm going to take damage from both of those tokens because they will each do one and then I remove the token I'm at two damage again it's time for the enemy group to begin their assault on Me 1 2 3 4 five that's going to move up to there I'm sorry I haveen forgot to swing this thing over to that area there according to the way these are going to activate they're going to attack the person with the most threat in their sphere of uh their their control Zone from what I understand of course if I do this wrong please let me know he is going to activate and he's going to attack the person that's within three that has the most threat well that is going to be
Rebecca Rebecca has three that is why I was trying to take this guy out so he's going to move one two over to here and attack Rebecca now the interesting thing is he is moving out of our area but we do not get to take reaction attacks against him these two are going to try to Target him because he has two threat but it's not going to go after Rebecca because one two three one two three they can they're not in the zone and they can't Target her because she's up on elevation so this one's going to move up one and attack this one is going to move one two three in attack but if it does that it runs out of points so I believe it would just stay there and attack him I could again be wrong about that actually I'm I think it would actually still move over here and not be able to attack I think it's going to stop right there here is the AI and I'm hoping I'm doing this right I could be wrong now one of the things is I could be having to use this column over here which is attack the heroes because after all that's what the card says the goal is to attack the heroes but it isn't a mission goal the mission goal is over here it says it does the active enemy have a mission goal yes it does the mission goal is to attack the heroes but that'd be X if you're supposed to if it doesn't have a mission goal it would just go down here to attack the heroes but it does have a mission goal the interesting thing is the mission goal is attack the heroes so it's a little confusing here and I'm not sure if I'm doing this right it does say is there at least one hero whose threat is greater than or equal to the mission goal well the mission goal is zero because there is any other Mission goal so the goal then would be that the enemy must choose their target the hero with the highest threat if tied
then choose the closest one if there's a tie persist then they choose the one with the most damage tokens if the tie persists then they choose randomly so at this point we're in this section here the enemy was choose their target of the hero with the highest threat now of course that is going to be Rebecca Rebecca has three within their area they're able to see so that means that's why that one went there but the other two can't see it so can the enemy attack the Target in this activation no because they can't see it so we're going to move over to here with the other two I believe and this one says that the enemy's goal becomes attack the closest hero so then at equal distance the target of the hero with the highest is if the tie persists the hero with the most damage tokens if it persists the player chooses the hero is the enemy's Target so at this point I think they're both going to attack Valero because the that is the closest enemy instead of moving to go try to get venzio I know there were a lot of words going on there and honestly sadly the AI in theory should be pretty straightforward but it does I there's a lot of things I'm not exactly sure if I'm doing right we're going to keep with what we have here if it's wrong I apologize these two are going to attack him and this one is going to break off and go after Rebecca so let's roll our Dice and see how it goes now the funny thing is I didn't need to attack these guys at all I could have ran straight for this area over here but of course every time I leave the Zone one of these zones here of these enemies that are adjacent I'm going to be taking attack so I figured
it' probably been best just to try to kill them so I can get through uh maybe this isn't the best plan so these enemies are going to do four damage Rebecca only has one physique and she needs to get a five plus she did get the five plus which is good so she's going to take a total of three damage and a bleed token that's not going to be good for her hopefully that is all she takes is three damage and a bleed token this particular model is now going to attack ferio and he's got to block a lot of damage coming through he needs to get a he blocked everything okay that's fantastic but he gets attacked again so let's see how he does on this one he was able to oh my gosh he's able to block everything again he got all of these he needed a five plus he got six6 eight and I get to use my shield token to block that one as well oh my goodness that was absolutely awesome all right fantastic that was the way you get lucky enough to stay in the game because there's I should have no business surviving this with all of them having activated it's now our three characters here we're going to start with her she's going to go one two three down to this area here and I'm going to move another two I think afterwards one two to come down off of the building but first I'm going to make an attack with my knives we're going to attack the guy that has four damage on him so I'm going to roll my three knives and see how it goes we're able to do we did it again we got one two and three we did three damage with her which is a critical hit but I don't think that's going to count for much because I only needed one two in order to kill him so I don't believe the critical fires off I could be completely wrong about that being able to do three damage is enough to do a critical hit but it's going to be overkill on this
guy so I'm not exactly sure how that resolves I'm only going to take two on my pilum which really doesn't matter here it's going to go up to five she's going to be the one that's going to have the most and now I think about it I'm not going to use the two to come off the building that's going to be terrible terrible news instead I'm going to use one to move over there and that would put my token here so then I'm just going to use a weight action to move it one space so that's equal to the enemy vieno is next he is going to use one two to grab a bless token and then he's going to use another 2 one two to try to heal our friend and then he's going to use another one to move one space I'm going to use that bless token again to help with my healing I'm going to roll these up I got three successes I only needed two to get rid of the only damage on top of Valerio and that means he gains another heroic point it is now Rebecca's turn Rebecca's going to use two to gain a Advantage token using her energy Shard for two time that means that now I can go one two three and attack with my arrow or Arcane arrow with that Advantage token things I always keep forgetting is she also should have gained another point on that for doing damage to the guy Rebecca does get to choose a Target 1 two three four five I'm going to choose this guy right here CU then maybe we can get by I'm going to zap that guy with my spell we do have our enemy here I get to roll four dice against him but I am going to use that Advantage token and hopefully take him down I got a six and a seven which is
enough to fire off my spell and I did get one of the Moon symbols okay that was perfect it's exactly what I wanted so I'm going to be able to do my two damage with this and I get to do one damage for each moon now there's only one here but that's okay that's three damage on that guy that was perfect that's going to give me one more heroic point and I'm going to get one more on my dial going to four and I have to take one damage because of my bleed so she is at four she's one away from dying Valerio needs to save the day one two three to attack and then I'm going to use I think one to move maybe or else I'll just wait I'll figure it out after we make our attack and we are going to Target this guy he is going to be the hopefully be dead we'll roll our four physique and see how it goes I've got a total of 1 two three that's enough that's six that's another critical hit but I again I'm not sure if that's going to trigger because we've already killed the guy so I'm going to gain two more into my polarium here which is going to bring me to three we're going to remove this model from the board and we're going to replace this model with this one so Leo looks everything like it's painted on top of that every time I kill one of those I'm supposed to gain one of these Elementium so I'm going to grab two of those cuz we killed two of the guys and at this point he will activate 1 2 3 4 5 and probably try to crush Valerio Valerio does have the most threat within the person's area one two three this person only has two he has three so he's going to attack Valerio I'm taking four damage I do have my shield token I forgot to give me at the start of my activation I do get roll four physique I was able to block two which means I take
two damage and I gain a bleeding token so we'll put two damage on him and he's also going to gain one of these bleeding tokens which means he also gains a heroic point and it's now going to be our turn to activate again I forgot to swing this around and I'm going to start with Valerio I think it's going to be awesome Valerio does have three of these points so he is going to pay one time and add two to the test of this attack I can roll any number of dice you miss keep the new roll now I believe that means I am going to use my sword to attack and I'm going to be able to add two dice this and roll any number of them if I want let's roll these Dice and take this guy out hopefully I get to roll my three four four for my sword and then I get to roll two extra dice as well now my sword does have tackle I haven't been using that what that does is after I'm done with the attack I can move my opponent one space and then I can take the space of it causing no reaction attacks but I haven't really been needing to do that nor have I wanted to do that so we're gonna roll these up see how we do I need five pluses I got a total of of one I got one oh this is not a heroic action I'm Gonna Roll Roll all these and see how it goes I got well that's way better one two three four five I got five I think I killed this guy in one shot he only has five Health boom done at this point I'll remove him from the board as well grab one more of these resources and at this point it's a mute point as to when it goes since there is no time restrictions on here we're all going to be able to make it to this point with over the
course of the next few actions at this point we have reached our goal so we're going to go to uh excerpt 0.010 you managed to escape and disperse the brins in the alley of traversa after a mad rush you stop to catch your breath you can hardly speak but your minds are filled with questions who were those individuals what did they want from you was it possible they were aware of the assignments you have just accepted after this experience you need even more time to rest at home to recover your strength and make a trip to the local market you are well-liked in the neighborhood and your friends will hide you until the next Dawn so at this point we are going to well we got loot none so that doesn't mean I get any extra loot no that means all the loot that we collected over the course of the C of that mission we don't get any of it it's all gone loot none oh that's the saddest words I've ever seen if the party has nine I get to loot half I never got this nine I don't know how I could have got that but we didn't get it so on but we each get one experience point and each hero gains their Destiny cards so we're going be able to look at all of the number one destiny cards and for example this person now has a destiny it says you have always thought that military career was the best way to get reputation for in Rome so as we've I think I showed this one I can't remember if I did or not if you're finished the mission with at least three damage on your hero sheet during the next during
the next rest phase I get to read a certain excerpt so our goal is to make him hurt in order to be able to move on with his Destiny and everybody else has a little bit different card Sophia's here says you have always been considered the black sheep of the family and your your brother Valerio was forced to bail you out of countless problematic situations so in this one I have to inflict at least 10 damage by the end of the mission during the next rest phase if I do that I get to read a certain excerpt our other two characters have them as well I think it's be really cool to check these out we have V Veneno his States you join the childhood friends to complete your training determined to heal their wounds of body and spirit if by the end of a single Mission you make the other Heroes discard a total of at least five damage during the next rest phase well that's pretty easy I think I cured so much this game already so his I don't think he going to be too hard the one that might be a lot SE actually these all seem like pretty doable which is really neat I think it's kind of cool these are pretty doable as you think about how to achieve your goal by joining the Black Rose Lodge memories of how it all began resurface in your mind so his this one is I have to successfully cast three spells by the end of the single Mission during the next rest phase so again I think that's pretty doable she cast I think four spells this entire during this Mission alone and at that point I can read this particular excerpt I really like the cards I think they're kind of cool and give you an a goal to make with each
character along with the actual missions you're doing at this time I can also discard any injuries the way you gain injuries in this game is if your character has taken all the damage it possibly can it is going to KO you're going to flip the character over for all intensive purposes the tech the character is still on the board and so you can't end your movement in the square of the character and whenever it comes to that character's activation if it is still down you're going to gain an injury card you're going to have to deal with this injury card by doing stuff in the rest phase where you can pay to get it removed or maybe there's special skills and abilities or other cards and items that can help remove any of those injuries of course at any time if you're able to heal your character any of those wounds they're able to stand up their activation token will move ahead one from where it was originally placed not from where the person who healed you but from where it originally was placed on the board so that is what happens when you get KO and you gain injuries it didn't happen this time and I would discard them all which is totally fine at this point we'll perform a rest phase in Rome then start Mission 0.1 a burning map in spotio by after performing a travel phase but we're going to do that in the next video I hope you enjoyed this playthrough this is just the beginning of our campaign in this awesome world going into the next video we will be doing the rest and travel phase and we'll be getting ready for our next mission there's going to be a lot of things we need to do which is going to be we're going to be spending some of our experience points maybe be able to
buy some new equipment and get ourselves a little bit more prepared for the next mission we'll see how that goes then we'll have to travel to our next location and get ready for our mission if you did enjoy the playthrough don't forget to like subscribe and hit that Bell symbol so you know when more content comes out for this game also please feel free to leave anything in the comments below I would love to hear from everyone I know I probably made a few mistakes I think I forgot a couple of the heroic action cubes and I think I maybe forgot the polarium a couple times so I have to get better at making sure I cover every turn one at a time so I remember all the different steps including these little dials and stuff there's a lot to keep track of not to mention my shield token I keep forgetting to put on my guy there's a lot of things to keep track of in this game but I think as you play it you're going to be able to get into a rhythm where you can remember all these things so I do thank you for watching the video and I hope you I do apologize for any errors that I made in this big game that is that is really fun to play and I can't wait to continue if you're interested in supporting the Channel please feel free to locate the patreon it's in the description of this video you can join it those that have are located here on the screen thank you so much for your patronage it does mean the world to me those that have joined the patreon are going to be able to help me moving into some of these new phases of the game to be able to help kit out our characters how to spend our experience points and what we should do when it comes to some of the New Missions if we should if we have a branching path I'm going to have them decide where we should go with our characters on top of that they do get to see all of the video playthroughs that I do usually about a day or two ahead of time without commercial interruptions thank you again for watching the playthrough of Nova AOS
Renaissance so again I probably said that totally wrong but that's okay if you're excited to see more of this game or anything else that Colin and I have coming up then I need you to meet me at the
table it's your master PL to set me up against your enemies