Timber Town | How to Play
Games in This Video
1 game is featured in this video — it unlocks as you watch.
Transcript
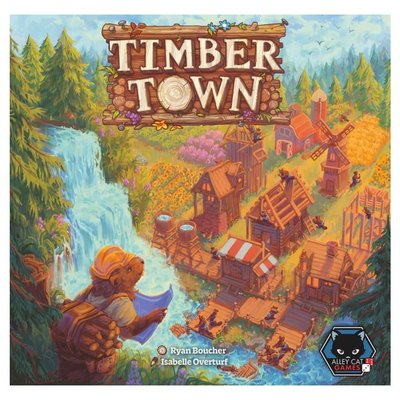
Hi everyone, I'm Tom and today I'm going to be showing you how to play Timbertown, a two-player only tile laying game. In this game, we play as Beaver Architects constructing a new town on the riverbank using buildings sent drifting down the river by our builders upstream. Trouble is, we're not alone. On the opposite riverbank, there is a rival architect seeking to construct their own town to compete with yours. The best built town is awarded a prestigious award, so choose your placement wisely and grab the best buildings before they flow off the waterfall's edge. Before we get started, let's see how we got the table to this point and look at the setup. To set up, each player takes their town board and a player aid. Feel free to have the boards the right way up. You may want to sit across from the table from each other, but for landscape purposes, we're doing it like this. Find the single colored raft token that matches the color of your player board and place it on your player aid. And you can stand it up, but for bird's eye purposes, we'll line him down. The player who most recently saw a beaver goes first. That's going to be the red player in our example. We're then going to make the riverboard by grabbing the four separate ones. The first one will match the first players color. And then we place them out in alternating colors.
So, we've got here red, blue, red, blue. Shuffle all of the building tiles together as I've done in the box here. and then make them into three draw piles going above the riverboards, leaving space at the bottom for three discard piles. Then draw the top tile from each stack and place it on the top riverboard. Next, get the scoring cards and if new players are playing, then find all of the cards with this starting card symbol in the corner. There'll be one for each color and put them with inside of both players. For future games, you can take all of the cards of one color, shuffle them up, and pick one at random. Then you'll have a unique scoring setup for your particular game. There is only one red and one brown card. So they will be the same every time. All the others will combine together. And finally, the score pad goes within reach as well as all of the other tokens. So, we have got the two-sided, two-colored ship tokens, the builder beaver and the regular beavers, the cranes, and the dams. And with that, we're ready to go. So, what is our objective here? Our town is represented by this 4x4 grid. On this grid, we will place building tiles claimed from the river. You must make sure that their boardwalks are connected. Each building type will score points in a unique way based on the scoring cards we've got in our particular setup. When both players have placed as many tiles as possible, the game will end and the player who followed the scoring cards the best will score the most points and
win. Now, I did want to show you the draw piles here, but I am going to shift them off because it will make the game a lot easier to show off if these river tiles line up with these columns. Because in a game of Timbertown, we will take one turn each round, typically claiming a building tile from the river and placing it onto our town boards in the matching column. The player whose icon matches the first riverboard will take the first turn in each round. Because they're alternating, the first player will switch every round. The game ends when both players have placed their final building tile or can't place any more tiles. And after that, we will have the final scoring. On your turn, you will take one main action and any number of free actions per turn. You can take these actions in any order. At the start of every round after the first, we are going to move tiles downstream, but we'll see that later on. It's important before you take actions that you take a look at all of the scoring cards and understand how they are going to score. Let's have a quick look at our starting cards. The brown tiles will score no points, but you get a beaver token and put it on the tile. At the end of the game, you will get five points if the beaver can move from left to right across your playerboard. This can be done just in a straight line like this.
If you're quite lucky, it can be done in a zigzag. As long as they can get from the leftmost column to the rightmost column by walking along boardwalks, they'll be worth five points each. Our red tiles are construction yards. They will score you two points each and they will get you a construction token. It could be a raft, it could be a crane, it could be a dam. You take the matching token from the supply and place it on your player raid. Each unused construction token will score you a point each at the end of the game, but you may well want to use them for the actions we'll have a look at in a sec. Now, we come to the variable ones, but for the starting cards, our cottages would like to be in pairs. So, one on its own, that's not a pair. Four together, that's too many. That's not a pair. Just two next to each other are worth five points each. Our gardens, the green tiles would score five points if they are in a corner of the town. The workshops score two points for each unique non-blue tile in the same column.
So you can see in the example here there are two purples and a green. So that's two different non-blue things, four points in total. The shrines are worth four points each, but if you have collected more than your opponent, you get an extra six points. And finally, the food markets will score you two points for each orthogonally adjacent non orange tile. So orthogonally, just not diagonally. And you can see in this example, each one has one, two, three tiles orthogonally adjacent. So each one is worth six points. It's three there. 1 2 3 1 2 3. That is just the starting cards. As said at the start, there are a load of different combinations for everything but these first two. So check those out. And there is an appendix at the back of the rule book that will go into what every one of those scoring cards means. So now we understand the scoring cards. Let's have a look at these actions. So main actions first. You can claim a tile from the river. Here's the river. Here are the tiles on it currently. You can grab any tile from the river and place it in the matching column of your playerboard. You must follow the building placement rules. The building placement rules are when you take a tile from the river, you must be able to place it on your board. If you can't place it following the rules, you can't claim the tile. The tile you're claiming must go in the same column of your board as the riverboard that it came from. So, if we're claiming from this riverboard, it must go in column one. You must also connect boardwalks shown on the tiles. So later on if I were to want to draft this from river 2,
I cannot place this here because there is no connection in the boardwalks. Now remember, you can freely rotate the tile. But if I had already placed something here, but desperately wanted this tile, there is no way I can legally place that unless I want to scuttle a token. We'll see that in a minute. The boardwalks can only be cut off by the town edge. You don't have to line up, you know, nothing with the town edge. It's okay for them to go off. I'll also mention groups as well, which is important for some scoring cards. As soon as you place a matching colored tile next to another one, they form a group. They don't have to be connected. They can just be adjacent. One tile on its own is not a group. A group of two tiles is called a pair. And a group of three tiles will be called a trio. Let's say I would like this shrine with four points each. I want to have more than my opponents. If it has an icon in the corner, so if it's the beavers or the construction, it will have a beaver or one of those things, the dam, the crane, or a raft token in the corner. Take that token and put it on your player aid. In this case, the shrines don't have anything. So, I'm just going to place it. Let's place it sideways in case we get a beaver and we want them to move all the way along. So, that would be my main action. I claim something from the river. And that's that. Another thing I can do with my main action is use a raft. We each have a raft to start with that's just our color. And we can gain more from construction tiles that have a raft in the corner. You would take one of the dual colored ones and put it on your color's side. To use a raft as your
main action, you place the raft on one of the tiles in the river and that reserves it. Basically, you are the only person that is allowed to take that tile while the raft is on it. You can't place a raft on a tile that's already got a raft on it. That's already been reserved. The last thing you can do as your main action is pass and just skip your main action for this turn. You can choose one of those options, but remember you can do it in any order that you like amongst free actions. So you either claim a tile from the river, use a raft or pass your free actions. You can do any number of these again in any order you like along with your main action. You can claim the tile under your raft. So although it cost you a main action to put the raft there, it's a free action to get it. So, if there's something you really want, but it's not quite in the right column yet, you would like something else first, you can reserve it for a while and then get it with a free action. If you reserved it with your single color raft, it goes back on your player aid. If you reserved it with one of the dual color rafts, you discard it and then you claim the tile as if you've done it with your main action going into the column that it currently is in the river. You can discard a crane token when you are claiming a tile to place it in any column you like instead of the one where it is in the river. You can discard a dam token to claim an additional tile from the river this turn. The last free action is you can scuttle a construction token. You can use one of your construction tokens, a raft, a dam, or a crane, and place it
onto your board in between tiles to make a connection between them so that you can follow the building placement rules. So, let's just say I'm in this situation here and I would really like this tile to complete this row. Unfortunately for me, there is no way I can rotate this tile to make it acceptable. What I can do though is scuttle this raft that I have previously gained. I can put it in between these two tiles and make a virtual boardwalk between them. So, I have lost one of my construction tokens in doing this, but I have made the tile placement legal and I can have the tile that I want. Now, if the tile that you are trying to take would come with a construction token, you can use that to scuttle at the same time that you're claiming it. So, in this situation, I really want this in the top row. It wouldn't work out here, but I can use the token that it would come with to scuttle here and make that a legal placement. Let's teleport us back to that first turn. I have claimed a tile.
Let's say Marty will take this in his column one. We have finished our first round. At the start of every round after the first, we will refresh the river. So, you would remove any tiles that are on the last board, the one that's furthest away from the draw stacks. Discard them. They have fallen off the end of the waterfall. They are gone from the game. They can't be retrieved. If there were any one color rafts on these tiles, they would be returned to their owner. If they were the dual colored ones that you gain, they would be discarded and lost. Sorry. Put that riverboard to one side. Slide the three remaining boards down roughly in line with your columns. Don't move any of the building tiles on here or the rafts or anything. And then the gap that we've made gets filled in with the riverboard that used to be the last one. Now that's the first one. Draw three tiles from the stacks. And so not only have we refreshed the display, the top riverboard now tells us whose turn it is to go first, which is the blue player. So every round this is going to alternate who is taking the first turn. The game ends when neither player can claim any more tiles. The first player to complete their board will take the builder beaver and they will get an additional five points. That player, since they're finished, has to pass on all subsequent turns. And the other player can go until they are either full up or they can't claim any more tiles cuz they can't follow the building rules. Maybe all of the tiles have now
been discarded off the edge of the waterfall. So, as soon as the other player has filled their board or can't do anymore, we proceed to scoring. So, we look at tokens and the building tile placement for each of the conditions on the card. Use the scoring pad for each of the types. Top them up in the most points wins. I will go through a scoring example now for us though. So, let's look at Red's board. So, first up, the construction yard. The red tiles score two points each. So here, red has one construction tile for two points. But the green tiles, the parks, they score five points if they are in a corner. So no, no, no. Yes, that's a park. So that is worth five points. Next is the orange tiles. So the markets, two points each for each orthogonally adjacent non orange. So we've got two on here, and they are each next to 1 2 3 4 1 2 3 four non orange things orthogonally. So that's going to be the full eight points each for 16.
Next up is blue. The workshops would like to be in columns with things that aren't blue. Two points for each unique nonb blue tile in the same column. So let's see. No blue in column one. None in number two. Here's one in column three. We have two purple. So one unique and an orange. Two unique things is four points. And then over here we have a green, a yellow, and a brown. So that's going to be two four six points. So 10 for our blues. For yellow are homes. The cottages would like to be in pairs and they're worth five points each if they're in a pair. So we've got a pair here. Five 10 points and one standing solitary on its own for nothing. So 10 from the yellows. Purple are shrines are worth four points each. And if you've got more than your opponent, an additional six. Now unfortunately for the blue player, there are only six shrines in the game and red has them all here. So, it's going to be 4 8 12 16 20 24 plus six for having the most. So, that is a whopping 30 points. The most you could ever get from the shrines. We look at our beaver tokens. Can this beaver go all the way across the board?
Well, yes, it can in a lot of different ways, but you've just got to find a path across the boardwalks and it can go right up here and get all the way to the left. Each beaver that can do that is worth five points. Then our unused construction tokens. We've got our starting raft and the dam that we didn't use for one point each. So, two there. Red finished first and got the builder beaver for five for a total of 85 points. And for the blue player, we have three construction tiles worth six points together. For the parks, we have one, two, both in corners for five each, which is 10 oranges. This one is next to one, two, three things that aren't orange. This one is next to two. So that's going to be two, four, six, eight, 10 blues. So let's see column one. The blue here is with one, two different colors for four points. This one again, two different colors for four points. Each of these two different colors for four points. And this one is in a column with three different non-blue things. So that's going to be 4 8 12 16 22. The houses want to be in pairs. We have got a pair of houses there for five each, which is 10.
Shrines, as we know, red got them all. So that's going to be an absolute zero for blue. Now beaverwise, each of these beavers can go all the way to the other side of the board. No problem. Could have just actually gone up and straight across. So five points each for those. Blue has four unused construction tokens and didn't get the master builder and so probably down to the shrines gets 72. That's how it went in this example. If there is a tie, the player who got the builder beaver wins. If neither player was able to take the builder beaver because the game ended because neither of you could finish your town boards, then the win is shared. Remember, there are a lot of different scoring cards in this game. There is an appendix with details on all of those. There is a reference on the back of the rule book as well, which tells you the distribution of tiles in the game, how many of each. The blue player might have wanted to watch out. There's only six shrine tiles. Don't let someone have them all. And in particular, the type of connections that are on each tile, and how many there are of each of those connection combinations. I hope you enjoyed this video and it's got you primed and ready for some Timbertown. If you have any questions or there's anything I haven't covered in this video, please let me know in the comments. and I'll do my best to respond to you. There are hundreds more videos.
There are how to plays, playthroughs, all sorts of things on this channel if you'd like to see more from me and ways to support me in the description if you would like. Thank you very much. But thank you most of all for watching this video and I hope you enjoy Timbertown. Bye.