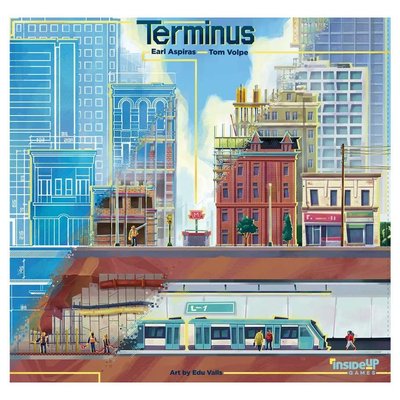
Terminus - Rondel action, tight resource and building train network.
Games in This Video
1 game is featured in this video — it unlocks as you watch.
Transcript
we are going to build the best train Network in Terminus today hopefully and we are going to play a few rounds play through of terminus and this game plays one to five players and publisher is inside up games yep and this is designed by Earl aspis and Tom vper and hello everyone I'm Stella and I'm Taran from mble University so what we're going to do as usual we are going to give you a quick overview of the game and I'm going to start playing jump right to it while explaining what we do yes here we are this is the city that we're building into and this is an action rondle game so we will'll play over three years three rounds and in each round we're going to do three laps of the rondle so to speak and on each turn you may Advance as far as you want and then you'll land in one of these six colored zones and within that zone you can take one of the actions there are several actions available within each of the zones and what we try to do mostly by the end of it is to build up collectively a network of railway lines through this city here individually what we'll be trying to do is make a we do a single line each so each we've already placed our starting stations here we've skipped a past setup and you'll be we'll be trying to build a single subway line that comes out of that trying to score as many points for it as we can this is largely done by building stops or
stations uh in strategic locations which could be these different colored districts which could be next to these uh similarly colored developments which we're going to be collectively adding to the board uh we can be collecting demand tokens and there's a few other ways of getting points but it's largely about getting in optimal locations here and particularly trying to score for the objectives on our agenda cards and the objectives on common project cards there's a lot of points that come in those up here on the board you'll see a whole lot of the resources which are available in the game this is a market driven game things are going to be cheap until players buy things so there's going to be some important timing as we work through our rles here very exciting looking one so the cones it's kind of like chunky nice shape good we've got what is this folders uh permits permits thank you and blueprint very cute and we are playing the two player variant of the game here so there is a third player an auto player represented by this red piece here going to get in the in the way a little bit so it only does two things uh firstly when we're going around the rondle if we want to take the same space normally there's no restriction against human players for that but if we want to go into the same space as the aut we're going to have to
pay a coin and then it's going to move anticlockwise and then out on the main map uh the automa also has a starting station and has a mechanism by which it builds rails because there's a bit of there's a fair bit of shared incentive going on down here if you're making connections with other people's rails you're both going to get some benefit out of it I think these days it's called positive interaction or interaction yeah positively like in terms of the type of it it's the opposite of tech that yes yes so with that we've completed setup and we've started getting our income for the first round which is 12 coins that's simply the number that's underneath our stations as we get more stations out on the board we're going to increase that amount and we each simultaneously choose from one of these five sets of benefits so we will do that now uh we each because it's Market based not allowed to see what the other player has chosen so we're each going to simultaneously place this marker and it's going to represent our choice all right all right everyone's ready I mean just you and me yeah and go all right so I choose to get a permit an energy and a train one my own train to my board avable and we put the resources in this area now we are limited to only eight resources out of
this this four the train can just go here on the side and this is quite limiting in a good way so really have to manage what to get when yes uh I got the one on the left here which is two permits and one rail uh I think we can both see that there's a bit of extra cost here so we're staying away from the timer y I mean one it's only one it's quite High during the first few turns but as the game goes it's getting easier hopefully all right so I'm going to begin by moving to the very first space I've got three choices of action here and I'm going to take this one this is going to start getting development tiles on The Bard usually a good way to start the game yes so it's going to cost me one permit so I'll pay a permit back to the market and now I choose from one of these these they have a number of implications they have actions on them they have uh demand tokens on them so there's a few considerations there so let's um let's have a look at the main board what I want to do is get one of these developments and place it next to my Prime Hub because that is going to give me a new action option so I would put it in one of these four squares covering up the potential rail spaces that are there now the tile I take has to at least partly match the color so if I took a blue I would have to to place it here if I took a green I could place it here or here this space can only take red I also kind of don't want to put it
next to you because you get points for that you get the opportunity to uh place meeples on that and use the actions so I don't want to pick blue so these are the blue ones these are the green ones these are the red ones the other thing I could consider is I may want a tile which has a demand token on it with which matches where my St are that was a CR token I'm in chipper row but you're also in chipper row and you have energy which is what you need to take it so I don't think I want to give that option right away it might just be easy points for you so I'm going to take this tile here and I'm going to place it into this space here and then I must take a lobbyist meeple from my board we have eight of these each place it onto that space so from now on When I visit this action that's the handshake space which is up here instead of taking one of the three actions associated with that location on the main board I can instead take the action down here which is to pay a coin to gain four uh traffic cones from the market it's always I found to have options for you to land at certain spaces and not having to take this because you can see that you only have certain rounds and rounds per per year and then you may have to skip and if you have more options that's probably better for you yeah this is also an action you
tend not to do that many times through the game so it's good to have an alternative there yeah good point and there are actions here both where you get cones and spend cones so having a way to get cones Elsewhere on the board uh potentially lets me do that more efficiently but it does cost you one money yes so that is my turn I will jump to the same area because it's not limited it's not blocked I can still go there I'll also do the same action as tent so I'll have to pay one permit which I return there and I will take this one so I will put it here or here or here or here but I'm going to put it here I'll do the ter trick taada and as turn I will put my mle on it so this action relates to the one in here so this will let me pay two blueprints to do this track advancement on my board which unlock the station which then the SE station I can put on the main board and that's in place of spending cones to do it here yes my turn I'll Advance one space to the handshake space I'm not going to use that new action I just unlocked on the board yet because I want to very quickly uh spend my second permit to take this action here it's an important part of scoring
it lets me get agenda cards so I draw three new agenda cards uh I can draw three of them in round one two of them in round two and one of them in round three and then I look at them and I keep one of them now we each started the game with one this one's going to go face up though and you'll see on it it includes a number of placement objectives so this is this one is hubs which are double height stations next to Green this one is hubs within old cross and nightsbridge which is out on the right hand side of the board and this is stops so that can be single height or double height within Knightsbridge upper Warden verant Park even further away from where I've started so I'm going to go with hubs adjacent to residential developments get rid of the the rest so if I have three I'll get three points if I have five and commit a mle to this tile a card sorry I will get seven points and it's your turn I'm going to jump ahead here and I'm going to buy the blueprint now as much as I want to buy more than I need this round of this turn I think I'm just going to get three the reason being as I alluded earlier is because you have limited capacity on your board so you kind of can't really hoard stuff does that make sense um I'm going to put it on my board and I will pay the total of one + 2 + 2 is 5 so that was this action
here all right ter turn my turn blueprints are now looking more expensive more expensive very expensive I'm going to go to the same space but I'm going to use the other action here which is to get an upgrade so we each have space for two upgrades the first one costs two coins and the second one two coins and a blueprint and there are these six upgrade tiles available with the game in the two-player game there's only one copy of each so once I take one it's not available for you anymore which one going to Big T I'm going to take number 1 a this is called the cashback bonus and it's interesting one it means that every time I do an action that costs me money including the one I just did I put a coin here and then I get that money back at the end of the round so it's kind of like a delayed discount and you'll see there's not a lot of ways to gain money in the game you get most of your money at the start of the round and have to make it last so having some extra ways to get some income kind of helpful very helpful especially near to start of the game and you really got to plan ahead what you can spend on but then there's a market price here that keeps changing so you kind of like never know in a way y I'm going to skip this one money cost area I'm going to skip here and I'm going to try to do this action which is this one uh which is taking all of these four so anything in
the First Column uh that is still available so let's say if it's like this that means only two is one I think so this is a really good one four is good and I have just exactly the capacity on my board which is four in here cool uh and that's that's my my turn my turn I do need some resources out of here so I'm going to jump ahead into this space I have to pay one coin to into the blocked out space and I'm going to buy some power so I will spend a total of five nice so you gained gain these two cost me five plus the one that I have to spend because of yep and I get another coin for my cash back nice then the blocking player moves three spaces based on what's shown on this card so one two three adding cost to this location next time round I'm going to go to this space the options are uh this one or this one because it's connected so or this one so three three spaces there it's to buy rails build rails this is the major building action or to pick up a demand token I'm going to buy rail for three money for three
rails so I'm going to have this kind of like spare please give me two change please I'm just basically taking three from the side to my supplier ready to go that's it I go now I there's there's good actions here but I see some points that I can now grab very quickly so I'm going to LEAP ahead to here hey one of my powers and I'm going to take this action here so this will let me pick up a demand token from a development on the board right now there is a chippers row demand and there is a verdant Park demand I don't have to be anywhere near this all I have to be is in the right location so I've got one stop there I can take one of these so grab that token add it to my player board you see there's only five slots here it's a small but important timing part of the game because if I can get five of these tokens it's worth 25 points to me right now this first one is worth three if I want a second one from chippers row I will need a second stop within chippers row now I'm going to go through here the starting area and then I'm going to move this day so you go around the board three times before you finish this round or year I think think now I'm going to jump ahead all the way here to do this action now but instead of doing these two I'm going to do this one the toes that I've purchased I'm going to do it I'm going to spend two blueprint from my board and I'm going to increase my
capacity so I can build more stations and hubs so it is three one two three that means I can build anything from here on to the left and it does not cost me any energy because of that to also yes normally it'll cost energy as you move up through there or power sorry um but this particular action it does not yeah so and the resources go back there so go back to here it is affecting the economy and because you've increased Your Capacity this is going to trigger the neutral player to start doing some building so we look at this tile the neutral player is going to build into three slots and they into three plots and this is going to be pretty simple at the moment moving in the main Direction which is up so I'm just going to do that in a straightforward way there's there's a lot more to building than just this but I think we'll see it when we come to our builds so red is neutral player yep so one so quickly so not fair this life is so easy for the neutral player can I be the neutral player please the neutral player doesn't get any points so it's just there to it's true it's there to fill up bits of the board but it's also there to help us out because we'll see there is a u not semi Cooperative but a positive interaction effect by having this on the board thank you you stole my
words yes now the this card each time after building flips over now the main direction is to the left is to the left but as we can see uh here there is nowhere to the left so it's probably going to continue building up as we go into the next action now I'm looking ahead to making sure I can get some rails on the board and I'm actually relatively thin on money right now so there's one thing I can see up there on the main board which is this one cost permit and I desperately need it I can't let you get it and I can see that you need it to build as well so I'm going to have to jump all the way ahead the enre loop Y and pay one coin sometimes it's necessary to do it right to to Jump Ahead all the way just so that you can do your action so pay one coin which goes straight into cash back in order to take that one cheap permit Taran guess me right I am planning to go there so I'm going to BU I'm going to buy this one here the permit now I have exactly for money everyone for money big spender I finished everything and I will buy the last two I mean the left two most so that cost four and that's exactly eight resources that I have your go I'll Advance one space here and I'm going to buy some rails it's going to
cost me three so you have just you have four you're spending three yep and one goes into cash back oh nice and that will give me three rails for my Supply I'm going to jump to you again I'm going to face that way now hello I'm going to gain H sorry I'm going to do the action here which is this one so spend the currents and to increase capacity now I have to buy energy if there's energy that I pass but in this case spending two which lets me here to be here and I don't have to spend energy so that's okay now something else is happening here so I went past this C symbol and that lets me upgrade one of these two tiles so it's up to me which one I want to upgrade so this one lets me be more flexible in building the rails so it doesn't always have to go one way yep you can build two directions out from your starting Hub yep and or this one that lets me build a two level not just one so I'm going to pick this second one and putting back here so if anyone I don't think tan Tan's already there but if anyone comes here let's say there's a third player then do this action they only get two sucks for them my turn I'm not in a position to construct I'm not in a position to afford that I'm going to go over to the
handshake area so I'm on to my last lap mhm and I'm going to take my devel M action so that's going to cost me one coin again it goes into my cash back pile and it's going to let me take four cones from the market uh ignoring the restrictions of the columns so I just get those four cones oh that's going to annoy me if I go there sucks to me yes now there's only a single cone if you visit that space and that's where the timing of this rondle is so critical yes we'll go I'm going to build W finally we can show you building so which is this action over here this is how much I need to spend one payit and two cones from my board back to the supply now it's full again and I get to build as much as possible um as I can I want of the Rails but I need to pay the H on each end of the set of rails so that would be limited by how many blueprints I have so I have only one so I'm going to pay that that one back to the supply I have only four rails we can only do two rails for now so what I'm going to do is building it here y now except this one I can build two Tan's Hub and this is good because I gain one energy and from the main Supply and tan
gets one money yes so you get one energy if you make any number of connections yes you get one money for each each of your stops that someone else connects with yes and because of this I can keep going and I do have the rail so I can go to the right left so my options are here here here so there's a few other intermediate options as well you I only have two I want to go here and put my Hub here so remember I stop sorry stop here remember I already paid the blue print and hopefully I can show you what it means also having it here next to this stle all right that does offer me a bit of flexibility because I was going to be able to build but not put down any stops but now that you give me that money from the connection I can pay one coin up here again to my cashback Supply to get this one blueprint into my Supply so simple action done so I just realized we did uh forget something with the auto player wouldn't have impacted what you just did but again you increase your capacity another time so the auto player will build again and this time it's only moving one that's what's showing on the card here it's going to make a single connection uh it cannot go in the left Direction so it's going to continue building up so it will build a stop here y with two stations up and then this
card once again flips over to the three station side direction is up which is not going to be achievable so it's going to be building to the right for quite a while and the uh the maple doesn't move for that I'm again going through here and that is the last one for me I will go ahead and jump here I don't have any money so I definitely cannot go there and I'm going to do this action luckily it also accessible from this area so what it is you see on my board I will take one of my me lobbyist thank you lobbyist and because I have a hub sorry a stop next to thisall I can now place my Lobos here and gain access to this power so that's great so that's what this one does so this actually is M my maple from my board to agenda card to increase the potential Victory point or back to the board and that's most of the things that you can do with the the lobbyist there is one more which I'll just point out now CU it doesn't generally happen early in the game that's this space here uh you would pay a permit to move a number of your lobbyists to a row of one of these project cards and they go there forever you can't move them off and if you have so for each of these objectives if you put two workers there uh you could trigger the leftmost score three
workers you trigger the middle one four workers you trigger the right hand like that I'm not putting I'm not leing it there but like that so that means that I can I can potentially gain seven points if I built three hubs that are adjacent to at least two development yeah I can add it later but then well it's two players which is you you have a choice you always the other player always have a choice to add yep but those will get quite competitive and therefore again an important timing matter at higher player counts when only two players can occupy each cart yes your 10 I am going to move here I'm going to increase my capacity because I need to get some stations down it's going to cost me I'll spend the two cones to move up two spaces technically these are called construction we generally call them cones but they construction so we'll return those to the market and then once again uh someone has increased capacity so the neutral player is going to place some rails and stops this time the main direction is up the alternative direction is this way and the distance is three that's so got a lot one two three it's got all the way there potentially yes so add these rails We'll add these stops it gives us something we can connect to we saw before how connections work and as we get to the outer edges of the board it gives us something that we could connect to it's almost has that Terror mystical feeling where you kind
of like get something out of your neighbors's building very much it doesn't have that teristic thing where it's so much cheaper to do it that way that you would never do it otherwise but it still incentivizes everyone kind of playing in the same space of the board which I do find quite fun yeah and that's why we have our stops kind of like close to each other in this case next to each other so we get that benefit and can show you that there's not much I can do here because I have no money all of these cost money so I don't want to I can't go there I can't go there cost money I can only go here and collect cones there's only two which is not the best but at least I get something y go go time for me to do a build action the basic cost is two cones and one permit yep I'll put it for you and we can see everywhere that I'll build over here so I'm going to start by making a connection with you in this this Direction one two oh nice so because of that connection you gain a coin I gain power power very expensive at the moment then with my other rails it really depends where do I want to go I've got two options I'll spend a blueprint so it will let me uh Place One Stop as well so I could come down here it would not be next to any developments or I could come up here and be next to your development and this is
where I would consider all right do I like that development uh do I just want to go next to it to try to combo some scoring I probably want to do that even if I never put a lobbyist there just the act of putting this grants me a point yep and so that is my that is my build action uh the neutral player whose pieces I forgot to maneuver around by the way has way more on the board than we do but as this game goes on particularly into the third round we're going to be able to play a lot more out get some pretty big pieces down this is the last stop before the end of this year but there's nothing I can do here I've got not enough things to do I mean I can afford these now but I don't have blueprint and I don't have rail so I'm going to stop here uh at the top and that is the end I stop first I finish first so mine goes there so I'll be next uh first player next round I start of next round and I gain one extra money yes and that's part of your uh part of the income you'll get at the start of the start of the next round so I will go there as last player I get no benefit I should probably go there hello and then we would go to well that would be the end of the round and we would go to income for the next round so we would get those benefits we showed up there again it's one coin for you nothing for me we would get the money that we've uncovered with stations so I would we would both get 13 for that we've both
got one station out onto the board and we would do our selection of bonuses again the way we did before and I also get this cash back money as part of my income as well so we got six money back out of that which is going to be a pretty good uh pretty good injection of money into the second round yeah very good and there we have it that is the first round of terminus and they are three rounds all up in the game and again this is the two with two player variance usually from three to five players you don't need that extra person to block you and make your actions more expensive yes the uh the map is the same regardless of the player count the markets are a little bit bigger when you've got more players so there is a separate side to the board yeah there's something in the back of of this so says one to two player variant and then that behind it there's the three to five there's there's more things there just take a word for that there'll be a few more uh few more projects in the a few more developments things like that flip it tan I don't want to flip it it's going to go everywhere should we flip it no hopefully you enjoyed it you find it useful please hit the like and let us know if you have any questions comments and hopefully we'll see you next time bye