The Lord Of The Rings: Fate Of The Fellowship - How To Play
Games in This Video
1 game is featured in this video — it unlocks as you watch.
Transcript
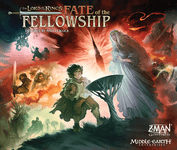
Hi and welcome to Watch It Played. My name is Rodney Smith and in this video we're going to learn the one to five player game The Lord of the Rings Fate of the Fellowship designed by Matt Lecock and published by Zman Games who helped sponsor this video. As the fellowship from the classic tale of the Lord of the Rings, you have an impossible task. You must rally the people of Middle Earth against the dark lord Sauron's forces and give Froto and Sam the time they need to smuggle the one ring into the dark lord's territory so they can destroy it in the fires of Mount Doom. You'll be under constant threat at all times, but not from the rules because we're going to go through those together. So, join me at the table and let's learn how to play. To set up, put the game board in the center of the play area. In its top left corner, set this threat rate marker onto the dotted space of this threat track. On the left side of the board, you'll find the hope track, which also has a dotted space for adding this hope marker to. Now, find the cards that make up the shadow deck, which have two different types of backs.
They'll be mixed together eventually, but first go through them by their faces and find these two specific cards, putting them face up in either order on this discard space. The rest of the cards you'll shuffle into a faceown pile and place here. Next, I want you to notice that on the board, we have a map of what is known as Middle Earth. And this is divided into several regions by thick brown lines. Each region has a name shown in large bold letters. And below some of them, you'll find icons which indicate the game pieces that will begin in that region. The icon we see here represents the eye of Sauron, which is this piece. So, we put it in this region. The other two icons represent any two of these nine Naz Ghoul miniatures. They have different heights and poses, but all work the same way.
So, these icons mean you put any two of them in this region, and it does not matter where you put them within that area, but you'll likely want to avoid directly covering up other spaces or lines you see there. Check every region for these symbols and place the indicated number of Naz Ghoul in them. So, it looks like this when you're done. Now, find and separate by color what are known as the friendly troops. These represent fighters from the dwarven, elven, Roheri, and Gondorian people of Middle Earth. And some of these will begin on the board. To see where, we have to check these circular spaces known as locations. Each will have a name in a nearby printed box, and some will show one or more of these friendly troop symbols. You now place the matching number and color of troops in that space. When you're done, it will look like this. And I'm laying the troops down so they're easier for you to see when looking at the board from this angle. I'll also point out if you're initially having trouble figuring out where the starting pieces go, this illustration in the rule book shows exactly where they belong, listing the names of their locations here. Once you've finished placing all of the friendly troops correctly, you'll have five left over of each type, which you put onto the matching spaces for them here, known as the friendly troop storage. By the board, you'll now create a supply of what are known as the shadow troops, along with the Naz Ghoul. These
represent the evil forces of Sauron that will be opposing you during the game. Check the location spaces of the board for any showing these red shadow troop icons and add that number of those pieces to those spaces. When you're finished, 18 of them will have been added to the board and it will look like this. You'll then reveal the top card of the shadow deck, setting it into this resolve space. Ignore everything on the card except for the name here, which represents one of the locations on the board. Find that location and then add a shadow troop from the supply there. Then flip eight more cards and in the same way add a troop in each newly revealed space. In this way, a total of nine extra troops will be added to the board.
And be aware there is no limit to how many pieces can share the same space. Once you've flipped and resolved the nine shadow cards, move them to this discard pile area. Putting them here first helps you keep track of how many you've flipped so far if you lose count. Now find the objective cards which have this back and go through their faces finding the one with a red star in the corner here. You will always use this objective in every game you play. Set it aside for now and shuffle the remaining cards revealing three random objectives to go with it. Putting the rest back in the box. That said, for your first game, rather than use three random objectives, they suggest going through and finding the three marked with a black star in their corner, which we'll use in this video. Some of the objectives you're using may have setup instructions in the area here. If so, complete those. Now, for example, this objective says to place three elven troops on it, which we take from the friendly troop supply, setting them here. This objective says to add two additional shadow troops to Eisenuard, which we take from the supply. And this location already has some additional shadow troops from the shadow cards we flipped earlier during the setup. Finally, this objective says we must use Froto and Sam, and we'll see what that means in a moment. For now, just ensure the objectives you are using are set in the play area where everyone can see them. The cards with this back
make up the various characters the players might control during the game. Find any mentioned in the setup instructions of the objectives and set them aside. For example, this refers to Froto and Sam. So, we would put that character card aside. Shuffle all the remaining characters and then add enough to any set aside ones. So, you have a total of two character cards per player. We'll assume we have three players in this video, so we need a total of six characters. and any leftover characters. We return to the box. Now, shuffle together the characters you ended up with and deal two of them to each of the players. The two characters each person is dealt are the two characters that they will control during the game. I also want to point out that while some characters have two names listed on them, like we see here with Froto and Sam, they are still treated as a single character. Also, instead of assigning characters randomly for your first game, they suggest using these ones listed at the start of the rule book based on your player count, which we'll do in this video. Meaning, we'd assign these characters to the first, second, and third player. Each person puts their two characters in front of themsel along with two double-sided player reference cards. Then, you collect the matching figure pieces shown in the corners here.
Your player cards will also indicate the location your pieces should begin the game in. For Froto and Sam, this is the Shire and Legololis starts in the woodland realm. So that means we'd place Froto and Sam's piece here and Legololis would go here. If you need some assistance finding the location for characters in your first game, this page of the rule book once again shows numbered locations and illustrations for where they begin on the board. Now find the player cards which have this back and go through them by their fronts, separating out the 12 named Skies Darken at the top and the 14 event cards as indicated here, leaving you with these 48 region cards. Put the region cards face down and then shuffle the event cards and using this chart found in the rule book, deal a number of them face down onto the region cards based on your number of players. So, in this threeplayer game, we deal six events, returning the rest unseen back to the box. Then you shuffle this deck thoroughly, keeping the skies darken cards separate. From the shuffled deck, deal each player a number of cards face up based on this chart found in the rule book. So, with three players, each person will get three cards. And again, these are dealt face up. You'll now divide the remaining undelt player cards into equal piles based on the difficulty level you wish to play. Four stacks in
an introductory game as we'll be doing here or five stacks if you want standard difficulty. Then collect and shuffle the skies darken cards you'd set aside and deal one face down onto each pile returning the rest unseen back to the box. Now shuffle each stack separately so the skies darken card is mixed within each. And when finished, stack each pile on top of the others. If your stacks aren't perfectly even, ensure any larger ones are near the top. This is known as the player deck, which you'll put onto the space for here at the bottom right of the board. Within reach of the players, also create a pool of these haven and shadow stronghold tokens, symbol tokens, and the dice. Also put the imposing Barador dice tower nearby, which you'll use for rolling the dice in true Lord of the Rings style. Just in case you're curious, after building the tower, following the included instructions, it breaks down into three pieces after, which fit snugly in the box so that when you're finished playing, you don't have to fully build and rebuild it each time you play. All right. Next, have players check their hand of cards. Now, remember I said that your player cards stay face up on the table in front of you where everyone can see them, but I'm still going to refer to these as a player's hand of cards.
The player with the lowest value showing at the bottom of their cards will be the first player. And these values have no other purpose, but they do relate to the piece of the Lord of the Rings trivia showing beside them. For your first game, they suggest ignoring the numbers and just having the player with the Froto and Sam character go first. And that's the setup. In The Lord of the Rings: Fate of the Fellowship, the players will all be working together towards a shared goal. And this means you'll either win or lose together. To win, you must complete the requirements found on this destroy the one ring objective. And we'll go through this in more detail later, but to summarize, the players need to get Frodo and Sam all the way from the Shire down to Mount Doom where they can perform the necessary steps to destroy the one ring.
However, before that objective can be fulfilled, the three other objectives must be completed first in any order, and they each have their own unique requirements. And remember, these can be randomly changed each time you play, giving you new challenges to face. While working on the objectives, you'll gain and lose hope, which is shown on this track. And if hope ever reaches the bottom space, the players all lose. So, you must ensure that doesn't happen. To summarize, you must first complete three objectives, which can change from game to game, and then after you must complete the final objective, which is always included. All while ensuring the hope marker never reaches the bottommost space of its track. And remember, this game is cooperative. That means players can discuss strategies together and freely give each other advice, but each player still makes the final decision about what they want to do on their own turn. Speaking of which, the game is played over a series of turns, starting with the first player and then going clockwise around and around the table.
And on your turn, you'll complete three steps. These are listed at the top of the board where it tells us that the first step of a player's turn is to do four + one actions. This means you perform up to four actions with one of your characters and the other character performs up to one action going in either order. So I might have Legalis perform four actions and then Froto and Sam, my other character, could only do one. On my next turn, I might switch and have Legalis take only one action while Froto and Sam perform four. remembering that you can choose to perform fewer actions than a character could take if you like, and you can resolve the characters in either order. Just ensure you fully resolve all the actions of one character before you resolve the next one. Now, in rare cases, because of certain objective effects you might be playing with, one of your characters might be out of play, meaning you can't use them on your turn. And in that case, the character you still have performs up to four actions during this step. When resolving actions with a character, you can pick from any of the six listed here on your player aids, repeating any as you like at a cost of one action each time. So, let's go through how these actions work, starting with travel. And be aware during this video, I'm going to move pieces freely around on the board to create the examples I want to demonstrate. So, while Legololis starts the game in the woodland realm, don't be surprised if in one of my examples he's suddenly somewhere else. With that in mind, let's discuss the travel action,
which moves the character you're resolving from the location they are in to any other location connected by a line. A plain white line like this is a normal path. So, I could go from here over to here. Now, a colored line with an arrow is known as a battle line. And your characters can travel on these just like normal paths. And you ignore the arrows. You can travel these in either direction. The arrows only apply to how enemies move, as we'll learn about later. On the other hand, some lines will show one or more symbols along them. These are known as special paths, and the symbols represent a cost the player must pay to travel them. There are four types of symbols you can collect and spend in this game. And you'll find them in the corner of many of your cards, and they represent friendship, valor, stealth, and resistance. As we'll see during the game, you may also collect tokens that show those icons. And anytime you need to spend symbols, you can use any combination of cards and/or tokens you have. And tokens, like your cards, are shared by both of your characters. In other words, if one of them helped you collect a token, you could still have your other character spend it. When you spend cards, put them into the shared discard pile located on the board here.
And when you spend tokens, return them to the general supply. So, going back to our travel action example, if I was here and wanted to travel along this path, I'd have to spend two stealth symbols in any combination of cards and/or tokens I have. However, when you travel, you don't have to go alone. If there are other characters and or friendly troops in the location you're leaving from, you can bring any number of them with you if the players controlling those other characters agree. So, while moving Legalis here, I might bring Arwin and these two troops. Friendly troops are not controlled by any one person, so anyone can move them while traveling. And you'll often want to do this because friendly troops never move on their own to get them from one location to another. They must move with a traveling character. Also, be aware if you're traveling along a special path, no matter how many pieces are moving, you only pay the cost once per travel action. So, if I was to use another travel action to go back along this path, I'd have to pay this cost again.
Just be aware, only the player currently taking their turn can pay any travel costs, even though they might be bringing another player's character with them. That player can't pay any of the costs using their cards or tokens. I should also mention that these shadow troops, which represent the various enemy orcs, trolls, and other forces of Sauron, do not keep you from moving into or out of the spaces they are in. So, I could use a travel action to move here and then spend another travel action to move here. Your travel is also not prevented by this eye of Sauron token being in the region or by any Naz Ghoul that might be in the region as well. We'll see why you might want to move troops and characters as we learn more of the rules, but often you'll be moving to help satisfy the requirements of objectives. For example, we know one of our objectives is to move Froto and Sam to Mount Doom. And that brings up a very important rule you'll find a reminder of on Froto and Sam's character card. As it says here, when Frodo travels or takes part in travel, in other words, even when another character is moving Frodo with their travel action, the player performing the action must either spend one stealth symbol or they are forced to roll a search for the destination Froto is moved to. We'll discuss rolling a search in a moment, but you generally want to avoid doing it if you can. This is because the dark lord Sauron is
obsessed with the one ring that Frodo is carrying as it holds the power he craves above all else. So, anytime Frodo moves, he risks alerting Sauron to his presence. However, if you spend a stealth symbol, which as a reminder can come from a card or token you have, you avoid rolling a search. And keep in mind, this stealth you spend must be in addition to any other costs you might have to pay for a special path you're traveling on. So if Aayoin was moving from here to here and wanted to bring Frodo, the player controlling Aayowin would need to spend the special path cost here and a stealth symbol if they didn't want to have to roll a search. If they don't spend the stealth cost when moving Froto, then they must roll a search instead. And again, just remember, only the current player can pay these costs. Other players can't spend their cards or symbols instead.
Now, sometimes you might choose not to spend a stealth symbol when traveling with Froto, or you might not have one to spend. But in either of those cases, you must then roll a search. We'll learn how this works together, but you'll also find the steps of rolling a search on the other side of one of your player aids. To roll a search, first check to see how many shadow troops are in the space you just moved to and collect that number of these black search dice. Ignore any shadow troops that might have been in the space you moved from. They have no effect. Also collect a dice for each Naz Ghoul in the region of the location you traveled to. We see two Naz Ghoul here, so we take two more dice.
You now roll all the dice you've collected for that search. Five in this case, and of course, you must use the imposing Barad dice tower to do this. Just drop them into the top where they'll tumble out at the bottom. You then resolve the symbols on the dice you just rolled. Let's assume we had these results. Blank sides are good. They represent successfully sneaking past Sauron's attention, and they have no effect. Any die showing this side represents becoming weary. For each of these rolled, you lose one hope. Anytime you lose hope during the game, in this case, two hope, you move this hope marker down that number of spaces. If this ever reaches the final space, the game immediately ends and the players all lose. For each of these results rolled on a search, you also lose one hope, unless Frodo is currently in a haven. A haven is any location with a yellow highlighted outline. So, if Frodo had been here when rolling the search, we would ignore this result. But since he was here, we would lose another hope.
Then finally, for each of these symbols rolled on a search, you recall one Naz Ghoul from that region back to Mordor. So that means we'd move either of these two to Mordor's region. If there had been no Naz Ghoul in the region where the die was rolled, then you would just ignore that result. I should also mention if you roll these symbols while in Mordor, then nothing happens. You just ignore these results. So now you can see why rolling a search is dangerous. It can cause you to lose hope, which can cause you to lose the game. However, after rolling a search, but before resolving any of the dice, any players with characters present at the location where the search is happening may spend any number of resistance symbols, which as a reminder are represented by this ring icon. For each resistance spent, you may re-roll a search die. And you can spend additional resistance to roll other dice or a die you already rerolled as often as you can afford and want to. And just to be clear, this is a case where any player present at the location of the search, not just the current player, can spend resistance symbols they have. You'll find a reminder of this here on your player aid along with a reminder of how many dice you roll during a search and all the effects of their different sides. Just be aware, no matter how many shadow troops are in your space or Naz Ghoul in your region, a search will only
force you to roll at most seven dice, which is exactly how many of these search dice the game comes with. So, if there are more than seven troops in the space and/or Naz Ghoul in the region, you still only roll seven dice. And that covers rolling a search. I'll also point out you'll find a handy reminder about the need to spend a stealth token or roll a search when Froto travels right here on your player aid. With that understood though, let's take a look at another action you can take on your turn known as fellowship. as a player with a character performing this action, you must be on a space with another player's character. And if that player agrees, you can give them a single card from your hand or take a single card from their hand as long as in either case that card matches the region you are currently in. Most cards will have a region name at the top and as long as you are in any location within that region. It can be given or taken during a fellowship action. The locations also have names, but the specific location doesn't matter as long as the space you are sharing with another player is within the region named on the card that is being given or taken. Some cards in your hand are known as events, and these do not have a region name at their top, which means they cannot be given or taken during a fellowship action. Events have powerful abilities and as they remind you at the top, can be played at any time without using up one of your
actions. So, I could play this at any time to either gain one hope or roll up to three dice. And then after an event is used, it is discarded. When I say events can be used at any time, that also includes during another player's turn. Now, there are some cases where events cannot be played. For example, when you're in the middle of resolving another effect, unless the event says otherwise, you have to wait until that effect finishes before playing an event. But for now, let's go back to the fellowship action, which, as we were saying, allows players to give or take cards from each other. This action is useful as it can help players gain the symbols they need. For example, to complete this objective, the player controlling Froto and Sam has to spend five resistance symbols from the ones they have. The fellowship action helps players work together on that goal. But just be aware, if you ever have more than seven cards in your hand, you must immediately stop and get back down to seven. So, if I found myself with eight cards, I would have to pick any one of them to discard. Or if I have any events, since they can be played at any time, I could play and resolve one to also get back down to seven cards.
You'll find a reminder of this limit printed here on the board. All right, with that, we've covered the fellowship action. So, now let's learn the prepare action. To resolve this, your character must be at a haven, which again is a space with this yellow highlight. You may then discard any one card from your hand in order to collect a token matching the symbol showing in its top lefthand corner. So discarding this would gain me a friendship token. Just be aware the tokens in this supply are limited. So if there aren't any of the matching type you need, you can't take this action. Now you might be thinking, why would you want to do this? Since a card can already be used like a token already and in some ways tokens are less useful because you can give another player a card using the fellowship action, but you can't give a token.
Well, remember you're not allowed to have more than seven cards in hand. So, if you thought you were going to exceed your hand limit later in your turn, you might want to prepare as a way of making room in your hand while still getting to keep the symbol it showed. Okay, moving on. Let's now learn about the muster action. You may only perform this action with one of your characters if it's resolving it at a location showing one of these four symbols. For example, like we see here, and if there's a matching colored troop in this friendly troop supply, the current player may then spend one friendship symbol either from a card they have or by spending one of their matching tokens to move one of those troops to that location. If we had been mustering here, then we would have added a green elven troop instead. All right, that was mustering. So, now let's look at the attack action. This may only be performed by your character if they're in a location with friendly and shadow troops. You'll first shift the Eye of Sauron from wherever it is to the region where the attack is happening and then roll up to one of these battle dice for each friendly troop in your character's location. You must roll at least one, but no more than three, which is how many the game comes with. So, if you had three or more friendly troops in the space, you could roll up to three dice. But you could choose to roll fewer if you wanted, as long as you rolled at
least one. and we'll see why you might choose to roll fewer than you could in a moment. Just keep in mind your character does not contribute to how many dice you get to roll. This is based on how many friendly troops are in the attack action. For this example, we'll assume we rolled three dice and got this result. For each of these symbols, you remove one shadow troop from the attack. For each of these symbols, you remove one shadow troop and one friendly troop. And when you lose a friendly troop, you can pick one of any color. Removed shadow troops go back to the supply and removed friendly troops go back to their matching colored space on the friendly troop supply area of the board here where they can be mustered again later. Going back to the die results, if your battle die shows this side, you lose one friendly troop unless the battle is taking place at a haven location, which it is here. So in this case, this die side would do nothing and we just ignore it. If the attack had been resolved at this location, which is not a haven, then here we would lose a friendly troop from this result. Finally, if a die shows this face, you first check to see if any Naz Ghoul are in the region where the battle is taking place. If so, you now remove two friendly troops. Now, if there had been no Naz Ghoul in the region, then nothing would happen. you would ignore this dice side. I should also mention after rolling the dice but before resolving their effects, any player with characters present at the
location where the attack is happening can spend resistance symbols. And for each one, they can reoll one dice. And they can keep spending these symbols and re-rolling dice, even ones they've already rerolled. After the rolls and rerolls, if any, are complete. Players with characters present then also have the option of spending valor symbols and for each one they remove a single shadow troop. And again remember that means you can also spend valor tokens. So you might be starting to realize when you take an attack action depending on the die results you might lose more friendly troops than you remove shadow troops. And even worse, if at the end of a battle there are no friendly troops remaining in the space, well, shadow troops remain. And if that space was a haven, you immediately put one of these tokens there, which turns the haven into a shadow stronghold. Anytime you lose a haven, you also lose three hope. And this explains why you might want to roll fewer dice than the amount you'd be allowed to because many of the sides of these dice will cause you to lose your own friendly troops. Instead, you might want to roll fewer dice and then count on rerolls and or spending valor symbols to defeat shadow troops. Either way, once the dice and any played cards have been resolved, the battle is over. even if that means both friendly and shadow
troops still remain in the location. I'd also like to remind you that characters in the location do not participate in the attack. They have to be in the location to allow you to perform an attack action there, but they don't count towards the number of dice you roll and are not affected by them. And just to be extra clear, that also means you can't start an attack in a space with friendly and shadow troops if one of your characters isn't there to initiate the action. And that covers the attack action and rolling a battle, which you'll find detailed on the other side of one of your player aids. Just be aware you ignore these instructions around shadow rules when you are performing an attack action. Those come into play when the shadow forces initiate an attack, which we'll learn about later. That said, with the attack action explained, we can now look at the final player action known as capturing, which can only be performed at a shadow stronghold. This will either be a location with this red and black outline, or a location that was once a haven, but was turned into a shadow stronghold by shadow troops and now has one of these tokens. In either case, if you have a character there and at least one friendly troop with no shadow troops present, you may spend three valor symbols and then capture that location.
If the stronghold is printed on the board, cover it with one of these haven tokens. This space will now function as a haven during the game. If you instead capture a stronghold that was a token, simply remove it from the board, turning it back into a haven again. Either way, after capturing, you shift the eye of Sauron to the region where you took this action. And then at the end of the capture action, you gain two hope, moving it up two spaces on this track. Just be aware, you can never have more than eight hope at a time. So if you would ever gain more, any extra is ignored. And with that, we've covered all the possible actions you can take on your turn, which are also summarized on your player aids. Just be aware, each of your characters will have its own variety of special abilities listed in this area, and some may allow you to modify actions you are taking when they are involved. For example, when Aayowin musters in a location showing the Roherum symbol, she does not need to spend a heart. Some characters may have their own unique actions that only they can perform which will begin with the action keyword like we see here. Other abilities are passive, meaning they can be resolved anytime their condition occurs. We're not going to go through all the character abilities in this video as how they work is described on them and their effects will make sense once you know all of the rules. Now, at this point, we've covered all the ways you can perform up to four actions with
one of your characters and up to one action with the other. After you then move to the draw two cards step of your turn. Here, you'll draw and reveal two cards from the top of the player deck, both at the same time, adding them to the cards you already have. These will often be region cards and occasionally events. Now, if you ever need to draw player cards and the deck is empty, for each card you should have drawn but couldn't, you lose one hope. Also, remember during setup, we shuffled a few skies darken cards into the player deck. If you draw one of these, you'll now resolve the steps it shows. First, you advance the threat rate marker one space. And we'll see how this affects gameplay in a moment. Then it tells us that if the eye of Sauron marker is in Froto's region, you lose two hope. Now, if the eye is not in Froto's region when this is resolving, you don't lose any hope, but instead move the eye to his region. This means you really want to keep the eye of Sauron out of Froto's region because at unknown times, you're going to reveal cards like this and they can cause you to lose hope. This is why you might want to start attacks or capture a shadow stronghold outside of Frodo's region because when you do this, it distracts Sauron moving his eye there. Either way, the next step on this card is to put three shadow troops from the supply onto the location indicated
here. This location is different on each skies darken card, and that's why so many are included in the game. It means the locations these will affect will be random each time you play. I should point out that although in this case we have enough shadow troops in the supply to fulfill the instructions on this card, anytime you would need to add shadow troops to the board but can't because the supply is empty, you lose one hope for each troop you should have placed but couldn't. And this is why attacking shadow troops is so important because it returns them to the supply so they don't run out. Also be aware if the new shadow troops were added to a space containing friendly troops, the shadow troops roll a battle there. It doesn't matter if a player's character is there or not. You only check to see if friendly troops are there. When shadow troops battle, you follow all of the same steps for rolling a battle. But unlike a player attack, you first refer here where it tells you to roll as many battle dice as the shadow troops in the space to a maximum of three. So in this case, three dice will be rolled, resolving the results exactly as before, which may remove shadow troops and or friendly ones. Now, if players did have characters at that battle location, they can still spend resistance to roll dice and valor to remove shadow troops. But either way, after shadow troops appear like this, if they cause a battle, only roll once, even if there are still
friendly troops in the space after. I should also mention when shadow troops cause a battle ro to occur, the eye of Sauron is not moved to their region. That only happens when a player initiates the attack. Finally, we're told that the danger intensifies and this means we shuffle the cards in the shadow discard pile and then after we put them on top of the shadow deck. Very soon we'll see the way this deck is used in the game. But I first want to mention that in the rare case you draw two skies darken at the same time. You resolve them both one after the other. After a skies darkened card is resolved, you remove it from the game and don't get to draw any replacements for your hand. And if after drawing two cards during this step of your turn and resolving any skies darkened cards you might have had, if you now have more than seven cards in hand, you must discard enough and or play events until you're only holding seven cards. With that, we now come to the third and final step of a player's turn. Drawing shadow cards. Here, you will draw and resolve a number of shadow cards from this deck equal to your current threat level as shown on this track. That means we draw two in this case. But as we saw, when skies darken cards are drawn, this token will advance, meaning you may be drawing even more cards during this step as the game continues. No matter how many you have
to draw, the important thing is that you draw them one at a time, fully resolving one before revealing and resolving the next. And each one you flip, you add to this space. This helps keep track of how many you've drawn. And once you've resolved as many as the threat track required, you'd finish this step by moving all of these to the discard area. To understand how to resolve shadow cards, we first have to understand some things about them. These always have one of two different types of backs. One showing a red flag at the top or a black banner marked in red at the bottom. On their fronts, all shadow cards are divided into a variety of top half effects known as advances and bottom half effects known as reinforcements.
With that understood, I can now explain that when you flip a shadow card over to resolve it during this step, you first check the card remaining face down on top of its deck. If it shows a red flag at the top, you resolve the top half of the revealed card. If it had shown a black banner with red markings on its bottom, then you would instead resolve the bottom half of the revealed card. So, let's begin by seeing how the bottom effects work. First, add one shadow troop to the location indicated here, keeping in mind there is no limit to how many shadow troops can be in each location. And also remember, if there aren't any shadow troops left in the supply when you would need to place them, you lose one hope for each one you couldn't place. Also, be aware if the indicated location has been captured and turned into a haven, then a shadow troop is not added there. So, this can be another benefit from capturing locations. On the other hand, if a shadow card adds a troop to a location where friendly troops are present, you roll a battle in that location, following all the rules we learned before for when shadow troops cause a battle, remembering that this does not cause the eye of Sauron to move to that region. After adding a troop and resolving any battle it creates, follow the text in the area here, which will be one of three possible effects. This effect means you shift the eye of Sauron
to Froto's region, unless the eye is already in Froto's region, in which case you roll a search instead, following the rules for searches that we learned about earlier. If you see this effect instead, you move the two Naz Ghoul closest to Frodo, not including those already in his region, one at a time, one region closer. In the example I've set up, Frodo is currently in this region. And you determine which Nazgoul is closest to Frodo each time one moves. So in a case like this, the Naz Ghoul in this region is closest. So it moves here. Now for the second Naz Ghoul, we would move. The ones in both of these regions are tied as closest. They are each one two regions away. And anytime you have a tie, the current player decides how to break it. So they might pick this region and then one of its Naz Ghoul would move one region closer. But once again, we have a tie because it could move either here or here and then be one region closer. So they might decide to move it to this region. Okay. Next up, we have the third possible effect you might see on a shadow card. And this one instructs you to deploy three Naz Ghoul from Mordor to the region where the eye is located. So in a case like this, we would move any three from Mordor into this region. If instead there had been fewer than three Nazoulool in Mordor like we have in this example, we first move as many as there are there to the
region with the eye. So just one in this case and then one at a time you move the remaining Naz Ghoul that you need from the region with the most Naz Ghoul. So the next one would have to come from here. And now we have a three-way tie between these regions for the most nasoul. And the current player would pick any one of those regions to take that Naz Ghoul from. When resolving this effect, if the eye is located in Mordor, you instead move three Naz Ghoul one at a time from the region with the largest group outside of Mordor back to Mordor. And if the eye and all of the Naz Ghoul are in Mordor, this card has no effect. And that's how the bottom reinforcement effects are resolved. So now, let's see what happens when you need to resolve the top advance effect of a shadow card.
These will name two locations on the board and show a colored path that connects them. We'll look at this path in detail in a moment, but begin by finding the location on the map shown to the right of the arrow. As you might have already noticed, the cards often have illustrations to help you find the locations you're looking for. And in this case, we're looking for Helm's Deep, which is here on the map. Now, at that location, find the matching colored arrow that leads to it and follow its path backwards to the next adjacent location. And then keep doing that, following those colored arrows until you get all the way back to the location named here on the card, which is this spot. Now, as you're going backwards through this path, if you come to any spaces with shadow troops, stop and advance them to the next connected location in the direction of the colored arrow shown on the shadow card. So, we'd advance this group to here. And you do this even if there were friendly troops in the space they were moving from. So, you'll keep doing this, going backwards along the indicated path, advancing any shadow troops as you come to them, like I'm doing here. Just be aware if troops had already been in the final destination space when you started resolving this, those pieces would not move. After advancing troops, you now roll a battle in each space along that arrowed line where shadow troops and friendly troops share locations. If
there would be multiple battles to roll, you resolve them from the frontmost location moving backwards. Once all the battles have been resolved, if any, check for any havens along that path and whether a battle happened in them or not. If shadow troops are present there with no friendly troops, those spaces become shadow strongholds. And for each one, you lose three hope. And that's how resolving the top portion of a shadow card works. Just be aware there are two special cards that are also in this deck. When either of these are drawn, you simply read their effects and resolve them as printed at the bottom. Now that we've talked about shadow cards, I want to point out an important rule around the timing of event cards.
We know you can normally play these at any time during any player's turn, but unless otherwise stated, not while another card or effect is resolving. For example, once we flip a shadow card, it's too late to play an event card. But once it's resolved and before we flip the next one, we could pause and play an event at that time. This restriction also applies when resolving effects on character cards that might indicate they are playable at any time. These also cannot be played in the middle of another effect that is currently resolving. Also remember, once you've resolved the number of shadow cards equal to the current threat level, you move them from this resolve space into the discard pile. And that ends the current player's turn. And then the next player in clockwise order takes their turn. And turns will continue like this around and around the table until the players all win or lose the game.
Remember, to win the game, you must first complete each of the three randomly chosen objectives by satisfying their conditions. or in this case for your first game, the three objectives that they recommend you use. These objectives will make sense to you now that you know the rules, and you can pause the video here to read these ones if you'd like to get a sense of the challenges they present. Once an objective has been completed, you resolve the when completed instructions at the bottom of its card and then turn it face down. Once all three of these have been completed, you may now complete the destroy the one ring objective. And since this will be included in every game you play, let's see how it works. It tells us that as an action, the player controlling Froto and Sam must spend five resistance symbols while at the Mount Doom location and then survive one final search roll. We know how search rolls are resolved, but this final search role has an extra condition. In addition to rolling a search die for each Naz Ghoul in Froto's region and for each shadow troop at his current location, you also roll one extra die for each hope missing at the start of this final test. So, if our hope marker was here, we'd roll three extra dice. But, as usual, and as it reminds us here, you will still only roll at most seven dice. But don't forget, other players with characters at Mount Doom during this roll may also spend resistance symbols they have to reroll dice as usual. If after making
this final search roll, the players have at least one hope remaining, the players all win. On the other hand, if your hope marker hits the bottom space, either during this final search or at any time before this, the players all lose. You'll find a handy guide here in the rules to remind you of all the ways you can lose and gain hope during the game. You'll also find suggestions for how to adjust the difficulty, along with combinations of objectives and difficulty levels you might specifically want to try out. You'll also find a handy guide explaining the symbols and rules for setting up here on the back of the rule book. And keep in mind, depending on your player count, there might be some objectives you could draw that wouldn't work with the number of characters you'd be using. And this will be obvious when it occurs. And in those cases, just randomly redraw a new objective. You'll also find instructions for how to play this game solo, which will make use of this included token.
But those rules I'll leave for you to discover on your own. But otherwise, that's everything you need to know to play The Lord of the Rings: Fate of the Fellowship. If you have any questions at all about anything you saw here, feel free to put them in the comments below, and I'll gladly answer them as soon as I get a chance. You'll also find forums for discussion, pictures, other videos, and lots more over on the games page at Board GameGeeek, and I'll put a link to that in the description below. And if you found this video helpful, please consider giving it a like, subscribing, and clicking that little bell icon so you get notification anytime we post a new video. And if you'd like to support us directly, you can join our Patreon team, which I'll have linked below. But until next time, thanks for watching.