Horizon Zero Dawn First Hunt with intro and setup
Games in This Video
1 game is featured in this video — it unlocks as you watch.
Transcript
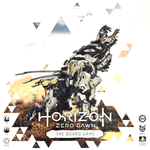
greetings i'm barron and welcome to meet me at the table today we're going to be playing a game of horizon zero dawn we are going to start our hunt in this video we're going to go ahead and set everything up and we're even going to begin the hunt because the setup for this game is not very much it's easy to get to the table and then we're going to go ahead and see if we can hunt some of these massive creatures out of horizon zero dawn for those of you that don't know this was a playstation game that i had played a long time ago and really was a cool game i'm excited to get the board game to the table it's made by steam forged games and it's gonna be a lot of fun we are able to play in three different modes one you can play semi-co-op you could also play co-op or you can also play solo we're gonna do this co-op using two different hunters and we're gonna see if we can make it all the way to the final hunt and take down the giant sawtooth which is this guy right here so we're gonna see if we can take him down now we're gonna quickly quickly set this up and then we're gonna get to plan so let's go ahead and meet our two hunters the first member of our warring party is going to be our kaja warrior she is kind of a nimble-ish type fighter that you're going to see move around the battlefield quite well she has this ability called nimble as well and it says when making an evade roll that only contains orange dice you may roll an extra orange die then discard a single die of your choice so that's her power and you're going to see how that works during the playthrough but for now we're going to place her right there now of course each one of these characters does get their own set of starting gear and each one plays a little bit different which is pretty cool she does have these silks light card jar it is allowing her to roll that orange die for defense and this symbol right here is a critical and so she gets to critical she's going
to get three defense and now this is going to go of course combo off of her power for nimble so when she actually gets attacked she's going to be rolling these dice and with her nimble she'll be rolling an extra one and we're gonna be looking for pips basically we're gonna be looking for all these different arrows the more arrows we have the more we've blocked damage coming in and of course these are our criticals if we roll those she's gonna be gaining three of them so we'd roll two and let's say that was our roll i could choose to remove that one so i could get my three defense against what's attacking us now we're going to move into our weapons we do have a carja halberd and it's going to roll orange and blue this is the range of the weapon it's zero this is it's a special ability when you're critical i believe that means she can move three squares after she hits with this she with her critical she can choose to move three now it also has this up here this is how much upgrade you can do on this weapon she can get two different upgrades for it but of course you have to get those from the merchant and we'll see how that goes during the playthrough we're gonna put that right there she also has a ranged weapon it is a sling it can only be upgraded once but it has two range it unrolls an orange die and it also has a critical of plus one damage now you can only use range weapons if you actually have the ammo and the ammo is actually found inside of your deck every person has a starting deck and this is hers so she has these freeze bombs inside her deck that allow her to use her sling which would roll a orange die and also the blue black dye on this and of course this house was a critical that can freeze people and if you roll a critical you can go ahead and use it here if you're the orange one you can use it there
so these are pretty cool cards everyone is a little bit different and each character fights a little bit different now this is not only a action deck it is also going to be your life if at any point you take damage you're going to be discarding cards either from your hand or from the deck itself and at any point you can't actually draw from this deck because they're on the discard pile you have called done what's called fainting in a semi co-op that just means you reshuffle your deck and you skip a turn but in the co-op mode if either one of our characters goes down fainting we have lost the hunt and we are going to have to move on to the next hunt or step of the encounter without having completed the hunt which really is not good at all so that is her she's all set up the only thing left she has is her upgrade tree each character has one of these cards and up here we start at our level one type hunter and we're gonna be moving on down and as we go through our hunts if we're able to do hunts that are more powerful than what our level is we're going to be upgrading our character with different abilities or weapons found inside the upgrade deck of our character for example here's her upgrade deck and you're going to see that she has ones and twos and eventually threes where she's able to get either weapons or she's able to get new abilities or things like that and of course as you go up the tree you have to decide because if you decide to take this power you can't go over here and get these because they don't connect you can only go down the ones that connect so that's our first character our karja warrior the next member of her handing team is going to be nora marksman she is accurate when targeting
components with a ranged attack you may re-roll any number of dice so some of the monsters we fight will have components on their back and if you hit them you can re-roll dice with her because she's very accurate for example if we look at our scrapper here's one of the enemies we may find these are the components down here so she ever targets one of these she'll be able to reroll some of her dice it's pretty cool now of course she does start with some armor she's got her nora protector light which gives her two orange dice and of course criticals are going to give her three defense which is pretty good now of course we've got weapons what would be complete without weapons here we got a spear this has no range and it can be upgraded twice and it's critical is going to give an extra wound and it also controls two orange dice and says if you roll a critical ignore the target's armor when resolving damage so every our monster is going to have armor associated with it again we'll look at our scrapper our scrapper card right here does show that it has one armor and so that would be ignoring it of course if you do ever attack a monster that is not alerted to your presence they don't get to use their armor as it is so it's always better not to attack alert so this power hopefully isn't going to come into effect i hope i just one shot all these enemies we don't even have to worry about that of course she does have a bow hence the picture if she's got her hunter's bow here it can be upgraded once that's two range rolls two orange dice and it does two damage extra with a critical so she's really good at using her bow and of course she has her upgrade card we'll place this down right here and just like our hunter or warrior i mean our card gel warrior she has an entire set of starting cards here as well and here exactly are
here hunter arrows so just like she had those freeze things this one has hunter arrows and you can roll an extra orange die the critical isn't going to help but of course that means you're rolling three orange dice to try to take down these things that's really good and of course they all have their own different cards in here now of course when you go to play cards you can only ever play one of these cards that are have this symbol on them you can't play more than one of those during an attack or action so we're gonna go ahead and place her cards right here she's all set to go we've met both of our hunters now we're gonna go into the setup for the actual game of hunting game of hunting wasn't exactly what i should have said maybe i should have gone with our two play spaces here's our first play space this is gonna be our exploration area now the exploration area of course has our three merchants and as we increase in level and difficulty of the monsters when we fighting we're going to be meeting up with different merchants that are going to be more upgraded so as you can see as these go further our items and cards in here are going to become better these are a pretty big merchant deck and you're able to buy things based on how you do during the hunt i just put the bows on top so you could see kind of how they power up based on how you actually go through the actual hunting this is our salvage deck as we defeat enemies we're going to be drawing salvage that we can use of course to buy some things for example this one would take two scrap to purchase if we decided to buy this and of course what the merchant has is always random we're never sure what they're going to have for us over here is our events deck we're actually not going to be using this deck and i will explain why shortly the next thing we're going to do is we're going to go ahead and we have to decide what quarry we're going to hunt now of course the base game only comes
with one and that is the sawtooth and that's this guy right here we're going to be going against him so we're going to take our hunter's call this is going to be set all the way at the end and if we as we go through our hunts if we run out of time we automatically have to go the hunter's call we're going to see if we have what it takes to take down the giant razor fiend and see if we can beat him in his own game where he lives and what he's going to do all right we're going to see what we can do about that now we have to take the other cards we have level ones level twos and level threes for example here are our level ones here's our level twos and here's our level threes we're going to go ahead and shuffle up our level threes there's four of each there's gonna shuffle them all up put it face down and grab our number twos we're going to shuffle them up we're going to put them down and then we're going to shuffle our level ones and put them down as well now in the semi-cooperative game you would go ahead and pick a leader that leader would draw three of these cards and then he or she would decide which one they think would be the best to play against also there would be a fledgling which is the person that's not doing as well as the other ones in the game it may need a little extra help they would get an event deck card for three cards from the event deck choose one and both of those people would reveal their cards at the same time and then you would resolve what those are we're not gonna be playing the event deck because of course we're playing cooperatively so we're working together we don't need any extra help and we're not allowed to have any extra help but we are going to grab three cards and we would be able to decide as a group what we think would be the best way of course there is still our leader and that's going to be our nora hunt was it nora marksman she's going to be
our leader so she would actually have the final say in this but we're going to look at these and figure it out together so we do have three different cards here now let's go ahead and look at some of these and figure out what we're going to do i'm going to take one of these just to show you what this is all about first off of course we have our map this is going to be the two tiles we're going to play on this is going to be the amount of extra resources we're going to gain if we defeat every monster on the board also up here is the difficulty and it also shows us how many hunt point victory points we need in order to be successful in this hunt we're really playing one or two players so we need to have two and this is gonna be the type of terrain that is gonna be found on these tiles when we place them down and these are the enemies we're gonna find and where we're going to find them a and b are going to be where they're located now of course we have three different cards here that we can choose from and we have to decide which one we want to do now i believe this is going to be i think the card we're going to do we're going to do this one the reason i'm doing is because i'm gonna get one extra one if i beat it this one's gonna have two extra ones if i beat it so i'm guessing that's a little bit tougher and we're gonna go ahead and do probably one of the easier battles we can right off the bat i'd hate to look like a terrible hunter in the very first game what a bad hunter i'd be if i failed oh besides i'm not really a hunter anyway i've actually never gone hunting i've gone fishing that's about the closest thing i've come to hunting is i can't fish but i don't actually hunt so this will be really awesome to do and i guess it's about the closest thing i'm going to get to it so again we're going to need to hunt points in order to succeed in this hunt we're get one extra salvage card if we actually can defeat all the enemies we're going to be having some boulders
out on the board we're going to be fighting against both our watchers and we're also going to be fighting against our one of those are those striders i think is what they are but we're going to go ahead and look at both of these enemies and the board and everything right now so we've chosen this card we're going to place these two we have past these hunting spots we're not allowed to go for these so we have to discard these two cards and we're going to go ahead and put our deck here our first one is gonna go right here and then we're gonna have some other ones fill up as we go so this is our first hunt let's go ahead and set it up and see how it goes i've set the map up the way that the card explains it and the way you can tell is these little dots down here are the actual numbers for the board itself so 2a is down here so i've matched it up so that it goes along the 4a board in that area so all three of our map tiles are set out exactly how they're supposed to be now on these map tiles we see many different things going on this is some tall grass we're able to hide in that we're also seeing paths these are the paths that the enemies are going to be moving on if they're not alerted so we have three different paths and one for each of these boards if any time a monster or an enemy moves off the board then you no longer able to hunt it it has got away and it could affect you by not being able to gain the amount of victory points you need also you wouldn't be in the salvage if you did not defeat everything in the hunt area now of course we're going to go ahead and put down our boulders we're going to be putting them on all the squares that we see out here on the board so if we look we have a square here and we have a square up there so we're going to go ahead and
take our two boulders here and place one here and we're going to place one here now each one of these terrain pieces does something a little bit different i'm going to turn it because i'm just like that i want to kind of make it look like it's good and there we go perfect i like them like that i like it so they're all facing the right direction i'm a little weird like that okay they're all set up and ready to go now of course every one of those does something a little bit different the rocky outcroppings or also boulders are the ones that are going to give us one additional glory point but that's used only in the semi-cooperative game if you're playing that obvi the goal of the semi-cooperative game is to be the greatest hunter of the group and to do that you're going to be gaining glory points the more glory points you have the more people look up to you and the more you become a glorious hunter but in the cooperative game of course we're working together we're not looking to see who's the best we're just looking to see if we can take down that sawtooth so the glory points aren't really going to matter but what it is going to do is it also allows us to be the most recent activated hunter on the board when it comes to what the monsters are going to do so if you had one of your partners is not doing so well you could jump onto this rocky outcropping and then if they were to choose who was the most recent activated hunter it would be the one on the rocky outcropping so that's what these rocky outcrops are going to do are they going to come into effect i don't really know we'll see how this transpires now of course we do have to put our enemies down and our enemies are going to be decided by the a and b so we're going to place all the watchers on a so we have our little watcher minis here here's our watcher painting them all up he looks like this these are the watchers
they're going to go ahead and go on a so we're going to place one right here we're going to place another one right over here and i've placed them in a way so they are following their designated path if you've ever played the video game they actually do walk on a designated path that your character can actually see the path that they're walking on based on how the game unfolds the other one we're gonna place down is we're gonna place down our strider and our strider is going to go and be here as our strider he's kind of a giant looking horse that has been manipulated and recreated through machinery we're going to go ahead and place it right down here that is where our horse is going to start our strider now we do have our two characters we have our kajara warrior she's right here she's also painted up and ready to go and we get to place her and our hunter anywhere on the board edge of the card tile that is highlighted with this dot this big giant dot here the highlighted one we're going to go ahead and put it anywhere on the outside board edge i'm going to put her right here hopefully we're going to take this watch her down on the first turn we'll see if that happens now of course we have our nora huntsman or marksman as well she's also painted up and ready to go she is going to go ahead and i think i'm going to place her right here on this board edge i'm going to hopefully have her take her on and her take around but actually no i lied i'm going to start her over here because she does have that arrow bow that's really good now does she have any heroes i don't know hopefully we draw a few otherwise we're gonna be in trouble and maybe right there that would be okay at least he's two squares away of course as these monsters activate you're gonna see how it works but you don't want to be standing next to a monster when it activates i'll
guarantee you that right now because that's how they're gonna activate they're going to see you and they're going to start coming after you so that is our setup we've gone ahead and got our board set up we have our two hunters set up and we've also set up our exploration area and we've already done the expiration phase how about that that's pretty quick to do and that's it if you're excited to see if r2 hunters can take down this hunt and continue to become the greatest hunters in horizon zero dawn then i need you to meet me at the table to say the human race
all humanity now to begin the first turn our nora marksman the leader is going to go ahead and draw her five cards from her action decks we're just going to give him another quick little truffle shuffle here and we're going to draw five one two three four five and see what she has got she has sliding shot the hunter may make a dodge before checking the range of this attack if the hunter kills an enemy during this activation they gain an additional glory point and i can only play one of these on my turn at a time we've got some hunting arrows i'm absolutely fanta oh we got football entire arrows that's awesome critical hit play after this hunter destroys a component to draw a card from the salvage deck so she might want to start going after that strider because she's the she can do all these extra things against characters components our watcher does not have components and i'll show you that as we look at our enemies and we're guessing guess we're back to sliding shots we got two of them that's awesome so we're gonna place our cards down here and we're gonna decide what we want to do with our nora marksman now at this point i'm allowed to do two actions with our hunter after this hunter has resolved her actions we're gonna move over the enemy step so it's gonna go back and forth between hunter and enemies hunter and enemies it's not both hunters then the enemies it's going back and forth so actually ending where you need to be is kind of strategic if you if you want to actually be able to attack this character like in your third turn you might want to be somewhere down the path but we can't be on the path instead what we're going to do is we're going to do some of our actions now the actions i could do i could either sprint which will allow you move two squares but of course if
you're sprinting you're going to be way more noticed if you ever move into a square adjacent to any enemy they're going to become alerted to you or of course if you start adjacent to an enemy when you sprint you're gonna alert that enemy as well the next thing you could do is sneak and of course that could help you because now you're not alerting those enemies you can move to one square in any direction including diagonal and it'll be a safe move now of course if this academy ever activates adjacent to your character it will be alerted so if i decide to sneak over here and then do something else like we'll see some of the other actions and this activates before i do i'm able to kill it i would still be adjacent to when activates and it would be alerted so we're going to go ahead and look at the rest of our actions some of the other actions i can do is i can craft which is kind of like healing your character you're able to take three cards from the bottom of your action discard pile and put them into your draw deck and you must you may actually use both of your actions to do this returning up to six cards to your deck now that is the only action that your character can do twice in one turn so i can't sprint twice i can sneak in sprint i cannot attack twice i have to do two different actions of course the only one i can do twice is that craft action another one i can do is i can distract an enemy which i can choose a target square of a non-alert enemy within two squares of your hunter and move the enemy one square towards the target square so i could again make it go over here i can make it come towards me that's how i could do it i could distract it of course i can do a ranged attack or i can do a melee attack and both there are
a little bit different of course range attack you have to have line of sight which means you have to be able to make a path to the enemy you're doing that doesn't go off the board or through other like bigger things now the other thing you can do with a may attack which is a little bit different than i want to show you is that if you decide to do a melee attack you either have to be adjacent or in the same square as the enemy when you decide to make your melee attack you actually do move into where that enemy is if you're not able to defeat the enemy you do actually have to move out of the square too you're kind of dodging back out of it or evading back out of the square i shouldn't say dodge because that's what you do when actually they attack you so those are the different actions we can perform i think for our nora marksman we are going to start by doing a ranged attack now the only way you can do a ranged attack of course is if you have ammo and we do have our hunter's arrow so we're gonna be rolling one orange dice for our hunter's arrow and we're gonna go ahead and look at our bow our bow of course has a range of two enrolls two orange dyson itself and of course we are going to go ahead and shoot this guy hence the reason he's on the screen we're going to go one two and shoot him with our bow and see if we can take him out in one shot now before i roll my dice i do want to show you a little bit about our watcher each monster is going to come with a card like this it's going to have its stats over on this side and it's going to have some abilities over here and potentially some components that go along with it our watcher over here has four health it has one defense which will reduce your damage every time you attack it it doesn't just you don't just knock off the defense you have to worry about anymore it's always going to have the defense unless of course it is not alert
when you attack it which in this case it is not it also is going to give us one salvage card when we defeated you're going to gain one glory point and it's going to give us one point towards the amount of victory points we need for this hunt if we're able to take out this watcher it looks pretty cool and these carts are really nice all right we're gonna go ahead now and see what we can do to that watcher with our bow and arrow we're gonna attempt to aim right at its eye and see if we can take it out so i'm going to gain my three orange dice and we're going to roll these up and see how it goes we got a critical and we got two hits so that's going to be a total of one two and their critical is gonna give us another two so that's four damage that we have done to our watcher and if we look at the cardigan of course he's got his four our health but he also has one defense but since he is not alerted he does not get his defense which means r4 is enough to take out this watcher we one shot at him with our magic hunter bow which is awesome i'm a huge fan of the bow and we're gonna go ahead and gain one salvage card for that we're gonna discard our hunter's arrow that we used and we're gonna go ahead and gain a metal shard we're going to put that right up there that is from our salvage we're able to gain a metal shard from killing that watcher we're going to go ahead and remove our watcher from the board and we're also going to gain one of our glory tokens now i know we're not really playing for glory tokens but it's always fun to have some kind of rivalry for her second action she is just going to go ahead and sneak over into the tall grass before we move into our enemy phase i do actually want to draw her cards i should have done the
beginning of the game one two three four five but i was too excited to hunt that watcher that i forgot to draw her hearts so let's go ahead and see what she got she has gotten silent strike allows her to use a blue dye and it does an extra four if it criticals and it says this ammunition can only be used if the hunter is on a square containing tall grass at the start of its attack so it's got that's got follow-up play after this hunter inflicts a condition with an attack to move into the same square as the target and perform a free melee attack if this attack kills the target this hunter gains one additional glory point that's pretty awesome then we got blazing strike if this target suffers a condition at the start of the attack additional two it'll suffer an additional two damage then we have anatomical precision after this hunter makes an attack they may reduce the damage inflicted by one to draw two cards from the salvage deck then keep one and discard the other oh that's really good that and it happens after the attack that's awesome so we're going to go ahead and place these down and nothing is really going to matter but i want to make sure she had them just in case she could affect the enemy's step the enemy step begins by activating alert enemies there are no alert enemies on the board because our first hunter was able to take that one out with just one shot that was awesome that's really really good so we're going to go and move our non-alert enemies and of course it's always starts with the enemies that are closest to the most activated hunter so our hunter down here is the one that activated which is why we're zoomed in here because our strider is up there that will activate second because it's farther away now these enemies can become alerted in
multiple ways of course taking damage or getting attacked will alert it if any other alert enemy enters its square it will alert it also if another enemy is attacked in the same or adjacent square these will become alert the other things that will alert it is if it starts its square in the same place as a hunter is so if i was hearing it started activation it would be alert now it also will start if anybody is act if there's any hunters adjacent to it it will also become alert unless they're in tall grass and i am standing in my tall grass that's awesome so i'm not going to alert that enemy now any hunter sprints or into an adjacent square or is adjacent when it starts sprinting you would also alert your enemies as well so where i am right now i'm not gonna let this enemy it's gonna be awesome so this enemy will then just move one space down its path trying to get off the board without us killing it because that would be good for it and bad for us our strider is in the same predicament he is not alert he's just going to go ahead and move one into this tall grass and who knows maybe eat a little bit of it looking at our kajara warrior we're going to go ahead and start her activations now at the beginning of your turn you can choose to discard any number of cards from your hand and draw back up to your hand size which is five of course unless you have a bonus of some kind but remember this is also your life so if you're discarding all these cards to redraw cards and anytime you take damage and you can't discard any cards you will become faint or if at any time you can't draw cards you can become faint of course you can get these back in by of course doing your craft action
we're not going to be discarding any cards i'm absolutely thrilled with the cards i have so we're going to go ahead and see what she can do we are in a super primed position to go ahead and hit that thing with our silence strike we of course do meet the requirements because we are the square we're in is our tall grass so we're going to be able to use our silent strike card and we're going to be attacking with our halberd so let's go ahead and roll our dice which is going to be one blue from this card and an orange and a blue from this card oh this is going to be awesome we can hopefully take this guy out in one shot so we are going to be attacking with our halberd and our silent strike card giving us two blue and an orange and in case you're wondering our orange consists of one two three of these one pips a double pip a critical and a miss the blue dice are better look at this they only have one two normal ones they've got one two one two three doubles and a triple so they've got an absolute monstrous amount now they don't have any critical symbols on them but that's okay this one has the critical symbols if i need to i can get my four attack from there or i could use it to do my three move we're gonna go ahead and roll these up and see what we get we got a total of one two three four five we did not get any criticals which is kind of sad i was hoping to move three actually at the end of this would be pretty cool but we got five of course we know our watcher only has four health and he is not alerted he got stabbed really badly before he was even able to know what hit him we're going to go ahead gain a salvage and just for the heck of it we are also
going to gain one glory point that silent strike card really worked well so we're going to discard that one and this did 5 damage to our watcher so i'm actually going to play this card as well anatomical precision after the hunter makes an attack then we reduce the damage inflicted by one to draw two cards from the salvage deck then keep one and discard the other i'm gonna do that as well because i would have still done four damage to it so we're gonna draw two cards from our salvage deck and see what we have found we have found a sparker and a blaze now sadly i haven't played this enough to know which one i should keep but i'm gonna go ahead and keep a blaze that sounds like a fun one to keep we're gonna go ahead and discard this one now we did kill the watcher so i get to draw another card from our salvage deck and we have found what says ancient statue discard this card during the merchant step to reveal the top three cards from the merchant deck and purchase one of them at a cost of one shard these once this has been resolved even if the card is not purchased shuffle the other cards back into the deck oh that's amazing so we're gonna go ahead and put that down here with our kajara hunt warrior now she does have one more action but i'm going to forego that action i like to be exactly where i am now that we have completed our actions there is a third step in the player phase that i haven't talked about because it only really plays an effect once you actually have enough victory points and we do have enough victory points here we only need two we could choose to end our hunt right now if we wish to and that step is called the maintenance step if we have decided we have enough
points to move on we could choose to end right here i don't want to do that i think we have enough to go ahead and take down that last creature and gain the extra bonus of one salvage so we're gonna forgo moving on and have a successful hunt and continue into the enemy step we're gonna remove this enemy from the board and we're going to go ahead and move our strider since our strider is a non-alert enemy he is just going to go ahead and continue following his path this brings us to norah's turn who's going to go ahead and draw a card because she has four cards here she's going to go ahead and grab innovate add an additional orange dye to this attack oh my gosh that's amazing all right let's see what she can do remember when i said i had a plan but it might not be a great plan but it might be a plan we're going to go ahead and first start with her she's going to dash or sprint i should say two squares up into some more tall grass i like this tall grass stuff and from there she's going to go ahead and make a ranged attack again using her hunter arrows and that bow again because this is going to be awesome now let's go ahead and talk about our strider for just a second our strider has a blaze canister here right with two tear value is what it's called it also if i destroy it the enemy is going to suffer fire damage which will be awesome and if i do destroy this it's going to take two damage of course i could maybe just damage it which will if i get half of the damage on the actual component i would damage the component which means it'd be even easier to kill next time
but we're going to go ahead and probably just target it with that arrow and blow it up i don't see i really hope we don't miss this we got three orange dice to go against that canister i'm going to go ahead and i have to choose right now if i want to go against the strider or against a certain component i'm choosing the component mainly because of we have nora of course our marksman here that has accurate when targeting a component with a range attack you may reroll any number of dice now we're gonna roll our three orange dice and see how we do against that canister we got a total of one two which is the tear value now of course it does get its defense if it's alerted but it is not alerted so it is not going to be able to deal with this damage i am going to destroy the the component but i'm also going to roll again because i can because i'm accurate and we got three just for the heck of it we have destroyed the canister super good we have totally destroyed the canister and i'm also going to go ahead and play critical hit play after the hunter destroys a component to draw a card from the salvage deck i'm going to discard this card and grab a card from our salvage deck and see what we have got we got well what do you know a blaze canister so we're going to go ahead and this character is gonna suffer two damage and it is now on fire wow we're gonna place two damage down on this card normally you could go ahead and put it next to the model but there's only one on the board so i'm just gonna go ahead and place it there and we're also to place a fire token on it as well when it ends its activation it is going to take one damage from that fire token and if that fire token is actually what kills the enemy
the players will get the listed encounter points but we're not going to draw from the salvage deck or gain glory points so you want to make sure you don't kill him with fire but fire is pretty good because now he's going to actually get half health by the time he's done with his thing also we are going to put a destroyed token on our blaze canister we have these tokens this means it's damaged and this means it's destroyed so we're gonna go ahead and place it right here some enemies this would affect their ai on this enemy in particular it really doesn't of course destroying it all it does it started on fire we are gonna resolve its herd instincts where it says when the enemy becomes alert it moves one square towards the closest enemy and guarantee right now he's on fire and wounded he's super alert so since our characters are both equidistant he's gonna go ahead and move one this way because this is the character that is not only alerted him it's the most one that has activated the most recently with her turn done we're now going to go in the monster's turn and we're actually going to see what these monsters do we didn't one shot at this time we're going to go ahead and look at the the ai card of our strider it's going to start right here it's going to ask is another enemy within two squares yes there is an enemy within two squares that's her and her and of course this is the one that's most recently activated so it's going to go after that one it's going to move two towards the closest hunter and it is going to attack with a melee attack of four damage so this is gonna come barreling into this square and attack her for four damage now the monsters don't roll dice we're going to be rolling our defense dice against this now if you notice these are black and these are
blue it's always going to do the black ones it's going to go ahead and deal with the blue ones in a different situation they're what are considered conditional steps it's going to start at the top and move down if it meets a condition it will go ahead and do that for example if we look at this one again if so for example had like an attack or something it wouldn't do that it says is another enemy within two squares no it would move one towards the closest enemy well that's not going to help it it could move two towards the closest enemy and it would actually attack it's that's going to try to do what it can to be the most beneficial at this point nora has to go ahead and evade she's able to use her two orange dice to try to evade and again we want to get these little pips because the more pips we get the less damage we take so we're going to roll up our damage our dice and see we got we got a critical and we got a one wow that's absolutely rocking so the three critical is going to give us three defense and this is going to give us one so that's four we totally nullified the attack of that strider now if the strider would have had a condition that would have been placed on us it wouldn't have been able to do it because it didn't do any damage to us in order to place conditions onto characters or enemies you actually do have to damage the person not just make the attack now before we continue on with what this is going to do to our strider because of course our stride is about to take one point of damage from fire i do want to talk about our card again it's right here is there another enemy thing two squares so the difference with the way this game works is enemies are actually the your enemies not his enemies so are there any any enemies within two squares no there were not because there's no other enemies on the board
yes move two towards the closest hunter in attacks so if there was another enemy within two squares which say there was another hunter or another one of these things right here it would have moved over and attacked but since there's no then it's going to go to these conditional things it's going to move one towards the closest enemy again there are no enemies boards so it is going to forgo that action it's then going to use the second action to move two towards the closest hunter so the hunter is you the enemies are your enemies not its enemies so it's going to move towards the closest hunter and then it was going to attack so the attack is still going to happen and everything's resolved the way it's supposed to i just misun explained how this card works and i want you to understand how it does because it's going to become more advanced the bigger and more intricate the enemies we fight are so this enemy has completed its activation it's gonna go ahead and place the card back over there it is gonna take one damage because of course it is going to be on fire now that it's taken its one damage we are gonna remove the fire token the other token i forgot to place is its alert token and while of course it's highly alert this now that it's in our square the only thing left to do is we have to dodge we have to dodge out of the way if you've ever played the game as you're attacking these things you're dodging all over the place and rolling around and i'm going to go ahead and dodge over to here you have to always move out of the square you're attacked from that's how this game is played so our strider has completed its activation it's now going to go on to our carja warriors turn
our cargo warrior has three cards she's gonna go ahead and draw two we're gonna see we get we found a freeze bombs awesome we found two freeze mods these would be fantastic to attack with but i'm sorry we're not gonna do that i've got too many other great plans i do have a couple options as to what i'm going to do to this poor strider one of the things i could do is i could go ahead and play my freeze bomb which would give me a black dye and an orange die to go ahead and attack this strider most likely i wouldn't kill it by that but if i'm able to conflict this condition i could go ahead and combo it with my follow-up card play after this hunter inflicts a condition with an attack to move into the same square as the target and perform a free melee attack if the attack kills the target the hunter gains an additional glory point so that's one of my options of course it's very situational i have to roll that symbol on a black dye which is a 50 50 chance on that black die or i could go ahead and sprint into that square and use my silent strike and this ammunition can only be used at the hunter is any square containing tall grass at the start of the attack and i could go ahead and sprint one two into the tall grass and make my attack and i believe that is going to be our best plan playing our silent strike and our halbrid card gives us two blue dice and an orange dice she's pretty cool she gets a lot of really good dice all right we're going to see if we can take out our strider in one shot here we got a total of one two three four five and our strider has a total number of health equal to six but of
course it's already taken three damage so that means i only need three to kill it but it does get to use its defense because it is now alerted so it's gonna be able to block one of them but guess what sorry mr strider these four attacks are gonna get through and you're gonna go down and i'm gonna gain a glory token and i'm also going to gain a salvage card we're going to take our glory token and we're also going to gain a salvage card just for the heck of it here we got a glory token we got a metal shirt so we've got three salvage cards and of course our other character has two that's the end of our first round we were able to take out everybody on the map meaning we're gonna get the bonus of one salvage card so our kajar warrior is going to go ahead and gain another blaze canister and our hunter our marksman nora marksman is going to go ahead and gain a blaze canister as well while we're blazing everybody's blazing that's awesome and we're going to move into the next step after absolutely annihilating those enemies we're moving into the third step of this and that's the campfire phase now of course we did a really good job we got some great die rolls but you also remember that was probably one of the easier fights in this game and it's going to become progressively harder as we go so we have to enter into the campfire stage buy some new equipment and level our characters up so the first thing we do in the campfire stage is we determine the victory step of course that's not going to happen in the co-op version we're just going to take our first player token and move it on over to our kajara warrior she's going to be the first player in the next step so she's going to draw the cards and we're going to decide together what to hunt but then she's going to be taking the first action
the next thing we're going to do is we're going to go ahead and move into the second step which is going to be our level up step so we're going to take our card here and if you complete a hunt that is a higher experience than you are you're going to gain new upgrades for example we were level zero and we completed a level one hunt so we could either add two elusive cards or a prideful card to our kajar warriors cards so let's go ahead and check these out the first one we have of course is prideful it says this hunter may discard one glory point to re-roll an attack if the re-roll attack is either destroy either destroys a component or kills the target this hunter gains one additional glory point this might not be too bad because i don't really care about glory points so that's one thing to think about the other one we could do is we could add in two elusive cards in elusive states after resolving an evade roll this hunter may perform a sprint action instead of a dodge roll remember whenever a monster attacks you in your square you have to move one square away this would allow her to sprint meaning she could move two squares away if she wanted to after being attacked by a monster or i could take prideful so that's something to think about let's go ahead and look at our nora marksman and see what she can take she can either gain a new weapon the carja bow or she can gain the trait scavenger let's go ahead and take a look at those the first one we have is scavenger scavenger states whenever another hunter kills an enemy you may draw a card from the salvage deck wow that
seems really good and this is going to be out on the board at all times now the other one i could take is our kajar hunter bow which is going to give us a blue die a critical of four and it shoots at a range of two now let's go ahead and look at our bow that we have right now our hunter bow i actually don't think we're gonna take it two orange giving us only two criticals so it's critical is better it gives us a blue dye instead of two orange dice and of course our weapons that we fire with give us an orange dye i think we're going to keep our hunter bow i'm not going to go for this we're going to go ahead and take our scavenger instead and with our kajara warrior i'm going to go ahead and take prideful i think that's going to be really good so we've gone ahead and leveled our characters up the other thing we have to do as we level our characters up is we're going to gain more cards to our deck which means our we're going to be able to last longer it's kind of like gaining hit points we start with 16 we're going to go up to 18. now we don't gain any cards from leveling up because we decided to take this scavenger card instead so we're going to add two stamina cards to our deck all these say is draw a card so we're going to go ahead add them to our deck they kind of give us more life but it's also going to give us the ability to draw some cards if we want to so we're going to give two to our our what is our marksman we're also going to give two to our warrior as well because she is also going to gain two cards because she starts at 14 and now she has 16. with our level up stage out of the way i'm going to go ahead and move our cards a little bit we're going to go ahead and i'll just put these with ourselves right here that's fantastic and we're gonna go into the merchant step where we're gonna go ahead
and take our level one merchant deck which is noticed by this symbol up here that's a level one merchant deck and since we defeated a level one encounter we're gonna grab some level one merchant cards we're gonna shuffle these up and we're gonna draw a bunch of cards okay here's how this is going to work i'm going to go ahead and draw cards until we meet the requirements of the merchant and our first card we drew is going to be a trip caster a jar trip caster this is going to be a bow type weapon or it's going to be a weapon card you're going to draw one weapon card so we have our weapon card out and we're going to keep on drawing we got a satchel this is going to be a miscellaneous item card we're going to put that down here we're going to draw again we have found an upgrade modification card we're gonna put that down here now we get two of those we're gonna draw another one we found another damage modification that's fantastic we'll draw our next one now we already have two out here so we're gonna go ahead and discard this one that one isn't gonna be in effect we've got another one we're going to keep on drawing we got shock wire this is going to be a ammunition we're going to put one of those out the only thing we haven't found yet is an armor card so we're going to keep drawing until we find an armor card and sadly look at these fire arrows they're just disappearing hard point arrow fire arrows i would so like to get these the shock wire really sadly isn't gonna do anything unless i decide to get both of these things together but we'll see how this goes another coil we don't need that another arrow another health potion which would be in our item here but we already have one of those okay there's got to be some armor in here somewhere but notice how you just keep drawing until you find what you're supposed to
we're going to keep going we've oh we finally found something we have found we have found baku ice hunter light armor it's going to give us a black dye and this hunter is immune to ice now this is a totally random piece of equipment because this black dye is a 50 50 roll so we're going to go ahead and put this here let's take a look at all the things we have that the merchant has put out here and then we're going to decide what we want to do of course we do have one more special thing we're going to be able to do but we're going to start here we of course have our kajar trip caster it's going to cost us two of our metal shards in order to get now of course i only have one metal shard here you can use any resource as a metal shard in a one to one ratio and you can use any two metal shards as a resource of your choice in a two to one ratio so that's how that works this is going to have no extra effect if you do a critical it gets one orange die it has a range of two now like i said this trip caster is going to fire these type of weapons and of course our shock wire is the only one we have up here and it's going to cost one salvage or sorry one metal shard and i get to invoke shock to the person and i get to roll a blue die so putting those together i would be doing a blue and yellow die invoking shock but of course that's at three shards to do all of that i don't know if that's worth it because again this gets shuffled into your deck which means i would take out one of my stamina cards in order to
place it in our deck and is it ever always going to come out who knows there's a lot of cards in our deck next we got our hoarder satchel this one says it's going to increase the hunter's hand size by one might not be a bad thing of course i am going to need a metal shard and a sparker which we decided not to keep because i didn't know which one to keep look at all these we've got a damaged coil it says right here on a critical hit this attack inflicts an additional one damage in addition to any other effects then we've got a resist melee weave reduce the damage suffered by this hunter from melee attacks by one these seem really good and oh you know what that might actually pair really good with this because even if i roll terribly i can still reduce the damage by one which wouldn't be too bad of course this is gonna cost us three shards and this would cost another one sadly i don't know if we're gonna be able to pick these up now of course before we continue on there is one more thing we have to do and that is going to have to do with our kajara warrior she has this ancient statue that she found it says discard this card during the merchants that reveal the top three cards from the merchant deck and purchase one of them at the cost of one shard once this has been resolved even if the card is not purchased shuffle the other cards back into the deck so we're going to go ahead and grab three cards we have found nora survivor light that makes me sad because nora doesn't have this it says reduce the damage from attacks that inflict any of those status
ailments by one hull but of course it costs something i don't have we're going to put that over here because i can only buy one of these three oh it doesn't matter it's only going to cost me one salvage oh look a better sling this might be totally what we get because she uses slings that's going to be awesome it does two yellow dice what does this one do just one yellow dice i bet i bet it is one yeah it does and it's got a range of one both of marina two this one's gonna do two on a critical oh that might be something we buy all right sorry mr sling you might be going by the wayside and our third one is a fire bomb which is going to be an arrow now sadly i can't use it so i think what we're going to do for one metal shard we're going to get that kajara sling i think that's going to be awesome i'm going to go ahead and take this that's why not i don't see why we're going to keep the other one we're going to do that just like that all right now these get shuffled back into the deck just like this there we go just shuffle it like that i'll shuffle later we're going to discard our metal shard and now we have to decide what else we want to get now of course she has two blades and she's got all this other stuff two blades and a metal shard now if we look at her she does have this one that gives her one die but she gets to roll two dice and take the one she wants so she's almost guaranteed three two at least one or two every time she dodges the other one on the other hand she gets two of these and but this is really good too i don't know what to get here i'm gonna leave let everybody go ahead and decide what i should do now remember i can spend one of these in a one-to-one ratio with to gain metal shards so these are all up for grabs
or of course i can discard two metal shards to equal anything else that pretty much null and voids this because i don't have enough metal shards of course i do have the trip caster in the shock wire i could try to get into my hand and into my person if i wanted to get rid of the hunter's bow but of course our hunter bow is too and i've got a lot of arrows in there so this is something we have to decide how should we go about equipping our characters to move into the next exploration phase and decide that we're going to fight i'm going to leave that up to you in the comments below so far we're doing fantastic we easily took out that first encounter i'm super excited this game is really really cool i'm really excited for the tactics of moving around on that board and having decided how to take out each enemy and when to take them out i think that's amazing i love the cards that we have and i love the way each character fights a little bit differently she only shot she only meleed attacked it was really cool to see the total difference in the way this attack of course now she has this new sling maybe we might be doing more attacks with her like that and who knows who this one might run in instead all right that's where we're sitting right now i hope you're enjoying the play through so far we've gotten through our first hunt we've got i think three or four more before we hit that hunter's call if you did enjoy this playthrough don't forget to like subscribe and hit that bell symbol so you know when the next part of this video comes out also please feel free to leave anything in the comments below not only do i want to know your opinion on what we should do i want you to tell me what else you think about the game are you enjoying it are you not enjoying it what do you think again thank you so much for watching and if you're excited to see if nora marksman and kajar warrior can
be the greatest hunters in all of verizon zero dawn then i need you to meet me at the table your enemies