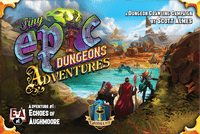
Tiny Epic Dungeons Adventures | Playthrough
Transcript
Hello everyone and welcome to Meet Me at the Table. This is Colin and today I've got a treat for you. We are going to do the first adventure in the eight adventures that are in Tiny Epic Dungeons Adventures. Lots of adventuring, right? Uh this game is a standalone expansion for Tiny Epic Dungeons, but now instead of the game being a one-off experience, you can actually play multiple chapters back-to-back. You'll keep your loot, you'll go through a story and I'm really excited to show this to you. Do make sure though to turn on your Klingon in case I make any errors and miss them in editing. A lot of these cards it's sometimes hard to interpret what exactly they mean and I do have the card reference of this appendix. I've printed it out, but in case I misunderstand something, I'll put those notes in the Klingon subtitles as well as a pinned comment on this video. Without further ado, let's go ahead and read a little bit of our story, then do our setup and start our playthrough. Adventure prologue, a simple quest. The porridge, though unremarkable, offers a warm respite from the journeys of monotony.
After weeks of stale provisions, any home-cooked meal is a welcome change for you and your companions. You sit around a modest table in the main hall of the watchtower perched on the cliffs of Goblin Coast. The crackling hearth chases away the chill of last night's storm, which still drones on outside. This room lacks the grandeur of Castle Edinmoor's dining hall from where you set out from almost a week ago, but it has a certain rustic charm. The tower keeper, a stout elderly man, hurriedly clears your bowls, his demeanor a mix of anxiety and gratitude. "Forgive the humble fare, esteemed guest," he mumbles, "but visitors are rare in these parts. For the first time in years, peace has settled over the continent. The echoes of the Great Sibling War, where the queen of Jordan repelled her brother's attempted coup, have faded. The treacherous brother, a dangerous but defeated sorcerer, now wanders the waste in exile. In this rare reprieve, you lot are heroes for hire aiding a recovering land to build back from decades of turmoil. Monstrous armies and dragons no longer threaten the countryside and people stitch their lives back together with routine and resilience. However, the towers keepers missive sent a fortnight ago seemed dire. South Abbey, a village a day hikes north, is on the brink of ruin due to a sinister curse.
The villagers pooled their scant resources to enlist your aid in recovering the echoes of Augmore, a magical set of relics believed to hold the key to their salvation. The storm outside dwindles to a drizzle and the sun timidly emerges. With appetites sated and gear partially dried, your party embarks on the muddy road towards the South Abbey. Chapter 1, the ruined keep. Upon arriving at the South Abbey, you are met with a disturbing sight. The once bustling village is now a shadowy suffocating place. A putrid stench rises from the blackened barren fields which now seep a foul gray sludge. Ugh. Emaciated horses and livestock sickly meander and the townsfolk despairingly shuffle around with gloom and sorrow etched on their faces. The elderly mayor, a gaunt and weathered man, guides your party to the crumbling remnants of the keep or bar. According to legend, the echoes of Augmore rests somewhere beneath in an ancient king's sarcophagus. I guess well that sounds like a great idea. Howbeit, the keeps catacombs are controlled by a terrible band of kobolds. The townspeople keep their distance fearing the loathsome creatures. After hacking through bramble, you behold the keeps once vibrant courtyard. The grand garden in pastimes with its ornate statue of flora and fountains is now shattered and overrun by weeds. A weathered cobblestone path snakes its way to two large oaken doors on the courtyard's far end leading into the dungeon.
And suddenly, a cobalt appears clad in rotten animal hides. It challenges you with a snarl breaking the serene silence of the hallowed grounds. Now, we open up envelope one and we follow our setup. Our additional rules right now is we don't spawn on any of these mob symbols until we have defeated that cobalt and someone moves on to space A. Here we have envelope one and one of the coolest parts about this game is the envelope itself has all of instructions for the setups. You don't have to worry about having a card in here. There was a card in here I set out which will show in just a second. Over to the left side here, it tells you how to set up your dungeon. I am playing with three heroes, so this is how I've set up my dungeon uh my dungeon deck. There are regular encounter cards and minion cards and I've just shuffled them up in each of these sets and then I've set them out on the board here on the three player which is using the blue ones here. So, I actually have three of these rooms left over. I've set them aside. I have one cobalt that you'll see on the board in the same area where we're starting.
We're starting in these two areas. There are two more cobalts set up on this map tile which we're not going to be able to get to for right now. And then our main objective right here, we need to venture into the keep or balls dungeon into the lower sanctum and then perform a search action with a key to unlock the sarcophagus. Once unlocked, proceed to section C in the adventure booklet. We fail if the torch ever reaches the skull or the ninth mob is added to the dungeon. Those are the two ways you fail. In this game, you do have to win the scenario to continue moving forward. If you lose, you continue to replay this chapter until you have defeated it. For this adventure, we're going to start with a mob called the stinky cobalts. They move up to three. They have only one health and an armor of four. How you deal damage is you have to deal damage higher than their armor and whatever value have above that, you'll then deal damage. So, we just need a five or higher and we'll defeat them. There are a total of eight mob tokens. Three of them are already out on the board and one of the ways we lose is if we have to place the eighth one. And I should say it's actually the ninth one. When we have to place the ninth one, we auto lose the game. We have our three Kobolds here, here, and here. Now, these two we cannot interact with. There's a wall.
So, we cannot move into this area. We're going to have to explore around this in dungeon area. And what's different with this than the base game? You have a set tile amount and they're set up in a specific way. So, I can't just keep adventuring north, south, east, or west. I'm going to have to follow these specific tiles to try and get over here to the sarcophagus. That's where we're trying to get to. I do have my three starting heroes over here. Just know that you can never have more than two heroes in each of these spaces. You can always have them move through those spaces, but they can't end in a space with two heroes. The other way we lose this game is if we just simply run out of time. We have our torch mat and if ever that torch gets down to here, we lose. Because we're playing with three characters, that's why I'm starting the torch here. If we were playing with four, we'd start here and if we were playing with two, we'd start in this location. And at the end of each of our turns, we're going to move this torch down. Let's now meet our three heroes.
Our first hero will be Jolene the True. I wanted one hero of each type. So, one that attacks melee, one that has the missile attacks, and one that uses magic for attacking. So, we have Jolene here. She can move for three. Her armor is five. You can see her stats for her strength, agility, and intellect or magic, if you want to call it. We start with a simple sword that we attack based upon our strength stat, which is three. And we have a bolster effect here that's a free action. We can spend two of our focus. All heroes within two rooms of us can gain one health. We You have this rally spirit ability that is considered a passive. All heroes within one room gain plus one to all their checks. So, when you're doing a check for anybody else, if they're within range one, they get plus one. We have our explorer pack here, and this is how we are going to hold our relic tokens. There are four different types of relics. We can take a free action as long as there's a location that we can do this free action to see if there's a relic there. If there is, then we can put up to two of them on here, and those give us extra free actions. Here we have Jolene's mini, and I think it looks awesome. PJ would probably make this thing look fantastic. Next, we have Ava the brave.
She can move five. Her armor is only three. She's much better at agility, and that's why she has a bow. Bows can only attack in a straight line, just so you know, but there is a range, range of two. And you cannot use one of these in your space. So, she has an enemy in her space, she cannot attack them with her bow. She will add minus one to her roll, though. You can see that minus one there whenever she uses that bow. She also has an explore, which is a free action. She can just spend a total of five focus, which she only has six, but she can spend five, and then she can just draw a relic. She has the scout's vigil. She can, for a free action, spend one focus, and then a room that's within range one, we can flip that over, and then any of the reveal effects won't impact us. That's really, really nice. Here we have Ava's mini. She will have the green base. Our final hero is Echo, our human illusionist. She has the flash bolt attack. So, this is also a missile attack, but unlike the other one where it's in a straight line, this one, because of that little arrow right there, it means it can go around corners. She will test her intellect and subtract two from it. And then, if she deals damage, it's the difference. She also has research, and all of the magic users have this ability. You can spend four focus and just draw a spell card.
That's really nice, because you want to get some spells, and that's the easiest way to get them. She has a Mirage reaction ability. Whenever the enemies activate, she can spend three focus, and then she's able to guard one damage for all heroes within two rooms, including herself. And that can be going around corners, so that can be very helpful as well. With that, I think we're just ready to start our play through. So, we're going to start off with Jolene. On your turn, your hero may perform any or all of the following actions in any order. We can move. We can perform one heroic action, and perform any number of free actions. At the end of your turn, even if you do nothing, the torch must move down one space on its track, resolving any space that it lands on. And we just go to the next player's turn. Our goal right now is simple.
We're trying to get to this sarcophagus and have a key. That's what our goal is. Once we get there, we'll then resolve a portion of the adventure. We do have a cobalt right here. There's a locked entrance here, and an unlocked entrance over here. So, we could take the long way, or we could take the shortcut, but we need to have a key. But, if we use a key here, there's going to be less keys for us to find in this location. So, we've just got to decide what we want to do. Jolene's going to start this off pretty easily. She can move three. She's going to move into this space with this minion. And we are going to attack with our sword. Because our strength is three, we'll roll three of these black dice, and then we do have one counterattack die that we do have to roll for the enemy. If we do not defeat the enemy, we resolve this die. If we do defeat the enemy, we don't have to resolve this die. The stinky goblins have a defense of four, so we want a value of five or higher. How this works.
We're going to look at our dice that we rolled. And actually, I got two fives and a three. We're going to choose one of these dice to utilize for our attack. Well, we'll use a five, cuz that's enough. Now, if any of these dice have a plus, we could also use that to add to the attack. So, this could be an attack of seven instead of just five. But, I happen to roll all of these dice as singleton numbers. So, I'm not going to utilize these two dice. I'm going to use the attack of five. Well, its defense was four, so one more is just enough to take out this cobalt. I'm going to place it on the mat at the highest number that was revealed. So, that was number three because of course we need to make sure we know how many minions are out on the board because if ever we need to place that ninth one we lose. Now, because we did not use these two dice, we can look at these dice for any of the focus symbols and gain that much focus. I haven't used any focus, so that's kind of useless right now, but that will be very helpful later. Let's say I hadn't defeated that stinky cobalt, then I'd be counterattacked for that three damage, and we'd have to look at their enemy card to see if there's any modifiers.
And there is right there that plus one. So, they would have attacked us for four damage. Now, our armor is five, so actually wouldn't have taken any damage from that, but still something to look at and you're going to see that it'll change with all of the minions. Now, since we did defeat one of those stinky cobalts, we can either draw one item or one spell. And I definitely want to do an item, so I'm going to grab an item from here. We picked up the halberd. We can attack with this die using our strength minus one. Oh, that's kind of stinky. But then, we can during a reaction, we can guard losing two health to block one damage for someone. I got to decide if I want to equip it right now or not. Reading about this rally spirit ability, it says all heroes, so I'm thinking it might actually include a Jolene as well. So, really I rolled a six there instead of a five.
Do I want this halberd? Do I want this ability? Really, that's what it is. I don't really think I do. I think I like the sword better and I like having this bolster ability. So, I'm actually just going to discard this. Now, someone else can pick that up when when gain a loot if it they'd like, but I would need to immediately decide right now do I want to equip it or discard it? I don't want to equip it. I'm going to discard it.
You approach two doors that lead into the catacombs below. One is secured by an enchanted lock with glowing runes. The academic amongst you remarks that no spell, physical feat, or lock picking will breach it. Only a key will work. Perhaps you or your companions can find one by exploring the courtyard. The other door, unlocked no doubt, leads to a much longer but more dangerous path.
So now we have the option in this location, we can do a free action once per turn to try and find a relic. We just spend four of our focus to do that. Unfortunately though, not all of the relics are keys, so we might get a different one. So we may want to just keep moving forward or we might want to search there. The other item we need to do is place a spawning token right here, and now whenever we get to a spawning symbol on the torch mat, which you'll see in just a second, we are going to have to spawn a mob in this location. We will end our activation by moving our torch down one space, and now we need to spawn a mob. So I just took out a mob, and now a mob's coming back on the table. This mob will be spawned in this location. Ava will be the next to activate. She's going to move one and do a free action here. She's going to spend four of her focus so she can draw a relic. Free actions do not stop your movement, but heroic actions or moving into a location with an enemy does stop your movement. She'll spend the four focus going from six to two so she can draw a relic. I'm going to draw this one. That is certainly not a key. That relic is a night lamp. When you perform a rest action, also increase the torch by three. So that gives us a little more time in the game. I like it, but it was not a key. You can hold at maximum two of these relics, so I'll place one right here. We'll then take our third movement moving into this space, and activate our special ability. We're going to use our
scout's vigil, spending one more focus, so we're down to one, but now we can flip a door that's in range one of us. Unfortunately, because of this lock, we can't flip this one, but we can certainly flip the one that's here. Oh, so this one has a locked door. Oh, boy, the only way we can put it in is this way for us to be able to enter, or I could put it this way, but then it's locked. Uh let's let's put it this way, but that means we're going to need to find a key if we're going to go through that location. And we can do a special action here where we can push down the torch by one and just get an item because it looks like this is a treasure trove. The cobalt is one space away from us in a straight line, so we are going to attack that cobalt. We would have to subtract one, but we'll also add one because we have Jolene next to us. So, we have a four here. We need a five or higher. 4 + 1 is 5, + 1 - 1 is 5. That's totally fine. That'll work. So, we don't have to worry about this die, and we'll gain three focus back. And we'll remove the minion. And oh, so many ands. We get either an item or a spell. I'm going to go for an item. Oh, we have the scout's jacket. This gives us additional movement. We can spend three, and then within range one open four doors. She That was amazing. That's a great draw for her. She is a scout fiend. We'll gain that three focus back. 1 2 3, we're back at four. That'll end Ava's activation. We'll move our torch down one space, and now it is Echo. Echo
really wants a spell, but you know what we want more? A key. We're going to go here and spend the four focus, hoping that it's a key, so we can either unlock here or unlock over there. We'll spend the four focus, so we're down to three to do this, and we are going to draw a token. And this one is a key. Nice. So, I do think I'm just going to discard this right now so I can unlock that door. Oh, wait. I'm not in the right spot yet. I personally feel like it's worth going the shorter route, so our movement two is going to be a here, and then this is still a free action. We're going to give up that relic, but I'm going to have to discard this key. So, I'm going to find another key later, and we are going to unlock this door to this tile. And do we spend another movement to move into that space? It's a little bit risky, but what the heck? We only live once. Let's go ahead and flip that tile. We found some sort of water tile. This is awesome. We're going to place our miniature there. I believe I can do that because there was a free action to unlock the door, and then I have to keep moving. I couldn't have stopped here. But so, I was here, moved here, unlocked the door, move in, and now in this location I can test my intellect. If I have to get a five or higher, I would just get a spell. We're definitely going to do that. So, I'm going to stop my movement because this is my heroic action. I'm going to roll three dice. We are within range one of Jolene, so I just need a four, really.
Oh, that's great. That's a six. I could heal, but I'm at full health, so I'm just going to gain three focus back. That focus will be awesome. One, two, three because most of the spells use focus. Let's draw our top one. We have the vampiric touch. So, this one we have to test our intellect to get a six. If we succeed, we spend four of our focus, deal two damage to one enemy, and then a hero of our choice can heal, too. Wow. Let's put that there for sure. That will end our activation. We're going to move the torch down. Now, all enemies that were out on the board would activate their reaction ability. For the kobolds, they first see are there any heroes within range two of them? If there are any within range two, lose a health.
Well, the two kobolds are so far away from us, they can't do that. The other thing they could do is move towards us up to three, but they have to have a clear path. They don't right now because that area is locked or we have flipped down dungeon tiles, so they will not move. That's it for Echo. We'll move back to Jolene. Jolene will start her turn by running headlong. She'll move one and then one onto this tile. Let's flip it over. That sadly is not a great tile at all. This one is a minion tile and because she revealed it by moving in, she immediately loses three health. Then we're going to draw It's going to spawn in that location and we do have a free action here. We can spend four focus to draw a relic if we'd like. First, let's take our three damage. 1 2 3, we're down to four health. If ever you go to a zero health when it's your turn, you have to do the rest action which gives you plus three health and plus five focus. You know what minion we drew? Just a bugbear. Oh boy, this thing's got seven health. It has five shields, movement of four. If we attack it with a melee attack, which is what Jolene has, uh she is going to have plus two armor, so you actually have to get past a seven and it adds plus two to the uh die that we roll, the counterattack die, and it's very likely he'll actually get to counterattack. Whenever he activates, he's going to move towards the closest hero and then just deal them three damage. When we hopefully defeat that bugbear, you can see the benefits right here. We can move the torch up six
spaces and then either gain one loot or spell twice, two times. And just so you know, if ever there's something in the discard pile that we want, these will allow us to grab from the discard pile. If they are grayed out, you can only grab from the discard pile. You cannot grab from the deck itself. We'll place that bugbear in this location. I do have a meeples for all of them. They look kind of cool. For example, this guy has that really awesome shoulder pad. I love how he looks. We've only utilized two of our three movement, but an enemy has spawned, so we have to end our movement. Our choices now are we can attack or do any free actions. I do think I'm going to attack with my sword first. I know I won't deal him a ton of damage, but I want to attack him. We'll go ahead and give our dice a roll, and we have Oh, look at this. 5 6 7 8 + 1 is 9. That means I just dealt him two damage, so he'll go down to only five health from seven. Know though, he will counter attack us for two damage plus the two that he has from his ability, so that's four. Although we were attacked for four damage, we have a shield value of five.
Ha, we don't take any damage. What I can do now though is do that one time ability on our the actual tile itself, spend four of our focus so that we can draw one relic. Maybe it's another key. No, it's one of these other tokens. What are these called? The night lamps. There are only three of those. I've grabbed two out of the three of them. There are four keys. We have three of those remaining. That'll end Jolene's activation. The torch will move one more down, and we will need to spawn another mob back in the courtyard. I'm not entirely sure where these are popping out, but they keep showing up, so we'll have to deal with them eventually. Ava is next. Now, she could attack here, but she also has a straight line of sight over to that bugbear. The one disadvantage is where she's standing she doesn't get the plus one from Jolene because she's not within range one. I know this is going to slow us down, but I do think Ava is going to take a move action here and then attack the brute. That way she is within range one, so she gets to add one to her die roll. We'll roll up our dice. We need higher than a five. Oh, this is nice.
We've got a six plus a two, so that's 6 7 8. Oh, we can do this one as well. That's nine. 5 - 9 is a four damage. What I could do is actually increase this and maybe take the bugbear out. As a free action, you can spend two focus and we can increase a die by one. So, we're going to change this plus one into a plus two. That means four damage. We dealt 6 7 8 9 10 plus one from Julian, which is 11 minus one here, which is 10. 10 minus five is five and that's exactly what we need for the bugbear. We just took the bugbear out. What a shot! Bugbear done in two activations. That means we can move this back six spaces.
1 2 3 4 5 6. It's almost at the beginning of the mat and we're going to draw two loot items. Our first one is the Griffin Quill. Okay, this can spend an action and just have everyone within range one heal. Okay, that's great. And then our second one is the blaster. This one is one of the legendary loots. Has a range attack. It adds a plus one. Yeah, we're going to equip this, too. We can have a total of two accessories and two spells. And I'm realizing with Echo, I put this spell in her hand. It doesn't have to go in her hand. That's awesome. That's an extra space. I put them up here. We can have one item that we're wearing and then we can have two things in our hands. So, this is a blaster I'm going to put in my hand here because this is infinitely better. Range two, we get to add plus one instead of minus one. And if we want a long range one, we can actually spend three of our focus to be able to do this. Now, since I used all of those dice, I didn't have any left over to increase my focus. My focus isn't great, but I still have my explorer. I'm going to finish my turn. I don't have any other free actions I'd like to do. But now that one kobold is going to be annoying. We are currently within range two of this one kobold, so each of us here are going to lose one health. Echo is going to react to this using her mirage. She's going to spend three focus, and now she can guard one damage for all heroes within range two, including herself. So, we actually take no damage. Take that, Kobold.
Now, it's going to be Echo's turn. Given that Echo only has a five health, it's a little bit risky, but I do think we're going to continue our movement. We're going to move one, and we could do that free action, but I only have three focus, so I can't. Uh we do need a key. Well, we'll see if Ava can do that or even Jolene. Well, both of Our focus stinks right now. We are not focused. You know what? We want treasure instead. Oh, well. I'm going to have I'm going to have Echo explore here, but this could be bad. Oh, yeah. It's definitely going to be be bad. She's going to lose three health and another one of the minions are going to show up. Three health puts her down to, oh, you know, only two. Oh, boy. We have found for ourselves a wererat. Oh, that sounds great. Four movement, four shield, it adds plus two no matter what whenever retaliating. It is going to move, and then any heroes within range two of it have to test their agility. Whoever fails takes two health.
Ow. Do I even want to attack this? If I My My armor Well, I guess my armor with the with her is a five. Do I take a chance and attack? We could utilize the vampiric touch because this symbol means it can be in the same room, but I'm actually thinking of doing something different. I believe I can rest even when enemies are in my space, so I'm going to go one, two, three, and then heal up to five for my focus. That's my main action. So, then for a free action, I can spend one, two, three, four because that location we do have a relic symbol. We can gain a relic. It's another key. That is great. We needed that key for the sarcophagus. I think that was worth it. That seemed like the best idea given that that wererat's not going to activate until here. It's back to Jolene. At this point, Jolene could also rest, which which somewhat appealing because of the relic that we have.
Uh is it worth it though? I I think it's going to be worth it. Let's rest. We'll heal up three health, 1 2 3 going to full and five means we're just at full for focus. We can then discard this and what this is going to allow us to do is push back the torch by three spaces. This will mean no new mobs will spawn which I like. We'll then spend a four focus going from five to one to draw another relic token. Ooh, this one's a bomb. What a bomb does is that it can blow up walls, place a tunnel token to make a passageway, or just deal two damage to all enemies in your room. So, bombs are very versatile. We'll then simply move into this room and because there's an enemy here, we do have to stop and that will end our activation. Ava will be next to go. Ava can take a shot at this thing, so she's going to move here. She only has two focus. We can't gain a free relic, but what we can do is attack. This blaster of automata is one of a legendary set. So, if we had more than one of these, we could actually gain a focus after using this or two or even three focus if we had all four pieces. Right now, we just have one, so no additional effect, but I am going to attack. We have range of two.
We're within range and it's not in our space. It's our agility which is three dice plus one and it's plus one because of Jolene, so it's plus two now. We'll roll up our dice. Let's see what we get. Ooh, that looks awesome. 5 6 7 8 plus two more is 10. 10 minus four is six health. 10 minus four is six health. That's exactly what we need, right? 10. 5 6 7 8 9 10. He only has six health. That means he does not react or do this attack, I should say. And he's gone and we we can push up the torch and gain a couple more loot items. Because we defeated that were-cat, we will get to push up our torch by one, and we're going to draw two loot items. Our first one is the captain's uniform.
I don't think I'm going to keep that one because I like my scout's jacket. Yeah, so we're just going to discard it. Another one is the secret darts. Ooh, this gives us a an attack. Ooh, this one we could even attack in our space at range two using our agility. We'll keep this one. Ava is certainly getting blinged out. I love it. That'll end her activation. We'll move our torch down, and now we're back to Echo. Unfortunately for us, Echo seems to be the one revealing tiles, and it really should be Ava. And you know what? A- Oh, no, Ava was here when she attacked, so she can't do the explore here. So, we're just going to have to leave it. We're going to have to have I Yeah, I think we're going to have to have Echo explore this tile. This tile has a trap. Oh, no. And I just want you to see I'm in turning these because we can turn them in any way we'd like, and I have to have doorways. That's a wall, and that one if we wanted to go to this tile, we would need a key to unlock that, which actually I have, but I really want to save that for the sarcophagus. So, I think I'm going to keep going down this way. We have to test something. Any of our three stats, we're definitely going to do our intellect. We need an eight. I get a plus one thanks to Jolene being next to us. We'll roll up our three dice, and we have a five. Plus one from Jolene is a six. I do think I have enough. I can spend two focus to decrease this down to a two.
Oh, is that worth it? I would just lose three focus. And I instead I'm spending two. You know what? I'm just going to have it go off, and I'm going to lose three focus. We have exactly three focus, so we're going to go down to zero focus. But then for our heroic action, we're going to try and get rid of this. I do get to roll two dice for an agility test, and we're going to disarm this trap. If I don't disarm it, then my other two friends also have to resolve it when they move in. This will only be a two dice, but we get to add a plus one. Well, there's a six. Actually, can we use the four? No, we can't. So, we have to use the six and that will mean we can place a disarm token on that tile and we don't have to worry about the traps anymore. We'll place that token right here. At the end of our turn, we do have to move this down one more and now that Cobalt's going to activate. No one is within range two of this Cobalt, so it's going to move one, two, three and hang out with Ava. That's annoying.
Uh but it is what it is. Ava hopefully can kill it with her darts. It is now Jolene's activation. Based on what we have, I do think we're going to go the long way. It would be great to go through here, but then I would need another key and I can't guarantee I'm going to have one of those and I don't have a lot of focus. So, I am going to move one and I don't worry about the trap thanks to Echo. And then two, we're going to flip this tile. We found an awesome looking tile with this hand, but guess what? If we fail at this trap test, which I have to get a seven with my three dice, I get to add one, so I just need a six. I have to discard two relic tokens. I actually have one. I don't want to have to discard it. I do realize that Echo should have gotten a relic token when she disarmed. Sorry that I missed that. So, I'm going to flip one of those over. She also has a bomb. Now, she has two relics, so she needs to use one before she can gain another. If she does, she'll have to discard one. We are going to have to do a test of seven. We need a something good here. Let's see what we get. We've rolled a four. Plus two is six, plus one because of our ability is seven. So, that's enough to not have to discard anything and we gain two focus. That was actually a really nice roll. We'll go from one to three. Now, if you look here, we could try and disarm this as our main action, but that would be our intellect, which is one for Jolene. Not going to happen. So, this did not stop our movement. We can continue moving. I think we will move here. One, two. Yeah, we have one more movement, right? Our movement of three. And you know what we found? Oh, just, you know, our third minion.
That's going to immediately cause us to lose three health. We are at seven, we're going to go down to four health, and let's draw our next minion. We have found a banshee. Oh, look at this thing. This thing has three movement, five total shields, plus three for melee attacks, plus one, but plus two shields for the magic and missile attacks. And what it does is going to move during the enemy activation, and then any heroes within range two lose a health and three focus. Six health total. And this is going to go into her space. I don't think she's attacked. She hasn't done a heroic action. No, cuz she moved. She moved. She moved. So, we are going to attack because the armor is less here. Uh but plus three, we could take some damage, actually. We at least get to add a one to this attack, and we have We have a six. Six, seven, eight. Plus one more is nine. Nine minus five is four damage. That knocks him down to two health.
Oh, I have an idea. But before that, I have to take damage from four plus the three, so that's seven. With an attack of seven, we do take two damage. We're down to two health. Oof. But we have knocked four damage down on that banshee. Why not use the bomb? We're going to discard the bomb, blow her up with that bomb. That was the last two that we needed. We just took her off the board. This means we can push that torch back all the way to the beginning again. I've been taking out these minions like nobody's business. We're going to get two loot. We have a morning star. This is an attack using your strength plus one, which is inherently better, and we can roll plus one die when we attack. We already roll three, so that's fine. But I will definitely equip that. Our second one is the crystal of the Pegasus. This would help your intellect. And we have you can spend two health to guard and gain one focus in your space.
Yeah, I don't hm I actually kind of think this might be better for Echo, and it is part of a legendary set. So, I think I'm going to discard this because you cannot give loot to each other. The easiest way you can do it is discard it. When you gain loot, they can gain from the discard pile. I almost forgot one thing. We did not use this die right here. That was a four that had one of the lightning bolts. That would give us one focus back, which is perfect because we can spend four focus to get another one of these relics. The relics, by the way, are super fun. Oh, it's another bomb. Ha, we have another bomb. I love it. That will end Jolene's activation. We'll move this down. It is Ava's activation. She's going to blow up that cobalt in her space. She gets to roll just her three dice, and she doesn't get to add anything to it. So, she needs a five or higher. Rolling our dice up Oh, we've got a six. That's more than enough. We don't have to worry about decreasing the torch because we did take out the cobalt. We can gain a loot.
Let's gain a loot. Ooh, the cursed figurine. Plus one die, but minus one shield and minus one move. Our shield would then be a two. Yeah, we're going to discard that one. We don't want that one. We'll remove this minion from the board. We then have a total of six movement. Let's move one, two Ah, if we move in here, we have to deal with that. Uh I don't have a key. Uh but I I think I've got to move in here. We're going to move in here, and we're going to have to deal with this trap. So, I need a seven, but Jolene is adjacent, so we will roll our green. We just need a six then. We'll roll up our dice. We have a six. That'll work, and we'll gain two focus. Six plus one is the seven. We'd gain a health, too, but we're at full health. The two focus is actually very nice. That puts us up to four. We're then going to move ourselves right here, and now I'm realizing there's a wall here. I had a bomb with Jolene. Can I pretend I was smart? She could have cuz this is what I was planning on doing and I just forgot. I'm going to use the bomb to create a passageway between these two. So, I just blew that up. We'll use one of these tokens to show that and then what I'm going to do is spend a focus so when I reveal this one I don't have to take any negative effects. All right, we can put this on a wall so this will work just like this. Now, this is just a trap room. Look at this trap room.
If you fail, you take two damage. I'm okay with spending that focus. That seemed worth it. I think at this point we are going to end our activation. We're not going to continue moving and there's a reason why. If we look at our torch map, we're going to move here and activate those two kobolds. No one is within range two so they're each going to move one to uh three because now there is a passageway to get to us. That's okay. Jolene's there and we're going to have Echo who's going to go next. She's going to blast one out of the sky. For Echo's turn, I think we're going to have her move into here but that means we are going to have to resolve this test. We are one away from Jolene so we really need a seven. Six plus one is seven. I'll gain two focus back. That was a really nice roll. One, two. Now, we're in a location where we could try and actually resolve or deal with that trap and we're the best one for it with our intellect. Why don't we do that? So, we're going to roll three dice for this. We need a six. This will end our movement though so we'll see if this is a good idea. Oh, three plus two is five plus one from Jolene is six and we'll gain three additional focus. On top of that, we would gain two health but we're at full but two more focus as well from this card. So, that's four focus. So, we'll go from two to six focus. We're one away from being full.
But that's going to end our activation. We'll slide our torch one more down. Now, Now Jolene and she is going to use her morning star and attack one of those kobolds. All she needs is four or higher. She has a six, that will most certainly work to take him out. She'll gain one focus and a health. We'll increase our focus by one and our health by one. I forgot her health was so low. Uh yeah, well, it is what it is. We're going to grab an item, and we have the tooth of the dragon. This is another one of the legendary sets. It's just going to increase either our strength or agility rolls by plus one. So, our strength's going to be What is that? Uh plus two when we attack. And the more of these that we have will increase our speed. Yeah, we can equip that. Even though there's an enemy in our space, we can move out of this location. We are going to move here.
Uh we are going to have to deal with this test of seven now. We'll test our strength, which gets a plus one from our ability and plus one because of that tooth. Uh so, that would be six plus two is seven eight. That's enough. Do I just need a seven? Let's see. I just need a seven. So, I could do five six seven. Or you know what? Actually, just do the five. No, I only Yeah, I have plus two. Five plus two is six seven. That's good enough. That means I can gain three focus and one heart. I love how the dice work in this game. It's really fun. Three more focus puts us up to four and another heart. We're up to four here as well. I have already done my main action, which was attacking, so I'm done. Ava will be activating next, but not before we have another minion spawn. That minion is going to spawn really far away from us. For Ava's activation, we're going to move out of this location with this minion. We're going to move here. We have to resolve that trap first. We need a seven or higher plus one because of Jolene. And I've got a three plus one is four plus one is five.
Oh, man. I could spend some focus to increase I I can increase a three or I could just fail. I'll fail and take the two damage. This will knock me down to five health. I then I think we are going to try and disarm this trap. We need an eight. We're going to roll this up. That's not good. Three, four, five, six, actually that is good. Three, four, five, six, seven plus one from Jolene is eight. That will work. I was thinking I'd have to use it some of my focus for rerolls, but I did not need to do that. That will push this back four spaces. This will end Ava's activation. We'll slide our torch down and now it's Echo's activation. Echo is going to attack this guy first. We're going to use this vampiric touch so we can target someone within range two. I have enough focus to do this. We can have them lose two health so you can see spells ignore armor. So I don't have to worry about the kobold's armor. They'll just lose two health and then another hero in Oh, is it in that location? It's probably in that location to heal by two. No one's in that location so no one can heal. I was hoping to heal Eva or Eva. It is what it is. I still think that's worth it because we're rolling for our intellect. That means we get to roll three dice. I am not next to Jolene so I don't get to add anything to this roll. I have a four plus a one so I'm going to spend two focus which will still work turning this to a two. So that means four plus two is six. That's enough to cast that. I'll deal the damage taking this guy out and I'll gain a focus back. I do have to spend the one
focus for adjusting the die then four, one, two, three, four for actually activating the spell and then one back from the die itself. I'm then going to grab our second spell and we have the dragon's breath. This one will target enemies all enemies in one room. I think that's what that's saying. I need a seven. If I succeed I spend three focus. I deal two damage. If I fail all heroes in that room take one damage. Risky but cool. We have not completed a move action, so we'll go 1 2 3 and we go into here, we need to read B. Forging a way through the dim, dank passage, you step into a vaulted chamber. You squint and slowly behold a bizarre lit room. Towering stone columns stretch upward supporting a ceiling that is precariously held together by a tangle of thick roots and dense cobwebs. At the far end of the tomb, a distinct stone sarcophagus emits a faint blue glow that serves as a beacon in the gloom. This surge of relief is swiftly shattered by the appearance of two mechanical kobolds, bloodthirsty and emboldened by trespassers in their lair, they block your path to the sarcophagus. The kobolds are flooding into the inner sanctum. Move the spawn marker. Okay, we're going to move it from here to here. New mobs are going to spawn from this space. Do not progress any further until we have someone with a key, which is her, showing up here and does the action in this location. Our total movement with Echo is four. Well, we can
move one more. We are one away, but we're not in that space. So, we'll end our turn. The torch will move one space activating enemies and the only enemy is this kobold 1 2 3 moving here. Now, it is Eva's or Ava's activation. Eva is going to do a rest, gaining her health back and all of her focus back. She's then going to discard this, to push back the torch all the way to the beginning. I feel like we've been able to do that really well this game. Not sure if that was their plan or intent, but so far that has been a non-issue in the game. We have a total movement of six. We're going to move 1 2 3. We're going to spend four focus so we can gain another relic. Oh, we have another key. We'll decrease our focus from six down to two.
And that will end our turn. Moving our torch down, I am now realizing I totally skipped Jolene's activation. We're going to have her rest, too. I'm just going to do them out of order. Apologies for that. We'll have Jolene activate. Jolene will rest. That will get her back up to full on both of these. And she's also going to do the same thing. Coming in here, we'll spend four focus. And we have Oh, what is this one? This one states, "When you rest after being unconscious, you can perform another heroic action and free actions." We'll utilize our torch mat yet again, and that cobalt will activate. It's just going to move 1 2 3 closer to us. They do not trigger traps, of course, for themselves. They know where they are. Now, my friends, it is Echo's activation. We're going to move into this space, give up this key, and we are going to read. "Encircling the sarcophagus, you notice hurried inscriptions etched into the stone floor in a language unfamiliar to your party.
You behold interwoven symbols bearing some semblance of a warning. Among the cryptic hieroglyphs, you interpret scenes of carnage and demise and whispers of an ancient calamity." Doesn't sound good. "Yet, this discovery does not deter you. There are desperate scratches powerless to stop you at your quest's crowning moment. Inserting the key and prying open the ancient lid, you shatter a mystical aura into luminous fragments. The slab dramatically arcs away, revealing a withered corpse adorned with a crown, sword, shield, and armor. The metallic surface glows with spectral power, illuminating the dim room. As your fingers brush against its surface, a low rumble shakes the chamber, causing the floor to convulse. 'What sorcery is this?' you cry over the tumult of crumbling stone. 'The room is collapsing!' shouts your companion.
Ripping the treasure from the corpse and equipping all you can carry onto your person, you frantically search for an escape. A chilling howl echoes through the chambers as the bodies of the once slain kobolds are now rising, seemingly more menacing than before. The race for survival has now begun. We now have to grab this envelope and open it up. I have not opened this up yet, you guys. I have not played this far. I only did a little bit of a practice play. Oh, there's a bit of tape here I have to take care of. We have found four echoes of the Augmore as well as these ghastly kobolds. So, now these ghastly kobolds, they only move two instead of three, but they have two health. So, I need to deal them seven damage to take them out instead of just five. They're going to deal us more damage. You can see that over here. They move and attack instead of either or. So, they're slightly worse and this is a plus two instead of a plus one, but otherwise they're mostly the same. So, I'm going to discard this one, update this to our new type of minion.
Then, we have we're going to shuffle these cards and we're going to give one to each of our characters. You must equip it. If you can't because you have something there, you have to discard whatever is there. So, I'm going to shuffle these up and give one to each of us. Jolene was lucky enough to gain the echo of wisdom. That will give her plus one movement and then she gets plus one to any test of any type that she's doing. She is going to be amazing at skill tests. Ava here has the echo of might. This is pretty good although she did have to discard an item. So, she had to discard the seeker darts because she can only hold two items in her hand. This one's legendary so I feel like I wanted to keep it. Uh this one states you can use any of your stats to attack and you have plus one so we can use our agility and if we defeat a mob, we can spend four focus and we can gain a basic relic. Echo gains here the echo of valor. It's going to give her plus one defense and if ever she is becoming unconscious, she will then push the torch up two spaces. We are not able to unequip these or trade these. We then have some additional setup items. We have the ghostly kobolds. I already set that up. Place your hero miniatures on the space with the sarcophagus and above. So, who is the slowest? I think she's the slowest actually at four. So, put these two together and she is the fastest. So, two here and one here. We are to return all mob tokens that are on the dungeon back onto the mob mat. And then we have to place two mobs out one
in each of these spaces. So, we have two out onto the board. Annoying. We need to place our torch at our starting space for three player. So, actually just moves down one. That's fine. We then need to remove dungeon cards in the rows above and to the right of the blockade cards and remove any passage tokens touching those cards. So, I'm going to remove this one and I have to remove all three of these. No. That's not good. Then we're simply going to replace those three with the three that we had from before. Remember I had three extra locations. So, I'm going to place both of them here and now those are re-faced down and we're going to have to re-reveal them I'm assuming. Yep, it's confirmed. Our goal is clear. We need to have all three of our heroes get to this location. Of course, we do. And this is locked again. I do have one more key though. So, that's helpful. Thank goodness I found that key. That's the second Actually no, that's the third key. There are no more keys for us to find or did I use it? No, no. Ava still has Thank goodness. So, these are going to be three new tiles. Fortunately, I did do all of these traps. I just wanted the benefits, but now it's actually nice that I took care of those traps. But, these mobs are going to get into the way. That I believe ends Echo's activation. So, we'll move here and spawn yet another one of these mobs in our room. Now it is Jolene's activation.
Jolene is going to lay waste to this ghastly kobold. I wish she could move more. She's going to have to move here and just stop using her morning star to attack. We need a total of seven to take them out, but we get to add how much to this? I have plus one for strength, plus two for strength, plus three for strength. So, five, six, seven, eight. Totally took them out or remove them from the board and that means I gain myself one, two, three focus. Sadly, I don't need any focus and that's just going to end my turn because I have no other free actions I'd like to take. We'll move our torch marker down one space. It is now Ava's activation. Ava has six total movement. She's going to move one, two, three, four, five, six.
That was disarmed. That was disarmed. I wish she could move more, but I think that's all she's going to do. She will complete a rest action at least for her main action. That means her focus is full. Moving the torch one space is not going to be good for Jolene. Actually, for Jolene or for Echo. These two are going to activate. They move into her space. That is annoying and everyone within range two is going to lose two health. This means Echo is going to go from five down to one health and we're going to go from seven, one, two, three, four down to three health and then another one is going to spawn and then they're going to activate again. It is Echo's activation. I think we kind of want to get out of here. You know we can do? We can move in here and then as a free action, we're going to chuck this bomb dealing two damage to both of them.
It's going to get them both off the board. That feels good. They had two health each. That means I'm going to grab loot for these. Yeah. Our first one is the wings of the Pegasus. That one we can't wear. We have to discard it because we can't get rid of our Echo of the Echo of Valor. And then we have the U bow. Do I want the U bow? I don't really want the U bow. I'm just going to Well, this would give us plus one. We would actually I'm going to keep the U bow. If we look here, that U bow will let us roll three green dice. We do get a plus one. So, why not? We'll do our rest action as our heroic 1 2 3 and then 5 + 2 is 7. We're back up to full. The torch though waits for no one. We're going to spawn another one of these kobolds. We'll place the kobold right here and it's now Jolene's activation. So, what we could do, we could run over there and attack him. But then he's just going to spawn looking at the torch mat. I think we've got to run.
Uh it is what it is. So, our total movement is 3 plus one because of the echo of wisdom. So, that's four. So, we can move 1 2 3 4. We're hanging out with Ava. Then the torch is going to move yet again and that blasted kobold is going to attack Echo. It's going to move 1 2 into her space and she's going to take, oh you know, two damage. She's down to two health. It's now Ava's activation and we need to push. So, Ava's going to move here for movement one. She'll then spend one focus to be able to flip one of these in range one. We'll flip over this room and we have Oh, that's going to have one of the mob minions. We'll definitely place it like this and normally if we had moved into that space, we would have taken a damage. But because we used our scout ability, we don't take the damage. I am going to move into here. Oh, wait. Yeah, yeah, yeah. I've got that Echo of Might. So, I'm going to move into here. The next thing we're going to do is scout yet again. We can do that free action. It doesn't have the 1 X. So, we can do that as many times as we'd like. We're going to scout this room. Oh, this room is a trap room. Well, just leave it like that cuz the door will go this way. I have one more key. I then am going to do a melee attack using my agility. Oh, I have a six. Ooh, this symbol you haven't seen that yet. If there is a retaliate, there they start at the level of our shield, whatever it is. So, that means any of their counter attack on their card is just damaged us. We're going to
kill them, no problem. We could do the six. That will be only one damage. So, these two together, 6 + 1 is 7. That's enough to take out the cobalt. We'll also be able to gain one focus back. And let's grab another loot. Oh, this one is a hand item. Ooh, let's see. I'm going to put this one right in the discard pile. I don't want to use that one right now. I like my blaster. But this one, if Jolene can get it's the second one of her set with the tooth of the dragon. This is the aegis of the dragon. Looking at our torch mat, we are going to have another spawning. That'll be just another mob here. And now it is Echo's turn. Echo does have a movement value of four. So, she's going to move 1 2 3. She's then going to spend four focus 1 2 3 4, going down to three, and grab another one of these relics because why not? So, we're going to grab this one. It's another one of the fairy dust. So, she'll put that on her explorer mat. And then she'll move here. So, 1 2 3 4. She's down to only three focus. We'll then do a rest action, healing by three, and putting this up. Do I want to use this? We could still use a heroic action, but I have nothing to attack. Well, I could have attacked Well, no, I didn't attack. I ran away, which I think was the right option.
So, I don't think there's anything else that we need to do. I think that's all we're going to do for our turn. We'll move that torch another space, and now it's Jolene. Jolene has four movement. 1 2 3. We have to do our test. We're going to test our strength. That means I get +1 +2. I get +2 to this roll. I just need a five. Come on, five. Let's see it. We've got a five right there. I'll gain two focus. You know what I'm realizing, the El Lock is on this side of the board. I don't think I can use a key to unlock that when I'm over here. I think I'm going to have to go the long way, which is obnoxious. So, I've done one, two. I could disarm that trap. But, I I think we'll be okay. It's a seven. If I disarm the trap, I'm done with my movement. So, I think I am going to keep moving. I'm going to push forward. We're going to move up to this one. Well, unfortunately, we found ourselves another mob location. We take a damage.
We're down to two health, but we have not done a heroic action, so we can totally kill this thing. We can add plus three to this attack. We just need a seven. Let's roll our dice up. Oh, that is a six. That's going to be more than enough cuz I get plus three. Well, can I do four, five, six, seven? Oh, that would give me a health. So, I'm going to do the four, and then I'm going to gain the health plus that plus one. It does not matter what this one is because four plus three is seven. That's what I need to take them out. So, we'd gain two focus, but our focus is at full, and we'll gain the health. That means Jolene is now back up to three health, and the Cobalt is off the board. We do get to draw an item, and I think I'm going to draw from the discard pile the Argus of the Dragon. So, that way this can uh block for us, but now we have it two of these. So, that will give us plus one movement. So, our movement is three, four, five total movement. We have to move the torch, and we're going to move it here, and now those two Cobalts are activating. This is when we say, "I'm sorry, Echo." These two are going to move here. Oh, wait. You know what she can do? She can at least block one damage from one of their attacks with her Mirage ability. She'll go from seven, six, five, four, four total focus. But, that means we'll take one damage from one attack and two damage from the other. One damage puts us down to four and then two more we're down to two. It's now Ava's turn. She is going to move into here first. We're going to have to resolve that test. We need a seven, but thanks to Jolene it's only a
six. We're going to test our agility. Rolling our two dice up we have a four plus two is a six. Uh and then we'll gain one focus. That puts us up to full. We'll then use movement two to move here. And then we'll spend that focus going back down to five to flip this one over. Uh this one is going to have another mob. Oh, it has a door. Let's go like this. So, that way we can use a key to unlock that. We'll put him there, but we don't lose the health because we revealed that with our scout ability. That was a free action. We haven't used a main action yet. We'll move right in here. As a free action we'll discard our key. And we will place out another one of these doors. I believe I can do that.
And we'll go like so. And then we will defeat that kobold hopefully. We roll three dice adding plus two. I got to say Jolene has been clutch really. Adding plus two three plus two is five. That's not enough, but this plus two is six seven. That will take out that ghastly kobold. And we gain another focus back. Don't mind if I do. With the torch mat though another spawning occurs. I think we'll be okay though. We'll place the kobold there. It's Echo's activation. She can move four. One two three we're going to have to do that test. And then four move to here. We need a seven plus. We'll roll this up. We have a five. And then we got the plus one for from Jolene. That's six plus one here for seven. And we get two focus back. That will mean our focus is at six. And then I do think we're going to do the rest action. I don't think I need to do a main action. So, we're not going to use the fairy. Yeah, I think that's all we need to do. At this point now, it's just running. The kobolds will each move two, one, two, and one, two from that enemy activation. No one is within range two, so no one takes damage. Jolene is next to go. She's going to move one, two, and three, moving right into here. And I think that's all she's going to do. And I'm sorry I moved Echo instead of Jolene, so I'm going to swap those two minis.
Uh then we'll move this down here. Oh, wait, am I going the right way? Yeah, yeah, cuz it's going down. So, we have to spawn another one of these kobolds in that room that's far away from us. Ava will then activate next going one, two, we're in the right space. We then have another monster activation. That will mean these two mobs will move to here, this mob will move here, and this mob will move here. That one is within range two of Echo. Echo's going to go from five down to two cuz she will spend three focus, one, two, three, to block one damage for herself. And then, of course, it's her turn, and she is just going to move into here. Having nearly escaped certain death, yeah, that would be for Echo specifically, from the collapsing dungeon, your party emerges, dust-covered but alive, clutching the coveted artifacts. But what awaits is not the sad town you arrived at mere hours ago, but instead, the pallor is replaced by an unsettling silence. The streets, once teeming with the barest of life, now lie completely deserted.
Dwindling lamplight cast long shadows over abandoned buildings, and the sound of your footsteps and beating hearts are all your ears can detect. If you wish to stop playing, or you wish to continue, what you can do is take your hero mats, the spell cards, and explore card pack into the chest of continuation. Whether continuing or not, return any revealed minion cards to the game box. Return all discarded loot cards and spell cards to their decks and shuffle, and return any relics tokens players still have. So, we don't get to carry over our relic tokens, but everything else we get to carry over. Return the Ghastly Cobalt to package one. Keep the Echoes of Augmore cards with their player components, and you'll use them in the next chapter. If you received the Kickstarter version, there are two additional adventures. One is actually in the box itself, and it's two adventures that they recommend you slot in between, I think it's scenarios three and four. Yep, confirmed right here, after chapter three and before chapter four. Then you also have a three scenario expansion that you can play as well. So, that means if you have everything, that's 8, 10, 18, that's 13 adventures that you can enjoy with this game. The only bummer is that I didn't get to show you a boss fight. I was kind of curious to see if that first adventure would be a boss fight. It wasn't. I'm assuming as you go forward, you will find more bosses. I have confirmed with Steve from Co-op Guild those bosses though are not cross-compatible to the base game, so watch out for that. They are only used
in the adventure mode, which is a bummer, but I am really enjoying this. I like how this works a lot. I personally enjoy this more than the one-off experience. Although the one-off experience is cool of this game, it just didn't connect with me nearly as much as this does, where I'm going through an actual story, and I get to see the next adventure. The only kicker is that then it will have less replayability, but you'll have additional characters that you can use with the core game that you can play as a stand-alone, and you can use some of those heroes in this version and try different the same adventure with different characters. I do also hope that this does well enough that they will create more adventures. They say main adventure number one, so maybe they'll have some more. Heck, they could even have ones that are simply print on demand where you pay, you know, $5 to get the booklet and print it because what you're seeing here you could utilize. The only thing you use is this.
You wouldn't have this. So that's a good point. But they could still utilize this for any of that as well. I don't know. We'll have to see if that is something that they're interested in doing. Regardless, I hope this helps you determine if this game is for you. I want to give a huge shout out to our patrons and subscribers. It's because of you that Bernt and I do what we do on this channel. I also want to give a big shout out to Steve. He helped me out with a ton of the rules. He's actually played through the whole campaign and the expansion on his own because he enjoyed it a ton. So make sure to check out his channel when he has videos on Tiny Epic Defenders or Tiny Epic Dungeons Adventures and I'll make sure to put links when I see them. And as always, if you're excited to see what Bernt and I have coming next, then I need you to meet me at the table. Goodbye, everyone.
With all your energy. It's a master plan to set me up against your enemies.