Fatal Knockout Brief Solo Overview and Review | DaniCha
Games in This Video
1 game is featured in this video — it unlocks as you watch.
Transcript
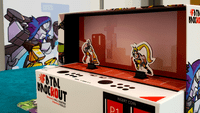
hey everybody Danielle here I'm doing a brief overview of this game called fatal Knockout by n Crabtree I was uh generously sent the base game along with two expansions which um if the videos are not already on my channel it will be so check the description for any links um but I have this ready to set up to kind of go over what a game like this might look like so actually you know just kind of reading off from the rule book on what this game is about fatal knockout is a 1 to two player tabletop fighting game where the last fighter standing is the winner so your win condition will be to deal five damage to your opponent before they deal you five damage damage in this game is tracked by these little tokens which will be placed on your board as you take damage so once somebody reaches their with damage they die and uh the other person would be the winner the boards for each of the characters uh do do change for instance I chose spur for this video and spur actually uses U some bullets so not all the character boards will have this icon on it but spur will and spur has a bunch of different bullet tokens that are placed into this bag um and depending on the one drawn there will be various
effects um that could happen another really cool thing about fatal knockout is that they included a guide book specific to each of your um characters that you choose to fight with so in this instance spur um uh has an introduction and there is special setup so you'll place your bullet tokens in a bag then Shuffle and place three face up on your player board so I'll go ahead and just do that just for example Sak I'll just choose three um one of them came out too fast that's fine and then we'll place them on the board like this and then further instructions will show that uh you could reload so when you see this icon you could remove um all bullets if any from the slots and place down three more so if you want to just kind of reshuffle it back and then when bullets are used um they stay out of the bag until you run out and then they're all reshuffled back into the bag and then you might be wondering what they do so this explains each of the different colored bullet and what it does um in case the colors are a little difficult for you you could also notice there's lines so this has one this has two and this has uh much more um if if uh if that helps so yes very helpful that there's a guide book this way not everybody have to look into the rule book for anything
specific to their fighter they have everything they need to know in this guide book you'll also notice that there is a meter at the top each player would end up getting one of these to track their meter you will put it here on all on all the tracks and then you'll also notice I have um spur this is the stande for spur I did remove it so that it could be flattened uh and then we have the AI this is a solo overview so we have the AI bot kind of just hanging out here as well and you'll place it on the um stage which normally would be on top of uh the box it comes with but in this case I did print out just a little um grid here just to save some space so that I can really zoom into the things that matter in the game so again playing AI or playing solo against the AI you'll use one of the included decks there are three different um decks I'm playing against V1 in this example some of the cards will look like this this will tell you what the AI will end up doing um very iconography uh heavy Focus here so if you're not sure what any of this means you would just reference the rule book for the icons and you'd know exactly what to do um the AI has a keyword that um does exist in the other deck but more uh almost every basically every card in
this deck has mix up basically if the AI is unable to do the top part they're able to do the second part if needed so the AI will always try to do something um and that's kind of why mixed up I think exists because it makes sure that um the AI won't take it too easy on us you know and then rolling the die will have an an impact on what the uh AI will do for the turn so in the rule book you'll turn towards the end of the um end of the book and you'll see when you roll the D6 you'll see how many uh cards a fighter might play so I don't want to jump ahead into um into what the solo AI would do I want to talk about more about what you as a player will end up doing in the game so the first phase of game play after you're all set up up is um the draw phase so you do have a deck and uh you would remove your uh upgrade card outside of the deck and just place it next to your board after that you will shuffle your deck and you'll put it in this draw section of your player board and during the draw phase you'll draw three cards to your hand so go ahead and draw three and we have a push five fire a dashing fire and fan the
Hammers all right so let me just put this down for now as we go through the rest of the phases so we have the planning phase next so starting with the leader uh one card at a Time Players place down cards from their hand so say I'm taking the lead I would be placing a card so in this case I might place this push fire down and then the AI would end up placing a card down the first card you place will be face up and then as you come back around to your turn you will place it face down although in Solo it it's kind of pointless to do that because everything is kind of you know known to you so it's up to you if you'd like to do that but if you were to play with a second player the rest of what you do would be unknown so the planning phase ends when all cards are played or if the leader chooses not to play another card um and the leader could actually be the AI so um keep that in mind as well and then next the phase is combat so uh once the leader decides to end the phase or all cards have been played any cards that are face down or flipped up so for example say uh these were the
cards that are out and um I decided to just keep this in my hand we flip everything face up and then we have to look at the numbers the cards are rearranged into initiative order with all ties being broken by the leader so in this case there's no ties but we would be rearranging ing all of the cards depending on the
number so now we would end up performing the actions on the card starting from the left which is the lowest initiative card and you'll just go through each of these cards and play it out so I get to choose for my cards what I want to do as long as I have the um right uh require ments to do the action and then um the AI would also have to do what they can do depending on what they've met as well and again they can mix up and so can
I something to note that during the combat phase when you're playing out your cards before you perform an action on the card you have to add to the meter so for example this card has three indications of the meter I would move this three times 1 2 3 and you saw that my tracker actually passed over this icon this is a shield so I'm able to grab a shield and place it on either side of my character and the side actually does matter because this would only block an attack coming from that direction so if I'm on this side and AI is on this side I probably will want the shield on the front where I'm facing in this way if there was an attack by the AI I'd be able to block that one one damage and then during the combat phase uh if a player were to take damage you immediately add that damage to the player board there's no waiting till the end of all this you do it immediately and just to show you what the um icons look like do want to show you here this is kind of a quick summary of what the these icons mean so when you see this action is played out in front of your fighter so you kind of see the face is facing this way and action is played out in front of it over here is the opposite so action is played out behind your fighter you'll
see it's facing this way but the action is to the left this icon means fighter rotates 180° a square that's blank represents a space on the stage and and then uh this would mean to move one space this says up two meaning to move up to two spaces and then this means it's an affected an affected space in which an opponent is affected by an action um this allows you to play action steps bottom up instead of top down which is the mixup and then here again about the shield when you place a shield for one round um you could place it in the front or behind your fighter and only protects for one instance of damage and then of course this is the damage and then uh this will tell you how many damage you would do so uh in this case this card here has two of those damage icons it would do two damage if I was in this space um next to the bot and then here it says the space in which the damage is dealt so as just as shown before there was a reddish Hue to that square um and then this means the opponent is pushed from the left space to the right space and then the opponent is pulled from the right space to the fighter so keeping all of that in mind um you would just play out these cards and hopefully uh do enough damage to your opponent so that you'd you'd be able to win of course depending on your
character there are additional rules so you'll want to reference the guide book um specifically for spur there would be um icons like this that I have to pay attention to and take advantage of there's also a reference card where um you'll know exactly what those specific uh character specific icons mean so in that case this icon means that you you fire all bullets on your player board one after another for one attack so that's a pretty big attack right there if you happen to pull that off and um you'll want to keep the reference card handy in that case there will be also instances where you could burn cards and if you were to burn cards they go into your pocket um otherwise after you play a card they go into your discard and then you would just start back up and draw up to three back to hand so specific to the solo we have um the rules again on the back so during the draw phase uh there are some uh changes for the AI Fighter the AI fighter does not use a hand but it plays straight from the deck the planning phase uh is unchanged if I'm the leader but if the AI fighter is the leader um then you roll the dice to how many cards they play so that's where this D6 comes in and it tells you exactly how many cards they will play so in this example it says the solo fighter is the leader and rolls a three at the start of the planning phase um dictating that they will play three cards so much like the planning phase
and the two- player game once all cards are played any face down cards are flipped over and the combat phase commences so in this case where it says um that they were going to draw three you can see the differences in the card this is the bot card a bot card and a bot card so they would Place one I place one they Place Another then it's me them me and it has to end here because the leader only um which was the AI robot the leader can only play three cards and they choose to end um so aside from that they're still doing damage to you you're doing damage to them so whoever hits uh five damage first would uh win the game so I hope this quick overview kind of gives you an idea of how this game plays it is very uh strategic you want to make sure that you're facing a certain direction that you're not too far away from your um opponent and also if you find that this is a little bit too easy there are other decks for AI to um to verse so um definitely a very interesting game this kind of gives gives me uh somewhat of like dice Throne Vibes because dice Throne has specific unique characters and special um abilities for them and this kind of gives me that kind of vibe but this is definitely more of a a combat game if that makes sense like like you're you're literally doing like um the video game
type of fighting um even with the up down arrows like everything is just very um uh reminiscent of all the the typical Street Fighter Style game but yeah let me know what you you guys think of this one um I find it to be very interesting the iconography uh does take a little bit to grasp I would say at least for me it's taken a bit for me to understand what exactly this might mean and then what this would mean as well so I think that's probably the biggest learning curve when you play this game but I think overall the game play um is pretty smooth and the phases are not too complex all right I will end my video here if you have any questions let me know if you have any specific questions about the game I'm happy to um uh ask the designer as well for for their input if you have questions but I appreciate you watching if you're interested in more videos of this let me know I can see if I can fit it into my schedule to record something but in the meantime I hope you're doing well and I'll see you next time bye