Under Falling Skies | Campaign Playthrough
Games in This Video
1 game is featured in this video — it unlocks as you watch.
Transcript
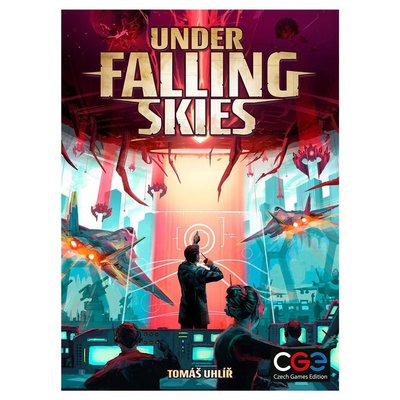
Hello everyone and welcome to Meet Me at the Table. This is Colin and today we are going to do a playthrough of Under Falling Skies. Do you like aliens? Do you like dice placement? Do you like losing? Well, all three of those things are possible in this game. My buddy Brent actually purchased this. He gave it to me almost 6 months ago to try and kept finding reasons not to play it. I finally played it and oh my gosh, I love this game. There is a great rules video by Paul Groen. Make sure to check that out. What we're going to do, which is something I haven't seen really anywhere. We're actually gonna play the campaign. Why not? We are a campaign channel. We love campaign games. So, I'm going to show you how that works and we're going to play them. It will be a little bit spoilery, but the fun part about the campaign is there's so many variables. Every time you play it, it'll be quite different. Now, do make sure to turn on those cling on subtitles in case I make any errors and miss them in editing. Otherwise, let's just jump in and start our playthrough. There are four chapters in the game, and each chapter has this nice art here that we can walk through. You can see what's happening. So, something's showing up above New York City. I've never seen anything like it. Breaking news. Oh, it's knocking down the Statue of Liberty. Why is it always a Statue of Liberty? I have. Okay, sir. On the back side, it has some information for the specific chapter. Each chapter consists of two scenarios, but you're going to have four scenarios to choose from. So each time we're going to randomly set up a scenario, a character, and a city. For
our first scenario, we can either choose to defend Mexico City or Havana. The one in Havana, we're going to have a reinforcements scenario, and we will have Jackson Moss as the character. I have I'm not I don't think I want to play with him. The other one is Battle for the Sky. Okay. And we have Clinton Harbor. Now, there's two others for chapter one that have different cities, different uh characters, and different scenarios. I just randomly chose these ones. That's what's so cool. So, when you play this, you could have totally different setups. Now, what you could do at this point is look at these scenarios and decide which one you'd prefer to play. I'm going to go with the character that I'm interested in. I like Clinton Harper. So, we're going to assume Jackson, even though he's seen what's happened before, he can't deal with it.
This city, this scenario, and everything is gone. Instead, for our scenario, we'll have Clinton Harper, who once per that scenario, he can shoot down one enemy ship on an explosion space. And here's the specific scenario that we're going to play. It says one down. Oh my gosh, that's hilarious. It's like it's him. That was completely random. One down, 1,295 to go. You know, that's what I say when I see mosquitoes outside and I kill one. Yeah, except for it's more like billions. This is going to be the scenario that we're going to try and accomplish. Now, we get two tries at this. The first try, if we lose, we'll actually flip this city over to the orange side and it will have something that can help us. And then if we lose that scenario again, we'll just continue moving forward. We have here for our scenario, for some reason, the enemy has decided to hit this city extra hard. For our setup, we have to place the orange ship and one white ship on the mother ship to be spawned at the end of the first round. The orange ship follows the standard rules for purple ships, meaning that that will never go away. It's going to keep coming back over and over again.
Effectively, you are facing six regular ships in this scenario. Right now, that might not make much sense, but that's going to be brutal as we play, and you'll see. The game comes with a bunch of these campaign trackers, and I am using one. So, uh, Brent, thank you very much. I owe you one of these. Uh, you'll see each of the different chapters. Chapter one has two scenarios, two out of the four that we'll play. And we have that for the four total chapters. Two, three, and four. Well, looks like four. There's only one. I have no idea how it works. I'm kind of excited to see. On the front section, we need to determine which city we're protecting. So, we're protecting Mexico City. which of the scenarios we're playing, Battle for the Sky, and which character we're using. If we win this scenario, we will notate what threat level we're fighting at, and we're going to do level one. Yeah, I've only played this twice. I lost once and I won once. And I'm just going to play at threat level one. I think it's a little easier with recording. I do think probably the best level would be two, but let's just keep it at one so I don't kill myself. If we end up losing it the first time, we'll put an X here. And then if we win the second one, we'll put the two in or I should say the one in this box.
Mexico City does give us an ability. It states that whenever we place a die to move the excavator four spaces or less. Move the excavator immediately. Normally, you place all of your dice and then you activate them after placement. For the excavator, we could actually do it immediately so long as it's a four or less. This costs no energy. Oh, it also costs no energy, which is awesome. Leave the die under the excavator until the room phase. Okay, that's cool. This also tells us how to set up our uh area where we'll be placing our dice. We can see the upper section needs to be a D and a lower section needs to be the C. Here we have our two base tiles, base tile D and base tile C. Now, what's really cool is every time you play, for example, if we had used Havana, we would have used A and D. And so, you'd have a different setup of these. These are dualsided and there's more of them. So, if this was up there, it would be different and have different options for us. We also have different starting uh amounts of energy, different amount of total health of the actual city or base within that city.
Ah, so cool how there's so much uniqueness in this game. For Mexico City, we start with only one energy. Here's our health of our city. If everyone gets to this skull, we're going to lose the game. We have our excavator. And our excavator starts right here. What our excavator does, it's going to start moving across this board and unlocking more locations for us to place our dice. While this is here, the only places we can place our dice are in these spots and these spots. The more we dig down into our base, the more we have options for placing dice. And the advantage of Mexico City, if I place a die, let's say right here, one, two, three, four, this would immediately move to here, and we could utilize that spot in the current round, which normally you can't do that. Next, we need to set up the skies. This is where all of the enemies are falling from the skies trying to hit our city. Because we're playing at threat level one, we need to roll a dieice one time and determine which of the four different sky regions we're going to flip to the harder mode.
And we roll for that a three. Here we have the night sky set up and ready to go. Now, this is all set up at the threat level of zero because we rolled a three. One, two, three. This section we're going to flip over. What you'll notice is that when we flip this over, the numbers over here are going to be more challenging and we're going to probably have different symbols over here. Oh, yeah. For an example, we lose the game if the mother ship uh gets to this spot. So, it's actually even won earlier here. Now, our city takes a damage when the mother ship gets here. And there's lots more symbols over here. Look at for our research. We need a seven to get past that location. Yeah, this is a much harder tile. Speaking of research, we need to place our token here to track our research. And that's our goal of the game, get to the top of the research track. When you play this game at home, this base is generally underneath the city. But just from a recording standpoint, it's such a long board, it's easier to have it set up this way. Uh when one of the ships comes into Mexico City though, we'll take damage here and denote it. We then have the mother ship. Oh, this thing looks insane. We have our mother ship and the five, they call them purple. They look more red to me, but purple alien ships here, plus the orange one and that white one because of our scenario. We've placed the mother ship at the top of the board. At the end of each round, this mother ship is going to take one step closer towards our base. It's going to keep going down and down and down. The
moment it gets to I'm not going to get over this bump here, but the moment it gets to this spot right here, we auto lose. So, we lose if the mother ship gets to here or if our base is destroyed and we have placed this marker here. And that's from these ships dropping down and landing in Mexico City. The game is broken out into three different phases. We have a dice phase. That's where we're going to roll our dice and place them onto our base and then move the ships down depending upon where we place our dice. Then we'll activate all the rooms with our dice and then the mother ship will move forward one space. We just keep rinsing and repeating that until we win or lose the game. It's super simple but really fun. In general, we'll be rolling five dice per round. Two of them are white, three of them are gray. the white dice when you place them, you then have to take all the remaining dice and re-roll them. That's very helpful because a lot of times you won't roll what you need, and so you might want to play that white dice sooner rather than later so you can reroll the others. Or conversely, if you really like your dice, you might want to play the white ones last. You also have two of these robot dice. They are blue dice. You'll see how they work as we play the game.
Let's really quickly go through the different locations in the base that we can place our dice. This location here allows us to attack the ships that are on the board. They have to be in an explosion space. And whatever die we place there, minus one, those are the ships that we can destroy, which is cool. Here, that's how we generate energy. Energy is going to be very important for activating certain effects. uh moving the excavator if we move it more than four uh then we have to pay the energy in this specific scenario with Mexico City or if we want to use this action here which is research we need to spend two energy so that's the way we get energy the green locations are where we generate the research needed to win the game and the final location are these robot locations they're blue when those are activated we can then gain a blue dye put it somewhere and then each round it's going to activate that spot which is really Nice. Okay. Until we either remove it if we would like or it ticks down past a one. There's one more location on your base that you can place dice, and that's these AA guns. You always have to place one die in each column. And so, the advantage of placing a die here, although it does not do any effect in your base, you're going to take that number and subtract it by one, and that's how much the ships move in that column. So, you can actually make the ships move less. For example, if I had a one, I can place a one here and then the ships don't move. You'll see how all of this works as we play. I always find the best way to learn is just by watching someone play. So, let's do it. Let's
roll up our dice. If you look at our base, we have lots of juicy actions down here that we cannot access until we get this excavator moving. So, what I think I'm going to do for my first dice placement, I'm going to place my die here. This four, it is 1 2 3 four spaces away from where the excavator is. This die is not going to be used to activate this spot because I cannot activate it. It is in front of the excavator. And I could if I wanted to place this die here, here, or even here. It just needs to be at a maximum the distance of pips that I have on the die. So, I couldn't place this here, let's say, cuz that's 1 2 3 4 5 six spaces away from the excavator. Instead, I'm going to place that die right here. And because of our Mexico ability, Mexico City, we can move that excavator 1 2 3 4 and not pay anything to move that. Normally, every time you move the excavator, it does cost you one energy. Now that we've placed this die, though, there's two things we need to consider. We can no longer play any die in this specific column. We only have these four available. Also, the ship that's in and any ships that are in this column are going to activate and move four spaces towards our city. The ship on the farthest left side will move one, two, three, four. Now, it moved over one of these symbols. Anytime these ships move over a symbol, you can ignore them. It's only the symbol that they end on that matters. Now, this spot is awesome. If we do end up attacking ships and we use
a die that has a value of two or higher, we could destroy this ship here because it's in an explosion space. Or I could just use Clinton's one-time ability, discard him, and destroy that ship. don't want to use that yet. We're going to get a lot more ships closer to us, but this just good to know that we could potentially take that out if we wanted. For our next dice placement, I'm thinking of taking this three and placing it here. Now, I'm not going to trigger that yet because guess what? I don't even have enough energy to use that. Uh, so I want to make sure I can generate at least one more energy before we activate our dice. Normally, you don't get to do it early like this one. Because I placed a three here though and it's white. I'm going to reroll these dice and I'm going to move the ships in this column three spaces down. Three spaces shouldn't be a problem. 1 2 3 on an open space. If you look here, there's some arrows which can get a little bit dicey. If they end their movement on an arrow, they get pushed to a different column. So long as another ship isn't already there. But then all of a sudden, when you're activating that one column, four or five ships can be moving. It can be overwhelming. We'll now reroll the rest of our dice. We got two fives and a two. With the three dice we have remaining, I do think I'm gonna place that five. Oh, now I'm gonna do the gray five so I don't have to roll. I'm gonna place a five here. That will mean I can research for a four. Five minus one with that die. And I do want to call out when we activate our dice, we can activate them in any order. This ship over here will move 1 2 3 4 five. It's going to jump over that explosion space. That's a bit of a bummer because I wanted to use
this with a five to be able to destroy more than one ship, but it is what it is. I'll at least be able to destroy one ship. And then I have to roll this die once again. This ship will move 1 2 3 4 five spaces forward. And then I'll roll this die getting a five. I only have two options for placement. Either here for energy or here for the AA guns. I'll do the energy. That will give us four energy. However, the ships are going to come down at us fast. two, three, four, five. This one would move over, but can't. Just to give you an overhead shot on where these alien ships are. We do still have quite a bit of space, but there's a lot of things we need to mitigate on the board. We did move up our excavator, which feels good. Now, let's activate these dice. First things first, we can remove this die. It doesn't do anything. Normally, now would be when you could move the excavator.
Then we'll remove this die generating one, two, three, four total energy, not five because there's a minus one. We then are going to do a research here for three. It does cost us two energy. And you can see there's a three in this uh circle right here. So we can move up one on the research track. This one is a four for research, which is perfect. So we can do a three and a one. And then finally, we can activate this five. And that means any of these ships that are on one of those explosion faces uh spaces four or lower, we can destroy them. The only one we can destroy is this purple ship. None of the other ones I could get on an explosion symbol. Purple and orange ships, whenever they are destroyed, always go back to the mother ship. The white ships, once they're destroyed, we set them aside, but they could spawn again. aka when the mother ship moves forward, which is that phase right now. We're going to trigger it and another one of these ships are going to come out. You can see, oh boy, lots of ships. O ships as they say. So, the first thing we have to do now or the last thing we have to do during the mother ship phase is spawn these ships.
We always look at any empty rows first. This row is empty. So, we will place that ship there. Then for these three remaining ones, we have to find where do we have the furthest gap between our the ships on this lane and the spawning. And that's going to be all three of these rows actually. So one here, one here, and one here. If ever there's a tie, you as a player get to choose. That will end our first round though. Nice and quick. Now you're going to see these symbols here. If ever a ship lands in those spaces, the mother ship moves forward one space. It doesn't activate the abilities on this right hand side. That only happens during the mother ship phase. So, if I don't want to have my excavator being pushed back two spaces, I might want to have one of these ships land on these spaces to skip over that.
We'll take our five dice again and give them a roll. Okay, a couple fours, some twos, and a three. I would really like to continue our movement for our excavator. So, I'm going to use this three. 1 2 3. Place it here. Normally, we can't do this, but because of the scenario that we're using, we can immediately move that excavator three spaces. Now, I'm going to have to move the ship three spaces in that row. But now, this spot is unlocked. And that spot is amazing. this spot. If we fill both of these runes, we can not only make a robot equal to the value of what's here, minus2, we can also take a shot for whatever we have as our value here, minus2 on any ships in an explosion space. This is where everything gets so interesting because we have a ship moving 1 2 3. It's on an explosion space of six. But this white one's also going to move one, two, three. And guess what? It gets pushed over here. Now we have three ships in this column. Probably should have thought of that. I have a plan of trying to activate these two runes, but I need a total of four energy, and I only have three. So, what I'm thinking of doing is using this white four so I can get a roll and placing it here. That will mean this one chip will move 1 2 3 four and get pushed over to this lane. We'll then roll our dice. And we have a six, a four, and a one. That six is absolutely awesome. Now, I have to roll because of this. But when I place it here, we're going to activate this column. And this
ship 1 2 3 4 5 6 is in a spot we can destroy it. But I have to reroll these two uh gray dice. We'll give our dice a roll. And we have a three and a one. I think we're going to place the one way up here in the AA gun section. That way, we don't have to move any ships because it's minus one up here. It's a zero. I could put it here, but we are not going to be able to research. Can you see it? We need a three to research next time. So, I'm just going to place it there. And then we're going to place our three here. So, our value here is 6 7 8 9 8 7, which is perfect. That will allow us to make a robot at a six value. So, good. But we do have to move ships three spaces. I'll move this ship 1 2 3 1 2 3 and 1 2 3. And guess what? I have another ship that I can destroy. I've got three ships I should be able to take out this round. We've completed our dice placement. Let's now activate them. So, the first one, we can get rid of this one. This excavator is moving this way.
This one on the AA guns is done. It does not activate. We'll use this die for two energy, pushing us up to five. And then we're going to use this. That's a 6 + 3 is 9. Minus 2 is 7. So, anything that's on a seven or lower, we can destroy. Plus 1 2 3 four. Spending the four total energy here. We now have a robot. And we can place that robot anywhere in our available slots. And that can stay there from round to round and activate that spot. And I want to do this one. Now, I have to turn it at an angle because it's exhausted. Our next turn, we still have to place a die in this column. But we can't place it here. Well, we could, but then we lose the robot. But when we activate our dice, we can activate this, and then it'll tick down to a five. And then we can activate it again. It'll tick down to a four. It can go all the way to a one, which is awesome. We are able to destroy this purple ship, this purple ship, and a white ship, which gets removed from the board. We won't see that one again until, of course, the mother ship respawns it in. Speaking of that mother ship, it is the mother ship's activation. This is going to slide down, and we have to push our excavator back two spaces. If you look at this rune, once we have this unlocked, we can place three dice in here. It's going to cost us five energy, but we can do a ton of research. So, that's what I'm trying to do is get this area unlocked. For that reason, we have two purple ships and two empty columns.
So, these two are going to be placed here ready for the next round. I think it's safe to say we definitely want to move our excavator this round. That's one of our goals. A two ones, a two, a five, and a five. The first die I think we're going to place is this five. But we're only going to place it 1 2 3 four spaces away. Whenever you place a die to move the excavator four spaces or less, move the excavator immediately. One, two, three, four. Look at that. We just unlocked this space. At the same time, though, these ships are going to move. 1 2 3 4 5 1 2 3 4 5. We could destroy that white ship. That's kind of appealing. I would like to keep my options open for these three columns. So, because of that, I'm going to use one of these terrible ones. Place it here. So that way none of the ships move and we can roller roll all three of these dice.
We'll give them a roll. And we have a six, six, and a four. Just a little different from our last roll. Are you ready to be a little bit risky? I am. We're going to place a four here and two sixes here. Placing the white dye last so I didn't have to do any other rolls. That means though this ship will move four. 1 2 3 four. These ones are going to move six. 1 2 3 4 5 six. And one, two, three, four, five, six. And this one's going to move six. One, two, three, four, five, six. And slide over here. Oh my goodness. So many ships coming down at us. If you look here, this ship is three away from hitting our city. The advantage though is during our activation step. Now for our dice, we'll remove these two. This one is going to generate 6 - 1, five total energy. So we'll go up to six. Here's our six. And then we're going to spend 1 2 3 4 5 total energy. So going back down to 1.
And we just did research of 12 + 4. That's 16. Let's see if that was worth it. 3 4 5 6 7 8 9 10 11. That's a seven. So we can't get over that seven. But that still feels really good. Then I do think we're going to use Clinton right now. And we are going to destroy this ship that's super close. We can do that because it's on an explosion space. So, he's done for this game, but he helped protect our base. And then during the mother ship step, we'll move this down. And another white ship is going to come into the mother ship. We can see there's one empty column. So, the purple ship will go here. We now have to choose the drop point that is farthest from the highest ship in that column. And the farthest one, I believe, is this one. So, we'll place that ship here. I think for next round we're going to want to try and create another robot.
I think that'll be awesome. And we could throw a robot maybe in this spot and just generate some research for us every round. Something I do want to call out on our track. We currently need a seven. If I placed a six here, guess what? We can't go over that hump. Even if I place other dice here, we have to use this whole value first and then use this one. We don't get to add them together. Some of the cities I think let you do that, but not in general. We'll roll up our dice for our next round. We've got a six, a four, a five, and a double twos. The first thing I think we're going to do is use this two and place it here to let the excavator continue to move for free. That will mean this ship will land on an explosion space. We have one energy remaining. We know we'll gain four. That will give us five energy. I'm thinking of activating this area this time. So, I'm thinking of placing a six here. If I do that, 1 2 3 4 5 6. This ship I can also destroy. That was a white dice, so we do need to roll. We've got a six, a three, and a four. This might actually work. Okay, what we're going to do is place this three here.
So, it'll only move those ships two spaces. And we're going to place this four here, which isn't going to do anything. The two ships here will each move two spaces forward. And then these ones will move one, two, three, four, and 1, 2, 3, 4. All on explosion spaces. This is going to work. If I use this six die here, then we'll move these ships six spaces. This is just crazy. 1 2 3 4 5 6 1 2 3 4 5 6. Look at this. on an explosion space. Explosion space. Explosion. Explosion. Explosion. Explosion. We're going to be able to destroy all of those. During the dice resolution phase, we'll take this down to a four for our robot, generating four energy. 1 2 3 4. So, we're at five.
We're then going to use four energy from here. 1 2 3 4. Going down to one. We'll make a robot that has a six. And where do I want to put that? Well, I'll figure that out in a second. Let's ex destroy everything at a value of 10 or less. This orange one's at a five. This one's at a six. This one's at a four. A seven. That one's gone. A six. And a four. We cleared shop. I think we're going to place this robot here. I know it's only going to generate for us four energy, but I feel like it's worth it because both of my robots are generating energy. And we can then activate these as need be. Once I unlock this one, this is energy plus one. That's what I need. The rest of these dice are totally useless.
During the mother ship phase, we'll place a ship here, here, here, and here. And then this one will go in the one empty spot. All five ready to take us out. Oh, and we can't forget this will move forward one. And you can see there's no event here. So, I wanted to make sure I did not activate or move the mother ship. Okay, let's do the next round and roll our dice. We'll roll them up. We've got a couple sixes, a five, a one, and a three. I feel like this round we want to do a big push for research. I've got to get over that seven hump. So, I'm going to use this six and place it in our second column. That only activates one chip. 1 2 3 4 5 6. And it's in an explosion space. We're hoping for a really big push here. So, let's use another six here. That's 12. We're going to have to roll these. I wanted that five, but let's roll these uh dice and move up that the two ships in that column by six. We'll move them both 1 2 3 4 five six. So I could hit the orange one but not the white one. We'll roll up our dice. And we have a six, a four, and a one. I'd love to place this six here, but then that would actually push the mother ship forward. So I don't think I'm going to do that. I'm going to place this six in this far corner. That will at least let me destroy one of the ships. Uh I wish I could do that one, but it's right in the middle of an area.
Next, I'm going to use a white dye, placing it here, so that we will get to do some extra research. This spaceship will then move 1 2 3 4. And now I have to roll this die. And it's a three. You know what? A three isn't bad, actually. I'll place that there. And this ship is going to move one, two, three right into our line of fire. Now, the only sad thing is I did not move my excavator forward. Eh, it is what it is. All right, let's activate our dice. We'll start with this one. We can destroy anything at a value of five or lower. That will be this purple ship and this purple ship. This orange ship is at a seven and no one else is on an explosion space. Then we can use both of our robots. So this will generate four energy and this will generate three energy and then we'll take this down to a three. So 4 + 3 is 7. 7 + 1 that we had here is 8. The max we can have on this is nine. And then we're going to use five. 1 2 3 4 5 to go up 6 12 13 14 15 on the research track. We can move up 7 + 1 which is 8 + 6 which is 14 + 1 which is 15. That's great. We only need 1 2 3 4 five more moves on this track.
And we might as well use this four, decreasing our energy down to one, and move one more time on the research track. So, we just need a five, a one, a three, and an 11. The 11 is the worst. Okay, so now this is going to move forward one. We have to deploy in the two empty spaces. We also get a white ship. And the furthest down is going to be this one. I think I have a farther back shot just so you can see this area is going to be an issue. Three ships in the middle column. We'll start this round by rolling up our dice. I'm starting to feel victory is coming soon. So, what I'm going to do is take a chance. We're going to use our white six. I want to reroll these anyways. A couple ones isn't great right now. Uh that will get us over that hump of five.
Then for our research, then we just need another research of four and then the big one of 11. So, I'm hoping I can maybe get a four to put here. And then next round, we can win the game. But we got to roll these dice. And two ships are coming down. One, two, three, four, five, six. That one is one away from hitting our uh Mexico City. 1 2 3 4 5 6. And there's no way I'm going to be able to defeat him. So, we're going to be taking one damage soon to Mexico City. We'll pick up our dice and roll. We've got a four, two, three, and six. The four is great. We can place that four here. And now that will allow us to get to the 11 slot. That'll be the only one left. This ship will also move 1 2 3 4 into an explosion space. Can I take them out? I think I actually can because I can place a six and a two here. The six will move this ship. 1 2 3 4 5 6. And this one goes onto an explosion space.
And then I really hate to do this, but I'm going to place this die here, meaning all of the ships are going to move two spaces in that row. That's great because we'll be able to take out this ship. But look here. This one is going to make the mother ship move. I'm okay with that mother ship moving one space, but the next space we're going to lose one research. I don't think there's anything we can do about it. We'll activate our dice. Starting with this one, generating two energy, taking this down to a two. I think we're going to be replacing that one in a second. And then this one, 5 minus 2 is three. 1 2 3. So we have six total energy. We'll take that down to a four. The robots are so dang cool in this game. Okay. Then we will spend this six as a five. And then this four here and spend two energy. The five lets us move right up here. And then the four will be one and three.
That means at the end of this round, we're going to get pushed back here. So, I'll just need 14 total research. That's going to be questionable. Maybe we can do that. We'll discard this three for no effect. And then this will give us a new robot with a six value. So, we'll grab this one. And I'm going to replace it here so we can continue to gain energy. Oh, or I could put it down here to help guarantee. H. Oh, that's appealing. But then I have No, no, no. I'm going to do it here because then I'll put our dice that we roll over here. I think that's worth it. We can also destroy any ships at a value of 6 plus 2, which is 8 - 2, which is six. That means three of these ships are toast. This one, this one, and this one. The white ship is on a seven.
We couldn't We can't hit the seven. We just can't. Bummer. Still feels good though. We might be able to win this next turn. Let's slide this down. We'll lose one on our research track. We have an empty row here, or an empty column. an empty column here. And the farthest back could be either one. So, let's do this one. All we need is 14 total research. I think we've got this. We'll roll up our dice. Ooh, that looks good. We'll start by placing a five here. This ship will then be one away. 1 2 3 4 5 from landing in Mexico City. We're then going to place our six here. That means we have 11. We only need three more, but I'm going to have to reroll these dice.
And with that six, these two ships are going to fly right in. And Mexico City takes two damage. We're 1 2 3 four away from death. Both of these will go back onto the mother ship to be respawned if we don't win this round. We'll give our dice a roll. That should work. We can place that three right here. And we'll have to roll these again. But that means we will have enough research to win the game. We'll reroll those last two dice. We've got a two and a three. I'll place each of these as AA guns up top. That means these ships will each move one space. And we have yet another one dealing us a damage. Uh but that's okay. This will go onto the mother ship. And then these two will each move one. But I think we've got it. We'll use our robot die here, taking it down to a three and generate uh two energy. That gets us six energy. this. Then we'll spend five. 1 2 3 4 5 and we'll move up 6 + 5 is 11 + 3 is 14. And at 14 research, we win the game. Woohoo. This means we've completed part one of chapter 1. We would now pick two more scenarios with two more cities and two more of these characters and choose one of them to try and complete and the other one's destroyed forever. I think it would be fun to play one more.
What do you think? So these are the other two scenarios that we have to choose from. Remember these were randomly set up. I like the idea of Montreal. Two or more room effects of the same type can be resolved simultaneously. So remember how I was saying before rooms you had to resolve individually. You can actually lump them together. That sounds really cool. So why don't we do this one? Unfortunately, Rio de Janeiro is gone forever. Beneath the flaming sky, ground troops fight a different battle for the lives of the city's people. Wo, this scenario looks interesting. The alien invasion is leading to mass panic. Instead of seeking shelter, civilians are fleeing into the streets. If you can't evacuate them safely, you may lose this city. Take the tokens numbered 1 to six, shuffle them and place one at a random face up or at random face up on the city tile. This is a civilian in need of rescue. Place the remaining tokens face down beside every other row of the sky starting at the top as shown. Whenever the mother ship descends to a row with a token, place that token face up on the city tile. When you place a worker die on the AA gun room, if the die matches a token in your city, remove the token before moving enemy ships. You have saved that civilian. Okay, interesting.
Whenever a ship hits the city, discard all tokens on it. You have failed to save those civilians. Take one extra damage for each. We also need to see which sky tile we need to flip. Well, six doesn't work. Let's reroll it again. Three. Wait a second. That was the one I did last time. Let's Let's do a different one, shall we? Come on. Uh, a six doesn't work. Uh, a three. Really? This is just me. Two. Two is this tile. Let's flip this one over. Okay. 2 4 3 2. So, not terrible for research. Oh, but look at these. Minus2 minus1 minus3. These are all bad for the mother ship. Gross. I already have the tokens set up on the board. And you know what? Our first token is a six. We'd have to give up a six in an AA gun space in order to save that civilian or we just take extra damage. Do we care about civilians? I'm just kidding. I'm just kidding. We certainly do. So, this is our new setup for dice placement. You can see how different this board looks than the other one. We don't have a huge research spot and it's going to be a lot easier for us to get energy. This is a dual location and no negatives. So, we should be able to generate a ton, but we can only hold a max of seven now instead of nine. I think we have more health here.
I just keep hitting these things. Uh, looks like we can make robots right away. We can attack right away, but it costs us three energy to attack. And we actually can't do any research in our first round because this time I'm not going to be able to move that excavator and activate things behind it in the same round. Oh, this is going to be interesting. Lucia looks pretty awesome. She is a mechanic. She can increase one robot by one or make an exhausted robot unexhausted. So that's what she can do once per game. We'll start us off by rolling up our dice. We've got a six, a four, a two, and two once. This might seem kind of timid for our first round, but I'd like to use that four here. 1 2 3 four. So I can move the excavator here. And that's going to cost us an energy. But if I use that four, I have to roll all of this. I'm actually thinking of placing a one and a two here. And you're going to see why. That will give us just a little bit more energy, but we also avoid all the negative effects for these ships. I then most certainly will place our four here.
It is four spaces in front of the excavator. We'll move that during the dice place or dice activation step. Now, this ship moving four. 1 2 3 four is no problem. We'll roll up our two dice. And we have a three and a one. We're going to place that three over here in this AA gun slot. So, it'll only move that ship by two. That means this ship will slide right down to here. We'll roll our gray dye up and we have a four. Well, it's not amazing, but it'll do. I think we'll make a robot value of three with that. With a four, this spaceship will move one, two, three, four right here. Now, we'll do our activations. Let's start by excavating. We'll spend the one energy so that our excavator can get over to here. We will then spend these two to generate one, two, three more energy and then reduce it by one to get a robot at a value of three. And where do I want to put that? If I put that here, that will move us up on the research track twice with that three. And remember, in this scenario, we can add these rooms together. I now have two really good spots. Or I could do it up here just to continue to generate energy. I think that's what I'm going to do. I'm going to put it up here. Actually, we'll then remove this die as it has no effect. The mother ship will now move forward one space, gobbling up that ship, and it will redeploy during the deployment step. We will get a white ship here. And now we have a token at a value of three.
So if we put a die at a value of three or six in our AA gun slots, that will help us save those civilians. Okay, we have to place one here. And then we could place this one in either spot. I guess we'll just put it here. Not a terrible first round, but certainly could have been better. I think I'm going to start off this round by trying to make another robot. So we're going to use this five and place it here. That will mean this ship will move 1 2 3 4 5. We're still okay. We're then going to use this white six and place it here because that will get us the value of seven for our research. But it does mean I'm foregoing generating energy here because I've already placed a die in that column. Uh but it is what it is. I can always go here for more energy. That middle row ship will move 1 2 3 4 5 six.
We'll roll up our dice. We've got a six and two threes. I want one of the threes to go here so we can excavate. But that's going to cause us to use another energy. That's this second column. 1 2 3. Now, this one would try and move, but there's a ship there. 1 2 3. That's why I was okay with that. This might seem kind of crazy, but I'm thinking of placing our six here and our three here. The six in this row, 1 2 3 4 5 6 is fine. 1 2 3. This one moves the ship over here. And now we have a free column. Actually, we can now activate our dice. We'll spend one energy and the excavator is going to move itself to here. It's going to get pushed back in just a second. We are then going to spend this to gain two energy going back up to four where they're going to use all four. 2, three, and then four. So, I'm just going to take this down to a zero. But this is 6 + 6 is 12 + one more is 13. Normally, we can't add those together, but because we have Montreal, we can. So 13 3 4 5 6 7 8 9 10 11 12 13.
That was an awesome research. We already spent the energy for this one to get our other robot die. Let's get a four. And we're just going to have those two pump us energy. So that will give us seven energy next time. Then six, then five, then four. And then we'll have to do something. But that's going to be nice. The mother ship has no deployment. It's just going to move up and push our excavator back two spaces. Kind of obnoxious. I'd love to have that spot open to us. Now, if you think about it, this column, we don't have many great actions we can do over here, unless we get 1 2 3 4 5 6. No, we'd have we'd have to get all the way over to here to make it worth it. We're not going to be able to do that with excavating. We'll roll up our dice for this round. Not a bad roll. 65 431. Our five here can be used to shoot some ships, or at least a ship.
1 2 3 4 5. This one we'll be able to take out, no problem. 1 2 3 4 5. I've been going back and forth on what we want to do here, but I think I want to push our research. We're going to place a six here, which will give us seven research. That will mean this ship will move 1 2 3 4 5 6. He's flying down there. We'll roll our dice. We've got a six, a three, and a two. I kind of can't believe I'm doing this, but I'm going to use this six here. That's not going to move any ships, but that's going to let us destroy this uh civilian, or I should say remove it. We've saved them. Uh and there's no ships in that column, so we don't have to move any. And then I'm going to place a three here, which means I'm going to have to reroll this two. That will move both of these ships two spaces down, and we're going to be able to destroy that ship. And we've just saved this civilian. Two civilians saved. But this means I didn't move my excavator at all, which I guess isn't the end of the world. We'll place that one here. That means nothing is moving.
Actually, you know what? We want to have that chip move. I'm going to move it. Uh, place it here. I want that chip to move one space. That's absolutely epic. Was not thinking I was going to be able to take that chip out, too. Let's now activate our dice. We'll take this one down to a three and this one down to a two. And that means we just generated seven energy. We'll then use 1, two, three to do our attack. I'm not going to do anything with this one. The attack is for five or less. This one, this one, and this one are all destroyed. We'll spend two more energy going down to two, triggering that die of six, which is actually a seven. So 3 4 5 6 7. We're already on the third tile for research. We also saved two civilians, which felt good. We're going to move here. Place a white ship here. And this is now a two.
Okay, I can totally deal with placing a two on my AA guns. Uh, we have this row, or I should say column is empty. This column is empty. And then we need to do this one next, followed by this one. We have our spaceships set up. We will have one round of reprieve against the this mother ship and one down here. Hopefully, it don't get that far. Uh, this one's probably going to hit us. I only have one spot left that I can take that one out. But our research is doing great. If I can do that seven again, four, five, six, seven, we can get to here and seven again. Wow. I just need to do that two rounds and then 11 12 13 14. We have to just have to figure out how to get to 14. We can do that. We'll roll our dice to start our next round.
Ooh, not a great roll. Four, two, two ones and a three. I don't love this roll, so I think I'm going to use this two and place it in our AA gun slot. That means we can save this civilian. And we're moving this ship just one space forward. I'm really hoping for a six somewhere. There's a six. That'll work. We're definitely going to place that six right here. That will mean though, this ship 1 2 3 4 is going to come into our city of Montreal and deal us damage. And this one, 1 2 3 4 5 6 is going to move here. I then think I'm going to place this four, one, two, three, four, over here. So, we can move our excavator to this spot during our activation phase. That will mean this ship will move 1, 2, 3, 4, and slide over. 1 2 3 4. And this one is in a location we could destroy it. We actually have three in locations that we can destroy them. Because of that, I think I'm going to use this five here.
So, I can destroy at least a couple ships. That means this one white chip will move one, two, three, four, five. It's on a six spot, though. And I had to use a five die. Bummer. All right, we'll have to roll this three. And we get for our roll a one. That will work. We'll place the one here. I'm not going to activate it because a robot at a value of zero is not worth anything, but we'll be able to destroy this ship. We can now activate our dice. We'll start with this one spending one energy. One, two, three, four. This one is moving along. Love it. We will just remove this. I'm not going to activate it. We can remove this one. I'll generate five energy. 1 2 3 four five. And this will be ticked down to a two. And this will be ticked down to a one. So, I'm going to need some new robot soon. We then will spend 3 plus two, which is five energy. We're at six. We'll go all the way down to one to destroy some ships and move up seven spaces on the research track. A three and a four. That gets us our seven. And then we can destroy this ship. This ship is off the board. We'll remove it. And this ship is destroyed. And this one's destroyed. Wow, that felt good. We'll then move the mother ship down. No effect this time. We'll place these in all of the empty columns first. And then uh we can choose one of these two. Let's do this one. We were able to choose because these two ships are in the exact same space. And unless I get really lucky, I'm gonna be assuming these two are going to hit Montreal. We can start the next round by rolling up our dice.
We've got some sixes. I love these sixes. We need seven more research. I'm most certainly going to go here for our first die. But this one red ship is going to come in and deal us yet another damage. And we'll place that on the mother ship to be spawned next turn. Let's then take a chance and use our white six and place it here. that will be using three energy which will generate with these two dice. Uh, but we have to move that chip six spaces. There's only one chip in this row. 1 2 3 4 5 6. So, we're okay. We'll roll up our three dice. Okay, we've got a 5, three, and a one. I think I'm going to place my five right here to get even more research. Remember, because of Montreal, we get to add all of our dice together. So, we have 6 12 + 5, that's 17. We'll move this ship five spaces forward. 1 2 3 4 5. In order to activate that spot, we're going to need more energy. So, let's place a three here. That will move this ship. 1 2 3. And then we have to roll this die. And we have a five. And with this roll of five, unfortunately, I was thinking it could go here, but it's at a minus one. If I count this up, 6.
Oh, wait. That's a seven. 7 + 6 is 13. + 5 is 18. + 4 19 20 21 22. No way this will work. We'll move this ship five spaces. 1 2 3 4 5. We now can activate our dice. We'll use Lucia here to increase this die to a two. Uh, and that way when we activate these two dice, knocking them both down to ones, we have four more energy. So, that knocks us up to five. And then I can use this die for two more energy. That's 67. And then look at all this research. So, let's just make sure I get this right. This is going to cost us 2 3 4 5 energy. So, we'll go down to two. We have 7 + 6 is 13. 14 15 16 17 18 19 20 21 22. We have a 2 + 5 is 7. Then this is 8. 9 10 11 + 11 more.
22. We have saved Montreal. That was better than I was anticipating. We have completed scenario two of chapter 1 for Under the Falling Skies. We have three more chapters that we can do. I think two is or two scenarios is enough for one video. I think it's safe to say if you enjoy dice placement, you're going to love this game. The different puzzles you have for all the different combinations here is so dang juicy. And these scenarios just add variety on top of that. I love how it changes this board just slightly. And then you can go at difficult more difficult levels flipping these tiles over. That's also cool. At the end of the day though, this game is a dice placement game. If you don't like that general mechanic, the rest of it, I don't think will be enough for this to stay in your collection. But this certainly is enough of a puzzle for me. I absolutely love it. And I love that there's all these different combinations. Oh my gosh, so cool. Let me know if you'd like to see chapters 2, three, or four. I could certainly do that as long as Brent lets me hold on to his copy a little bit longer. And I also want to give a huge shout out to our patrons and subscribers. It's because of you that Baron and I do what we do on this channel. If you're excited to see what's coming next, then I need you to meet me at the table. Goodbye, everyone.
It's your master enemies.