How To Play Backgammon Correctly! - A Full Tutorial
Games in This Video
1 game is featured in this video — it unlocks as you watch.
Transcript
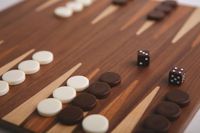
hi and welcome to watch it played my name is Rodney Smith and in this video we're going to learn the classic two-player game back gaming we don't know who designed back gam or exactly when it was first played but experts think it was about 5,000 years ago to play you'll need a back gam and set and if you end up liking the one I'm using in this video you'll find an affiliate Link in the description below to pick up one of your own but really any set will do so join me at the table and let's learn how to play to set up put the board between the players so that one is sitting on this side and the other is over here each player now collects 15 Checkers in one of the two colors different sets will have different colors but normally you'll have a dark and lighter one I'll play with the brown pieces and my opponent will take the white ones you'll notice the board is made up of several narrow triangles known as points and the checkers will start in a specific Arrangement on those points as shown in the rule book but as you play you'll find you'll have this setup memorized in no time so that it looks like this when you're done these points are divided into four groups of six points each the six which includes the pair of two white colored Checkers on a single point is known as Brown's home board or in this case my home board this is White's home board because it has a point with a pair of Browns chair Checkers the two groups of six points on this side are known as Brown's outer board and White's outer board so that
means we have Brown's home board here then Brown's outer board Whit's outer board and Whit's home board each player now collects two dice and a cup if your set comes with just two dice total the players can share them if you also have a doubling Cube like this set it aside for your first game but I'll explain how it works at the end of this video and and that's the setup in back gam you and the other player will each be trying to be the first to remove all of your own pieces from the board but you must do this in a very specific way as the player controlling the brown Checkers I'll be trying to get all of them onto the points of my home board here and when my pieces travel they always move in one specific direction that you can imagine goes from this point of my opponent's home board all the way to the left then up here and over to my home board so if I had a piece let's say on this point and I was moving at four spaces it would travel this way one two then up here for three and here for four in the same way when my opponent moves their pieces they go in a direction that runs from the point here all the way to the left then down and all the way over to the right into their home board so our pieces each move in opposing directions mine travel like this and my opponents travel like this we'll see exactly how you get your Checkers to move in a moment but just know once you get all of your pieces into your own home board area you'll then be able to
make moves that cause them to exit the board on this side also known as bearing them off this is known as Browns bearing offside and this is whites so again I want to move all of my pieces around the board into my home section and then and only then can I start having them bear off exiting the board on this side the player who gets all of their pieces off the board first wins the game has played over a series of turns starting with the first player and then going back and forth and to determine the first player each person picks up and rolls one of their dice the player with the highest result goes first rrolling any ties and then they take their turn using the value shown on both dice so here I won by Rolling a three and will use it along with my opponent's two on your turn pick either of the dice and move any one of your Checkers that number of points in the direction your pieces are allowed to move which for brown pieces as we learned is the direction going from this point all the way around to this one let's start with a die showing a three and pick this point you can always move any one Checker from a point you've selected and going three spaces would send it one two three spaces to here now we use the other die and again we move any one of our Checkers this number of spaces we could even pick the Checker that we just moved with the first die but let's move one of these instead and just keep in mind when moving you don't count this raised section known as the
bar so moving two spaces we would go one two also note you can have any number of your pieces on the same point so feel free to stack them if necessary to make room the only point you can't enter with the move is one that contains two or more of your opponent's pieces that's known as a block space so if it was later in the game and we had a situation like this I couldn't use this three value to move one of these pieces because that would put it one two three spaces into this blocked point I also couldn't use a five to move one of them either because that would also put it 1 2 3 4 five spaces into this blocked point also remember you can't move your pieces off the board until they're all in your home board area so we couldn't use this three or five on this piece because that would take it off the board which isn't allowed yet sometimes you'll roll a value and not have any legal places to move any of your pieces with it if so you just ignore that die I should also point out earlier I said you could use both dice rolled on the same piece if you want but each move must still be performed separately for example if I had a two and a three and wanted to move a piece in this position I can't treat this as a five and then move directly to here I have to resolve each die separately so if I moved with the two first I'd be one two and blocked so I couldn't pick this piece I also couldn't use the three to
move it because again 1 two three would also be moving onto a blocked point I'd need to find another one of my pieces to move with these values if you ever roll the same value on both dice you've rolled what is known as a double and something special happens you treat them as if you had actually rolled four copies of that value so in this case you now have four threes to use on your turn and again with each value you resolve you can either move a different Checker each time or one or more that you'd moved previously that turn rolling doubles in back gamon is awesome possibly even more awesome is moving one of your pieces onto a point that only has one of your opponent's pieces remember we said that if a space has two or more of your opponent's pieces it's blocked and you can't go there however if your opponent only has one piece there you can go to that space in back gamon a point with only one piece is commonly referred to as a blot so for example we could use this four to move one of these pieces 1 2 3 four spaces onto this blot when you enter a space with only one of your opponent's pieces that Checker is said to be hit and is then moved to this Center Bar as we'll see later hitting your opponent's pieces is good but otherwise that's how you resolve your turn you use the values on two dice to move two times unless you got doubles and then you get to move four times and in situations where you
don't have a legal move to make with a die you just ignore it once you're finished resolving the dice that you can you indicate the end of your turn by picking your dice up and then the next player goes rolling their two dice and using the values to move their Checkers remember we said if one of your pieces is hit it is sent to the bar if you start your turn with any of your own pieces on the bar then you must get them off before moving any of your other pieces a piece that is leaving the bar must enter one of the points in their opponent's home board so count the points in that section starting with the one closest to the edge of the board as one and then continue 2 3 4 5 6 the value shown on a die you've rolled is the numbered space you can move directly two so if I use this three it would allow me to move my piece on the bar directly to point number three however if a space is blocked you can't move a piece there from the bar so for example I could not have used this six because the six space is currently blocked I would have to use the three as I showed previously as soon as all of your pieces are off the bar any dice you have remaining can then be used as usual to move any of the other pieces that you have let's say we had a situation like this and it's my opponent's piece that is on the bar they will need to enter my home board area and again these would be numbered 1 2 3 4 5 6 they've rolled a one and a six but both of those points
are blocked this means they can't do anything in a case like that the player is said to be dancing they're stuck and won't be able to do anything else that turn so it immediately goes back to their opponent's turn this can really hurt if a player has a piece on the bar and then rolls doubles but that one space rolled ends up being blocked by their opponent's pieces remember rolling a double is like having four of the same value to use that turn in this case four fives but the five point of this home board is blocked so this piece can't leave the bar and that means none of the fives R can be used there's no limit to how many pieces can end up on the bar so you'll want to carefully plan your moves to prevent your own pieces from being hit anytime you can use your dice to move and create blocked spaces rather than leave pieces vulnerable on their own is always a good idea but if you roll the dice and there is a legal move to make you must make it even if it puts one of your pieces in a vulnerable position you can't choose to ignore dice that you've rolled you also can't use one of your numbers in such a way that it makes it impossible to use the other number if there would have been a way that you could use both for example let's say my opponent was taking their turn and they had rolled a six and a four if they used the six to move this piece it would end up 1 2 3 4 5 six spaces away on this point but now they don't have a legal move anywhere that would allow them to use the four because every piece they could choose to move
would be blocked so this move isn't allowed because if they used the six to instead move this piece first 1 2 3 4 5 six they would then still be able to use the four on this piece going 1 2 3 four again you must always resolve the dice so that you use as many of the results rolled as possible however if you roll and only one Checker could be legally moved by your results then you must use the highest value that you have to pick from if either of them could end up being the only die that you can legally use for example in a case like this if white rolled a six and a four they'd love to use the four to move this piece to go 1 2 3 four spaces to here causing a hit on my piece but then they'd have no way to use the six that they rolled since every six move is now blocked however if we reset this piece we can see that they could have used the six to go 1 2 3 4 5 six spaces now they can't use the four but as the rule state if you have only one possible move you must use the higher value if possible remember the object of the game is to get all of your Checkers off the board before your opponent does but you can only do this once all of your Checkers are in your own home board so right now I can't remove any of my Checkers because there's still some that aren't in my home board area but once I use a
die to get all of them in here any future die value I use including on the same turn can now be used to Bear off this is a term to describe removing your Checkers from the board to understand bearing off imagine the points of your home board being numbered from 1 to six with the one being closest to the edge of the board when it's time to Bear off you may use a die to remove one of your Checkers from the board which is sitting on the matching numbered point for example with this four I could remove this piece whereas a six would remove a piece from this point you can also use a value to Simply move a checker closer to this bearing off side for example if I had rolled a three instead of bearing off one of these pieces I might just move one of these pieces one two three spaces forward if a die value is for a point that doesn't have one of your Checkers on it you must use it to move a checker on a higher numbered point if possible so let's say I had just rolled a four I don't have a checker on that point to Bear off so instead I'd need to move a checker from either of these two points four spaces forward for example I could move this one to here here if you need to resolve a value and don't have a checker on that point or a higher Point within your home board you get to Bear off a piece from your highest point that still has a checker so if our home board area looked like this and we were resolving this for we don't have anything on the for space or higher so
you get to remove a piece taken from the highest point where you still have pieces then when we resolve the six it'd be the same type of situation so we'd take another piece from here let's say we had a situation like this where our pieces are all in our home area and we've started bearing them off but my opponent still has one of their pieces here as well it's possible on their turn that they'll end up hitting one of my Checkers which will send it to the bar now I must get this Checker off of the bar as normal before I can move any other piece not only that I no longer can bear pieces off until I get this piece all the way back around to my home board area just to test all our knowledge let's look at a situation like this where the brown player has been bearing off their pieces and they've just rolled a six and a four they might want to Bear off this piece with the six but they can't because then they'd be left with a four that they can't use and you have to use both dice if possible you see it isn't possible to use this four for example to Bear off this piece because you can't use a die value to Bear off a point that is lower than the value if all the pieces above that value haven't been borne off yet and we also can't use the four on the checkers of this point because moving four spaces would go 1 2 3 four onto this blocked space so instead we have to go back and use the four on this piece moving it 1 2 3 four spaces and then we could use the
six to Bear off the piece here and those are all the rules for moving and removing pieces from the board and turns will go back and forth until a player has removed all their pieces from play winning them the game being the first to remove all of your pieces earns you one point however if you get all of your pieces off the board before your opponent has removed any of theirs that's an even better achievement known as a gamon and you score two points for that game on the other hand if you get all of your pieces off the board and at least one of your opponent's pieces is still in your home board or on the bar you've won a back gam which is worth three points you'll often play a number of matches until someone's total score is an amount that you've decided on beforehand for example playing until someone has scored a total of 11 points but with that understood we can now introduce an optional element though some would say it's an essential one the doubling Cube this is a die that has six sides showing a two a four an eight a 16 a 32 and a 64 at the start of the game leave it on the 64 side place somewhere between the two players although this shows a 64 you can think of this as having no real value yet however on a player's turn before and only before they roll the dice they can first pick up the cube and offer it to their opponent turning it to the side that
shows a two the opponent now has two options either accept or drop the cube let's explain accepting the cube first to do this they take the cube and set it beside themselves with the two value face up now when the game ends the winner no matter who it is Will multiply their score by the value on the doubling cube in this case two so remember normally if you get all of your pieces off the board first you score one point but now you would multiply that by the value on the doubling Cube so 2 * 1 scores you two points remember though if you get all of your pieces off the board before the other opponent removes any of theirs that scores you two points but in this case that would be 2 * 2 or four points it doesn't matter who has the doubling Cube now if either player wins that winner will multiply their score by the value it shows so passing the cube is a way of saying I'm so confident I'll win I'm willing to double the final score if you thought you were going to lose you wouldn't pass the doubling Cube to your opponent that said once a player has it they may decide to pass it back once a player has been past the cube during the game they and only they can pass it again later and again they can only pass the cube at the start of one of their turns before rolling the dice and when pass the die is rotated to the next highest value so if my opponent passed the doubling Cube back to me they
would rotate it from two over to four now the winner will multiply the points they earn from this game by four if I decide to pass the dieback later the score will be multiplied by eight and so on back and forth it goes increasing each time as often as the players choose to pass it back and forth as you can see suddenly a single game can be worth a lot of points and although the cube only goes to 64 there's really no limit to how much you can double if it was already at 64 you could still pass the die but you would treat this as if the multiplier was 128 though I've never played a game where that's happened but remember I said when the die is passed you have two options you can either accept the cube which we've talked about or you can reject it this is also known as dropping the cube and you might do this when you don't feel confident that you can win the game when you drop the cube the game immediately ends and whatever value is being passed to you is now haved and that becomes the final score your opponent immediately earns for that game so if the cube was already at two and my opponent passed it to me they would first rotate it to four and if I decided to reject the cube my opponent would cut this value in half and score two points total for this game just remember once you've been past the cube you control it only you can pass it back to your opponent to increase its value also remember no matter who passed the cube the winner of the game is the one who will gain its benefits and with that
let's just end on a couple of notes about etiquette when playing back gamon your turn is considered over once you've picked up your own dice and put them back in your cup in other words you roll your dice use their values and when done you signally your turn is over by dropping your dice back into your cup if your opponent rolls their dice before this happens their roll is not counted and they must wait until after you've finished your turn and then they can roll their dice until you pick up your dice you can still move but then change your mind about the moves you've made resetting your Checkers and trying something else for example the white player here having rolled a six and a two might move this piece six spaces then think better of it and put it back and decide to move this piece six spaces instead also make sure you roll the dice from a reasonable height so they're properly randomized using a cup and shaking it at least a few times is the best way to ensure a fair roll tradition also suggests players rolling the dice onto the home side of their board like this but if either of the dice land hands on a checker outside of the board or is leaning against the edge of the board it is not considered a valid role and you will have to roll both of the dice even if only one of them was invalid personally I think it makes more sense to just roll on a flat surface beside the board but some players may be more particular about this and as with any game that's been around for 5,000 years you may encounter slightly
different rules or etiquette used by different players in different places but otherwise that's everything you need to know to play back gamon if you have any questions about anything you saw here feel free to put them in the comments below and I'll gladly answer them as soon as I get a chance you'll also find forums for discussion pictures other videos and lots more over on the games page at Board Game Geek and I'll put a link to that in the description below and if you found this video helpful please consider giving it a like subscribing and clicking that little bell icon so you get notification anytime we post a new video and if you'd like to support us directly you can join our patreon team which I'll have linked below but until next time thanks for watching