The Druids of Edora - How to Play in 13 Minutes. A Board Game Quick Start Tutorial
Games in This Video
1 game is featured in this video — it unlocks as you watch.
Transcript
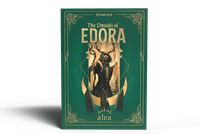
Druids do what they do best. Wandering a mystical forest, brew herbs, raise mighty stones to win the most prestige in the Druids of Adora.
And today, we're diving into a quick start tutorial for the Druids of Adora. We'll explain everything you need to know if you want to get started quickly and pick up the details and icons as you go along in 15 minutes or less.
And hey everyone, it's Stella
and Tarant. Welcome to Meeple University.
And hey, if you enjoy this video after watching, like, subscribe, and comments. You know what to do. Now, let's get to the classroom.
In Druids of Adora, players are competing druids, traversing the board and using their dice to visit shrines, all to take actions and to gain prestige. Whoever has the most prestige by the time one player has visited 13 shrines will be the winner. At setup, you'll set up the board in such a way from the frame and tile pieces such that every circular shrine has as many spaces as the player count. There will be 24 shrines broken up into different clearings by these areas of dark forest and all interconnected by these yellow paths. Round the edge are six pairs of colored dolmans placed so that each is at least three steps away from its pair.
On and near the central board is a whole range of general gainables. The provisions, these are the main currency that you'll spend on most actions in the game. And then the gemstones, beige dolmans, fire tiles, mistletoe, stone tablets, and magic potions, which all connect to a specific action. Players take two playerboards. a large one loaded up with deployables, which are runstones, standing stones, and medicinal herbs placed randomly on the sickle track. All of these will be deployed for bonuses during the game. Take a random face up stone tablet. This is an endame objective to chase. Now comes a critical moment which is going to impact much of the game, the roll of the dice.
Roll four of your dice into your personal supply and then roll your other nine to the central board. You won't roll again. Your 13 rolled die faces will be your die faces for the game. There are different pros and cons for having rolled high or low and you'll have to build your game around them. Highest rolled four die total goes first and remaining markers go on the score track at zero and on the knowledge track in bottom to top turn order. The knowledge track is often called on to break ties during the game and whoever's on top of a stack is considered ahead. In reverse turn order, players choose a starting space and its associated shrine for their druid.
Take a starting supply of 15 provisions and you're ready to play.
The druids of Idora plays in turns clockwise
and each turn is resolved in up to seven steps done in order. The steps are first move your druid paying any provision cost for the move. Second, place a die on the shrine paying the provision cost for the die. Third, resolve competition. If it's a contested shrine, the player with the highest dye face gains points. Fourth, resolve the action covered by your die. Fifth, resolve and gain bonuses from a fire pit if you're the first player to completely surround that fire pit with your dice. Sixth, take and score points for a matching pair of dolmans if you've joined them together with a path of your dice. and seventh, unlock medicinal herbs from your player board if you've passed them with your sickle this turn.
Steps are always resolved in this order, although not all steps will resolve each turn. So, let's review these steps in detail. The first step is move. On your first turn, move for free to the shrine adjoining your starting location. On subsequent turns, move to any shrine not already containing one of your dice. Move any distance across any number of paths, paying one provision for each shrine you enter or pass through, and one provision for each path which crosses the dark forests that separate the clearings. Moving from here to here, for example, passes one, two, three, four shrines, including the destination, and crosses one, two, three dark forest paths for a provision cost of seven.
After moving comes placing a die. Choose a die from your supply, never one from the central board, and pay provisions equal to its pip value. Place it in the empty action slot of your shrine corresponding to the action you'll later take. Step three is competition. If this is the second, third, or fourth die placed in that shrine, then the player who owns the die with the highest pip value now gains two points. In case of tie, ties are broken by the knowledge track. Step four is action. Resolve the action covered by your die. There are eight different actions, and I'll explain them all in the next section of the video. Step five is fire. There are 16 fire pits, each surrounded by two, three, or four shrines.
If your placement has made you the first player to completely surround a fire pit, then gain each bonus on that fire pit and cover it with a fire token. Step six is dolmans. If your new die creates a path of your dice linking two matching colored dolmans, then collect those dolmans. Score two points for each of your dice on the shortest such path. So here it would be eight points. And if still available, take a beige almond and score the eight, six, or four points next to it. Step seven is medicinal herbs. For each pair of herbs your sickle has reached or passed this round, take both herbs, place them next to your second playerboard with one face down and one face up. From the next turn onwards, you can take advantage of the special power unlocked by the face up herb.
After those seven steps, play goes to the next player. So now, let's have a look at the eight different actions that the druid can take. Hm. It seems like you really need constant supply of dice and provision to take actions. So, there's got to be a way to get more of those, right?
Indeed, there is. The first action is take dice or provisions. When taking this action, either gain 12 provisions from the supply or three dice from the central board. Pick any among those on the central board without changing their faces and add them to your own supply. ready for use. With this action, advance two steps on the sickle track. Your new herb will get unlocked in step seven. For these actions, advance two or three steps on the knowledge track. You stack on top of any marker you land on. In the case of knowledge, dice, and sickles, gain two points if you've reached the end of the track and gain the reward again.
here. Gain a stone tablet. Choose any one among the 12 face up stone tablets. On it will be some sort of endgame scoring objective. If you achieve what's on the tablet, you'll gain 10 points. Gain the bonus on each of the blue tinged oracle stones adjacent to the tablet you took. And then replace the tablet from the draw stacks. With actions like this, add a gemstone to your amulet. The icon will show an amulet row. Here it's 1, two, or three. And an amulet multiplier. Here it's three, two, and two. Upon making your choice, let's say here it's row two, multiplier 2. Take a gemstone from the board that you don't already have. Place it left to right in the two slots of that row of your amulet and gain the bonus on that gemstone a number of times based on the multiplier.
At game's end, you'll get 10 points for each amulet row you fill and 20 points if you fill the entire left hand side. For these actions, gain mistletoe and brew potions. In this case, you would gain two mistletoe and then brew up to one potion. Here it's gained one mistletoe and brew up to twice. To brew, pick any available potion in the supply, pay its mistletoe cost, collect it, and resolve its effect immediately in your current location if it's a location dependent action. For this action, place a standing stone. Take an available standing stone from your board, immediately gaining the reward underneath it and add it to your location.
Then gain every reward below one of your deployed standing stones, including the one you just deployed. Finally, this action is to deploy a runstone. Choose any one among your six runstones and add it to your location. Now gain once off the benefit printed next to that runstone based on the pip value of the die you used to take this action. For runstones, you always get better rewards for playing higher valued dice. And this is the only one among the eight actions for which the pit value has any impact. Throughout all of these actions, a lot of your strategy is likely to be driven by the herbs you choose, the potions you brew, and the stone tablets you collect.
And you can find all the icons explained between the rule book and the supplement. Through all of these actions and bonuses, you could still find yourself in a position where you don't have enough dice or provisions to take an action.
In this case, you become a druid in distress. If you choose or are forced into a distress turn, then you ignore the normal sevenst step sequence. Your entire turn is spent gaining six provisions and one die from the center. The game end is triggered once at least one player has placed all 13 dice. Then once all players have had the same number of turns, the game is over. to the points you've gained in game. Gain one point for every six combined leftover provisions missile tote and dice you're holding. 10 points for each completed stone tablet. 10 points for each filled amulet row. 20 points if you've filled the left hand side. And points based on how far you've advanced on the sickle track.
Now resolve onboard shrine control. Each shrine is controlled by the player with the single highest dye value with ties broken by the knowledge track. Then each player counts up the total number of dice they have left on the board plus total rune stones and standing stones within the shrines they control. Here, blue controls 11 dice and stones. For each dye or stone, score one, two, three, or four points based on how far up the knowledge track you've moved. The player with the highest score wins. And if tied, it's whoever's further behind on the knowledge track who breaks the tie.
So, thanks for watching. And if you like this video, maybe you'd like to watch this next one. Have a great day. Bye.