Myth l Avatar of Shadow l Act 1 Campaign Playthrough
Games in This Video
1 game is featured in this video — it unlocks as you watch.
Transcript
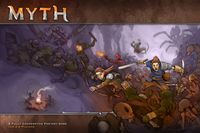
Greetings. I'm Barren and welcome to Meet Me at the Table. Today we're going to be doing a playthrough of Myth. We're going to continue what our characters have done after the Stone of Life. I know it's been it's been so many years since I've done this. If you're interested in seeing the Stone of Life video that I did, it's a whole video series and it was the first mission we've ever done with Myth. Uh please check out that. I'll try to put a link in the description of the video. Otherwise, you can search the channel. You're going to have to search for a long time. It's like one of the first videos I ever did. Uh, this game is the game that started my channel. This is the one that I was super excited to see played on YouTube. And sadly, my friend Colin would not do it. So then, that is why I did it. And the rest is history. I have created Meet Me at the Table. And now Colin and I together are that channel. And it's all because of this game. So, we're going to dig into Myth.
We're going to play through this second mission that we have. And I'll show you the ones that I had a choice of and we're going to continue the epic story of Brian, Karen, and Ben and see how far they can get in myth. And if you're excited to do that, then I need you to meet me at the table.
first class. For those of you that have not seen this particular book, this is a book that I was part of like an extra thing you could add on to your game after during the Journeyman Kickstarter uh which has long which finally delivered all the rest of the miniatures. But this is some of the paper components. In case you haven't seen this, this is a super cool book. It actually has all the rules and everything that has to do, including rules for how to play solo. So, if you want to play single player, it's found in here. And then I was thinking about doing this mission. Hey, got you. You got that thing was the mission I was going to do, but there's a small thing right here that states this module is different. It is not played with a group of players. And I want to play with the same group we used in the Stone of Life. Of course, uh I am not going to be using Alex the Swordsman. He has gone on now that he has uh done with the Stone of Life. So, it's just going to be Brian, Sarah, and Ben, or Brian, Karen, and Ben, sorry, going on. So, this is so it was a fiveact mission book, which was really cool. I kind of read through it and was excited to do it. But sadly, it's a solo only. Now, also, it does give an idea of how every one of the characters plays. It gives you ideas of synergies and how to uh kind of what some of the tricks that might trick people up uh when it comes to playing the character. And it gives you ideas of how to advance your character going forward. And it has like all the different characters that are part of this. And then on top of that, it even goes into the journeyman characters, kind of what to think about when you're early upgrading your characters, how to play these new characters that you might be join learning going into. Um, and
after we are done with this particular mission, we are going to be able to turn one of our characters into journeymen. Actually, I could say we turn them all into journeymen, which could be really cool. So, it does go through all the characters, which there's a ton of. Um, there's like monks, there's pupils, there's swashbucklers, there's hunters, there's skulls, there's uh wardens, there's tricksters, there's a whole bunch of different characters you can play. And each one plays completely different, which is super cool. It has a beasty that talks about all the different monsters in the book. And then it of course has some cool art at the back that are some of the cards that you're going to see as you play through it. These are some of the card images that they have in the book. And it has our alternate heroes. It has all the different art and things that go along with it. shows you all the different items you can gain in the game. So, that is the book that I am not going to be playing through that instead. I had because it was a solo game. So, I had a choice between Avatar Shadow and The Rot. And I was going to do the Rot, but the problem is it uses a lot of the infected models, and I don't actually have any of those infected models. Um, when they created it, from what I understand, I didn't actually get them.
I don't know. for me something that was uh part of the the whole journeyman extravaganza that went with myth or they just didn't have enough of them produced. I think I have like four of them I think is all I have. But I'm going to need more than that in order to play through this. So I decided I'm not going to do that. So instead I am going to do Avatar of Shadow. Now a spoiler I actually did Avatar of Shadow, but I used Ulyses Spiel's new print and play game when I originally did the Avatar of Shadow. So, the very beginning of this is going to set up similar to that, but it's not going to play like it at all. So, I'm excited to see what the difference is between their quick little print and play that I did and the actual one that was written by Brian a long time ago. This is a one skull module. So, that does mean that our characters are built for this. It can be played right with some novice characters that we have. So, we're going to be using that. Um, and I'm going to go through the entire setup and everything and show you all the things we have to do to get ready for this particular mission. And then we're going to dive right in. And of course, I'm going to show you who we're playing with. So, for this particular module, we're going to not use any of the Realm Legend tile, the tile legends. Uh, and you'll see those on some of the tiles. We're not going to use them. I might explain a little bit what those are as we go through. I am going to start this video off as somebody who has not seen Myth before.
So, I might be repeating a lot of the rules and how the game plays to people that have already seen some of the videos for Myth. And if that's the case, I apologize for it being a little slow at the beginning, but then we'll start gearing up and really jumping in. For this module, we're going to get our treasure bag with 25 white tokens, 15 green tokens, and one blue token. When making up a treasure bag, the tokens that the game comes with are these cardboard ones that you can use. I have upgraded those, of course, with the Kickstarters through the years with Myth. So, I have these metal ones as well, but we're not going to use those. And I'm going to use the metal ones for actual money in this game. So, instead, I do have a whole set of beads. So, I really like to use these. So, we're going to take all the white ones and stick them in the bag. Then, we're going to take all of the green ones that we have and the blue one, put them all in our bag, and this is going to be the treasure bag. So, if you ever had asked to draw a treasure token, these are what we're going to draw from. We're just going to reach in here, pull out one of these, and we'll see what it is. That's a white one. what I draw from the white treasure deck and you'll see how that goes as we play through it. The difficulty of this is one skull which means that players can attempt this module starting heroes and no upgrades.
However, it is suggest players have learned the game and completed the Lucy quest cards in mythbased game. When playing through Myth, you can either play them through as a module like you see in front of you or they have a deck of cards that are all individual quests that you can go on as you move through different tiles in the game. Uh we are not going to be doing the quest parts of this. I actually find that I am not a fan of the questing system, though it is a very unique system and it does bring some joy and fun, especially if you're just sitting down for a short session. You don't have to feel like you have to get through it. As soon as you finish a quest or two, you can just box the game up and keep your characters the way they are and play again when your friends all come over another time. So, there are multiple ways of playing Myth where you can get super fun enjoyment out of it.
But, we're not going to be doing the quests. We're going to skip all of the quest cards that have to do with this. I'm just going to jump right into this module. And at the end of the Stone of Life module that we played, it did recommend going into this module next. So, we are not going to be having novice characters when we go to look at them. We do actually have one upgrade for each of our characters, giving us a little bit of a boost when we come into this, but once we're completed with this particular module, we might have a chance of moving into two skull modules, which are going to become more advanced and harder to get through. Here are the required components in order to play through this particular mission. We do need the base game. We're going to need the cons expansion uh boat tile. We'll need the realm expansion supplement one and the realm expansion uh one. We need the item expansions. We're going to need all these different tokens and tiles that may come from the base game and the cons expansion or maybe just from the base game. Uh we'll need the tribunal, the unholy models and monsters. Uh one of the uh enemies called the Stylin St.
Stalin Stylin Steel. I apologize. I'm terrible with names. Um, we're going to have the Avatar shadow and these Fireborne models and monsters as well. Now, not all of this is found in that core game, even though it says you do need it. A lot of this is extra stuff that was part of the Journeyman expansion and also part of the original Kickstarter. Um, so in order to play this, you need to try to find a person that actually has a lot of the extra stuff in order to get into this. Uh, if you just get the base game, you're only going to be getting the crawler uh miniatures and the what is it? Terror of a thousand legs enemy boss. You're actually not going to get any of this other stuff. You might get some of these tokens and everything, but all these other things are going to be extra things that you're going to have to find along the way. Myth is going to be a tough game to get if you're interested in actually getting it, but if you're able to find it, it is a super fun game, as you're about to see. Important note, intro text should always be read before encountering the tile and is preceded by the following icon. If there's an interlude between tiles, it should be read after clearing a tile, but before setting up the next tile. Interlude text is preceded by the following icon. Setup sections and references required for these sections have a white background.
The first map we're going to be setting up is the prison. Uh the restrictions for this is I am not allowed to use serendipity which is a resource that we can use to help out our characters or gain access to merchants or raise characters from the dead. Uh we're not be able to do that. We do have a goal. We have to escape after researching what happened in the prison. Uh we fail if all heroes lose if the if the heroes dies, they abandon the realm tile or they cannot escape the prison which I hope we don't fail. That'd be really really really bad. reward. Each surviving hero receives a quest token that represents the one use power. This power lowers the darkness AP by one when a hero uses this power. Discard the quest token. There are no limit to the number of heroes that may use this power during the hero cycle. So, it's going to be so that'll be the thing we're going to be able to get a reward if we're able to get through this. This particular adventure is broken down into three acts. The first acts is act I should say is the prison of Arthos. You prepare yourself. You must hold on to every detail if you are to find her. You have never stopped searching to your dying breath. You will seek to rescue the little girl you lost in to the shadow.
She haunts you, especially on nights like this. The bold bright moon reminds you of that night long ago when you failed her. You know, once your eyes close, Lucy will be staring back at you. She speaks to you. Some nights, asks for help, taunts you with images of people and places. It is almost as if you could reach out and touch her. Always you arrive too late. Always the guilt awaits, heavy and alive. A splinter of her shadow forever fixed, immovable in your soul. One day you will be judged, and there will be a reckoning. But today, tonight, there is still hope for one little girl. You will not leave her to torment in shadow. You stoke the fire a bit more and lay down. Flames dance in your vision. You watch embers float into the night sky, mimicking the stars far above until they fade and disappear. You are close. You can feel her. Your eyes close. You hang in the air above a prison of some sort. There's a man in each of the two jail cells. Two men sit guarding them, playing stones. Lucy walks in alone, innocent, made flesh. A wolf among the sheep. The guards are surprised and move to help the lost little girl. You try to call out to the men to warn them. It doesn't help. One of the two men behind bars looks scared.
He knows. He backpedals, fleeing into the farthest corner available to him. It happens so quickly. One of the guards reels back, clutching his eyes. He flails across the floor. The other looks on in disbelief. She launches at him and bites his throat clean through. She rides him down as he falls, head still buried in his neck, jaw still chewing. She rises from the dead guard, her face is and dress covered in blood. The other prisoner begins to beg her to free him. He is flung and held against the far wall. Suddenly, your perspective changes. You have become the prisoner floating above the ground, pinned to the wall. Lucy's smile in darkness. You scream as your inards burst forth from your abdomen and begin to snake along the wall where you hang. With a flick of her wrist, the other cell is flung open.
So, that was like, I don't know, the exorcist gone bad. So, we're after Lucy. Our goal is to free her from the darkness's grip. um the quest cards that we did not show have that whole theory behind it. So, she has kind of been possessed by the darkness and our goal is to try to save her. We feel bad that we weren't able to help out a father that needed her daughter saved. So, our goal is to continue that into this module and we're going to attempt to save her. So, we have set everything up out on the table. We're going to go through each of these and what exactly they are and then we're going to begin our adventure. The different tokens we have out is a soldier fighter token. Uh, if we interact with him, it's going to take us one movement point, and we'll roll a d10 and consult the table. We have Fireborne reinforcements on the second darkness cycle. Three Fireborn appear on the left side of the tile and activate immediately. We have a cage with a marked by a grave token. Again, we can use a movement point and roll a d10 and consult the table. Lastly, we have two crates out there. And again, similar to the last ones, all we do is have to use a movement point and we can uh roll on the table and see what happens. These are combined tiles, so it all is one thing. Uh we are going to start here.
Our goal is to get to here. Uh but we might want to try to collect some of this treasure, and we'll have to get through that seductress, in order to make it. I'm going to quickly go through each of our characters. The first one we have here is Karen, our archer. The way this game is played is you have a deck of cards that are going to have actions and things you can do. You're going to be able to spend these cards in different slots here. Once they're full, they're up. You can't do anything else with your character. You're going to have a set of gear. We have our gear all up here. We started with a long bow and we have an arrow bag and adventures gear. This right here is the stone of life. We're able to claim that as well, but I don't have a card for it. So, I just use it up here as a little I just put the card like face down. Uh, what that stone of life allows us to do is we can resurrect a hero when they're dead.
Just automatically just boom, there you go. Uh, so we kind of have one get out of jail free card yet here. Each character comes with a card that explains a little bit about how that character works. So, for example, our archer here has a unique ability to deal with line of sight. Uh, the archer does not follow normal rules determining for line of sight. Enemies do not block line of sight for the archer. Normally they do for people, but not of course the archer because she's tricky like that. Uh we also have ourselves eight health. Our starting placard here will show us all the things we need to know. These are metal ones I got with the original Kickstarter. Uh this character has what you're seeing on here is you're seeing the dice pool. It she automatically gets to use 1d10 and one fate dice whenever she makes any type of roll. she gets this symbol that on the fate dice, she is going to be able to activate anything that is like her normal symbol. So, when you're looking for gear or things of that nature, if it has that symbol on it, most likely that is going to be for this particular character. So, it might benefit that class. Uh, she has a total of two movement. Whenever she moves, she starts with six health. Oh, sorry. I think it's five health. She starts with five health and she has six courage. If I have to take a courage test, she will have to roll a six or better in order to do that. We are start with five health, so I'll put that down there. Start with five health. We do have a adventurers gear, which gives us plus one health and we so we're at six. And then we have
from completing the stone of life the lifebringer title. The hero has plus one vitality and receives plus one vitality when the target when it's the target of heals. So, I get an extra starting one. Every one of our characters has that for completing the stone of life uh module that we did earlier. Uh other than that, everything else is as seen. This is our threat meter here. This is our movement. When we decide what movement we're going to do, we can lock in that movement. And some cards h can only be played during certain movement patterns or also you're going to get bonuses based on what movement you're doing for certain cards. And you'll see how that works as we go through it. Every character gets a set of deck of cards right here. We're going to give our deck a truffle shuffle. Now, since we did complete the Stone of Life at the end, it did tell us that we were able to manipulate our hero deck, which means that we're able to substitute one advanced card for one of our novice cards. So, as we're playing through this, you're going to see that advanced card in this deck, which is hopefully be good because I put it in there. It should be good for something. Now, every hero does draw up to five cards.
Normally, there may be things that adjust that. We don't have anything that's going to adjust that at the moment. So, we're going to gain five cards. We're going to flip these over and see what we have. We have Fool's Earrand. There is a token for this right here. Fool's errand is a card that allows us to make the enemies attack it. And you may see how this goes. It does have an ongoing. And in order to use this, I have to have a ranged weapon, which I do. And when I use this, it's I can choose a square within range. And the range is going to be found on your ranged weapon. And the range for this particular weapon is five. So it's within five range. I can ready one. I can discard a ready ammo card. I don't have any at this time, but I'll probably be getting some because there are plenty of them in this deck. And place the fool's Aaron token in the chosen square and reduce the darkness meter by two. I don't have you'll show I'll show you the darkness meter in just a second. We Here's one of our ammo cards. We have that one. We also have through a needle's eye, which is an attack. It does one damage uh in attack one damage with it within target. If using ammo the target uh his armored enemy it has negative -2. So it's just a way of being able to hit something. We have another ammo. We have find weakness. Choose one target within range. Each hero attacking the target gains plus one d10 and plus one fate dice to the attack action. In addition, each hero within range gains negative one target number to non-combat actions and courage tests. That's going to help us quite a bit. Now that you've seen all the cards we have, I'm going to explain a little bit about what these
are. Over here is what we bonuses or whether we can play the card based on our movement patterns that I was talking about earlier. Uh these all the cards we have can be played at any with any type of movement we do. But if you notice this one, if I do not move, I get plus 2d10 when making my attack. This gives me plus one. And this one just says I can make the attack. Now this one, I cannot actually make this attack. The different movement patterns you're seeing is stationary careful move which means when we use our movement which you get one free move action per turn you don't if you move only one it's a careful move if you move both you've made a full move there are cards like hustle and uh just run I guess you could say that are going to trigger this particular one down here it's going to show you how many points towards the darkness meter that it's going to act it's going to accumulate when you play the card also So down here, you're going to see arrows going that way and arrows going this way. Arrows going up are actions. You can only ever play one action on your turn. So this would be the only action I could play. If I decide to play it, I'd place it down in my card area and then I would be able to perform that action. I cannot perform any other actions that turn. But anything with an arrow going down is considered a reaction. You can play as many reactions as you want. that you can only play up to four cards a turn unless of course you have something that augments that. So this character actually has some pretty decent cards right off the bat and she is all set to
go. Moving on to our next character. This is Ben the acolyte. He has a total of eight health. Again, if we look at our little placard here, he starts out with six health. He has six courage, two movement. He's going to be using this faith symbol as the or the uh roll on the fate dice that he is going to want to see to activate most of his things that he has. He of course has 1d10 and one fate dice to start. Almost every novice character that's what they start with. But as we move into the journeyman things that could change. Uh I do have my adventures gear and my lifebringer. So that means instead of six I have eight starting health. I do have adventures gear. He has two different things here. The first one he has is a wooden plank. This is his normal melee weapon that he can use. It gives him 1d10. And if he does roll this when he uses his attack, he's going to be able to negative one threat after the attack, which is good. It keeps his threat down.
He did get to upgrade. When you do complete a module, you when you're done, you get to keep cards that you've collected during that module equal to the number of uh titles that you have. So, at the time, we have one title. So, when we were all done, each of my characters were able to keep one card that they had received. So, he kept the dark crystal. It gives him extra attack and fate dice. And a lot of this is going to be used when he uses any of his type of magic type attacks. And you'll see those in just a second. So, that's what he has for that. He does get to draw five cards. So, we're going to shuffle these up and get them all set to go here and see what kind of cards he is able to get for his first turn. Hopefully, some good stuff. We'll see how it goes here. I will say one thing I've noticed about Myth as I play is every turn you're going to be drawing your cards and you're going to be able to perform actions from these cards.
It's very rare that I have found myself having a dead turn because I didn't get cards that really allow me to do something. I have noticed playing the game that there's really a a good amount of cards that no matter what, there is something you're going to be able to do. This particular character does have a couple things that are unique to him. He has faith and he has relics. So, the relics are right here and like I said, they're going to be used more for a lot of his uh faithbased uh magic attacks that you're going to see or healing properties. and his faith is an interesting way. It says it is used to increase the effectiveness of many of the acolytes hero cards. The acolyte starts with a base faith of one and each hero card played with faith keyword counts as one faith. The acolyte can also use pray cards to gain additional faith. After resolving a pray card, each faceown card on top of it becomes one faith. So, you can really generate a lot of faith with some prayer cards. One, two, three, four, five. I get five cards and we'll see what we get. I have feet of the saints. This is one of our cards we get. Uh, it's a range tile. So, this is going to affect the entire tile you see. And since it's a combined tile, it is the entire tile. Faith. It already is right there. So, now if I play this, I'm going to have two faith. Each hero within range reduces the uh AP cost of attack actions by one. That's going to be fantastic. Now, it's attack actions, not reactions. I also have Righteous Fury. Again, this is a faith card. Range
four. The number of heroes equal to Faith in range gain one damage to attack actions. That's absolutely awesome. I've got soothe words. Now, it's interesting that I drew this card. It's really good that I did. If you notice, this is a reaction card. It goes down, but it has a circle in it, and all of my movement is black. That means I can only play this card during the darkness cycle as an interrupt. So if somebody gets hurt, I could interrupt the darkness, play this card, and I'm able to restore two vitality to one target within range, and I gain two threat at a range of two. I have smite. This is just a range one damage card that I can use my melee attack, which would be my wooden plank. Attacking one target within range. If you played after guided by the light, you may play this card as an interrupt.
So I could play this as an interrupt if that card was played first. But this can be played either as an attack action or a reaction. So when I did play Feed of the Saints, each hero within range, including himself, reduces the attack action. So if I want to use as an attack action, this cost me no. But if I use as a reaction, it would cost me one action point towards the darkness. Uh then we have hand of the father faith heal. Restore three vitality to a hero within range. This affected the number of additional heroes equal to faith. Each affected hero gains plus 1d10 to all roles and you gain four threat. So gets a lot of threat, but he can heal people with that card. Lastly, we have the outsider. This is an expansion character. This is not a character you would find in the base game. Uh this character is pretty cool. He is going to be using a lot of malice. Malice is something that is going to be important to this character. The outsider here starts with six vitality, six courage, two speed, and it's looking for that symbol on the uh fate dice to activate many of the different powers that this character has. It has a malice pool of six. So, that's what it really likes to have malice. And malice is all talked about on this card. It says, "The outsider uses a resource called malice, represented by malice tokens. The malice pool is determined by the hero or enemy with the largest malice pool on the hero token or monster card. Place an amount of malice tokens into the malice pool
equal to the number listed on the largest hero token or monster card. Malice is shared between all heroes and enemies who use this resource. The malice pool starts at its maximum value at the start of play session and changes based on the hero action using malice. Playing a hero card with the keyword malice adds one malice token to the malice pool unless the hero or monster card says otherwise. If there is no malice tokens in the malice pool and a hero card, monster card or an item requires it, the card or ability cannot be played or used. Once the malice tokens are spent, they can only be generated by playing hero cards that have the keyword malice. If a card does not create dictate how much malice it generates from it, add one malice token to the malice pool. Um, so that is what this character does. This person does have this obsidian glade glaive which if I roll the symbol here, it's going to reduce threat after the attack by one. I was able to keep one item for this character and the ring is of naira is what we kept. It gives me an extra fate dice whenever I make an attack and it gives me plus one movement and it ignores one damage per darkness cycle.
So this is really good. There are different colors of items. Green are kind of uncommons. Blues are kind of uh more rare items. Then there's also orange. There's purple which are like legendary type items which are super super powerful. But we'll probably not see one. Remember, I only have one blue one in this bag. Now, we'll shuffle up this character's deck, and we'll get it all set to go. Drawing out five cards. Now, I know I bombarded you with a whole ton of stuff, but you'll see it all come together as we play through the game. One, two, three, four, five. He gets five cards. He has this. It's a parry card. It ignores one enemy attack targeting you. I have hand of darkness. Now, this does have malice on it, so it'll automatically add one to the malice pool, which is six right now because of this. It starts, it says malice pool six, so it's going to start with six in it. Uh, each enemy defeated by you generates one malice token.
That's fantastic. I have path of the guile. Each other hero within range is dealt two damage. And then their dice pool increases by 2d10 for attack actions. Gain one malice token for each affected hero. Then we have path of rage. Each other hero within range gains three threat and plus one damage to attack actions. this hero cycle. Gain one malice token for each affected hero. So that would be good. And then we got sojourer's path. This one is an attack melee. This does not give me any malice. This says attack three targets with range shown. So it's going to be attacking the two in front and one behind in order to hit everything else I'm not able to target. For each malice token spent, reduce the AP cost of this card. Now this card normally costs two.
Notice it has different values then as also whenever I decide to play it. So that is his cards. He is all set to go. Let's set up the darkness board. Here's the darkness board. This is a board that's going to make kind of keep track of how the enemies activate. The coolest thing about this game that I really enjoy is that this game is not a you go enemies, you go enemies, you go enemies. You're going to be playing cards and performing actions until you reach a threshold of on the darkness board. Once you reach that threshold, then the darkness is going to activate. The first thing it's going to do is draw a card. I was in this particular mission, I'm able to choose to either use the bones darkness deck or the terror of a thousand legs darkness deck. Each one functions differently. I have chosen the bones for this one because in the stone of life, we use the Terror of a Thousand Legs. So, you can if you want to see those in action, those cards, you can go check out that particular playthrough on my channel. I again will warn you it was long long time ago in a galaxy far far away back when I was just starting out in recording. So the quality of it might not be as good as it is now. So now we have everything set up. We're going to start playing our action cards until we get to six and then we're going to or we go over it. Then we're going to activate this darkness. Now there a couple other things on the board. We have this is keeping the total damage value for our one of our enemies. You're going to not put tokens for the health of our enemies on the actual enemies. You put them out here on the darkness board and just follow it based on this. Down here, we
also have the serendipity, which is if we ever get any serendipity. These are the different things we can do with it, and I'll explain that more when that happens. We do have trap table clarifications. This is more for when you're doing questing. Uh, in here is the turn summary, and these are different treasures. You're going to put treasures out on the board whenever you're able to defeat three minions in one hit or you're able to take out any commanders or captains out on the board. Destroy any layers or you take out the boss. That is when going to be dropping treasure tokens for us to pick up. That cost us one movement point to gain. I did mention the turn summary here. The turn summary we have is for the darkness and the refresh phase. Those are the two phases that are found on this darkness board. The one they don't have there is the hero cycle. Normally the way this game works is you're going to be performing a hero cycle until either all the characters decide to stop or you activate the darkness. After that goes, you're going to continue back into the hero cycle until you decide to go to the refresh phase. So now let's get to playing and I can show you how this all works. Oh, I'm so pumped to do this. All right, let's play some myth. After reading the beginning of act one, we do have a interlude now for our characters.
It says here, "You shield your eyes from the whipping wind. Fragments of dirt and bone glance off armor, helm and hand. The windstorm carries a foul smell. The wasteland has risen to the south, does nothing to block the element. Hegel is a harsh land, dangerous, all but lost to the followers of light. It isn't surprising that Lucy led you here. But for what purpose? You are unaware of any prison guarded by men this far into the west. But your dreams are never wrong. What could this prison be holding? Why had you never heard of its existence? Who are those guards? Who are the prisoners? What could they have done to deserve to live out their life in a cell forgotten by men? Why did Lucy want the one she let live? Always more questions than answers. The great wall of Hoggle rises to the north. The mountains of fire cast the horizon red. Eternally sunset. Doom and darkness await there to kill men and destroy the world. It only took one day's walk to bring you to the foothills of the great mountains. There in a fold hidden from sight is a prison.
You found it easily. Never before have you been here in your waking life. Only in fear and nightmares you are certain it is the right place. just as you are certain what you will find there. At the beginning of the game, we are going to do our hero cycle. So, we're going to start with our archer just because and you can the cool thing about this game is this game is of course completely free form. you can discuss who and when and why you would want to perform actions. And it's a good way to figure out who's going to get the most out of what cards and be able to perform hopefully enough actions and be able to do enough during your hero cycle. So when the darkness activates, it's not as deadly as it potentially could be. I'm going to start by playing some reaction cards for our archer. This one is an ammo card. If the ammo card is in the action space during the hero deck phase, immediately ready it. The limit of the ready ammo cards is listed on your equipped item to a ma minimum of one. If you ever don't have a way of holding ammo, for example, I lose my arrow bag, which allows me to hold four ammo. You can always have one readied at during it at any time because you're able at least carry one arrow in your hand is kind of how they're representing it. Now, this card can be played no matter what type of movement I decide to use. So, I don't really have to choose a movement yet because there isn't anything preventing me from from not doing certain movements. We're going to put two ammo cards down. So, they're going to be ready for our next turn. Now, interestingly enough, I cannot play this
card right now because I do not have a readed ammo card. So, I'm going to have to wait till I get one. So, we're going to hold on to that card. I do have find weakness and fool's errand. Again, I need an ammo card to play fool's errand. So, instead, I am going to play find weakness. There's another reaction card. So, I can play as many reaction cards as I want. And this is for the entire tile. And choose one target within range. Each hero attacking that target gains plus one d10 and plus one fate dice attack actions. In addition, each hero within range gains negative one to its target number for non-combat actions and courage tests. So hopefully if we have to do any of those, I'll have that extra bonus. That's all she's going to play. She's going to hold on to her two cards cuz she can't really do anything else with them for this particular turn. But she's boosting her allies and she's getting ready for the next turn. Now, at this point, I'm going to have my acolyte Ben. He's going to move one, two up to here. He is allowed to move a free move action up to two spaces. He is going to move his two spaces. Another thing I failed is, you may have noticed on the picture that there's supposed to be a token there. I forgot to put that token there. Having performed a regular move, I am going to lock in my movement value.
Also, when I played find weakness, I should have chosen a target. I'm going to choose this guy. He's the only guy we can really get to right now. So, I'm going to choose that guy as my find weakness target. And I'm going to have my Aculite hit him. And we're going to do that with Smite. I'm going to use this as an action because I'm not playing this after guided by the light. So, I'm going to play that as an action. Another thing I didn't mention about the cards is this little white dot up here. symbol that is a little flame symbol, I should say. That's showing that this is a novice card. Now, like I said, there are cards in here that might have a little green symbol up here, and that's the only one we're able to upgrade so far. So, this is a damage one range with weapon. So, I'm going to attack with my weapon, which is a melee range, which means I have to be adjacent to it. Um, in this game, you can count range and you're counting and you can move diagonally orthogonally. It is up to you. So I am able to hit this particular enemy and we're going to attack it with our wooden plank. To make our attack, we are going to create our dice pool. Our dice pool is going to be created by everything that is affecting it. So we do have our weapon which is going to be a d10. We have our hero tile that is also going to give us a d10 and it's going to give us one fate dice. So I'm going to put that one there as well. I don't like that one. I like these. These are colored. Those are cool. We're going to use that one. Uh then on top of that, if there's any other cards affecting you or the enemy, that's going to be in effect, too. So, this one says that it each hero attacking the target gets plus one d10 and plus one fate dice. So, that
is also affecting it. So, I'm going to grab one more d10 and another fate dice. All right, I think that's everything we have for this particular attack. We are going to be attacking the firebor enemy. The fireborne enemy, what we see on here is its defense value is five. The other things we're seeing is that it has three movement. It has one health. It has keywords demon, minion, and intellect. Intellect is going to have to do when it actually activates. And we'll see how that works potentially. This is its courage value. This is the priority that it's going to use when it goes to decide who it's going to attack. This is the type of attack it's going to make. It's a melee using 1d10, one fate dice. It's going to attack one person one time and needs a seven or better to hit. the damage in range one. If it gets its fate, if it gets this particular symbol on its fate dice roll, it is going to ignite, which is f. This is uh and this down here is its um activation number.
It depends on how you have to be four or closer to this monster to make this particular enemy activate. And then once it's activated, then it will of course during the darkness cycle activate. Back here, we have its abilities. It has ignite right back here. So if we didn't know what ignite meant, we could just flip it over. If the target suffers any damage from this attack, the target suffers one additional fire damage. It is also planer. If this figure spawns from a layer or appears during the resolution of a darkness card, the figure activates immediately. And then down here, it shows you how it's going to spawn based on what it is. So we have initial spawns, normal spawns, and heavy spawns. And it has an immunity, of course, to fire because it's built from fire. So now I'm going to take my dice pool and I am going to attempt to beat that number. So we're going to roll all these up and see how we do. We got a nine, a five, and a three. So we did beat the number. If we look at our fate recipe, we needed a candle. We did not get that. So we did defeat the enemy. It only has one health. And the attack itself does deal one damage. It says right here, one damage. the damage is found on the cards. So, we're going to remove that enemy from the board. He is super dead. I am then going to gain threat equal the amount of damage that was dealt. It's not how much dam it should say damage inflicted, not how much you deal. So, for example, if that particular attack would have done three damage, I still would only get one threat because I only had to deal it one
damage to kill it. I'll place my weapon back up there. And I'll now move the darkness meter up equal to the amount of uh activation points that I use. So I had one, so it's going to go up to two. At this point, I'm going to have my outsider move three spaces. He can normally only move two, but because we have the ring of naira, he is able to move an extra movement point. I can't really do any attacks against it because the only attacking card I really have is my Sojourer's Path, which I can only attack forward and backwards. Actually, I guess I could hit him if I go uh one, two, three over the top. But then I would hit uh the acolyte as well. If I would have been a little bit smarter, maybe I could have had this happen. But that's okay. We're just actually going to step right to there and we're going to hold on. We're going to get ready for our next turn. But before we do, my archer also gets to move. She's going to spend one movement point to check out this. She's going to go one over to here, grab this chest, and we're going to roll and see what happens. Let's take our die, roll it up, and see what number we get. We got a 10. And that states that we get to draw one green treasure card. Oh my gosh, that's so good. I have a ton of green treasure items. Look at all these treasure items. There's so many. Uh these are from all the different type of expansions. I have like the treasure expansion one, treasure expansion twos, all the stuff in here. I put them all together because it's super fun to get all these cool little treasures here. So, we're going to mix up both of these stacks and then once we're done mixing up the stacks, we're going to have to choose which one we want to draw from uh and decide then
we get to keep that item. Now, if it's not something we can use, that's okay. We can trade it to somebody else later on or we could even decide to sell it to a merchant if we want to. All right, so we shuffle them all up. I'm going to grab this top one right here and see what we have found. We found ourselves Scrier's Orb attack plus two fate dice plus one. Look at the top two darkness cards and place one on top or one on the bottom. Now, this is a shield card. This is for the character that uses those. That's the uh a magic user type character. Now, if you notice down here, there's a four and a one. The four is uh how much you could buy it for, but the one is how much I can sell it for. So, I can put this in my backpack. You can hold as many items as you want in your backpack and I can just sell that to a merchant when we see him next time. So, that is what we found when we looked inside of that crate. Now that our characters have all decided to stop, we're going to move into what's called the hero deck phase. At this point, we're going to reduce threat. Now, he's the only one that has any. Threat is going to reduce equal to the amount of empty spaces you have in your character's dashboard here. So, we have three here. So, we're going to be able to reduce it by three. I only can bring it down to zero. That's the max you can go to. We're going to clear any of our action spaces and discard those cards.
If you had anything with the ongoing ability, that would stay in effect, but none of our characters have anything with ongoing that's going to remain here. Our archer did have an ongoing card, but we haven't played it yet. So, that is one we might play in the future. At this point, each of our heroes can choose one card from their hand and keep that card. I'm going to take Feat of the Saints. I'm going to keep that card. discard the rest of my hand and then we're going to draw back up to five cards. And this, remember, is a choose. You could choose to just discard all five all your cards in your hand if you didn't have anything you think was going to help. But I'm going to draw four more. Three, four, four. Our accolade. Here we have pray. So, this is that one we were talking about earlier. It has a stacked ability. I can shuffle my discard pile, draw three cards, place each faith card drawn in this car on this card face down, and discard the rest. And the face down cards all become a faith. And you can even go look through here. I've got one, two, two different faith cards in my discard pile. So, there's a pretty good chance I'll get at least one. We have blessing of the dawn. This is a tile card. Faith.
Each hero within range gains a number of faith dice to attacked actions equal to my faith. Remember, if I can play a prey card, that'd be really good. Another smite. Then we have last rights. It's an attack holy. You know, this is going to use our relic that we have and it allows us to attack one target within range. So, here's the target and it says that the other also affects a number of squares equal to your faith counted clockwise to in a cross. Player chooses position one. So, it's the target and then it can choose one for one faith, two faith, three faith, four faith. It can hit all these things in all these directions. just absolutely out of control and it gets extra dice if you stay still. It's a really powerful card. Last right is super cool. It only does one damage but it can hit a whole bunch of enemies. Next we have our archer.
First thing we're going to do is we are going to do what's called ready these. I'm going to put these right up here or actually I can put them right above my bow. That's where it's going to go. So now I do have two ammo. This gets discarded and I can choose to keep one of these if I want. I'm going to choose to not keep any of those. I don't really need fool's Aaron. There's only one guy on the board, so I'm not too worried about it. I'm going to grab five cards. I got 1 2 3 4 five. Let's see what we found. We found another ammo card. We have retrieve, which allows us to search the discard pile to find an ammo card. We have another retrieve. We have sprint. Oh, that's going to be awesome. And we have Orion's tier. I can attack range. It does one damage, but for each ready ammo card, you may attack one target within range, which is super good. So again, it can hit a whole ton of people. So she's got some really fun cards. The outsider is going to keep this path of rage card. Discard the rest of his cards and draw four more. One, two, three, four, and see what we have found. We got mind splinter. This is an attack. It's massive, which means it can do a lot of damage. That's 10 range.
Spend two to four malice tokens. Attack one target within range. Target gains a damage over time, which deals one dark damage to uh for two refresh phases. Spend three ma uh malice tokens to extend the damage by one or spend four malice tokens to make the damage over time automatically just immediately happen. That's super cool. That's our That's an awesome card. We have Knowledge of Evil. I can gain 2d10 to non-combat actions in action uh in action. In addition, you may spend two malice tokens to automatically succeed at a non-combat action. That's really good. We have curse. Choose one target within range. Target enemy has the dice pool reduced by 1d10 and one fate dice for the attack and uh for all attacks and special abilities. And we have a lone in the dark. I can choose a captain within range. This captain becomes the only priority for minions on the realm. Now, I sadly there aren't any minions out there right now, so it's not really going to help too much, but he does have some cool cards along with his path of rage. With that done, we'll move into the refresh phase. The darkness meter is going to go up one for each active enemy type. The only type out there right now are demon, but if we had other ones out there, they would activate as well. For example, if we had, say, one of these guys out there, this would be elemental. We'd activate an elemental. Or if we had one of the uh
one of these guys out there, he is unholy. He's a different type of enemy. So, he would act add to the darkness track equal to the amount of active enemies out there. We don't have any allies to activate. They would activate at this time. We could check to see if our quest results. If there's any uh quest things that happen during the game, they would activate at this point. Or we can also check to see if our quest is completed. We also have the status effects. So, if there's any effects that would affect you or the enemies, that's when it be. For example, the damage over time dark that we would get from our uh cards for our outsider, that would activate here or poison or something of that nature. Any traps that are on the board, you would activate them at this point. And then we have cleanup. If you were unsuccessful at any quest, this is when you would clean up those tokens.
Also, if an if your hero goes down, they would be removed from the board during the cleanup step. Again, we're going to start with the archer. I got a plan. First thing she's going to do is put another ammo into her ammo slot here. And then she's going to sprint. So, she's going to be able to gain three additional movements movement. So, I'm also going to lock in my movement value. So, she has five total movement that she can move. That does raise the darkness by one. And she's going to move one, two, and then she's going to use one more movement point three and one more movement point four. And then she's going to move one more here to five. So, those are the five movements she's going to do. and she's going to spend one movement point each on these two tokens. Let's check to see what happens when we talk to our soldier. We got a four. It says we get to gain one malice and discard the fighter token. Then we can also check the cage and see what we get.
Got a seven. Gain one malice and draw a green item. Our malice total is going to go up to eight. I've kind of just represented it by this die. Also, I'm leaving it next to the outsider cuz he's the only one that can actually use malice. Is there even an eight on this die? There it is. Found the eight. It took a long time. And I get to draw a green treasure card. We're going to draw from this deck this time. Oh, I found another long bow. I got two long bows. All right, we can sell that one, too. Moving over to Ben the Acolyte. He's going to start by playing Feet of the Saints. It's going to allow us to lower our AP cost of attack actions by one this turn. Now, I can't move fast with him, but that's okay. I don't have any sprint cards in my in my hand, so I'm okay so far as to what movement I still want to do with him. Moving over to Brian. He's going to play that path of rage. It's a reaction card. Again, I can't sprint with him now, but that's okay. Again, he doesn't have a sprint card in his hand, so he's only going to be able to do one of the normal movements anyway. This is going to raise the threat of each of my characters by three within range three and deal one damage to attack actions this hero cycle. I'm going to gain one malice token for each affected hero. So, I'm going to raise this to 10 because I am affecting two other heroes. It does say other hero on here. I'm going to try to remember that by placing a couple dice next to these guys that show that symbol. Hopefully, that'll remind me that they have plus one damage. They also both had to gain three threat because of that card. At this point,
we're going to move back to our acolyte. Uh Ben is going to activate his last rights card. It's an attack holy relic and attack one enemy target within range. The range is four. Then I center this on wherever I want to. And then I'm going to be able to lash out equal to the amount of faith I have. I only have one faith right now. I actually have two. I lied. I've got two. One for my character and then one for this. So we have a total of two faith right now. I'm going to target it so it goes like this. So the target is here and it goes one, two out to there and not actually hit uh the outsider. We do not need to be hitting Brian the outsider. That'd be very bad. So, we're going to then have to spend one
activation points of this by one. So, it's only going to cost me one to do. And then based on the whatever movement I decided to, I get to add or sub or subtract dice, I guess, from this. I am going to choose to careful move. So, at this point, I am going to lock in my careful move action. So, we'll place our last rights card here. I am going to get a d10 for our dice pool because of the card. Then, we're going to use a relic. The relic itself is going to give two d10 and one fate dice. So, we'll grab two more d10 and one of our fate dice. Our character also gives us one d10 and a fate dice for being an acolyte. This character does have a seven defense, so we have to get a seven or higher in order to damage him. Let's roll these up and see how it goes. Hopefully, we get enough to damage him. We've got a nine.
That's way more than seven, eight. Now, notice we got three different ones that had actually affected him. But once you hit, that's just what happens. So, we're going to do our damage of one, but because of our path of the rage in play, we are going to do two damage, bringing this character down to five health. Sadly, I did not get any of the acolyte symbol here. So, I do not get to activate the fate recipe on that card. Our darkness goes up by one. And if I was smart, I might have played this one first. Each hero within range gains the number of fate dice to attack actions equal to faith. It doesn't cost anything to play this and it's reaction. I should have probably played that first, but maybe it'd be best not to play it because I have a lot of uh threat right now and my threat actually is going to go up by two because I did two damage.
So, I'm already at five. If you get to 10, when you draw the darkness cards, there potentially could be some really big ramifications that will stay with you for the entire act because you're going to hit what's called a threat penalty. So, I think actually we are going to hold off on playing this card. Even though it'd be good to get some more fate dice into our character's pool, being able to clear some threat at the end of the round might be best. Now, our archer is going to go and she's going to do something super cool. She is going to fire off her. She has a range of what is it? Five with the bow, which is sweet. I'm going to play Orion's tier. What Orion's tier says is I can do an attack at range for each ready ammo card. Oh, I cannot play Orion's tier because I sprinted. Look at this. I can't play it. I have already sprinted this turn. So, I am not able to play any more cards for our archer. Oh, that makes me so sad. I had such an awesome plan because if I would be able to play Orion's tier, I could do damage to targets. It does for each ammo card, you may attack one target within range, and you can attack the same target with multiple ammo cards. just keep plugging that target full of ammo. So, I'd be able to do two damage plus the extra one from our rage card that we got from our outsider, which is why I moved her so that she could get into range of that rage card. But sadly, I failed to realize that I can't play it because I did a I did a aggressive move. Now, if you're interested in wondering how some
of these cards work and a little bit more about how Myth itself is played, please check out Rey's channel. I'm going to put a link to it in the description of this video. He goes through step by step how to play each of these characters in the core game and gives you a pretty good idea of what these cards do and how they all activate together. It's a really good watch. You should go check it out. It is an older video because this game has been out for I think up to I think about eight years now. Maybe nine years, maybe seven, eight or nine years this game has been around. So, the video is a little bit older, but the content is still very relevant when it comes to myth. So, please check out the link to that in the description of the video. Let's really kind of tone down the Seductress a little bit because she's going to activate, I think, real soon. I'm going to play curse on her. It says here, I can choose one target within range. The target enemy has its dice reduced to -1 d10, negative one fate dice for all attacks and special actions. This is not going to cost me any uh AP. Let's just make sure that this character is not immune to it. Fire, prone, and arcane are its immunities. So, this is not immune to curse. So, that character is cursed. So, I'm going to place this token just right on the card there to remind myself that that character is cursed. The AP is one away from activating. And I've got two options.
One, I could put some damage over time on the enemy, or I could just smite the enemy. You're right. I think it's time to smite the enemy. I'm going to move up one to here with Ben, and then I'm going to play smite. It's going to give me plus a negative one, sorry, to the target number because I moved with careful movement. It's going to do only one damage because this is not an attack action. So that may mean I should maybe do mind splinter. Now I think about it. I'm going to move Ben back. I'm going to do mine splinter cuz that is an attack action for our outsider. But it says other heroes, so that's not going to matter anyway. Let's just go ahead and smite them. We're going to move up one and smite the enemy. Ah, it's so bad. He's so much threat. So, after doing this little dance, I have chose to do mind splinter. I think that's going to be a better choice. It states, "Spend two to four malice tokens. Attack one target within range. Target gains a damage over time, which deals one dark damage for two refresh phases. I don't think it's going to be along around that much longer. spend three to extend the damage over time by one and spend four to make all the damage over time immediate. And I think that's the one we're going to do. I'm going to spend four bringing my dice down to six malice. And with that, I am going to be able to do I think it's one, two, three damage to this enemy because I get two automatically. I'm at the third one gives me an extra one and
then I'm spending four to be able to do all of it. Mine Splinter itself is going to give me potentially three extra dice if I don't want to move. But I am going to do a cautious move. So we are only going to get two. That's my chosen movement for him. So we're going to do two one cautious movement for him. So he's going to get two from this. He's going to get one and a fate dice for himself. This is not a melee attack. So I do not get my Obsidian Glaive. It's just going to be what I have here. I do have my ring of nyer which is going to give me one fate dice whenever I make an attack. So I get one more fate dice. So we need a seven in order to hit this enemy and hopefully do a lot of damage to him. I got a four and two ones. I didn't hit. Oh no. That's absolutely terrible. I don't have any way to reroll those. So oops. I guess I missed. That's terrible. Even though I missed, I still have to raise the darkness meter. It has to go up by two. So here's one and then two. I believe it wraps around if I remember right. So I now draw. Now we're going to go into a darkness cycle. We have hit the threshold of six. So we're going to draw an event card which is right here first. Let's give these a little truffle shuffle here. I know I already shuffled them once, but we're going to shuffle them again. Get them all set to go. We'll draw our card and we'll start at the top. The first one is the event. If the darkness is activated in the refresh phase, then no interrupt cards can be played this darkness cycle.
It did not. It got played during the hero cycle. Threat penalty. A mini boss appears at the edge of the closest to the hero with the highest threat. See how horrible having threat penalty could be. The threat penalty is always 10 unless it's told otherwise. Then we're going to activate in the order here. Mini boss, captains, minions, and bosses. So, we don't have any mini boss out there. We have a captain. This is technically a commander, but I categorize I believe as captains. Once that's done, then we do an ill-fated spawn. After a normal spawn, a random card is discarded from each player's hand. We don't have anything to spawn because there are no layers out on the board. But now we have this unpainted piece of plastic, which I'm very sad about. I really wish I would have got to painting that. I didn't realize there was need fireboard for this. I This person is going to activate. So, we're going to look at the activation here. First, we're going to check its priority. It priority is faith. That's our person with the most faith. So, it's going to attack Ben.
Just straight up going after Ben. Uh, Dark Desires fell promise. All right. Oh, that's no good. Let's see what Dark Desire says here. On the back, it says dark desire. At the start of each hero cycle, each hero must roll one fate dice. If the result is a darkness symbol, the hero cannot play interrupt cards. In addition, for each darkness result, the figure gains this figure gains one fate dice. Well, I probably should have done that. We'll roll at the beginning of each hero cycle. We're in two hero cycles, so I should have done that. I apologize. We'll roll these up. I did not get the darkness symbol, so that does not fire off, but that is good to know. I got to check my characters here. Then we have fell promise here. Let's see what fell promise says. If a hero is or ally successfully attacks this figure, their dice pools reduce by one until the realm tile is clear. Oh, all right. Well, that means that my attack for uh my attack ability for my acolyte is now -1d10. So, I got to watch that. Now, if the heroes attacks this figure, their dice pool is reduced by 1d10 until the realm tile is clear. So, he has one less that he can roll for the entire time. Oh, that's super fun. Now, melee attack. It has a damage of one.
Its range is three. It's going to roll 4d10. It's going to attack one person one time and it needs only a two in order to hit it. So that's going to be brutal. Let's roll our four dice and I got a two plus. So that is going to hit. It's going to do one. It's going to do one damage and it's going to rend and tear. So let's check out what rend and tear does. Rend and tear is where is rend and tear? Right down here. If the target suffers any damage from this attack, place the target adjacent to this figure. Well, then he did get attacked. He's going to move him right there, I would guess. And I'm also going to take one damage, bringing me down to seven. Now, I did forget about the curse. He should have only rolled three, but more than one hit, so I'm not too worried about that. I do get to roll three fate dice to try to activate his powers here, but I'm going to remove one because he is cursed. We only have to roll two. Now, at this point, he is going to start at the bottom and try to activate these. Once a fate dice recipe is activated, those dice are no longer used to check other ones in this order.
So, if I actually did have three and I had rolled this, I would have activated nightmare. But then those two dice would have been spent and I wouldn't have activated seduce because I wouldn't have had that extra darkness die to be able to do it. Now, of course, if I had rolled that, that'd be super bad. And I would activate nightmare and then activate seduce. But the way that we have it here, we rolled nothing. We had those two symbols. None of those are going to be a fate dice recipe for this particular enemy. So, we are safe from anything ex absolutely out of control that could happen to him. With the darkness cycle complete, we'll move right back into the hero cycle. I have not stopped yet. I do have a careful move with my acolyte, which I intended to go over here and grab this chest. I do have a careful move with my outsider.
My outsider is going to move over here. I'm going to check out the chest with my acolyte. We'll roll our die and see what we get. We got a six, which is going to give us two gold that I will give to our acolyte. I am also standing right in front of him and I am going to smite him with this cart. I'm going to try to hit it. I have negative 1 to TN and I have it's only going to cost me one darkness to attack with this. This is going to start getting really tough to hit. I get one for my wooden plank, but I do not get the 1d10 for my character. I do get a fate dice from my character, though. I don't think there's any more I'm going to be gaining to try to hit him. I need a seven or better, but because I did a careful move, my TN is negative one, my target number. So, I only need a six or better to hit him. I did not hit him at all. So, this also did not affect him.
That's that makes me very, very sad. Wow, this guy is absolutely no joke. That's amazing. That's the end of my turn. I am going to ready my ammo card. I have three. I can have a total of four. I'm going to discard that one. I had two open slots. One, two. I go down to one threat. I get to keep one card. Yep, I'm keeping my Orion's tier. That is the one I'm keeping. I am going to get four new cards. One, two, three, four. See what we have found. We got another ammo card. We have to the knee. Now, this is a one we can use during the darkness silence as a reaction. I can attack with my weapon. Attack one target within range if the target is a captain or a minion. The target is prone. That could help out a ton. I got another hustle card. Oh, I got pacify. This is my green card. It says reduce the darkness beater by one. And it's just you cost me nothing. That's that's absolutely fantastic. It's so so good.
All right, those are the five cards for her. Oh, that's so good. Our acolyte has some problems. He only has one to clear, so he's only going to drop his threat down by one. Going to four. We're going to discard the cards. And I might actually discard everything. I think I'll keep the prey card and grab four new cards. One, two, three, four. And see what we have. We have armor of faith. This one is going to each enemy within range has its attack TNC increase by the number equal to your faith. The is tile. Oh, that's so good. Then we have a sprint card. A consuming fire. Attack fire. Oh no, they're immune to fire. Angelic word. I can attack holy relic. Attack one target within range. This attack gains a number of additional d10 equal to your faith. Now, right now, my faith is one, but I have my prey card, so we might be able to get a good angelic word out on him. But again, that would raise our threat quite a bit. And finally, our art our our outsider here who I forgot to had an extra movement point if I wanted to use it. And we are.
I'm probably going to spend it. I'm going to move him one more before the beginning of our turn. I'm not going to keep alone in the dark. I think that's fine. I don't even think I acknowledge his evil. I'm going to grab five cards. One, two, three, four, five. See what we find. We found ourselves a hustle, a sprint. So, both of these are movement cards. One gives us two, one gives us three. One's a reaction, and one's an action. So, have to watch out about that. I think that might have happened for the now I think about I think the archer had played a sprint card which was her action. She couldn't have played Orion's tier anyway. We have disengage. I'll take it and path of nature. Each other hero within range increases our threat by three. In addition reduce the AP on the darkness beater by two. That's not bad. All right, we'll put those down. We're going to start with our archer again. The archer is going to play an ammo card into that thing then uh in my first slot. Then I am going to use Orion's tier. I'm gonna fire all three of my arrows into it, doing three points of damage. If I hit, I am going to activate my movement of normal move, meaning I'm not going to gain Xne extra fate dice. I don't get that extra bonus anymore because the card is not out there. And I believe the curse goes away as well because the card is no longer in play. So at this point, we're just going to make up our dice pool. I am going to gain one fate dice for my character.
Then if we look at my bow, I get two d10 and a fate die. So I'm going to get an extra fate die for that. And then I'm going to get three d10. Two for myself or two for the bow and one for myself. I'm going to switch that die out cuz I like the ones of color better. I don't know why I keep the other ones even next to me. Uh so we have our fate our fate pool or sorry our dice pool is ready to go. Let's roll these up. I don't get any bonus for Orion's tier and I need to get a seven or better on one of these dice and I got it. Now, sadly, my fate recipe does not go off on my bow. I needed the nature symbol. So, that is not going to happen. But, I did get to do three damage. I do one for each ammo card. One, two, and three. Now, if I would have had that extra card out that allows me to do plus one damage, that would have been four damage. Been so good.
I'll drop one, two, three. So, she this character and the seductress only has two hit points left. I am going to raise the AP by two. One, two. Just like that. Then I am going to still stay on my archer and play pacify to lower the darkness meter by one. Bring it back down to two. Also, I did three damage. One, two, three. Bringing my threat up by three. Sadly, the archer can only move two spaces. Karen is stuck in only the normal movement pattern because of the card that she played. Now, it's time to take this guy out. I am going to use my angelic word. Damage two, range three, attack one, target within range. This attack gains a number of additional det equal to your faith. So, let's get some faith. We'll start by playing our pray card. We'll place that right here.
Then I shuffle up my discard pile and I'm going to draw three cards and place each card with faith right on top of this. So, right now I have one faith from my character and we're going to grab three more. One, two, three. We're going to see what we have. We have faith. We have faith. Oh, we have faith. Oh my gosh. I got more faith than George Michael and Limp Biscuit together. We got three faith. Oh, that's so good. Okay, this guy is so toast. I'm going to play Angelic Word. Now, this thing is going to give me a total of three extra four extra d10s because of that. I am going to do a normal movement. So, I'm going to lock in my movement. And we get to roll an astronomical amount of d10s and I get to do two damage if I hit. I need a seven or better on this. And I got a 10 up at the top here. I can't believe it. One, two, three, four, and then F. Oh, I think I had an extra die anyway. Um, we hit him. He's good. I did get my symbol. So, the symbol does activate on my dark crystal. I get the dark crystal one that says, "Move one card from your discard pile to the top of your draw pile." Oh, don't mind if I do. But sadly, there's really nothing in here that's going to help me. Um, I might as well move my I'll move soothe words to the top. I'm not going to keep it, I don't think. Actually, I decided not to do that. I'm going to not gain any two damage dead. I'm going to grab one of the darkness and move it up by one. I am going to kill the enemy off and put a treasure token and I can put it any of the four spaces I want to. I'm going to place it right there. And my insider is going to grab it on the way
through. Or actually, I might have my I think I'm going have Ben do it. He's going to move two and grab it. But before I do, I do have to raise my threat by two up to six. We're going to draw our token now. I'm going to shake up my bag a little bit. We're going to reach in here and see what we get when we pick up our treasure token. Oh, I think I have to be on top of the treasure token. So, we're going to move on to the treasure token and then spend Oh, I have to spend a movement point. That's right. I can't pick it up. I have to be on the thing and spend a movement point. So, I'm going to move one, two. He's going to move one. Grab this and two to here. He's going to pick up the treasure token. And we're going to see what we get. Oh, it cost me two. One, two, one. There we go. All right. I'm cheating already. Here we go. Mix all these up here. Get the all these things all over the place. Here we go. We're going to draw one of these out. And we got Oh, we got a green one. That's awesome. All right. So, now you put it right back in. You don't just take them out. So, I get to grab a green card. We grab this one. Something good.
What do you found? Aaron's Essence. What's this? Uh, summon 1d10. One fate dice summon. Attack range is increased by two. So, this is an Lar Essence. I I can sell it for three, so that's good. It's worth a lot. So, we'll put this into my backpack. Not going to be using that. That's all we're going to do. I'm going to discard everything from my hand and lower my threat by two for the acolyte. I'm going to keep my sprint card. Grab four more cards. One, two, three, four. Uh, these might I consuming fire. We've seen that. Here is intercession. One hero uh within range gains 1d10 to non-combat actions and courage test range of five. That's pretty good. Stand fast faith. Now notice I cannot move if I play this card. All grants all heroes negative 110 to their courage test and plus d10 to all hero attack actions. Super cool card. Guardian Angel. This is a reaction card I can play. Each successful attack targeting one target within range must be rerolled once. You gain two threat.
They have consuming fire. This is a damage over time card, but it is fire, so it doesn't work against the fireborn. All right, those are his five cards. Looking at Karen the archer here. I'm going to lower the threat by one to three. I'm going to get rid of these cards, load my ammo in. I'm going to keep my hustle card and grab one, two, three, four cards. See what we have found. We got a sprint card. That's even better than the hustle card. Another ammo card. Then we got Oh, we got Kuron's payment. Check this card out. It does. It's a attack critical range attack one target within range. And look at this. Damage three. And depending on how you move, you gain fate dice to roll. Oh my gosh, it's so good. And I got a dodge card. All right, those are our five cards. One, two, three, four. One, two, three, four. Did I not count right? One, two, three. Oh, I get my hustle card. There you go. We got five.
And our outsider is going to probably Oh, keep the hustle card or the sprint card. I'm going to keep the sprint card and get rid of everything else. And we're going to draw one, two, three, four cards. See what we found. We got Sojourer's path skewer. This is a new one. This one says it is damage one range weapon counterattack. So, this happens during the darkness cycle melee. Play this card immediately after ignoring an enemy attack with parry to attack that enemy. An attack hits two squares in an orthogonal line. That's really good. So, I can hit multiple people. Skyance. Oh, Skyance is so good. Check this out. It says attack massive melee move. Choose one square within three squares. Move into the chosen square and attack one target within range. Spend two malice tokens to turn this card into a reaction. So, I could make this reaction. So I could jump down and skyland something and then Sojourer's path or like skewer this thing or so sorry then I could do sojourer's path because it's an action card so you can do like so much damage with all this and dis durision. Derision oh durision is so good. It's a range tile malice taunt. So you get a malice token or malice automatically for this.
If dur darkness uh activates from playing this card, gain one malice token for each AP exceeding six. In addition, enemies within range have their attack reduced by 1d10, and you are the only priority. Most minions only have 1d10, so this prevents almost any minion from doing any damage to you, which is pretty sweet. So, those are his five cards. At this point, our goal is to get to the next tile. I already set the next one up and ready to go, cuz I think we're going to get pretty darn close. I am going to have our archer is going to do both a sprint and a hustle. It's going to do two AP, but I think that'll be okay. That's going to give us a total of five movement points. I'm going to play them into her area. That'll allow her to move 1 2 3 4 five. And then she can use her one two to move over here. And at this point, I should go into the board the the story, but I'm just going to get everybody there as we're since we're so close. Again, I'm going to use a move action here. I'm going to gain three movement points for our acolyte. One, two, three, and then one, two into this room here. And the final one that's going to play is going to be our outsider. Our outsider is going to use his sprint card as well. That sprint card is going to allow him to move three spaces. One, two, three, and then one, two into this room. And at this point, we'll read our next part of the adventure. Here's the continued story.
Evil has been here. In the far corner of the room, a man hangs in the air. His intrails have been spun about him like a spiderweb. His cell blasted red as if all his blood tried to escape at the same time. To the right, the fireplace still burns. Everything is as you remembered, except for the hunched over man kneeling near the fire, moaning. Suddenly, time slows. The air seems too thick, holding you in midstep. Even the embers in the air seem to hold their positions. The air is cold. Your breath lingers in front of you, suddenly visible. Evil is still here. The door to the room slams shut. You try to open it, but some cursed force binds it. Before we continue on, I do have to add AP to the darkness because I did put down one, two, three, four different movement cards, which is going to raise us one, two, three. It's going to trigger the darkness, but there is no active enemies, so I will not draw a card. And we'll go back to zero. And then we're going to add one for the final movement card I used. Here's the setup for the second tile. I have set everything up and I placed everything where it's supposed to go. Um, when I was originally just setting everything up for us, I may have put a few things in the wrong place, but now I have it completely set up the way it's supposed to be. So, if you see a difference from when you saw just a second ago, that's because I was just kind of laying things out and getting things ready to know where I needed to go next. Now I have it all perfect. So we have all our different points of interest out here.
We're going to have to deal with a darkness falls trap. And I'm going to zoom in on all these a little bit so I can show you these. We do have a soldier fighter token that we'll have to interact with, a grave marker that we're going to interact with. We have some bookshelves. There's a couple, one here and one here. And then we also have this trap door that we'll have to check out. There might be something we need there. Who knows? Here are the first few things for the reference setup here. First, we have the Darkness Falls trap card. We are going to consult the Darkness Falls trap card. I have it right here. We'll look at that in just a second. Um, if the trap fails to dis the player, sorry, fail to disarm the trap, then stiff. What? St ln. Is that even a word? I don't think that's a word. I'm going to call him styling. Styling the leash.
Trust me, he's styling. It's good to go. Styling the leash appears. If the players succeed at the trap, read the soldier interlude followed by the tile interlude. So, that must be the way we continue on to the next tile. Uh, it's going to be completing the Darkness Falls trap. We also have a soldier. The soldier may be spoken to by the player who ends their turn adjacent to the soldier. Spend one movement point. Read the soldier interlude. It's another way to read the interlude. Then, we have the grave marker. This token may be searched by a player who ends their turn adjacent to the grave marker and spends a movement point. Uh, again, discard the token, then roll a d10 on the following table. There's a table right below it. There's a table right here. That's the one from up here. We also have bookshelves. There's a few bookshelves out there. You can search them if you end next to them and spend a movement point. Uh you can gain some potions, some gold, maybe a super potion, and oh, a blue treasure token goes into the treasure bag which could be drawn. Oh, that's so good. That that's that's actually really good. We also have a trap door. That's that lock. It says here, "It may be removed by a player who ends their turn adjacent to the lock token and performs a non-combat target number four. Then discard the lock token. The trap door may be searched by an adjacent player who spends a movement point gaining the craftsman goggles. I have no idea what those are, but if they're locked up, probably sounds like a good plan." That brings us to our Darkness Falls card. We have the setup.
We're going to use rune tokens to represent the successful disarm. uh randomly select a mini boss to encounter if the heroes are damaged three times. We're not going to grab a random one. The mission itself told us that Stylin is going to jump in here if that happens. Also, instead of ruins, I will be keeping track on a die. I think they'll just be easier. Uh then we can disarm. Each hero may attempt to disarm the trap once per hero cycle by discarding a hero card from their hand if the trap targets them. So, it's only if it targets them. This grants them one non-combat action to disarm at a TN7. If the hero is successful, place one rune token. Like I said, we're going to use a die uh on the square. This trap must be disarmed three times. Um I guess if it's going to be on the square, I better put I better I better use the rune tokens. I will grab the rune tokens. We will use the rune tokens. As it says activation at the start of the hero cycle, the heroes roll a fate die. If the result matches any hero's defining attribute, that hero is dealt one damage. If they fail to dis the disarm roll, if the heroes collectively take three damage before the trap is disarmed, a random mini boss, not a random mini boss, Stylin is going to appear adjacent to the last hero damaged by the max AP. And the max AP on the darkness board is reduced by one. So instead of triggering at six, the darkness will trigger at five. Then for the rest of the act, uh we So I'm going to have to get three rune tokens. We need Stylin. Um it could
be anywhere because this is like a this is supposed to be kind of representing a trap that's kind of throughout the entire tile that we're dealing with. Uh like I said, it's hidden. Uh start of each hero cycle. We are going to it's going to activate. We need three seven target number sevens. We have to succeed on those to disarm it. The range is tile. The effect is one damage and max AP is reduced by one. If we are able to succeed, we're going to gain two serendipity. Uh the time the rhyme tile restrictions is none. And this, of course, is covering all the tile here. So, there we are. And we, like I said, are all set up and ready to go. Here are the two bookshelves over here. There's the corpse token, the lock, the guard. Um, now I'm not sure how this works, but it looks like there's a big wall that runs through this entire thing. But I'm actually going to pretend that that is not a wall because otherwise I'd be able to get over here at all. So, we're going to be able to just freely move around this map as we see fit. We're going to It is going to be as far as I'm concerned in one big empty open room, except of course for the cell here where I'm going to say we can't get into that.
That's a cell, but I'll say this cell got busted open. We can get in there. I think I think we're good to go here. There is a wall right here though. We're going to abide by that wall cuz it has a red line. That means we cannot pass through it. Actually, this does have a red line and that has a red line and that has a red line. Oh, I see. And there's a little opening here in both of these. There's openings right there. I'm actually going to say the red line goes across there as well, just to make it so these are two separate cells. We do have entrances to both of these if we want to go there. No reason to. Um, but there isn't any red anywhere else. So that that does mean that these are not walls that these are actually walls. The ones actually have the red line. So there we go. That's how we are going to play this. I think that's it. It is going to be our turn. And we actually we have done all of our stuff. We've done all our movement. We've played our movement card. So, we're actually done with this hero uh hero cycle. So, we're going to move into the refresh phase uh of the game here. There isn't anything to activate when it comes to enemies. So, the darkness is actually not going to activate. And we are going to discard our two cards here. Uh we're going to lower this by two because I had two empty spaces. Um we're going to see if there's anything I want to keep. Oh, I should have played my ammo card. There have been no reason I didn't play my ammo card. So, this is actually going to only go down by one. So, we're at two.
This does a lot of damage, but there's nothing really to hit. Right now, it's all about moving around and dealing with this trap. One, two, three, four, five. So, I'm going to grab five cards, but if the leash comes out, uh, Stylin comes out, we're have to deal with him. Uh, we've got the underground, sorry, the underworld attack bleed weapon. Attack one target within range. If using ammo, the target uh, the attack hits the target, gains damage over time, and the damage over time deals the target one damage during the number of recess phases based on your movement. So, it's if I don't move at all, I have a I have way I'm able to target something more deadly than being able to move. Um, we have another ammo card. Play that right now. Vision of the Mark. Your next attack action that uses ammo gets a d10 and a fate dice and plus one damage. Another ammo card. I'm going to put that out. And circumvent. It's a counterattack dodge weapon. Before resolving an enemy attack targeting you, attack that target, then move two spaces. Ignore the enemy's attack. Not considered a move. That's That's pretty good. But we're not being attacked right now. We're not probably going to use any of those cards. As for Ben, one, two, three. Get rid of three of it, which is really good. Um, I am going to keep my intercession card. We're gonna get rid of those. And I'm going to draw four cards. One, two, three, four. So, we have found. I'm hoping for pray last rights. Attend the weak. And we got a sprint card. Good. I was really hoping I got a movement card. Attend the week.
This is a faith heal. Uh, restores vitality equal to twice your faith to one target within your uh range. Gain three threat. If you have like if that would have been with the three uh prayer card over here, that would have been twice been six, seven, eight, eight. I could have healed eight damage. So, two in the week is awesome. But I did Oh, I don't need to discard these yet. I get to keep them. That'd be good. I need these two cards. What I need this one is actually a faith. One hero within range gains a d10 to non-combat actions and courage test. That's going to be huge. I'm going to really need that, especially if we're trying to search some of this stuff. Uh the sprint card, like I said, is going to give me three extra runes. We got five movement with him. Our outsider is going to discard a card. I'm not going to worry about his threat. It's not even there. 1 2 3 4 5.
We're going to grab five cards. Attack. Just a straight normal attack card. Dark Fate. Malice ongoing. Each time you roll a darkness result, add one malice token to the to this card. When this card has three malice tokens, you may clear it to gain 2d10, two fate dice, and plus one damage to an attack action. Oh, that's really good. We got a sprint. That's awesome. Shrouded in darkness. It's a taunt. Spend two malice tokens for each enemy within range. You are treated as the only priority. Enemies attacking you have their fate dice pool reduced by one. So, it's going to help prevent them from doing special attacks on you. I have path of faith. This is one of the ones I upgraded. Spend one malice token. Each there's one malice token. Each other hero within range may discard two hero cards to automatically pass courage tests. I wish non-combat test. That' been really good. Uh, then we got an attack card. We're back to normal. I'm going to make sure I keep this one out.
These I'm probably not going to use. I'm just going to place this all the way up there because we're going to be running. That's going to be the plan. Might as well start with him. I'm just going to place my sprint card here. Give me a total of five movement. But before we move, we do have to trigger our Darkness Falls card. It does say this is going to activate at the start of each hero cycle, which is right now. We're going to start our hero cycle. So, I'm going to activate this. It looks like we got a rage, a and don't even remember that all the symbols are anymore, but we do not have the acolytes symbol. We do not have the outsider symbol, but we did get our ranger symbol. So, our ranger is going to have an attempt to be able to try to disarm this trap during this hero cycle. All right, for those keeping score at home that to test Baron's myth knowledge, this is the nature symbol.
This is the guile symbol. This is the rage symbol. This is, I believe, I'm going off my memory here. This is the arcane symbol. And the final one that we have is the darkness symbol. 1 2 3 4 5. Nope. There's one more. That's the faith symbol, of course, from our acolyte. So, those are the different symbols on the die. So, I redeemed myself a little bit, I hope. All right. At this point, I am going to play intercession. It's a faith card. So, I'm going to be having two faith now. Once he one hero within range gains one d10 to non-combat actions in courage test. I'm going to play this I'm going to play this as a reaction. That's what I'm going to do. Play it as a reaction so that my ranger can discard a card. Let's discard gift of the underworld. I'm going to discard that which gives me a chance to try to deal with this card. So, I get to roll a d10 or I sorry, I get to roll a non-combat action to try to get a t target number of seven. I get to roll d10s equal to the amount of target number things that are going to help. This is again for attack. So, I don't get any extra dice for this. There's nothing up here that is going to help me with more dice. So, the only dice I'm going to get is my placards dice, which is a d10 and a fate dice when it goes to trying to disarm this trap. Now, the fate dice really isn't going to play into anything here.
There's nothing that's going to activate off of that. So, I'm not going to roll that because I am not using this. This will not be able to be activated. Now, I do get plus one d10 to my non-combat because intercession is on the board and I am within range five of my acolyte. So, I get one more d10 to try to get a seven plus. We're just going to roll it up right here. See, we get we got a nine. That's awesome. So, I'm going to place a rune on that card. I only need to get two more. And we have completed that trap. At this point, we're going to do some moving. We're going to do some moving really fast. I'm going to place sprint on my acolyte. That's going to give me three additional movement points. I'm going to use them. I'm going to go one, two. I'm going to use my normal two movement and then move one, two, three to right there. We're both going to try to head down this way. The next person that's going to sprint is going to be my uh outsider. Uh Brian is going to move three additional movement places. So, he's going to go one, two, three, and then normal move of one, two, going down that way. Next, we have our archer. Our archer does not have any movement card. So, she's going to move one, two onto that bookcase. She can't activate the bookcase this time because it does take a movement point to do that. That's going to raise our darkness by two by playing both those cards. So, my darkness level is at three right now.
I am done. We'll start over here. I'm going to discard basically all my cards. I don't think I have any need for these. We can do courage test automatically. Taunt. Uh, darkness. Also, this is an ongoing. I'm going to play this as a reaction. Ongoing cards don't clear. So, I actually am going to play that as an ongoing card. I'm going to discard the rest of these. And at this point, I'm also going to clear my sprint card, leaving the ongoing card in this area. Now, the ongoing card itself says, "Malice ongoing. Each time you roll a darkness result, add malice token to this card." card. When the card has three, I can clear it to gain 2d10, two fate dice, and one damage for up for for my next attack action. Our acolyte is going to discard all the cards here. Sadly, I can't keep this. This is not an ongoing card. That'd be super good. Uh lower my threat to zero. I'm going I could keep some of these if I want to. I don't think there's anything really to keep right now. All we're trying to do, move two, three, four. And once we're out of cards, we'll take our deck, shuffle it back up, and we'll draw some more cards that we have. So, we'll shuffle these up real good. Give them a good old truffle shuffle here. Drop some on the ground. Why not? Do I still have my four? Yes. Okay. Just making sure I didn't accidentally drop one into the pile there. All right. Give these a good truffle. Shuffle. I'm trying to shuffle them a little bit. Careful because these card sleeves aren't made anymore. And they're not the greatest most uh they're not the most durable card sleeves on the planet. All right. Let's see. I got a Prey Soo wounds blood durage. Okay, we have no movement cards for him, but that's okay. Lastly, our ranger is going to equip two ammo cards, lower threat by two down to zero, and then probably discard both of those. I don't need them. drawing two cards and shuffling
these up to give myself a chance at hopefully some movement cards. That will help us out. That'll be super super good. Let's draw Actually, I don't want movement cards right now for her. I'll tell you why in a second. One, two, three. I'm going to grab three cards. She got, of course, sprint. And that's awesome. Okay, so she got a movement card. We'll have to We'll have to do some debating because we are going into this. We're going to move the darkness meter up one. Now, of course, I did kind of do that in a little bit of wrong order there. We should move the darkness up. Then, uh, we will the allies activate. quest results happen. The status effect, the trap results are going to take place, but there aren't the trap is activating actually at a different time than normal traps. Um, and then we'll clean up. So, now we go to the hero uh now we go to the refresh phase itself or sorry, the hero cycle, the beginning of the of the hero cycle, which is the hero deck phase, and that's where we gain all our cards and everything. We also have to roll for that trap with three different characters out there. We'll roll these up. And I did get my faith and the darkness symbol, which first off is going to put a malice token onto the onto dark fate. And it's going to give him a chance to try to discard disarm this trap. Now, I did forget to do his hero deck phase here. So, I should grab one, two, and then roll shuffle his up to grab three more here is what I need to do. So, let's shuffle these up and see what happens. One, two, three. Just like that. And see what cards we have got for five of these. We got the blade of hate, hands of darkness. We've got dis uh derision, sorry, souljourer's path and skewer. Lots of attack cards that aren't going to help us to move, but that's okay. Sadly, these guys didn't get anything to help their movement, but they're going to still
move to one two. So, they are going to do a normal movement, and I'm going to lock that in for them in case that makes a difference. I'm also going to give this card one malice because of the uh roll I had. I got the darkness roll, so it does give me one malice token on here. And then I'm going to use this ability for him that he has. I'm just going to discard Blades of Hate. We're gonna move a draw pile over to here. I'm gonna use Blades of Hate now. I need to get a seven or higher in order to get this. Let's see how we do. I got a Well, that went flying all over the place. I should have rolled a little tray there, but that's okay. I got a four. Oh, that didn't help. So, I'm going to take one damage. And that's one failure for the Darkness Falls trap. My acolyte can also attempt this. And he did a normal move. And I am going to try with him, too, because you never know. So, I'm going to discard one of my cards. Let's see if there's anything in here that can help me out. Blessing of the Dawn. It says, what does it say here? Faith. Each hero within range gains a number of fate dice. Two attack actions equal your faith. Nope, that's not going to happen.
Help. Uh, Durge of the Twilight is a massive attack. That's not going to help. Soothing wounds is going to heal me. Blood of the Overcomer. Each affected hero within range may clear all status effects. The number of affected heroes based on your movement gain one threat. Nope. And pray. Nope. Okay, none of these are going to help him. So, he's just going to roll a d10 and hope that he gets a seven or higher. Let's roll it up and see what we get. We got a 10. Oh boy. So, we get to put another rune on that. So, we're two runes up and one left to complete the trap. But, of course, we also have taken one damage. So, we're one fail away from succeeding or sorry, two fails away from succeeding. My archer is going to move to here and end her turn and then use the other movement point to check out that bookcase. So, we're going to roll a dieice, see what we get, and hopefully we get we got a five. Let's check it out. Looks like we get ourselves four gold. My archer is pretty happy about having four gold. We'll put them right there. And that's going to be the end of our turn. So, we're just going to raise our darkness by one and go to the hero deck cycle phase. I'm going to be discarding these cards. I don't think I need any of them. There's nothing here that moves me. One, two, three, four, five. Grab five new cards. Hopefully, these move. I got a sprint. I'll take that. Skyland, sprint, tack. Oh, so good. We got some good cards. And of course, I totally forgot this. I should have gained two extra movement points every turn. And because of that, that should have moved him one, two spaces, so he is next to lock. He can't still use it until this this hero cycle, but he should have at least gotten to there.
That's my fault. Our archer is going to keep the sprint card and discard the other cards. Draw four more cards. One, two, three, four. And we have ourselves retrieve, um, hustle, vision, and Kon's payment. Now, hustle gives me two movement points, and it's a reaction. So, I can actually run a total of five spaces with her if I want to. Our acolyte is going to keep nothing. I don't think there's anything I need to keep here. Nothing. Going to keep nothing. Going to grab five cards. One, two, three, four, five. Let's see what we have found. Why is there an Ardan Ranger card in his deck? That's absolutely out of control. That should be over there. Let's shuffle that one in over here. Um, I don't know how that got mixed in. Apparently going super fun. All right, he Oh, and no more no movement cards for him. Not the end of the world. We'll roll our three dice and see what we get for the trap. I did get a faith symbol, but sadly the two rage symbols are not going to work. Uh the main character that uses these is the soldier, which is the warrior type character from the base game. Uh I do not I'm not playing with that one. Guile from the base game is used for the uh thief type character. And the other one that's in here is going to be the guy the uh the was it the arcane symbol. The arcane symbol is for the magic using character in this game. But again, those are just the base characters. some of the other characters. There's a whole bunch that came with expansions and things. They but there's only six different ones. So, there's other ones that do use these symbols. Uh but the base characters th those are the specific symbols that they use. Okay.
So, the first one we have is the lock. I am going to activate that and I am actually wrong. I could have actually gotten rid of it last turn. It does say lock may be removed by a player who ends their turn adjacent to the lock token. And I perform a non-combat action four. So, I am going to do that. I'm going to perform a non-combat action four. In order to perform the non-combat actions, he's going to cost me one movement point. So, I'm down to one movement point left for him. I did get a three. So, this does open. And on the back, it does say lock. I love it when they actually rate them what they are on the back side. Uh, so that's super cool. I do get to get rid of the lock. Then, uh, once it's done, the player may search by spending a movement point. So, I'm going to spend another movement point, meaning I have no movement points left to be able to gain the craftsman goggles. These craftsman goggles are going to go on the head slot. This shows that it is from the item expansion one. There are two different item expansions. I believe this is from the first one. It's going to give me an extra health point. On top of that, uh when I build, I get a d10 or I get a plus d10 when disarming trap. So building that is going to go uh a particular character class or can use this and be able to work the build action. I believe it's the tinkerer. The tinkerer can gain the ability to build with an extra d10. That part of it I don't care about, but the d10 when disarming traps is awesome. And the plus one health is amazing as well. And once you do gain something that gives you health, you automatically adjust it in the on your character sheet. Next, I'm
going to have the acolyte move one space there and then end his turn using a movement point to activate that gravestone. I have to roll a d10 and consult my table. I got a seven. It looks like I gain one malice. A 10. If I gotten a 10, I would gain one malice and a scrying stone, which is a trigger token. I believe you're going to probably use this later on in the mission. I don't know, though. It says allows Oh, no. It's something I can do. Allows the player to draw two darkness cards instead of one. One is kept and the other is placed back into its darkness deck, and the darkness deck is shuffled. Oh my gosh, that would have been really, really good. But sadly, no, that did not happen. I did get one malice, so I'm going to go from six malice over to seven malice for our character's pool. I am going to play a sprint card, which is going to give me three additional movement points. Sadly, it's not quite enough. 1, two, three.
Maybe if I would have moved a little bit better, I probably would have ended here and been able to search it, but I can't. Uh, so we're going to end right there with him. That character is done. Playing that card does move our darkness up to six, and then it will reset back down to seven, and there's nothing to activate. Now, the acolyte does have the ability to discard a card. I'm going to discard uh consuming fire. I don't think I'm going to need it to be able to try to discard remove this trap. Let's see how we do. I got need a seven. And I got a seven. So that's it. We were able to discard this trap. That's awesome. We were able to get all the things we needed for this trap. Uh once the seven uh ten if the hero if the trap must be disarmed three times, I did it. At the start of each hero cycle, we have ability to try to do this. Uh we were able to we were victorious. Um each effect one damage and max AP is reduced by one. So that's not going to happen.
We were we were successful I believe. Let's see how this works. If the heroes collectively take three damage from this before the trap is disarmed and random mini boss happened. That did not. I only took one damage from this. So we're able to gain two serendipity. Now this is a resource that we share amongst our characters that can be used to do different things. Here is a list of them. For one, I can use one serendipity to draw two treasure tokens. Add a 2d10 2d two fate dice to a roll. Two tensiders to a non-combat action. We can uh meet thal three dunes. He's a merchant. We could spend one to do that. Two, we could add two d10 to a hit roll. Extend a quest timer. Manipulate the darkness deck. We can use three to do a heroic event. We can call to arms, which is like gaining an ally. We can ignore the darkness event. Or we can even resurrect a hero if we had four serendipity. And there's even more things you can do be based on some of the submissions or some of the modules that you play. You rarely ever see this much serendipity, but other things that could happen if you even more is you can remove immunities from one enemy for a hero cycle. Remove a permanent negative effect from a hero cycle. For six, you can manipulate one hero card for a hero, which makes them more powerful for all ever, which is super good. Discard one status effect and restore three vitality to each hero. add one gold treasure token to the bag, which if you draw is going to give you a very powerful item or weapon. Summon three random merchants for eight or for 10, I can add an orange token to the treasure bag, which is even better than gold, if you can imagine.
Now, it did say when you're able to successfully uh disarm the trap, you can read the soldier interlude followed by the tile interlude. So, this says the guard turns awkwardly towards your voice, his eyes like stone. Listen carefully. I'm lost. But the man that fled this place with that abomination must not be allowed to impart that girl the secrets of the circle of innocence. Long ago he sacrificed a great many things for the knowledge of good and evil. His investigation he learned too much. His name is Nicodemus and he is not an evil man. He came to us voluntarily to hide himself from the darkness and to protect this world. At first we did not understand his request.
When we realized what this man knew, we moved to kill him. But the wisdom of his words stayed with our hands. If he crossed over to death in any way but a natural one, the darkness could use him and his knowledge. So we secreted him away. We are knights of the Bright Legion. We are a safeguard around this world. This prison is one of three. This one called the prison of Arthos and it has now failed. You are here now and do not belong to the Bright Legion. You are now marked for the trials. Anyone who finds a bright legion hold has begun to peel back the layers of this world. A war beyond your comprehension rages all around you. And now that you have reached out and touched it, both the light and the dark know you. They will seek you out. A judicator will come to you in the next three days. pass his tests and begin your path as a true hero. There is a great rising upon us.
The darkness is stirring. His avatar is upon the world. And now he seeks a the circle of innocence. Protect this world. Stop that child. The whole prison seems to groan under a massive weight. Dust and dirt begin to fall down from the ceiling above. The building seems to be closing in on itself. You have to get out. So, at this point, we now are going to go back to uh the original map. So, we moved in, found uh this this soldier that was part of the Bright Legion. And now that we know what we have to do, we have to go find Lucy, who is now being who's looking at for the circle of innocence. But to do that, we have to get out of this prison before it collapses. Once that's done, we are going to have to face the three trials, which sounds pretty super awesome. Uh but right now, we have to try to get out. We have to deal with this falling ceiling trap and hopefully get out before it crushes us. Here's the falling ceiling. It says assign a number 1 to 10. Each horizontal and vertical line of the realm tile shown on the diagram below. Use web tokens to represent falling ceiling debris. The only exit on this tile is opposite from where the heroes entered. The heroes cannot disarm this trap. Activation. Each time the hero spends two movement points to move, roll a d10. Two d10s, sorry. one at a time. In addition, if a move card is played, roll the dice again. The first d10 represents the horizontal line. The second represents a vertical line the trap effects. Place a web token on the
space or sorry, the square. These two numbers intersect. If a hero or enemy is hit, they receive two damage and are knocked back one square. Falling ceiling debris blocks all movement and line of sight. If a hero is trapped by the debris and cannot move forward, they are defeated. Oh, that's no good. So, here is how we're going to play this out. And it does, it's special. It says whenever a hero moves, it's going to activate. Uh, it disarms when we escape. That we gain two serendipity if we manage to get out. Uh, every time we are hit, we are going to gain two damage and knocked back one square or death. So, here we are. Now, when it comes to this hero cycle, everybody's moved except for the archer. The archer is the only one that hasn't gone. So, the archer is probably going to get out of here. The archer has a lot of ability to get here. So, we're going to move to one, two to right there. Now, it does activate the trap.
So, we've got our trap card right here. I'm going to leave that right there. We're going to roll 2d10. The first one is going to be this row here and see what we get. We got an eight. Now, of course, I have to put this back. This is from the other room. It goes right there. Eight is going to be in one, two, three, four. Let's see here. Where is this thing? One, two, three, four, five, six. Wait, wait a minute. Okay. Four to six and six to six. There's only four here. 1 2 3 4 5 six. That's six there. Let's see here. What do I Oh, I see. One. Nope. I don't see I don't see how this works. So, wait a minute. Maybe I got to figure this out. Okay. I could be wrong about this, but I believe it's going to go there, which is actually be in this row here because it's a six tile. We're going to roll our next one. Nine. So, it's going to fall at nine. So, 1 2 3 4. Sorry, 1 2 3 4 5 6 7 8 9.
It's actually going to fall right there. There's nothing there. So, we're safe at that point. So, at this now, we're going to use our movement cards. I've got a move two and gain two additional movements. So, we're going to do that. Whenever I play a move card, I have to roll the dice again. I'm going to move one, two down to there. We'll roll our die again. See what we get. We got an eight. That's going to be in the same spot. We'll roll again. Nine, which is be way over here. So, it again is not going to affect anybody. We're going to play our move three additional movement places. One, two, three. We're almost to the door in one turn. That was pretty good. I have to roll. I got a five. That's going to put us one, two, three, four, five. Right there. Hopefully it doesn't hit anybody. I got a three. One, two. Let's see here. 1 2 3 4 5 6 7 8 9 10. Yes. So, it's going to go one, two, three. There's going to be a debris right there. Our first token has been placed. I don't really have any hero cycle I have to worry about. And I'm not gonna be moving the darkness at all because it really doesn't seem to matter. One, two, three, four, five. Cuz there's nothing that can come on the board. I just have to get out of here.
Uh, we got one hustle cards. That's fantastic. I'm just going to place that down to remember that we're going to play it. All right, Ben, our acolyte has to get moving here. We need some movement cards. One, two, three, four, five. Come on. Movement cards. Let's go. We've got We got one sprint card. That's fantastic. I'm just going to discard the rest of those. And for our archer, it really doesn't matter what she draws because I've already got one, two, three, four, five. Her going out the door. The only thing that can matter is I can put a couple ammo cards in here. Now, I can only ever hold up to four ammo in this. And I've got one, two, I've already got four in there, so this really doesn't matter. I will just hold those cards like that. To make sure we get one person out, I'm going to go one, two, or out. Now, I do have to roll the dice. First one's going to be that one. Four and four. So, we're going to place that one. One, two, one, two, three, four, five right here. And one, two, three, four. So, we're going to place another rubble right there. Now, hopefully we do not if any of this gets blocked off, we're in big trouble. It's time for Ben and our uh and and Brian to move. One, two. Ben's going to move there. He's going to roll some dice. You got a two and an eight. Oh, no. I think that actually hits him. That's absolutely amazing. All right, so number two is going to be Yep. Right here. And then one, two, three, four, five, six.
One, two, three, four, five, six, seven, eight, nine, 10. Oh, so it just missed him. It hits right there. He's like, "Ah, rocks in front of me." All right, this guy's going to move up two spaces. Hopefully, we don't get the same situation here. A one and a one. So, that's going to land right here. We got another one right there. We got to get out of here. Okay, the next thing we do is I'm going to use my hustle card for Brian. Brian's going to get three two extra movement spaces. He's going to move one, two to right there. Let's see what happens to him. Seven and four. Seven is going to be 1 2 3 4 5 6 7 right here. And then 1 2 3 4. Uh-oh. If we get two more kind of in this area here, we're going to be in big trouble. All right, at this point, I'm going to have Brian use his sprint card. He's going to get three additional movement spaces.
So, he's going to go one, two, three around this, saying, "See you, Brian. I'm just going to meet you in the breast." A nine is good because the nine is actually going to be up in this area up here. And six is one, one, two, three, four, five, six down there. So, it's not going to matter. All right, that's the end of that turn. I'm going to just draw one, two, three, four, five new cards for our uh for Brian the Outsider and see what he gets. He got Alone in the Dark Path, Curse, Disengage, and I'll take that. He didn't get a moving card. Oh no, that's bad. All right, next we're going to draw five cards for one, two, three, four, five. Ben, the Acolyte. Let's see what we got here. Smite, Smite, Hands of the Father, Last Rage, Pray. Oh no, don't move my cards. All right, our characters only be able to move two spaces. One, two, one, two to right there. Well, first I got to move Brian. Brian or sorry, Ben Ben move first. We roll. I got a two and a seven.
Oh, we got lucky because it goes one, two right here. And if I would have gotten one, two, three, something like that. That' been really bad. One, two, three, four, five, six, seven right there. That's uh still not the best. I'm going to put one of these out here. I think I'm running out of web tokens. Uh next, Brian is going to move up one, two to right there. Okay, we're on that one. See what we get. Six. 1 2 3 4 five six seven to right there. Six and then one two. This whole tile is becoming filled with this debris. All right, that's the end. Our characters are going to draw new cards. Brian's going to get five cards. Here's four. Let's flip these over and draw some more. He needs to get any movement card he gets gets us out of here. That's the deal. So, we're going to shuffle these up real good and draw one more card for him. One, two, three, four, five. Let's see what we got. Hand souljourners. Oh no. Oh, we got a sprint. Boom. He's out. Okay. Fantastic.
Next, we got one, two, three, four, five for him. And he got a sprint card, too. Okay. Oh, I think we're going to get out of here. All right. Our character first, you know, I'm not even going to use uh my my base movement. I'm going to just sprint three. One, two, three. He's out. We're going to roll. We got a nine. That's not going to matter because next I can just move my two movement points. One, two, and we're out. Oh, we barely made it out. Look at this. This was starting to cave in on us. That would have been super super bad. We do gain two more serendipity for completing that, which brings our total serendipity to four, which is super good. Uh, we can do some really cool things with that. This will carry over into the next act. But when we're done with the entire module, we would lose all of our serendipity. Whenever you whenever the end of this module or when you stop playing your questing for the night, you would remove you would lose all your serendipity. So Lucy is seeking the circle of innocence. Could that man actually know where the circle is? It was said back before the age of Hearn and the time of the Ildar, one innocent was selected from each of the 13 tribes of the free people. These innocents were taken to a special location where they were sacrificed. This was done each year to appease the darkness. During the ritual, it was said a gate opens between our world and the place where darkness waits to devour. Could it be true? If Lucy is able to get it, what could stop her from opening a rift between the lands of the living and the horror that lies beyond the mountains of fire? And
who is this judicator and his trials? You have heard of tales of the bright legion long ago defending Fenerick and pushing back the darkness. Hearn the host. What has Lucy got into? Sister Helen sat up clutching her chest. Her sleeping robe drenched in sweat. She could feel the impulse to cry bubbling below the surface. She gave it no room. She exhaled. The air escaped broken through shutters and small muscle spasms. Purposefully she drew the air back in. A large, slow, deep breath. It filled the lower part of her lungs and extended her stomach. She relaxed. She was never good at crying. She wasn't about to begin now. She drew a cloak about herself. The moonlight shone silver, sparking the flint into the candle it caught. The warmth of the small flame was not lost on Helen, nor was the location of the nightmare she had just woke from. Marin would be asleep still. She would not bother him with her fears just yet. She sat at the small table. She was allowed not a possession, a tool. She scribbled on a small strip of parchment, rolled it, stuck it into a small cylinder, then rang the bell for a sister to take it to the aviary before troubling anyone with
her fears. She would have them investigated. She would send a brother to Arthos to see if her visions were true. Marin would be told a pigeon was sent out in the night and he would need to know why and she would tell him. She prayed it wasn't true, but she couldn't shake how it felt already. Something inside her knew it to be true. And there you have it. That is the end of the first act of Myth, Avatar of Shadow. Of course, if you haven't seen my previous one, it's called The Stone of Life. Please go check that video out as well so you can see where we got to with our characters if you're interested in seeing it. There was a lot more combat and action in the first act I think of that one than there was here. We did have to deal with that seductress out here which was super cool. But then the rest of it was two different traps. We did get through them. Thank goodness. We almost got trapped in here which would have been super super bad. We would have had some dead people. Sadly, I didn't get to check out the other bookcase that was over there, which maybe would have got us more gold because when we do meet our traveling merchants, there's a chance that we could get something really cool from them, but we have to buy it. We'll be moving into act two of this very shortly. We have Brian. We'll be moving into act two of this module very shortly. We do have Karen, Ben, and Brian going forward into their next part of the Avatar of Shadow. I hope you enjoyed the playthrough. If you did, don't forget to like, subscribe, and hit that bell symbol so you know when more Myth comes out. And if you're interested, and I would love to hear from you about this, and know it's been forever since I've played this, please let me know in the comments section
below if you're excited for me bringing this back. If it's something you were not interested in, or if it's something you never heard anything about and are wondering what this game is and what it's all about, cuz it's a super cool game. Also, if you're interested in supporting the channel, please check out the Patreon. The link to that is also in the description of the video. Those that have joined the Patreon are shown here on the screen. Thank you so much for your patronage. It means the world to me. With the Patreons, we give them special perks. One of them is we do get to let them watch our playthrough videos usually about a day or two ahead of time without commercial interruptions. Also, moving forward in our campaign games, we do give them a chance to help us decide who we're going to play with or even our oneshot games now that I think about it. Who we're going to play with, what skills we should upgrade on our characters, and so on and so forth. That way it gives the patreons a chance to help decide how the game evolves moving forward. So there you have it. That is the first act of Avatar of Shadow by Myth Modules. This is super cool. This is Myth. This was the game that started my channel and I still have the game now and I still play it and I still love it.
So, thank you all for watching. And if you're excited to see more myth or anything else that Colin and I have coming up, then I need you to meet me at the table. It's your master plan to fill me up with all your energy. It's your master plan to set me up against your enemies.