Sand - How to Play Board Game. A euro pick up and deliver goodness.🏖️🐛
Games in This Video
1 game is featured in this video — it unlocks as you watch.
Transcript
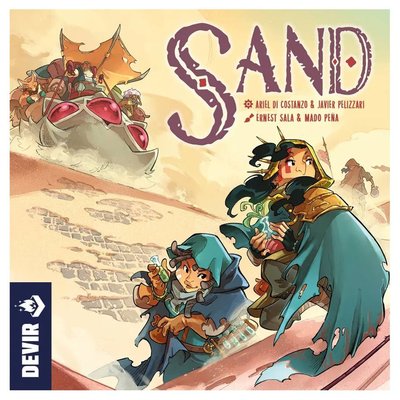
use your sand worm to pick up and deliver Goods efficiently but be careful carrying too many Goods will slow you down in sand and today we'll be teaching you how to play sand game designed by Ariel de costano and Javier pitari and published by div games and hello everyone it's ta and tan here from map University all right let's get to the classroom set in the bco universe in sand players are Travelers traveling on their worms around the cities and camps in a euro style pickup and deliver battle with their speeds and actions limited by a common set of dice available to all players players will move to gather the basic plants cash them in for money upgrades or better resources and spreads songs about their Adventures throughout the land whoever earns the most money over five or six rounds of play depending on your Play account will be the winner I won't take you step by step through setup but I'll show you what the board looks like at the end of setup and introduce you to the components sand is a pickup and deliver game and you'll have supplies of all of the various resources which can be delivered the most basic are the plants and these are all mixed up in the bag these come in four colors red blue black and white and you'll see these colors a lot because they also represent your actions and the dice you'll seed all of
the printed cities on the board with randomly drawn plants with one on these upper ones that show a diamond and two on all the others and roll the four dice and place them in any order into the dice tray these need to be visible and available for all players to use between the board and the bag there should be 20 of each type of plants then you'll have supplies of all of the other resources with five in each color from least valuable to most valuable these are in bright secondary colors the crafts in pastel Primary Colors the relics and then in Gray the iwakura rocks at the top of the board you'll find the port where each player's worm begins above that is the turn order tracker and the round phase tracker as well as the mission cards you'll have a layered Deck with these four dot cards on the bottom then the three dot then the two dot the one dotts and the blanks for these you will have dealt out a number of cards equal to one more than the number of players returning the rest of the box and arrange them in number order from highest to lowest in the Fourplay game you won't use the four dot cards you'll simply start with the three either way these cards will track the number of rounds in the game which is five in a four player game or six at 3 or two in the middle of the board you will have randomly placed the six Camp tiles with the blue tiles which produce the
lower value crafts nearer the port at the top of the board and the green camps which produced a higher value relics further away from the port each tile has two minor tribe tokens on it a one and a two in that order near the base of the board are the plant seals which may figure in final scoring each player takes a player board and the matching shelter and songs in their color around the board there's a series of upgradeable tiles this will be one matching set of companion tiles these are the same for all players and likewise a worm which begins on its blank unupgraded side in the top left slot players may choose a starting character who has a special power they can use throughout the game or if you don't wish to use these flip one over to an illustration of your color you begin with five money and your aim is to gain as much money as possible to win the game along the left of your board there are five tracks you'll need to manage you take one cube in each of the five colors these aren't taken from the resource supplies there are four extras in the game for each color and you'll set your hydration your food and your health to maximum your prayer to minimum and your prestige according to your position in turn order finally this section of the board represents your actions and your resource carrying capacity we'll explain
how this works shortly but to start the game you'll have one action token in each color flipped over to the dice side and you'll have one of these blocking tokens covering one of these four lower row slots you're now ready to play sand is played in either five or six rounds and each round is played in three phases morning afternoon and night for the most part these phases are identical unless you have some specific effect that refers to one otherwise these phases just mean that each player will get three turns in the round that is in the morning phase each player takes one turn in turn order the same will happen in the afternoon and the same will happen in the night on your turn you may take multiple actions in any order several factors impact which actions are available to you at what strength you can take them and how many you can take and this includes your action tokens the availability of your storage slots and the common dice which are used by all players and rolled only at the start of each round at its most basic it costs you one action token in one of these storage slots to take an action which corresponds to that color and or the number on the die so with this in mind to take a turn the first thing you do is choose action tokens from the top row to move down to empty slots on the bottom
row here for example at the start of the game I had only three slots available so I'd be limited to taking three of these actions once the actions are declared I can then take the actions in any order moving for example the white one back up to the top to take a white action of strength six then a red action of strength four and then a black action of strength three be aware that not all actions rely on both color and strength some actions for example simply need a white Dy of any number some might need a strength six action of any color and in some cases neither matters you simply have to spend an action the strength that corresponds to each color is based on the die roll and because this is done once per round you'll have these same strengths for all three turns in a given round if you need a d of a higher strength there are two ways to achieve this shown here you could spend points from your prayer track to increase the number of Pips or you could spend coins so here for example I'd spent three prayer and one coin if I were then taking a red action with that it would count as a red eight there's no limit to how high a die can go but it counts only for this action and you don't modify the die itself the slots you use to declare your action are also the slots you use to carry resources on your worm as such as you start carrying resources between
turns your capacity to take actions on subsequent turns is reduced furthermore anytime you have a plant in your worm's inventory the matching colored action token is flipped over to its resource side in this way carrying a plant not only blocks out an action slot but it prevents you from declaring the action of the matching color because you can only declare actions which show the die icon face up once you no longer have that plant in your inventry the tokens flipped back over to its diece side becoming available again but be clear that you must declare all of your actions at the start of your turn if through your actions you free up these slots or flip tokens back over to their dice sides you still won't be able to make use of these slots or tokens until your next turn so in summary begin your turn by declaring which die side up action tokens you'll Place into empty inventory slots and then one at a time in any order return those tokens to the top to take an action in that color and at the strength of that die which can be modified with prayer or coins continue doing this until all of your action tokens are back on the top row and then play passes to the next player in turn order so with that understood let's have a look at the main actions you can take the first and most common action you'll be taking is move and this allows
you to move your worm along a single path to an adjacent location there are three types of path green gray and the shortcuts in red green and gray paths are cheaper and safer but require more actions while shortcuts get you where you need to go faster but at a higher cost you may move with a d of any color but the number of Pips must at least meet the threshold value for the type of path you're walking on your worm tile in this case assuming I used no modifiers I would have to use a white Dy to move on a shortcut I could use red or white to move on one of the other paths these thresholds reduce as you upgrade your Worm but a single action still allows you to move only a single path even if you meet the PIP threshold multiple times you must then also pay the costs on these three tracks again based on the path you've chosen and the level of upgrade of your worm if you can't afford the full cost then you can't make the move finally move your worm multiple players May occupy the same space to restore these tracks as they dwindle you'll need to take the care for your worm actions for these you'll spend an action of the color matching the reason resource to regain an amount of points based on the strength of the die in this case I'd spend the blue action to regain six hydration
points here I'd spend the red action to regain five food each of these tracks is limited by the size of the track so any excess would be lost life points are more costly to restore it's the only action in the game requiring you to spend two action points a white one and a black one when you do this you restore life points based on the higher of the two dice so in this case if I did these and spent a coin to increase the Black die I could regain Seven health the two other tracks prayer and presstige are increased in a similar manner for prayer you would spend a white action to gain as many points as the White die and for Prestige you'd spend a black action to gain as many Prestige points as the black Dy just note that these two actions have one difference in that you're not allowed to spend prayer points or coins to increase the values on the dice you can remember this by the absence of this icon from those two tracks if your worm is in a city that's any location with a name then you may take the compos song action this simply costs an action it can be any color and any strength take one song token from your player board and add it to the song slot of your city if there was already a song present you displace it returning it to its owner having your song tokens on the board provides a couple of different
ways of scoring which we'll see a little bit later if your worm is in a city which has at least one plant token present then you may spend an action to pick up that plant this costs an action matching the color of the plant you're picking up but can be any number place the plant Cube into the slot you just freed up and flip the action token over to its unavailable side all of these actions lead us towards what is your primary objective in the game which is the delivery of goods delivery of goods is a free action you simply need to check which resources are on your worm and have your worm in a location which accepts that color of goods as long as this is the case you may make the delivery without spending any action token a lot of things are going to be triggered when you make delivery and most obvious among them is that you're going to gain some money for what you've just sold each type of goods has two different prices a high price represented by the green plus and a low price represented by the red minus the locations tell you which price they sell for this camp for example takes white and red at the high price or black black and blue at the low price so if I delivered red and blue I'd get 3 + 1 a total of $4 in addition to the printed price of
your goods there are two other money benefits you get every time you make a delivery first gain money equal to your current position on your prestige track before dropping your prestige track to zero secondly when you deliver gain one coin for every song you have anywhere on the map the song bonus comes once per delivery visit to a city not for each Cube delivered there are three types of location and the goods they'll accept differ cities already produce plants so you cannot deliver plants to cities you can deliver crafts or relics to any City for the lower price which you can remember by this generic City Banner icon at the bottom of the board each of the six camps will pay top price for two types of plants and lower price for two other types of plants they will not accept any other types of deliveries these camps are most efficient if you deliver both of the requirements either the high cost requirements or the low cost requirements at once if you deliver both high cost requirements then in addition to the money you gain the craft or Relic Cube shown in the top left immediately adding adding that to an inventory slot without paying an action if you deliver both lower cost requirements at once then in addition to the money take the top minor tribe token from that camp this collection could be
worth points at the end of the game the last location is the port and you can deliver anything here you'll get the low value for the plants and the high value for everything else this is the only place that accepts deliveries of rocks last of all anything you deliver to any location you don't return it to the supply you add them into these tracks down the bottom of your board again this is on top of all the money and other benefits we just described you then immediately gain any benefit covered in this case it's another $3 if you run out of space on a given track any spillover goes to the bottom for a flat $5 benefit all of your Eng building benefits come from these tracks one benefit which is specific to collecting your plants is that you can get a specialization seal the first player to deliver four of a matching type of plant collects its seal from the bottom of the board each seal you collect grants you some extra points in the end game but more important are your player board upgrades as you've been listening to these rules you may be thinking that everything sounds very expensive and hard hard to do in this game and that's true until you get these upgrades the worm upgrade lets you upgrade your worm and you can do this a maximum of twice for the game for your first worm upgrade flip
this token over remove the marker that's blocking your fourth action space and immediately gain five on each of these three tracks for your second upgrade remove the tile and again gain five on each track this upgrade lets you flip over one of your four companions making its special power active the custodian makes it cheaper to restore your worm's Health now instead of having to pay both your black and white action markers you need to pay only one of them to gain Health points based on that die the Navigator lets you move your worm twice for a single action when doing this it costs a single action marker but you add up all the requirements of the two Roots you move for example if I moved a green and a gray I would have to pay a total of two hydration a total of one food and the total of one Health and have a total of at least four Pips you are allowed to stop and perform other actions and deliveries between the two legs of this movement the young worm upgrade lets you carry two matching resources in the same inventory slot for non plants this simply means placing the new Cube on top of the old one in the case of plants it means that where you would normally need to spend the matching colored action to pick up that Cube you may now pick up a
second copy of a resource you already have simply by being in a city with it then stacking as before the final companion is the Sharman and the shaman goes hand inand with the shelter upgrade and is the only way to get access to the most valuable iwakura rocks resource and so I'll cover all of these in this section whether you have your Shaman or not when you place your third plant you make your shelter upgrade take your shelter piece and place it into any location Camp Oasis or city which doesn't already have a shelter if you visit the location with your own shelter you may freely move resources between your inventory slots and the four slots in your shelter in this way your shelter can be a central Hub to make sure you have access to the right combinations of resources at the right time just remember to keep your action tokens updated so that they match the current inventory on your worm you can't deliver resources directly from your shelter only from your worm once your Shaman's unlocked you have a couple of special actions available to you the first is to have the shaman acolytes collect plants for you find a city anywhere on the board where there is a plant which matches one of the acolytes in that City the acolytes are these robed figures shown at the front here this white plant or this blue
one would be options spend an action with color matching the plant you're targeting and pay one coin then take the plant regardless of where your worm is and add it to your shelter in this way the shaman helps you to transport plants across the map without having to do all of the traveling yourself the Shaman's other benefit is the ability to turn relics remember those are the pale blue yellow and pink cubes into rocks to do this you must first obtain relics from camps as usual and move them into your shelter once per turn the shaman May convert a single Relic into an iwakura rock this doesn't count as delivering a relic you return it to the supply not to the delivery track to monetize the Rocks you'll then need to load them from the shelter onto your worm and deliver them to your Port the last option for your turn is to abandon goods and this simply means to drop Goods out of one of your worm's inventory slots without delivering it if you abandon a plant move it into one of the four abandon good slots and make your action token available again if it's anything other than a plant simply return it to the supply you can abandon Goods at the very start of your turn making these tokens available for the turn you're doing in on any turn subsequent to the one on
which you abandoned the plant you can spend the plant from your abandoned Goods section returning it to the bag in order to take the matching colored action whether that token is available or not this behaves exactly like spending that token you'll use the current value of the die and can take actions in that matching color this can be a way of taking extra actions or the same action color more than once on the same turn once all players have finished their night phase turns you'll proceed to the upkeep phase firstly in Reverse turn order players choose Mission cards from all those available in this round then players choose whether they're going to do the top half or bottom half of that card if you take the top half simply discard the card and gain the immediate resource shown if you choose the bottom half take the card and add it to your collection if you can meet the objectiv shown on that card you'll gain the printed points at the end of the game just be aware that you are not allowed to collect these Mission cards for their endgame points if you have delivered any rocks as soon as you have delivered your first rock you must discard any of these cards that you'd previously collected without gaining their immediate rewards and from this point onward you must always take the top half rewards when you choose a card reset the turn order by returning
these markers to the track from right to left as in setup players gain The Prestige benefit for their position if any refill all empty plant spaces in cities with random plants from the bag including the diamond spaces which were left blank during initial setup discard all leftover face up Mission cards and then as in setup deal out a number of cards from the next part of the deck equal to one more than the number of players and arrange from highest number to lowest then remove all the remaining cards that have the same back so that you've reached the next set roll the dice to set their new values for the next round and proceed to the next morning phase the game ends after five rounds in a four player game or six rounds in a two or three player game there will be no Mission cards on offer in the final round and you'll skip the upkeep phase gain money for any endgame missions you met this for example is $5 for every three white boxes you delivered so in this case a total of 10 this would be $4 because the rightmost box in the crafts row is orange this would be seven coins for having made no red deliveries and this would be eight coins for having the most or equal most total relics delivered gain one coin for each delivered box matching one of your specialization seals if any in this case
I've got a total of 11 matches add up all the numbers on any minor tribe tokens you collect Ed and the player or players with the highest number gain a bonus $12 finally count up all of your song tokens on the board and the player or players with the most songs gain $3 per song the player with the most money wins and if tied Victory goes to the player with the most delivered plants then the most delivered rocks then the most completed missions and if still tied Victory is share that's how to play sand thanks so much for watching and sticking around your like and comments are much appreciated subscribe to see what's coming and hopefully you have a wonderful day see you next time