Kingdom Crossing | Solo Board Game Tutorial and Playthrough (Review copy provided)
Games in This Video
1 game is featured in this video — it unlocks as you watch.
Transcript
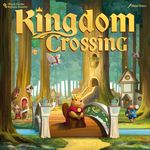
Kingdom Crossing is a mediumweight worker movement and engine building game based on a famous puzzle, the seven bridges of Kunixburg. The solution to this puzzle by Leonard Ooler in the 1700s led to the branch of mathematics known as graph theory. Now, as you can see, I have everything set up for a solo game. Setup is extremely straightforward. You want to separate out all these decks of cards based on their backs. Shuffle up each set of 10 cards and then place the decks randomly on the map, flipping the top cards face up. Take the five queen cards, shuffle them, remove one at random, and then place the remaining four cards back right there. This deck will track the four rounds of the game. Place the six bridge goal tiles here for your first game. Place them all on the side showing the compass icon. Then you're just going to shuffle up all the bird tokens and the queen's favor tiles. Deal out three.
Our solo opponents for the game are the beaver twins, Paco and Paca. Based on your chosen difficulty, add anywhere from zero to three rest tiles into their action tile stack. The more you add, the easier the game will be. I've decided to add one rest tile into the stack, so we're going to be playing on a hard game. These two can go back into the box. To finish setup, we need to determine our starting resources. You want to take the four starting cards and you want to randomize them, even flipping them over. And then you want to deal out two. Pair them with a queen's favor tile each. And then we get to pick which one we prefer.
I think I'll go with this one. This is going to show us all of our starting resources. So, we're starting with 30 money, and I'm going to be using my poker chips for money in this game. We get one movement up the income track. We get a wood and a mushroom, which we just track here.
and it shows us where our starting house is going to be located and it's going to be in the location with that type of bird. As you can see, there are four different land masses, each with a different type of bird. I can then take the card and tuck it into the appropriate guild space. As you can see, there are five guilds up here, and this one is the purple guild. We can just tuck it right there. And this is going to be an endgame scoring goal. So, at the end of the game, I'm going to get two points for every card that I have of that red guild. Each guild actually corresponds to an animal. So, we have the fox guild, the owl guild, the bear guild, the boar guild, and the deer guild. The other pair goes over to our solo opponents.
We're going to set their starting house in that location. They don't need a worker though, so just place out their house. And then you want to place out this Brussels sprout hot air balloon in the same location. They're also they're not going to take the money or anything like that, but they will take that stone. So any resources they'll take, but other than that, they'll ignore everything else and they'll place the card in the guild. In this case, the bear guild. And there we go. That's setup complete. We're ready to begin. In Kingdom Crossing, players take the role of beaver foreman, tasked with collecting resources, decorations, and craft animals to help with construction of an eighth bridge in the kingdom of Brightpring. Each round begins with the morning phase. We start by collecting income, which is shown down here. This shows that we get to take an invest action. For an invest action, we can either just move this one up or instead we can collect the money that's underneath it and then move it all the way back to the beginning. So for right now, I just want to move it one up. The solo player ignores income and, you know, doesn't invest. Instead, we just shuffle up their deck.
Now the birds arrive, which basically just means we take these bird tokens and we place one on top of every deck of cards. Each of the four regions has its own set of birds. And now the queen awakes, which basically just means we flip over the top queen card. Now we move to the noon phase where we get to take actions. We're going to go back and forth until each of us have had four turns taking actions and then that will be the end of the round. At the beginning of the game, Paco and Paca get to go first. So they have the first player marker. Their turn is super easy. You just flip over two of these and you take both actions.
And each of these actions involves just taking the card that is shown on the tile. So here we're going to go to this region with this bird and we're going to take the third card. Now they're going to ignore the bonus on the bird tile. They'll just put that off to the side. For the card, they're going to move forward the resource that corresponds with the guild. So you can see based on the colors, the fox guild corresponds with the wood, the owl guild corresponds to the stone, the bear guild corresponds to the sap, and the boar guild corresponds to the mushrooms. The deer guild doesn't correspond to one of the resources. Instead, you're just going to move forward whichever one is the furthest back. And if there's a tie, the tie is broken by whichever resource is further up the track. So in this case, we have these three that are tied.
The wood is furthest up, so it will go forward. Everything else on the card, it ignores. And then you just tuck it into the column corresponding to the guild. So that's that one. You immediately flip over the next top card there, but you don't replace the bird token. We're now going to go up here and take from that second pile.
This is the bear guild. So that sap is going to move forward one. And then we tuck. And there we go. That is their turn complete. On our turn, we must select from one of these six action tiles. and we'll use that tile to either rest or to work. If we decide to rest, then we'll get however much money is shown in the upper right hand corner. And then that will be it. We'll just take whatever tile we selected and move it to the right side of our board to show that we've used it this round. If we decide to work, then we'll move however many spaces it shows. Either one, two, or three. Or for this tile, we won't move at all. And then wherever your worker ends up, you will purchase a card from that region. The exception is with this tile, which instead of moving and taking a card from the board, you instead take the queen's card if it's still available. That can only be done once per round. Also, when you take the queen's card, that's how you become first player. I should also note that it's important that you start the game with your tiles on their non-upgraded side, the side that doesn't have that little gear symbol.
For my first action, I think I'm going to take this tile here and we're going to work with it. So, that's showing that we can move three spaces. And in fact, we must move exactly three spaces. So, I'm going to take that movement around. I've basically crossed three bridges. And each bridge that I cross, I put a little foot marker on. The reason I'm doing that is because during a round, you can only cross each bridge once. So, now that I have a marker on those bridges, I won't be able to cross using those bridges again for this round. Now that I'm here, I can choose to purchase one of those two cards. And in fact, I must purchase a card. If you're unable to purchase a card, then you can't move into that region and you need to rest instead to get money. But I have 30 bucks. And so I think I'm going to purchase this card right here. And so you can see there it cost seven.
I'll get three back. And I get to have this little bonus of the bird that just shows two victory points. Then I get to keep the bird token. Put it off to the side. And we get to activate this card, which is basically showing I can take two resources that are different. So let's go ahead and take a stone and let's take a sap. Oops. There we go. During this game, we're collecting these resources, trying to move up as far as we can on these tracks. We're never going to spend these resources. And then when you get a card again, you just tuck it under the appropriate guild.
So, I now have two owl cards. That's going to be great because when I take income, you can see here for every two owl cards I have, I'm going to get to do an invest action. Investing is a great way to get money. And so that's what I'm hopefully doing. I can do an invest action here. I can do an invest action there when we do income at the beginning of the second round. Now, we flip the next card. And that's it. That's my turn. At the end of the game, we are going to get points for the resources that we collect. I'll explain how we get those points a little bit later, but another thing that we're keeping in mind is trying to complete these bridge goals. You can see at the top there, whoever is the first to get five stone and three mushrooms will get to put a marker out there and get three points. In a two-player game, if you're second to do that, you don't get the two points, you get the one point. We skip that second one. And that's true of all of these. So you can see over there having three wood and five sap. First person to do that will get three points. Jumping down here, collecting seven bird tokens of any type. That's a way of completing that one. This is getting your three buildings out onto the map. The way we get these buildings out are by having a set of each of the guilds. So, as soon as you complete your first set of all five guilds, you can put your second building out into a different region.
And once you have a second set, you get to put your third building out. Once you do that, you can collect this goal. This goal here is about decorations. On our board here, we can collect flower decorations and statue decorations. collecting those is, you know, good for that goal, but also those are how we're going to score points based on the resources that we get. And so there are various cards out here that, like, for instance, this one will give us flowers. This one will let us choose between flowers or statue. This will give us a statue. And let me quickly just explain what this means here. If we were to go here and buy this card, we would get a flower for every three steps that we've taken this round.
So, if the next turn we come down here and get this card, that would be four steps that we've taken. So, we would get to take one flower. But if we wait a little longer and we cross a few more of these bridges, you know, up to six times, then we could actually get two flowers when we take that card. Each of these cards special abilities happen immediately when you buy it and then it's one time only and then you tuck the card and it's gone. Now, keep in mind there are two different types of cards here. There's this one and then that one up there. Those are actually buildings and rather than tucking them in here, you see they don't have a guild. instead you tuck them down here at the bottom of your board and they're giving you an ongoing income that you'll get every time you have an income phase. So, for example, this would give us one coin income for every building that we have down below our board. And just to complete what I was saying, this last bridge goal there is simply to move back on the investment track three spaces without taking the money. So, let's say we were here. We could claim that, get those five points, and just move back one, two, three. And we can do that any time on our turn. We can complete any number of these any time on our turn once we've met the condition. Okay, enough rules. Let's just keep playing.
So, here we go. All right, so we drew that one rest tile that's in this stack. That means they're not going to take an action there. They're only going to be doing this one. That is that up there.
And this is a building. So, they're going to tuck it. They're not going to advance any of their resources anytime they take a building card. They're just going to get points for these building cards at the end of the game. There we go. That was an easy turn.
Back to us. Okay, now what do we want to do? I actually have a little bit of a plan. Let's take this one where we're going to get two money. Can always use more money. And we get to move one space. I'm going to move in there. I think I'm going to buy the fox card. So, that's six money.
The bird token is going to give me a victory point for every two steps that I've taken. And you can see I've taken four steps. And when I say steps, I mean crosses over a bridge. So that's going to be two victory points. Take the bird. And the card is going to give me one sap for every two bridges that I've crossed. this round so far, which is four. So, I'm going to get two sap. One, two, and then we just tuck. It's my first fox card. Now, before I end my turn, I want to do something that you can do either at the very beginning of your turn or at the very end of your turn. You know, either before your movement or after it. I want to ride on the uh hot air balloon. The hot air balloon costs a little bit of money though, and it's right here. You can see if it's in the region where you are, it only costs three bucks. But if it's in a different region, say it was down here and I was up there, it would actually cost 10 bucks for me to summon it and then ride it. Luckily, it's only going to cost me three cuz I'm here.
And now I can take that hot air balloon and go to any other region that I want. I want to fly it down here. And it's a good thing that I did that because as you can see, I was trapped on that island there. Here's the other trick. Using the hot air balloon is the only way that you can cross all of the bridges. And this is kind of the point of the seven bridges puzzle. The question was, in a configuration like this, is it possible to trace a route where you cross all of the bridges exactly one time? And what the mathematician Ooler figured out was that no, it's impossible. But by taking this hot air balloon into a new region, now it is possible. And the reason you want to cross as many bridges as possible is because you can get points for it. So once you cross your sixth bridge, you get three points. And then if you can manage to cross a seventh bridge, you'll get four more points. So crossing seven bridges can get you seven points each round, which is really good. There we go. Now my turn is over. Back to Paco and Paka.
Okay, they're going to be taking both cards from here. This one doesn't have a bird, but they're going to move up their wood. And I'm realizing I think I forgot to move this up. This should be at two because when we put this in, this should have moved up with that card. So now they have two cards. So their sap is up two. Sorry about that. And now we can tuck this And then here
mushrooms going to go up. And now all they need is one of the owls and they will have a set of all five and they will get to put out one of their buildings. And it doesn't really matter where their buildings go. They're just trying to race for that bridge goal by getting all three of theirs out back to us. And I want to move two spaces.
And I think I like that bear card. So, we're going to go for that. That's going to be eight bucks. A little expensive. The bird tile though is going to give us a buck for every one of our movement. And so far we've done six, which also reminds me we get three points.
Another bird. And that card's just going to give us two stone. One, two. So, we're now at three stone. And that's our first bear card.
And now the last turn for our solo opponents. Just grabbing some cards. Number two here, that's a building. And number three, that's going to be a wood.
And now our turn. I can move across that bridge. I have to use a one. Now, I don't have to do that. I could play this in order to get that queen card. If I move, it will be worth four points, but that queen card there, that special ability would just let me activate one of my building cards, which in this case would just give me a investment. I think I'd rather move one space. So, I'm going to use this one. That'll give me a victory point and one movement. That's my seventh movement. So, that's four more points. And I'm kind of intrigued with that card right there.
This card would just let me improve one of my tiles, which is really good. But yeah, I like this bear. So, let's go ahead and go spend the nine. Going to be really low on money. But here, we're going to get to take a statue for every three steps we've taken. And we've taken seven. So, that means we're going to get two statues. Now, we could take just two of these one statues. And you can see there's places on our map where we would put them. So, we could go like this. one and two. You can see on these statues they have one star. Over here there's a place for a two star statue, but these are each one star. Or instead of doing that, we could take one of these tiles that have two statues on them like that.
And maybe I will do that instead since I'm getting two of them right now. Maybe that will be best. And then we can just tuck this. And now look at this. I got two bears. So that means that when income comes along, I'll get to do this, which is I'll get to activate one of my buildings. So that's going to be really nice. And now is probably a good time to explain what these uh flowers and statues are really for. Essentially, at the end of the game, our cards are going to score points based on how far the corresponding resource has gone and how many of these little stars it's passed.
So, let's say I at the end of the game, I managed to get this up to the six. The wood corresponds to the wolf faction. I've crossed one star here. If I get this flower, then that would be two stars. So, let's say I get this flower and I've passed two stars. Then each fox card that I have at the end of the game will be worth two points. So, in order to have these cards, you know, give us victory points at the end of the game, we need to have both resources moving up and these decorations here that give us stars. All right, it's the end of the noon phase. We now have an evening phase. If in the evening phase, our worker is in a location with one of our houses, then we get a little special bonus, we get to choose to collect one of our incomes. It can be any of your guild incomes or your building incomes.
Unfortunately, my worker did not stop in a location with a house, so we don't get that. The solo opponent completely ignores that. They don't even have a worker on the map. We then just do some cleanup where we get back our four tiles. So each round you're only going to be using four of your six tiles. We also get back all of our step markers.
And that's it. We now move to round two of four. Just like we did before, we begin with the morning phase. And we start by collecting our income. So, first we look up here at our guilds. I only have one fox card, so I'm not going to get an income. You have to have two, and it's every two. So, if I had four cards, you would get to do it twice. Here, I have two owls. So, that means I will get to do this once, and that is to take an investment action. I could get six money, but instead I'm going to push it forward. And look at this. I got two bears. So, that means I can do one of my buildings. This is the only one I have. So, it's another invest. Let's move it forward. That's all I have. And now we get this income, which is another invest action.
Now, I could be taking 15 money. But if I push it up, then the next time I could take 20. How much money do I have? I only have five. That's barely enough to buy anything that's on the board. So, I think with this one, I will in fact take the 15. That will save me from having to take a turn to rest and this way I can keep moving. Also, during this phase, we need to shuffle back up uh all of their action tiles. I think I would have preferred these being cards, but that's okay. There we go. Now the birds arrive and starting in the second round, if there are any leftover bird tokens, you discard them
and then you place out the birds. Oops. Then the queen awakes. Since the card wasn't taken, we just discard the card and draw a new one.
And that's the morning phase. We now go to the noon phase, taking actions. And since I didn't go to the queen, our solo opponent is going to remain first player. All right, Paco and Paka. Did I mention I wish these were cards? All right, they're taking this one. Oh, that was the card I was thinking of getting.
These two are both furthest back. This one goes forward because it's higher up. sap moving up and as we can see they've now collected seven birds that's going to give them three points. It's nearly impossible to beat the solo opponent at that goal. They're just going to rack up these birds. Well, that sort of ruined my plans, but this is not terrible. 1, two, three. That'd get us right back in the money.
I also need two sap. This card's also pretty good. But I could try to come around and get it after I've walked a little bit. If I just did three right now, I could go one, two, three, get here, and at least get one more statue. We need four statues for that. Or I could try to wait until I have more. I think I am just going to go one. Get two money.
Uh, do I want those mushrooms or the sap? Let's go sap. So, that's just going to be six. I'll get to activate that.
And that's two sap and a fox card. So now I have two foxes. That'll be two victory points for each of my incomes. That's it for me.
Here it's another one I was going for another building and then up there middle.
That'll be a mushroom. Now that we have the sap we need, we only need two more wood. You know what? Let's move three.
Just like that. This is super expensive, but it would get me a flower and one wood. And it would get me a boar, which I kind of need. Feels expensive, but let's do it. So, that's a wood.
Just a single flower. Put it right here cuz my stone is already beyond that. So, we know that these purple cards will be at least one point.
And now, yep, you guessed it. We're taking the hot air balloon or the hot air Brussels sprout back over to there. That's me. Oh, okay. So, let's do this first. Ah, taking that card. Really doing a good job of eating up the cards I want. And this is a purple.
That means they have one set. Their house is going to go out. And again, it doesn't matter where you put it. But now, if they get one more purple, that's going to be two sets. And they'll have this one as well. There's two statues though. 15 coins. Wow. Now, for this one, this is them taking the queen's card. So, they're going to take that.
Their mushroom is furthest behind. So, boom. They have everything at uh space three. They're going to stay first player for the next round. And then this moves the balloon clockwise. Just like that.
I really want to get another wood so we can jump in there. Get first place. I only have three bucks though, don't I? So, I'm going to need to rest. I'll use this one because this will give me the most. Eight bucks.
Oops. I now have 11. And they take the last actions here. That is going to be sap.
So they're one sap away now. Oh, and then here. Oh man. So they're taking that stone. They have two sets now. So they get to put this out. And when you've gotten both of your buildings out, you get a little special bonus. You get one of these queens favors. So they're always just going to take the top one. And these are going to slide up and then you can refill. Oh, right. And then I forgot three more points.
Okay. So, I could go one and end there. Or I could go two, end up over here. I would get those three points. I wouldn't be able to afford that, but I could get that one. And I have a lot of money for next round. Okay, let's do that. So, we're moving two spaces going into there. That's the sixth one. So, that's three points.
spending four. Get to move this up three. One, two, three. And look at that. I've now got a set. So, I get to put a house out. And I can put it here. That's going to be good during the evening. And actually, the evening begins right now. So, we did end in the same location as one of our uh houses. I could do two victory points, but I think I want to move this up. Round three in the morning. We get our income. That's going to be two victory points. Invest here down here. Invest.
And then we only have one of each of those. So, we don't get those, but we get this. Invest again. We're all the way at the top. Now, what I could do is I could go one, two, three to get that and then move back. I'd be getting 15 instead of 30. But if I take all 30 and then I go one, two, three, and I go back from here, I'll only be losing 10. Whereas here, I'll be losing 15. So, I think I will take all 30. That should set me up for a little while. Paco and Paka are still first player.
And that's stone. That's the fifth stone. So, three more points. Oh, and I forgot something and I'm seeing it right now. Right here. Anytime you score on two gold tiles that are in the same row, you get a queen's favor. That's what that little icon between them means. So, once again, he's just going to take the top one. These will slide up. I really need to start getting some of these. Yeah, I just I want to go one. Yeah, let's do it. I'm going to go one. Take these two coins.
I want this building. So that's going to give me a wood. I have to spend six. Just tuck it under here. And I do get to get this immediately. So I will get two victory points because of my two bears. But I'm also on the board here. Three wood, five sap. Three more points. Beautiful. Oh, and I'm seeing something else that I forgot.
So Paco and Paca, they cheat. So every time they pass one of these, they just get it. So right now they have four flowers and when that stone moved, they now have four statues. So they also get that one. So they're killing us on these right now. Oh, they're taking the queen's favor again. But that's all they're doing. So now we don't have to keep tucking these. We can just sort of stack them here because it it doesn't really matter once you see that they have two of each. We'll just stack them up. But that is going to be the sap that they needed.
They get that one point and they get another one of these. Oh no. And then this moves as well. That puts a little bit of a damper on my plans. Oh boy. We're going to have to reassess here. I'm now thinking of going just one into there and then I would go one. Oh, see, but that ruins it. That balloon moving has really screwed me up. I don't think I'm going to be able to accomplish what I wanted to, but I am going to use this three.
One, two, three. We're taking the long way around. do a nice little scenic loop. And I think we're gonna spend the money to get those mushrooms. It's expensive. 13. Seven back. I'll get to upgrade. I want to upgrade. Yeah. my two. Uh, actually, let's upgrade this one. Yeah, let's upgrade that.
Or the other one. Ah, I can't decide. Going through this money so quickly, but I need victory points. We're going to do that. So that is actually my seventh bird.
Nice little point there. Three mushrooms. One, two, three. It's our third bear. So that makes this a little more valuable. And now I just need two more stone for that.
Another bear. Another sap. And this one, another bear. Yeah. So, you can see the bridges are all messed up. I'm going to move one and take three points.
move into there. Gosh, I wanted to do that instead of doing that. Okay, I see what I could do instead, but it would cost me 10 to summon the balloon, and that is just too much money. I'll stick here. I'll get this. That'll be six bucks.
I have moved five steps. So, I will get one of these. Yeah, let's go right there. So, we got another statue. We just need one more statue and one more flower to get that.
And this will give me one good. Yeah, let's take stone. That was my third action. Here's their final action. Ooh, those two.
That's a mushroom. So, I don't need to take the balloon because I've split the bridges. I think I'll just go one down here and save me some money. I can come down here. That's my sixth movement. So, that'll be three points. And yeah, I definitely want this So, we're going to spend the 10. It's expensive, but that's two flowers.
Do I want to take this one? I think I do. Oh, yeah. We'll take those two flowers. Looking pretty good on decorations. Just need one more statue. That's it. And now with this, I could spend four money in order to get a good. And I have four. So, what the heck? Let's do it. We'll get that stone that we need.
one point. And because we got both sides, boom, we get one of these. Now, you can also just draw a random one from the top if you want. Look at this though. We have three of those birds. So, I think that's pretty good. We'll take that. Also, this one. Three points for each set. We also have three of those. Let's do this. And then maybe we'll try to take that at some point. I am now out of money. But there we go. That's the end of that. I did not end at one of my buildings, so nothing there. We move on to the last round. I get income. I'm getting two points here.
Move on that. Move on that. Here I get a good of my choice. If I did stone, I would land on that and that would let me upgrade one of my tiles. So, let's do that.
So, I want to upgrade this one. And then down here, I can move this forward. And got three of those. So, three more points. And the solo opponent is first. Okay, I have a little bit of a plan. I just really hope that Paco and Paca don't take the card that I want. All right, that's fine. And that's fine. Okay, good. That's going to be stone
mushroom. They didn't take the card I wanted. So, this is good. I'm going to go this one right here. So, I can move two. One, two. Oops.
And then because I've upgraded this, I can do an investment. Bam. I'm going to do this card right here. So, I'm going to get another investment. Boom. And then this card costs nothing. It's going to give us money. 12 minus the number of steps we've taken, which is two. So, we're going to get 10.
And then what I want to do is get that one, two, three. We're going down to get those five points. All right, that worked out. I now have 10 money. I can work with that. And we got a rest. That's good. But they are taking this card.
That's going to be wood. I really want this card, but I can't get there this round. Oh, I could I could go one, two, three. Yeah. Yeah. Yeah. That's what we're going to do. We'll spend three.
Yep. Let's grab this one. That's going to be three more bucks, but this costs six. So, we'll just say that I spend three.
So, I got seven left. That gives me one statue. It's all I needed.
one point and now boom, I'm right there. Let's take this because right now this is nine, but it could end up being 12. And now we definitely want to take this balloon. We're in the same location. That's only going to cost three. Oh man, we're gonna run out of money. So, I don't even know if I want to use the balloon because I'm not going to be able to do both movements. Just simply not going to have the money, especially if I spend three. I'll have four left. If I use this, that'll be six. I definitely want to go up there. Okay, I'm not going to ride the balloon. We're going to stay where we are.
Oh, here. Here. I might just take that queen card. Yeah, let's do that. We're just going to take the queen card.
Yeah. So, that give us a good of our choice. Let's take sap. And then look at this. Boom. I have two sets. So, I can put out my building. Go right there because I got my third building out. Bam. one point. And there we go. I get another one of these. This is only four points. This is actually like eight points. Yeah. So, we'll take that. So, there we go. That's me.
This is their last turn. I was going to take that card and this one. My goodness.
Another building. I'm going to move one for my last turn. Let's take those three points. again. Upgraded tile.
Just gonna go here. I think that'll give me another sap, which will land me on that, which means I can do another invest. I have exactly seven bucks. Ooh, actually hold the phone.
Changed my mind. Go there. So, same three points. This moves back. That moved back. I'm going to spend seven for that card.
This will give me another statue. And actually, the only single space statue I have right here is this. So, I have to get a twostar one. There we go. Now, it's not going to matter because my wood's not going to get anywhere close to that. But boom, two mushrooms,
this card. But this is another bird that gives me three points because of that tile. So that's nice. And I don't think I took this these three points. I took those three points, but not those. I think that's right. If I'm wrong about that, I'll I'll subtract those. And there we go. That is it. Now, we still do the evening phase. And I am with one of my buildings. So, I can do one of these down here. I can get three points by doing that. And I think that's my best bet because that's just two points.
And there we go. We're going to end on 51 points. And that's the end of the game. We're now [clears throat] just going to add up scores and see who won. Let's start with Paco and Paca. They're going to start by scoring all of their cards. And like I mentioned earlier, the number of points each card is worth is equal to how far you've moved that particular resource and how many stars you've passed. For them, they automatically get the stars when they pass them. Unlike us, they just automatically get these decorations. And you could put them on here if you want, but it's just easier to just know that once they've passed it, they have the star. So, let's go with the foxes first. Their token is here because they correspond with the wood. They've passed one star. So, that means that each of their cards is going to be worth one point. There are four fox cards, so they get four points.
With the owl, we look at the stone. They've passed three stars. That's three points per card. There's five owl cards. That's 15 points. Bear, same thing. Three stars. There's seven bear cards, so that's 21 points. And then the boar has passed four stars because this is a double star. So 1 2 3 4. They have six bore cards. So four * 6, 24 points. The deer cards score no endame points. So, we can ignore those. Now, we're going to look at their building cards. They score their building cards based on whichever one of these is furthest back. And you're going to look down here. So, this is the one furthest back is the wood. And it's in the three victory point spot, you know, or region. So, each one of their building cards is going to be worth three points. They have six cards, so that's 18 points.
Lastly, they have their favors here. They have four favors. Each of these favors is worth however many rest cards we put into their deck times two. So we put one rest card into their stack times two. That's two points for each of these. They have four favors. So that's eight points. And then during the game they managed to get 13 points mostly from those. So that means altogether they scored 103 points.
Now, what about us? We're currently at 51 points. That's what we scored during the game. We score our cards exactly the same way. So, right now, our fox, we never got that uh flower there. So, our foxes are worth no points because we have no stars. We have these stars over here, but our marker didn't get past them, so they don't count. So, we're getting zero points for our foxes. Our owls, we have one, two, three stars and three owls. So, that's going to be nine points. The bears, exactly the same thing. Three stars, three cards, nine points. Our boar, only two stars and two cards. That's going to be four points.
And again, the deers, zero points. For our buildings, it's exactly the same. We look at our furthest back, which is wood, just like theirs. And we are barely in this threepoint region. So each of these is worth three points. We have two buildings. That's six points. So far, that's 28 points. That puts us at 79 points. Now, one thing I forgot. If we had any leftover money, we could spend five money to move up the investment track. Every five money we spent, we'd move up the investment track. And then depending on where we were, we would get some extra points. We don't have any leftover money. And right now our marker is below the one point. So we get no points from the investment track. But you know, if you could end the game maxed out, that could be worth 10 points. The only thing we have left to score are these four favors.
So first up here, this is for sets of flowers and statues. We have three sets times three. That's going to be nine points here. These are for bore cards. We only have two. So that's going to be four points. Here we get two points per statue. 1 2 3 4 five. Five statues. That's 10 points. And then here we get three points for every one of that type of bird. And as you can see, we have four. So that's 12 points. Altogether, our favors are worth 35 points, which means our final score is 114. And there you have it. We've won by 11 points. That was a complete solo play of Kingdom Crossing.
I'd like to thank all the financial supporters of Totally Tabled, including the totally radical Jeff Fitz Simmons, Hextra, John Kohler, Scott Meyers, Kevin Qualls, and Jay Satderite, as well as the totally bodacious Connie Wac. If you're interested in becoming a member, you can join on YouTube or my Patreon at www.patreon.com/tolettable. You'll gain access to my new exclusive podcast, Table Talk, as well as unboxing videos and whatever extra stuff I come up with. As always, thank you so much for watching and goodbye.