Lightning Train - How to Play. Including 2P Variant. Complete, Clear, Concise. A Board Game Tutorial
Games in This Video
1 game is featured in this video — it unlocks as you watch.
Transcript
Load your goods, grab your chips, and prepare to choo choo choose chaos in this fast track freight fuel frenzy, Lightning Train.
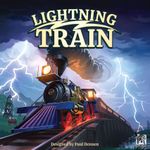
And today we'll be teaching you how to play Lightning Train game designed by Paul Denon and published by Direwolf.
And hi everyone, it's Stella
and Tarant. Welcome to Medieval University.
And hey, if you enjoy this video after watching, like, subscribe, and comments. You know what to do. All right, now let's get to the classroom. Lightning Train takes place during the golden age of North American railway expansion. Players are railway companies meeting the growing industrial needs. And through the game, players will compete to build the best stations, make the best connections, and try to facilitate deliveries across their own infrastructure, earning points for their own links and stations. Players will run their empires as a bag builder using train and action chips gained from their bags or purchased from the markets to take their actions. And whoever can build the greatest transport network will be the winner.
I'll take you first through the three and four player game and come back at the end of the video to explain how the dummy player at two players works. At three or four players, you'll begin the board on this side. There are two types of city on the board. Producers, which show one of the seven goods icons, and potential destinations, which show the outline of a station. In setup, you'll see any producers showing these dotted lines with two of their matching goods. So here, New York City, Pittsburgh, and Toronto all get their goods, but Sousie has a solid line and so is not seated with tokens. You'll keep unplaced goods in a supply until they're needed.
Near the leftover goods, shuffle and place the production deck and remove three of those cards, leaving a deck of 12. These are the cards which are going to seed more of these tokens onto the board throughout the game. and it also serves as a timer for the potential 12 rounds of the game. In the top corner, you'll have shuffled faceown stacks of large and small stations, as well as a face up market of two of each type. And in setup, you'll draw one of these cards to seed the board with neutral stations. Either five or seven, depending on your player count. All white components are considered neutral, including these preprinted trains.
Each player will have a bag and a playerboard, as well as two upgrade tiles, six cubes representing stations, which go on this track, and a score marker, which begins at zero. Shuffle the mogul cards and action cards, and deal two moguls face down to each player. These are upgrades or endgame scoring objectives which players can aim for. A major part of setup will be separating and distributing all of the chips. Chips are the lifeblood of the game. They are how actions are taken. You will take all of the doublesided train chips in your color as well as your six locomotive chips into personal supplies. Then you'll find all of the other chips in the game which have the same image on both sides.
These are the starter chips and each player takes a complete set of seven and puts them in their bag as well as three of their own train chips. This gives you your starting bag of 10 chips. Chips with this back are your power chips. And each player takes a complete set of four different chips and places them here. All the remaining chips go in the common area. The eight chips with this back are loans. They are placed in the loans box. The six chips with this back go in their own little stack next to the two price box on the market. And every other tile will have this back. These are market chips. And by the end of setup, six of them will be face up in the market row, each in the box matching its price.
Choose a first player and in clockwise turn order, the first two players gain two delivery tokens, while third and fourth player exchanges one of those for a delivery and contract token. Finally, draw five chips from your bag into your boarding area, making sure you have exactly one or two of these double colored contract chips. If you have zero or three, reset and redraw. You're now ready to play. Lightning Train plays in a maximum of 12 rounds. And in each round, each player will take one turn clockwise around the table. Turn order never changes. to begin each round. So before the first player takes each of their turns, flip over the next production card, place the depicted production tokens in the depicted city and then set the card aside.
Now each player resolves a turn, resolving their full turn sequence before play passes to the next player. Turns are broken into two steps. operations, where you'll take your actions, and turnover, where you'll set up for the next turn. Now, before I take you through what any of the game's actions are, I'm going to take some time to explain how the bag building and the flow of chips around your board works. Now, I will warn you, this may feel a little abstract at first, but then when I come to explain how the actions work and what they do, you'll see a lot of examples, and this will put everything into context. The other thing I'm going to do before I start is to flip these four power chips face down. Now, you don't normally put these face down, but I wanted to get them out of your mind for the moment.
These are upgrade chips which you do not yet own. And until you actually unlock them later in the game, they don't form part of your flow of chips. The chips you own can be in one of four places. Your bag, your boarding area, your railard, or your warehouse. Your warehouse is effectively your discard pile. At the end of each of your turns, you will always begin by emptying your boarding area to your warehouse. That is, you'll discard everything out of your boarding area, leaving it empty, and moving all of those chips to the warehouse. You will not empty your railard at this time.
Then to set up for your next turn, you will fill the right hand column of your boarding area with five chips drawn randomly from your bag. If you ever need to draw a chip, but your bag is empty, move all chips from your warehouse to your bag, shuffle them up, and then continue drawing. Your boarding area also has two slots with a plus icon. And if you draw a chip with a plus icon in its left corner and you still have one of these empty, place the chip in a plus slot and then continue drawing to the right hand column. As such, if you draw enough chips with pluses, you could end up with up to seven chips.
If you've run out of plus spaces, then simply use a standard space. But whatever is the case, you always stop drawing as soon as the right hand column is full. Chips in your boarding area are effectively your hand of chips for taking actions next turn. There are two different types of chips, trains and non-trains, and I'll explain them both separately because they behave a little bit differently. Non-trained chips contain a series of icons, and across the course of your operations phase, you can take any number of actions as long as you have sufficient icons to pay for them. So, for example, my handle chips here has a total of $5 in money icons and two of these delivery icons. Therefore, the total cost of any money actions I take cannot exceed $5. and the total cost of any delivery actions I take can't exceed two deliveries.
The icons from a single chip can be split across multiple actions and the icons from multiple chips can be combined into a single action. There are also two types of icons on these non-train chips which aren't consumed by actions and those are tunnels represented by this icon and contracts which are represented by the colored background and one of these region indicators. Each of these icons can be used multiple times within the actions on your same turn. So if I were taking actions requiring tunnels, I could take as many of these actions as I wanted, even more than two. for the contracts. The chip gives you access to perform building actions within these regions during this turn.
So overall within this hand, the once off icons I have to spend are $5, two deliveries, two conductors, and a lightning train. I'm allowed to take any number of tunnel actions. And if I take building actions, they must be partly or fully within the northeast or Atlantic regions, including more than one per region if you wish. Non-trained chips remain in your boarding area until the end of your turn, and you discard them all at once to your warehouse during the turnover phase. Anytime you gain a new non-train chip, which is usually from the market, you add it to your warehouse. And most non-trains will remain circulating through your bag and boarding area for the rest of the game. You can't remove it from your circulation unless a specific effect allows you to trash one.
Your other type of chips are your trains, and this includes your locomotives. They have a plus symbol on them and they're more valuable, but for the most part function exactly like a regular train. With the non-train chips, you are spending their icons but discarding the chips at the end of your turn. For the train chips, when you spend them on an action, you're going to move them out of your boarding area immediately. This includes with actions which let you build track on the main board. You would take the chips and place them or it can mean using your railard. These are the six actions of your railard. And during your operations phase, you can move a train chip from your boarding area to an empty spot on your railard.
Then again, at any time on your operations phase, you can discard the train chip cost from a railard slot to resolve its action. This also frees up the slots to be used again this turn. You do not need to fill a railard action all at once, and you don't need to take the action on the turn you filled it. Trains in your railard remain there until you choose to take that action. When you go to your turnover phase, when you're emptying your boarding area, also empty any train chips from the boarding area, but leave them in your railard. As we've seen, you're going to be putting a lot of your train chips onto the board as train tracks. And so, to keep your bag and circulating chips from dwindling, you're going to frequently seek to add trains from your supply back into your circulation.
There are a few effects which will add trains to your warehouse when you gain them, the same as you would for a non-train ship, but most of your newly gained trains are going to be through the lightning train effect, which is this icon. Anytime you gain a lightning train, usually by drawing a chip that has one of those icons, into your boarding area, add a new train chip from your supply to your lightning area. This sits inside your boarding area, meaning it's now available for use, and it does not fill up a slot in your boarding area, meaning you can have many more than seven total chips if you draw a lot of lightning trains. In addition to the standard lightning train icon, every time you get two conductors hats in your boarding area, that also gives you a lightning train.
So, this chip with its two lightning trains plus the second conductor lets me add three more train chips to the lightning area right away. So, finally, if we put all of this together and take what we've learned about the circulation of chips, you can see that on the turn where we use this boarding area, we have a total of six train chips to play with. Can take building actions in the Midwest. have a total of $3 to spend on actions. And if we had four stations on the board, would also have a delivery icon. So, with all of that background, let's now learn about what the actions are. The first action we'll look at is build station. And you may do this at most once per turn.
Pick a region for which you have a contract and pick any empty station city inside one of those regions. Let's suppose we picked Chicago. Check the number on the station and spend that many train chips through your railard. This will be between 1 and three, hence these question marks. Pick a face up station of the appropriate size, small or big, and replenish to mark it. Place the station and mark it with the leftmost cube from your station track. And if the cube you removed is next to a bonus icon, gain that benefit now, which could be to gain an action card from the deck, to trash a low value chip from your boarding area or warehouse, taking it and removing it from the game, or to gain a point.
The second action is to build a rail line. By default, you can do this once per turn. Again, check the regions you have access to on contracts and then pick an empty rail link which is either wholly or partially within one of those regions and which has valid connectivity to some of your previous infrastructure. What that means is that the link must connect to at least one of your stations or to a city which is already serviced by one of your trains or to a city with one of these sun icons which runs along the Atlantic coast. So with these contracts and therefore these three regions, I could build any link which connects to Boston, New York City, Baltimore or Raleigh. From my previous train, I could build any link out of Montreal.
From my Chicago station, I could build any one of these three links out of Chicago. While from my Duth station, I could build to Omaha, Chicago, or Susamarie, but not to Winnipeg or Deadwood because those links are not within my contracted regions for the turn. Having picked a link, determine the cost to build it. By default, this will be the number of empty spaces in that link. So, this link here would cost four train chips. the cost is reduced by one if one or two of your train stations join that link. So I'd only need to pay one chip to build Chicago to Detroit or two chips to build duth to Chicago.
If you're building a tunnel line which looks like this, then in addition to the train chip cost, you need a tunnel icon. So, building this link would cost three chips, and I'd need a tunnel in my boarding area. Spend the train cost from your boarding area in train chips or locomotives if you wish. And if you're taking a one chip discount from having stations on the link, fill up the remaining spot using a train chip from your supply. Finally, score points for your newly built link. Each link has these star icons at either end, and each of those separately tells you the points for that link. This, for example, would score two points when built. This line scores three points. This would score nothing.
And the one I've just built here is a onepoint line. Track those points immediately. Some other actions and rules related to building stations or tracks. Your railard has one slot called line storage. This is not an action in its own right, but you can move a train chip there and then on a subsequent turn, spend it as part of the cost of building track on the board. Building track is the only allowable use for your stored line. You can't move it to another rallyard action. If you want to build a tunnel track, but you don't have a tunnel icon in your boarding area, then as long as you've built at least one station, you can use the use explosives action.
Spend two train chips through your railard to gain the tunnel icon for the rest of the turn and then spend any other chips from your railard as required to build the track on the board. You could also use explosives again as long as you have at least one station built to build extra rail. Normally, you can only lay track once per turn. But if I were to use explosives, then I would be allowed to use my remaining chips to build twice. I'm still, of course, limited by my contracts, I'd have to build both of them through the Rockies. You can also get the extra track icon from some market chips. If you want to build somewhere, but you don't have the region contracts you need, you can use the secure contract action. Again, this requires that you've built at least one station, but then spend two train chips through the railard, and you can pick any one of the games regions and act as though you have that contract for all future building actions this turn.
This stamp is the icon for that wild contract. And so likewise, there are some market and other chips which might give you that effect. So here, if this chip were in my boarding area and I had already built four stations, then I can pick one wild contract for this turn. If you began the game third or fourth in turn order, you'll have one of these tokens, and you can also discard that token for a once- off special contract. Finally, each player begins the game with three of these special starting contracts, each of which has two colors on the East Coast. These are not intended to be kept for the long term. And on any turn in which you use one or more of these contracts for their regions during that turn's turnover phase, you must trash one of the contracts you use.
As such, within your first three to five building actions, you should expect that all of these will be gone. And as such, you need to be thinking early about how to replace them with new chips. And that's what we'll talk about next. The main function for the money that you gain on non-trained chips is to buy new chips. On your turn, you may make any number of purchases up to the amount of money you have. Mostly, you're going to purchase one of the six market chips placed in these differently priced market slots. As soon as you buy a chip, add it to your warehouse discard and replenish by drawing a new chip, flipping it face up, and placing it into the leftmost open slot in the section of its price.
If when replenishing you draw a price which doesn't fit in its box, slide as many chips as necessary one step left until the rightmost slot of the appropriate box is empty. This means that a chip could end up selling for less than its printed price. Other options are to pay $2 for one of these $1 plus chips, as long as there's still some in the stack, pay $7 for a point and a lightning train, or $8 for a point and two lightning trains, which you can start to use immediately. At most once per turn, you can take a $1 loan from the bank. Take one of these chips into your warehouse and then you can purchase as if you have an extra dollar to spend this round. This can be a good way to get some more powerful chips, especially early on.
A loan serves no function other than to fill up a plus spot when it gets drawn on your turn and it will be worth -2 points at the end of the game. However, when it's in your boarding area, you can spend $4 to trash it, returning it to the bank. The other benefit of money is a bankroll effect. And bankroll is represented by the rolled up bills rather than the flat bills. Bankroll is a conditional benefit that you gain if you have at least that much money in your boarding area this round. You don't have to spend it, you just have to have it. So in this instance, this tile gave me a lightning train. And then because I have a bank roll of seven, I gain a second lightning train and still have my $7 to spend.
You cannot take a loan to increase your bank roll. If this were my draw, the loan would give me $7 to spend, but I would still only have a bank roll of six and therefore not gain the second lightning train. The next action is delivery. And to make a delivery, you either have to spend one of these delivery icons or one of these tokens you gained at the start of the game. to deliver. Choose any station on the board, whether it's yours or another players, as long as it has at least one available demand icon. And that demand can be met from tokens on the board, which can get there through constructed rail.
Unlike building, you do not need the matching region contract to take the action. You can pick any valid station. Having chosen the station and one of its demand icons, determine the single shortest route to get the matching type of goods tokens to that city as counted by number of complete rail links. For example, Las Vegas could take passengers from Phoenix by this route or by this route, both of which have a length of two, from Cheyenne with a length of three by this route, or a length of five along this route. The delivery must always be by the shortest route with ties broken by the number of locomotives in that route.
So, as such here, delivery would be Phoenix to Albuquerque to Las Vegas. This two-link route with one locomotive, beating this two-link route with none. In the case of a tie, suppose this had been built as a locomotive. It's the player taking the action who decides which of the equal shortest routes is taken. Now, score. Each line used scores one point and the player who owns the destination station also scores one point for this delivery. Yellow and blue get one point each for their lines and purple for the station. Now flip the station down. It cannot be delivered these goods again.
As some other examples, if I were now delivering passengers to Denver, my shortest route would be two links here from Phoenix through Albuquerque to Denver, scoring one point for blue and one point for purple. Nothing for the neutral player and nothing for yellow. Line things up correctly and you can get some really high scoring deliveries through this route here. Yellow scores a total of six points with only one each to blue and purple. Undercutting your opponent's circuitous routes by making shortcuts is the clearest way to gain an advantage in the delivery part of the game. Now, I'll take you through some of the other assorted actions available in the game. Your last two railard actions are industrialize and go public. And these are ways of leveling up your company.
You must have built at least two stations to take these actions. To industrialize, spend two train chips through your railard to flip over the industrialized tile below your boarding area. This gives you two more spaces for plus chips. And so, while your draw will still end after these five slots are full, this can give you a lot more to do on your turn if you've been collecting a lot of pluses. The other option is go public. Spend three train chips through your railard to flip this tile for two ongoing benefits. From now on, and including this turn, every delivery icon in your boarding area grants you a lightning train. And you gain two points every time you bankroll seven.
We've seen that you mostly gain train chips from lightning trains. However, the way you gain your locomotive chips is by gaining conductor tiles. This effect happens only when you gain the conductor, not when you draw it from your bag. And so, upon gaining the conductor, add one locomotive to your warehouse as well. You'll get a few mogul and action cards throughout the game. Not very many, but they are quite powerful. During your operations phase, you may play a green action card from your hand to resolve its effect or icons and then discard it. Also, during your operations phase, if you have built the required number of stations and you have a mogul card showing an upgrade, you may play it face up. This will give you an ongoing passive ability for the rest of the game.
All of the other mogul cards are endgame scoring objectives. You keep these secret throughout the game, and you'll reveal them in final scoring to score their bonus points. You may find that the early game scoring progresses quite slowly as players will often try to set up the board for big late game deliveries, but be careful. There are some good rewards on offer for players who start to move up their scoring track early. Each time you reach a score with one of these icons, and this will be at three, 10, and 15, you get to unlock one of your power chips. Remember these ones, which I flipped down earlier. Choose any one of them and move it to your warehouse as if you'd purchased it, including gaining the locomotive for this conductor.
When you reach six points, draw an action card. And when you reach 19, draw either an action or mogul card to your hand and then discard either an action or mogul card from your hand. You must still have at least one card in hand to gain the benefit. As soon as any one player has reached at least 25 points, it unlocks a new market option which all players can use to spend $4 to gain a lightning train. Other effect you'll come across are chips which give you points. This icon which doubles the points you gain for any rail you build this turn while it's in your boarding area. While with this chip, you could trash it from your boarding area to build a station for free.
As soon as an unbroken rail link is created between New York City and San Francisco, you'll pause the game for intermediate scoring. Find the single shortest such route and you'll follow the same rules as deliveries in that you're counting total links, not chips. You'll break ties by number of locomotives on the link. And if still tied, it's the current active player who chooses how the tie is broken. In this case, my shortest route on the eastern half is here. And among four tied routes on the western half, this one wins on locomotives. Each player now scores two points for each of their locomotives on this chosen route. So here, yellow would score six points, blue would score two, and purple two.
The active player then picks up their turn from where it left off. Play continues as normal for the rest of this round, but from the start of the next round onwards, players are not allowed to build stations anymore. The game end can then be triggered in one of two ways. The first is by joining Seattle or Houston to your transcontinental railway. In the three-player game, this trigger occurs when either Seattle or Houston is joined to the transcontinental connection. In the four-player game, it's when both Seattle and Houston are joined. It is possible for this to occur at the same moment as you make the transcontinental link.
When the end triggers by a Seattle Houston connection, complete the current round and then play one more complete round before ending the game. The other way for the end to trigger is after 12 rounds. If you get to the start of the round and have no more production cards left, the game ends. Now in such a case it is possible that no New York to San Francisco link was ever finished and in that case the intermediate scoring simply doesn't occur. Finally in standard turn order each player makes their final deliveries. Players get one turn and on that turn they may make a single delivery as if they had the delivery icon plus an extra delivery for each of their starting tokens they still have left.
Now, count up your final scores. And to the score that you've currently accumulated, lose two points for each loan that you still have in your bag, boarding area, or warehouse. And score the objectives on any of your mogul goal cards. The player with the highest score wins, and if tied, victory is shared. Lightning Train has modified rules for both solo and twoplayer play. And in this video, we'll take you through how to control the dummy player at two players. Set up the board as you would for a threeplayer game, but you'll use only the two score markers. The dummy players role is to fill up the board, not to compete against the human players.
Place the dummy players cylinder, known as its builder, in Baltimore. And if it wasn't built by the white neutral, build a random station in Baltimore and mark it as belonging to the dummy. Then the dummy player will take a full turn effectively in round zero before taking a turn as second in turn order in all subsequent rounds. Whichever is the second player among the humans is the one who controls the dummy player and does so before their own turn. A dummy turn is resolved in three steps. First, roll the dice. Then, build one track link. This always happens. Then, build a station. This sometimes happens.
To build the track, check the number and check all of the cities which are adjacent to the builder marker's current position. If there's an empty track to the city with that number, build it and move the builder marker to the other end. If there are multiple options, pick the one which is alphabetically first. Here, New York City over Pittsburgh. If there's no open link to a city of that number, pick up the builder and move it straight to the city whose large die number matches the number rolled. Then using that same number build out of that city to a destination. If upon making this move the matching numbered city is also blocked then increment the die by one number at a time until you find a number which matches an open route.
If there are no valid routes out of the city which was moved to with this big die roll, then increment the die and move to the new city that has that number. Again, building out by the valid rules or incrementing as many times as necessary to get a valid path. Continue this process over and over until you find an empty link to build to. To be clear, you never go through the process of incrementing the die in the builder's original city. Here, on a roll of four, five, or six, the builder would always move away. It's only in each of these subsequent cities that the incrementing of the die occurs. By whatever means the dummy reaches its destination, it now automatically builds a station. If the destination is an empty station city and the dummy still has at least one cube in supply, always choose the station of the appropriate size whose number matches the current face of the die.
Otherwise, all player turns follow the standard rules and the endgame trigger is the same as it would be for a threeplayer game.
Thanks for watching and if you like this video, maybe you'd like to watch this next one. Have a great day. Bye.